

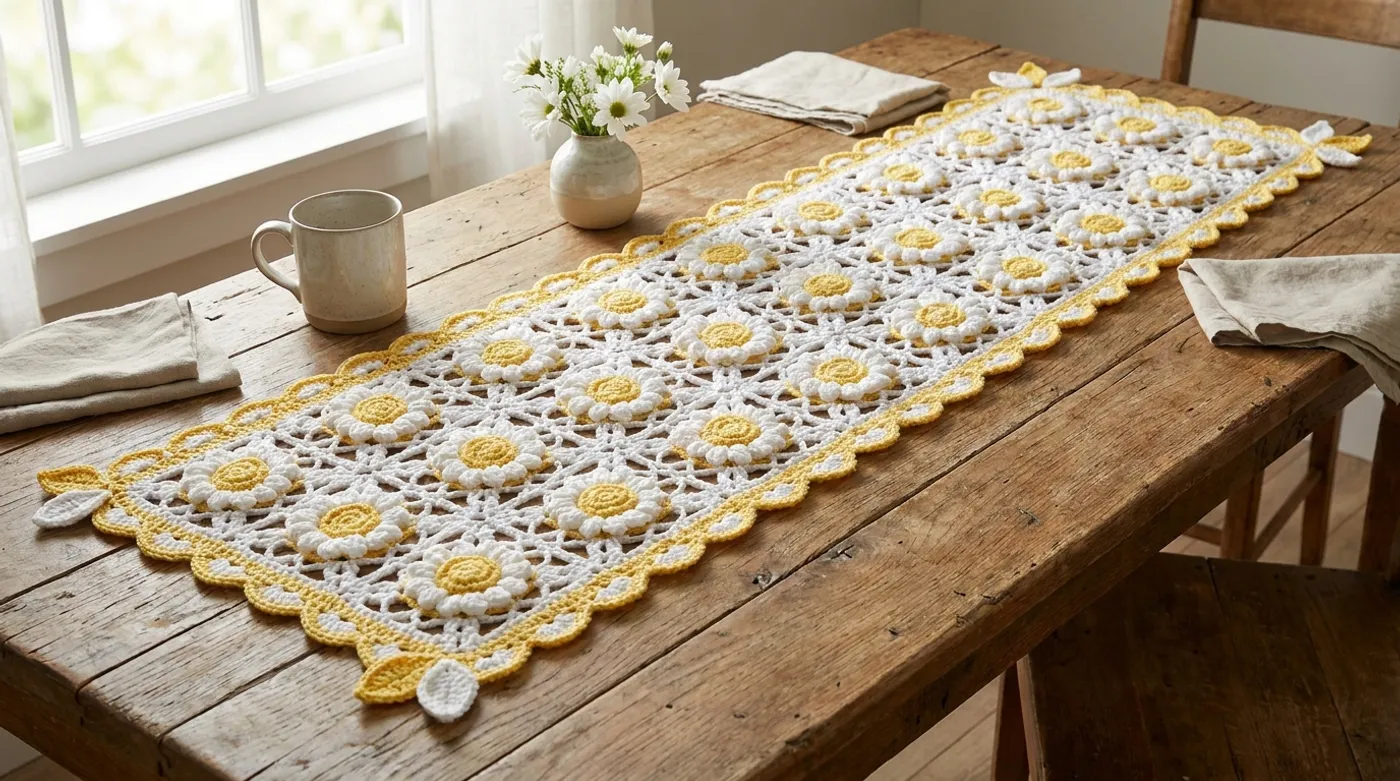
Yellow White Flowers Tablerunner: Free Crochet Pattern & Tutorial
A rectangular table runner made of white and yellow worsted-weight cotton yarn, featuring a lacy mesh of double-crochet clusters and chain-space openings that creates a semi-open, airy surface. Three-dimensional daisy motifs float above the mesh, each with a tight yellow spira...

Pattern Specifications
Introduction & Design Inspiration
There is a particular quiet joy in watching a table come alive with handmade texture — the way morning light catches the raised petals of a crocheted daisy, the subtle shadow play across a lacy mesh ground, the gentle scallop of a shell border framing it all. This Yellow White Flowers Tablerunner was born from a desire to capture that fleeting spring feeling: the first warm afternoon when you move breakfast outdoors, the vase of grocery-store daisies that lasts exactly three days, the linen napkins you only iron for guests.
The design centers on contrast — airy openness versus dimensional bloom. The foundation is a classic filet-inspired mesh worked in double-crochet clusters and chain spaces, creating a semi-transparent fabric that lets your tabletop show through. Floating above this net, each daisy motif is constructed in two distinct layers: a tight, spiral-worked yellow center that mimics the dense florets of a real flower head, and six white puff-stitch petals attached by slip stitches, giving them a lifted, almost quivering presence. The entire piece is unified by a yellow scalloped shell border that echoes the petal curves, with tiny leaf accents at each end as a final botanical nod.
Worked in 100% cotton worsted-weight yarn, the runner has the substantial hand and matte finish that only natural fiber provides — it drapes beautifully, blocks crisply, and withstands the inevitable wine spill or candle wax. At 60–70 inches long, it graces a farmhouse table for six or a console table in an entryway with equal grace.
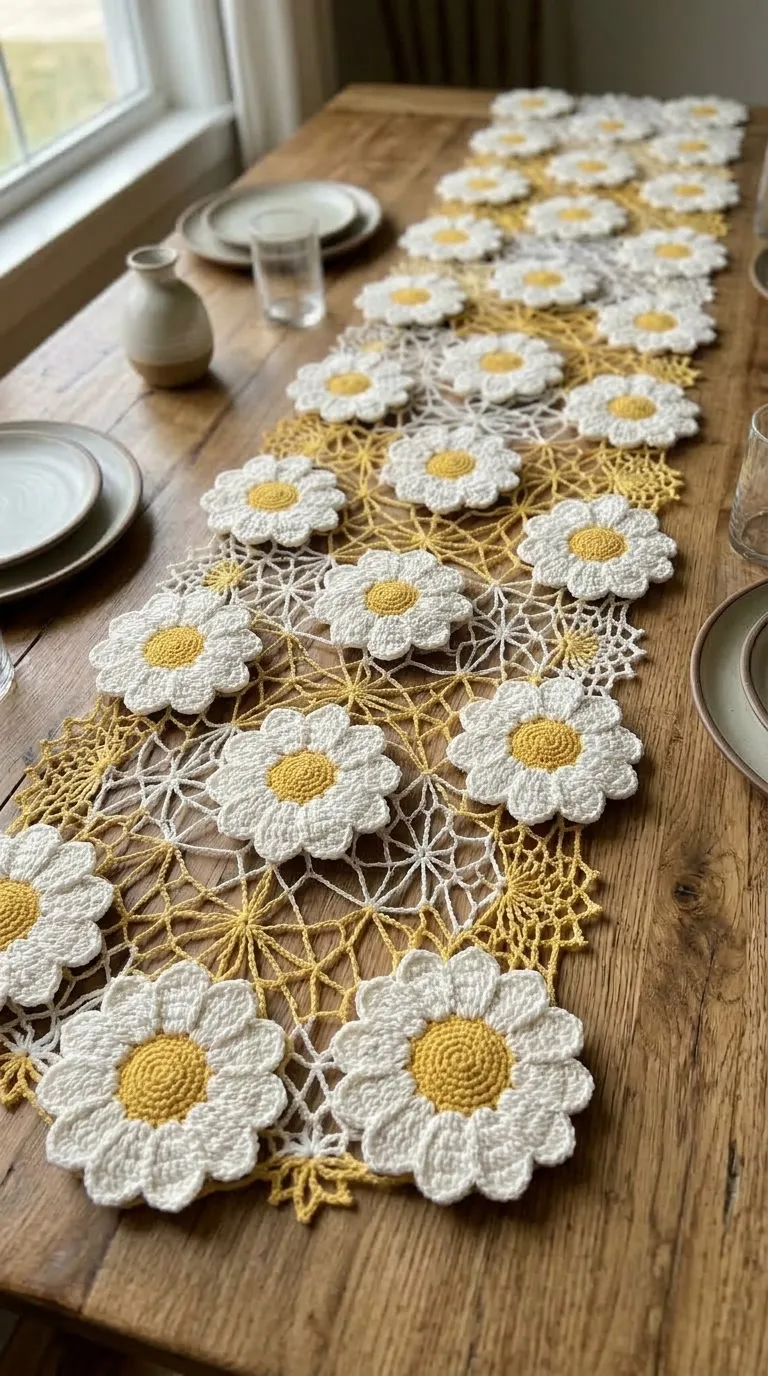
Pattern Overview & Finished Dimensions
- Finished Length: 60–70 inches (150–180 cm), adjustable by repeating mesh pattern rows
- Finished Width: 10–12 inches (25–30 cm) including border
- Daisy Motif Diameter: 2.5 inches (6.5 cm) at widest point
- Border Depth: 1.5 inches (3.8 cm) at deepest scallop
- Structure: Rectangular runner with all-over mesh ground, 12–14 attached 3D daisy motifs (arranged in two offset rows), scalloped shell border on all four sides, leaf accents at short ends
- Yarn Weight: Worsted (4) — 100% cotton recommended for stitch definition and washability
- Hook: 5.0 mm (US H-8)
- Skill Level: Intermediate — requires comfort with puff stitches, working in back loops only, joining motifs as-you-go, and reading stitch diagrams
- Notions: Tapestry needle, blocking pins, steam iron or garment steamer, stitch markers (6–8)
Materials, Fiber & Hardware Checklist
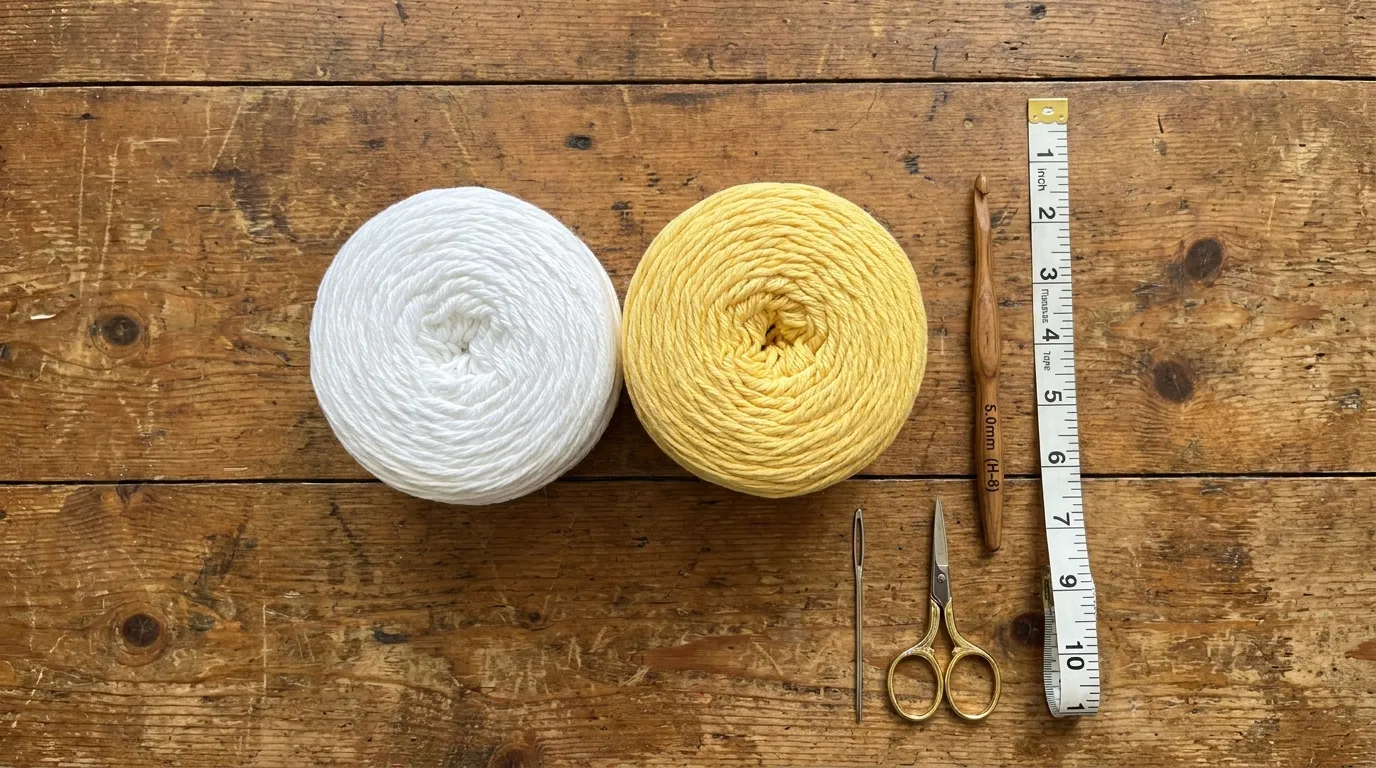
| Item | Specification | Quantity |
|---|---|---|
| Yarn A (White) | 100% cotton worsted-weight (approx. 220 yds / 200 m per 100g skein) | 280 yds (256 m) — ~1.3 skeins |
| Yarn B (Yellow) | 100% cotton worsted-weight, same brand/line as White | 200 yds (183 m) — ~1 skein |
| Crochet Hook | 5.0 mm (US H-8) — inline shaft preferred for even tension | 1 |
| Tapestry Needle | Blunt tip, large eye for cotton yarn | 1 |
| Blocking Supplies | Rust-proof T-pins, blocking mats or towels, spray bottle | As needed |
| Stitch Markers | Locking or split-ring, 6–8 pieces | 1 set |
| Measuring Tape | Flexible, 60+ inches | 1 |
Yarn Substitution Notes: Choose a mercerized or unmercerized cotton with good stitch definition — avoid acrylic blends, which lack the body to hold the puff petals upright. If substituting a DK-weight yarn, go down to a 4.0 mm hook and expect a runner ~15% smaller; add extra mesh rows to compensate. For a slightly larger runner, use a 5.5 mm hook with the same yarn.
Stitch Abbreviations (US Terms)
| Abbreviation | Meaning |
|---|---|
| ch | chain |
| sl st | slip stitch |
| sc | single crochet |
| hdc | half double crochet |
| dc | double crochet |
| tr | treble crochet |
| BLO | back loop only |
| FLO | front loop only |
| sp | space |
| sk | skip |
| rep | repeat |
| * * | repeat instructions between asterisks |
| [ ] | work all instructions inside brackets into same stitch/space |
| pc | puff cluster (see Special Stitches) |
| dc-cl | double crochet cluster (see Special Stitches) |
Special Stitches:
- dc-cl (Double Crochet Cluster): [Yarn over, insert hook in indicated st/sp, yarn over, pull up loop, yarn over, pull through 2 loops] 3 times, yarn over, pull through all 4 loops on hook. Creates a compact, textured cluster of 3 incomplete dc joined at the top.
- pc (Puff Cluster): [Yarn over, insert hook in indicated st/sp, yarn over, pull up loop] 4 times (9 loops on hook), yarn over, pull through all 9 loops, ch 1 to close. The closing ch 1 is structural — do not skip it.
- Spiral Center (worked in continuous rounds, no joining): Begin with adjustable loop (magic ring). Work in continuous spiral without joining rounds; use a stitch marker to track round beginnings.
Architectural Mechanics / Technique Deep-Dive
This runner’s architecture relies on three distinct structural systems working in harmony: the mesh ground, the dimensional motifs, and the unifying border. Understanding why each is built the way it is will help you troubleshoot tension, adjust dimensions, and appreciate the engineering behind the aesthetic.
The Mesh Ground (Filet-Inspired Cluster Net):
Traditional filet crochet uses open and filled squares to create images. Here, we replace the solid dc blocks with dc-clusters — each cluster occupies the “filled” square but remains breathable, while the ch-3 spaces between clusters form the “open” squares. The result is a fabric with 40–50% open area, lightweight yet stable. Working clusters instead of solid dc prevents the ground from curling at the edges and gives the motifs a slightly recessed “stage” to sit upon. The cluster stitch count (3 dc per cluster) was chosen so that each cluster spans roughly the same width as a ch-3 space, keeping the grid square.
The Daisy Motif (Two-Layer Construction):
A single-layer puff-stitch flower tends to flatten with washing. By separating the center (spiral sc) from the petals (puff clusters), we create true dimension. The spiral center is worked in continuous rounds (no slip-stitch joins) — this eliminates the visible seam that would run radially through a joined-round center, preserving the organic “floret” illusion. The six petals are each a puff cluster worked into the back loop only of the center’s final round, then slip-stitched to the mesh ground at two anchor points. This BLO attachment lets the petal hinge upward naturally, while the dual anchors prevent flopping.
The Scalloped Shell Border (Self-Supporting Edge):
The border is not merely decorative — it structurally finishes the raw edges of the mesh, which would otherwise stretch unevenly. The pattern (sc, ch 2, 5 dc, ch 2, sc) in each ch-3 space creates a deep, rounded scallop that adds 1.5 inches of depth. The ch-2 “shoulders” on either side of the 5-dc fan give the scallop its architectural lift; without them, the fan would lie flat. Working the border in Yellow (not White) frames the entire composition and visually ties the yellow centers to the perimeter.
Step-by-Step Stitch Instructions
Phase 1: Mesh Ground Foundation
Row 1 (Foundation): With White, ch 43 (or any multiple of 4 + 3 for desired width — 43 ch yields 10 clusters across).
Row 2: Dc in 4th ch from hook (counts as first dc-cl base), *ch 3, sk 3 ch, dc-cl in next ch; rep from * across, ending with dc in last ch. Turn. — 10 dc-cl, 9 ch-3 sps
Row 3: Ch 3 (counts as dc), dc-cl in first ch-3 sp, *ch 3, dc-cl in next ch-3 sp; rep from * across, ending with dc in top of turning ch. Turn.
Rows 4–60 (or until piece measures 57–67 inches): Rep Row
3. Do not fasten off after final row — you will continue directly into the border.
Placement Note: Daisy motifs will be attached on Rows 10, 20, 30, 40, 50 (and 60 if you work that far), alternating between the 2nd, 5th, and 8th ch-3 spaces across the row. This creates two staggered rows of 6–7 motifs each. Mark these rows and spaces with stitch markers now.
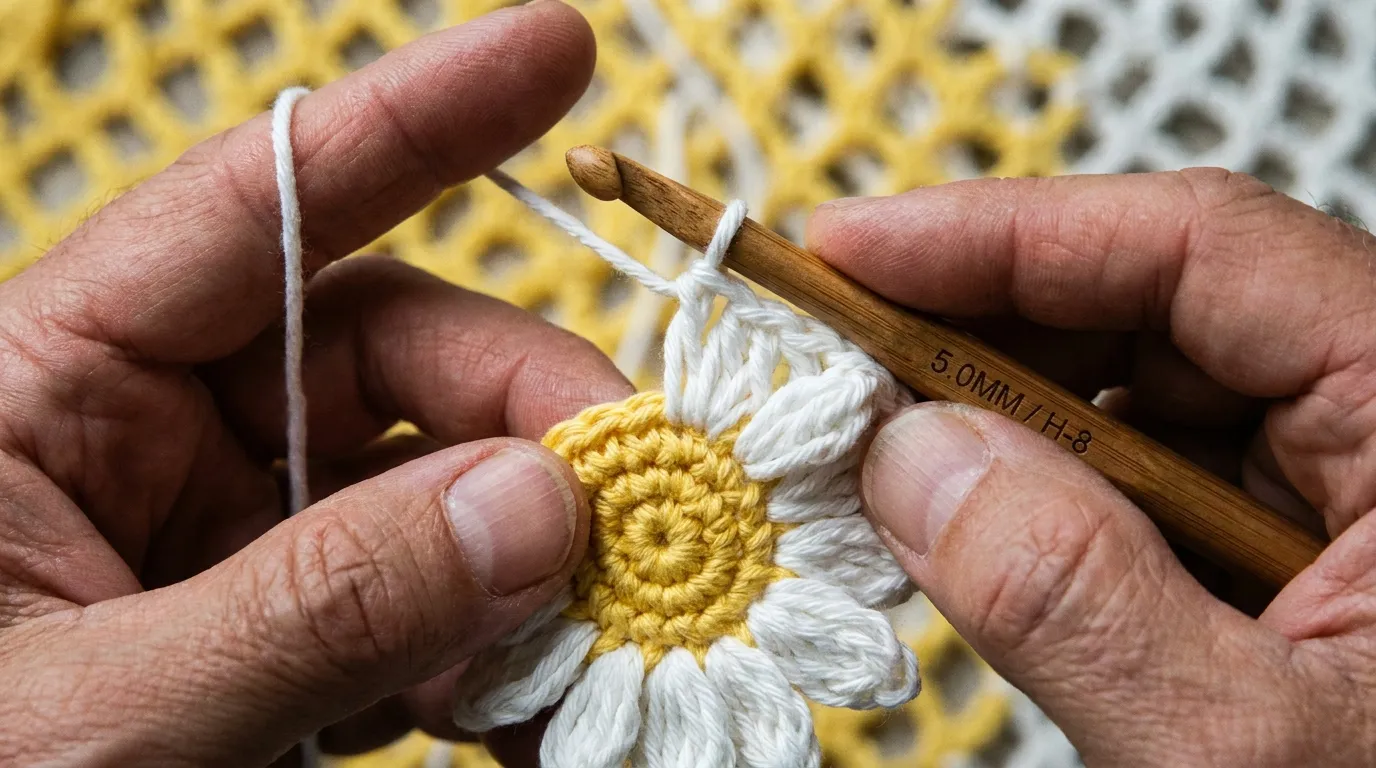
Phase 2: Daisy Motifs (Make 12–14)
Center (Yellow, continuous spiral):
Rnd 1: Magic ring, 6 sc in ring. Do not join. Place marker in first sc. — 6 sc
Rnd 2: 2 sc in next sc 6 times. Move marker. — 12 sc
Rnd 3: [Sc in next sc, 2 sc in next sc] 6 times. — 18 sc
Rnd 4: [Sc in next 2 sc, 2 sc in next sc] 6 times. — 24 sc
Rnd 5: [Sc in next 3 sc, 2 sc in next sc] 6 times. — 30 sc
Rnd 6: Sc in each sc around. — 30 sc
Fasten off, leaving 12-inch tail for sewing. Pull tail through last stitch to secure.
Petals (White, worked into BLO of Rnd 6):
Join White with sl st in BLO of any sc on Rnd 6.
Petal 1: Ch 1 (does not count), pc in same st, ch 1, sl st in BLO of next sc.
Petals 2–6: [Sl st in BLO of next sc, pc in same st, ch 1, sl st in BLO of next sc] 5 times.
Fasten off, leaving 18-inch tail for attaching to mesh. Do not weave in ends yet.
Attaching Motifs to Mesh (Join-As-You-Go):
At each marked ch-3 space on the designated rows:
- Position motif so two opposite petals align with the ch-3 space edges.
- Using the White tail, insert tapestry needle through the ch-3 space from back to front, catch the base of a petal (the sl st join), pull through; repeat for the opposite petal.
- Secure with 2–3 small stitches on wrong side. Weave in tail.
- Using the Yellow center tail, tack the center to the mesh at 3 points around its perimeter (whipstitch through back loops of center into mesh strands). Weave in.
Repeat for all marked positions. Motifs on even-numbered rows (20, 40, 60) go in spaces 2, 5, 8; motifs on odd-numbered rows (10, 30, 50) go in spaces 1, 4, 7 (if your width allows 10 clusters, space 10 exists — use it for a 7th motif on odd rows).
Phase 3: Scalloped Shell Border (Yellow)
Setup: With RS facing, join Yellow with sl st in corner st of last mesh row (top right corner).
Round 1 (Long Side): Ch 1, sc in same st, ch 2, 5 dc in next ch-3 sp, ch 2, sc in next dc-cl — rep across to next corner.
Corner: In corner st: (sc, ch 2, 5 dc, ch 2, sc) all in same st.
Round 1 (Short Side): Working evenly along row ends: sc in next row-end, ch 2, 5 dc in next row-end space, ch 2 — rep to corner.
Corner: Same as above.
Round 1 (Other Long Side): Same as first long side.
Corner: Same.
Round 1 (Other Short Side): Same as first short side.
Join with sl st to first sc. Fasten off.
Round 2 (Optional Reinforcement): With Yellow, join with sl st in any sc of Round
- Ch 1, sc in each st and ch-2 sp around, working 3 sc in each corner 5-dc fan center. Join, fasten off, weave in ends.
Phase 4: Leaf Accents (Make 2 — one per short end)
Leaf (Yellow and White, worked flat):
With Yellow, ch 11.
Row 1: Sc in 2nd ch from hook, hdc in next, dc in next 2, tr in next 2, dc in next 2, hdc in next, sc in last. Ch 1, turn.
Row 2 (White): Sl st in first sc, ch 3, sl st in next st across to tip (work 2 ch-3 loops in tip st), then ch 3, sl st in next st down other side. Fasten off.
Assembly: Using Yellow tail, whipstitch leaf base to center of short-end border, slightly overlapping the corner scallop. Weave in all ends.
Assembly, Mounting & Structural Integration
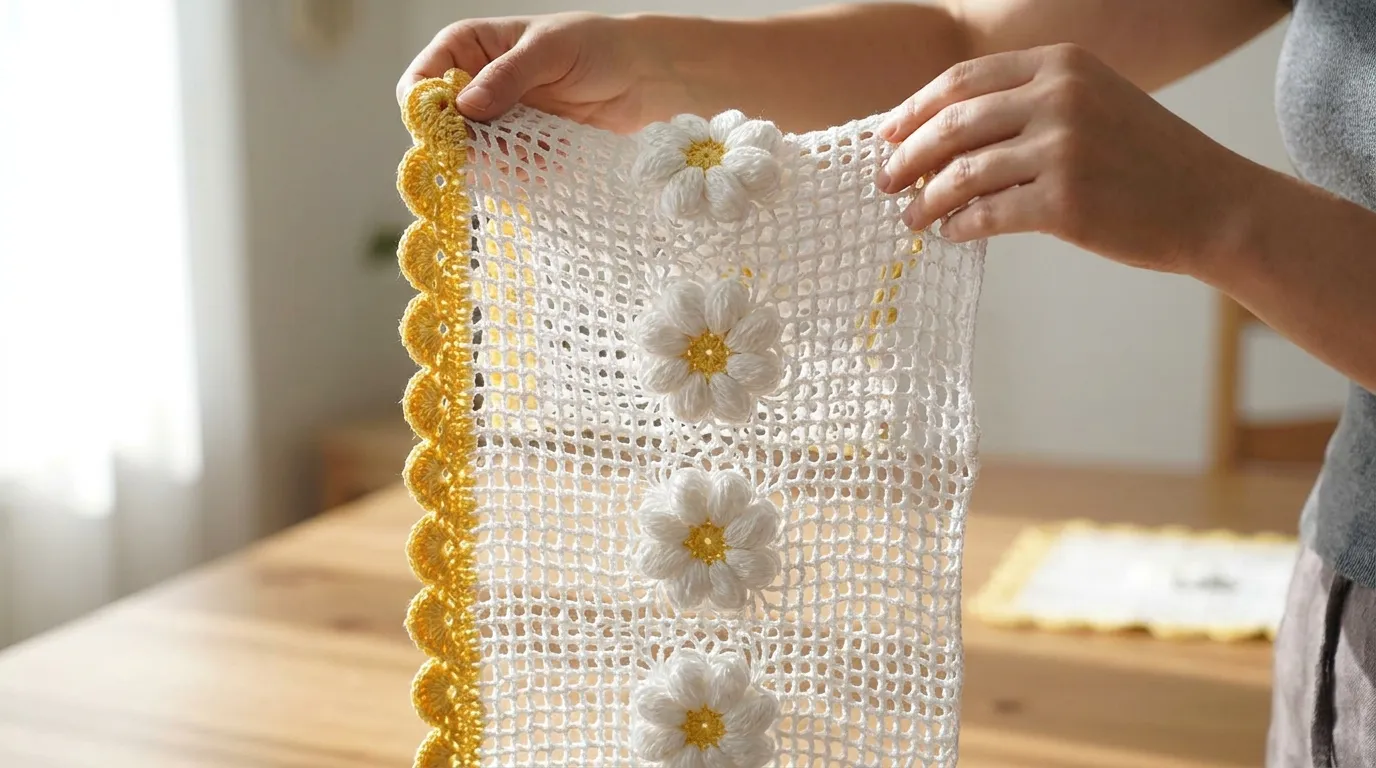
This runner requires no lining, mounting hardware, or structural reinforcement — the cotton mesh and border are self-supporting. However, proper blocking is essential to achieve the intended dimensions and open the lace fully.
Blocking Process:
- Fill a basin with cool water and a drop of wool wash (or mild detergent). Submerge runner, press gently to saturate — do not agitate. Soak 15 minutes.
- Drain, press water out (do not wring). Roll in a clean towel, step on it to extract moisture.
- Lay flat on blocking mats. Pin short ends first to target width (11 inches). Pin long edges, gently stretching mesh to open ch-3 spaces into clean squares. Pin each scallop peak at 1.5-inch depth. Pin leaf accents flat.
- Mist with water if needed. Allow to dry completely (24–36 hours in humid climates).
- Remove pins. Lightly steam-press border only (wrong side up, press cloth) if scallops need sharpening.
Storage: Roll (don’t fold) around a cardboard tube wrapped in acid-free tissue. Store in a cotton pillowcase — plastic traps moisture and invites mildew on cotton.
Hardware, Accents & Embellishment Assembly
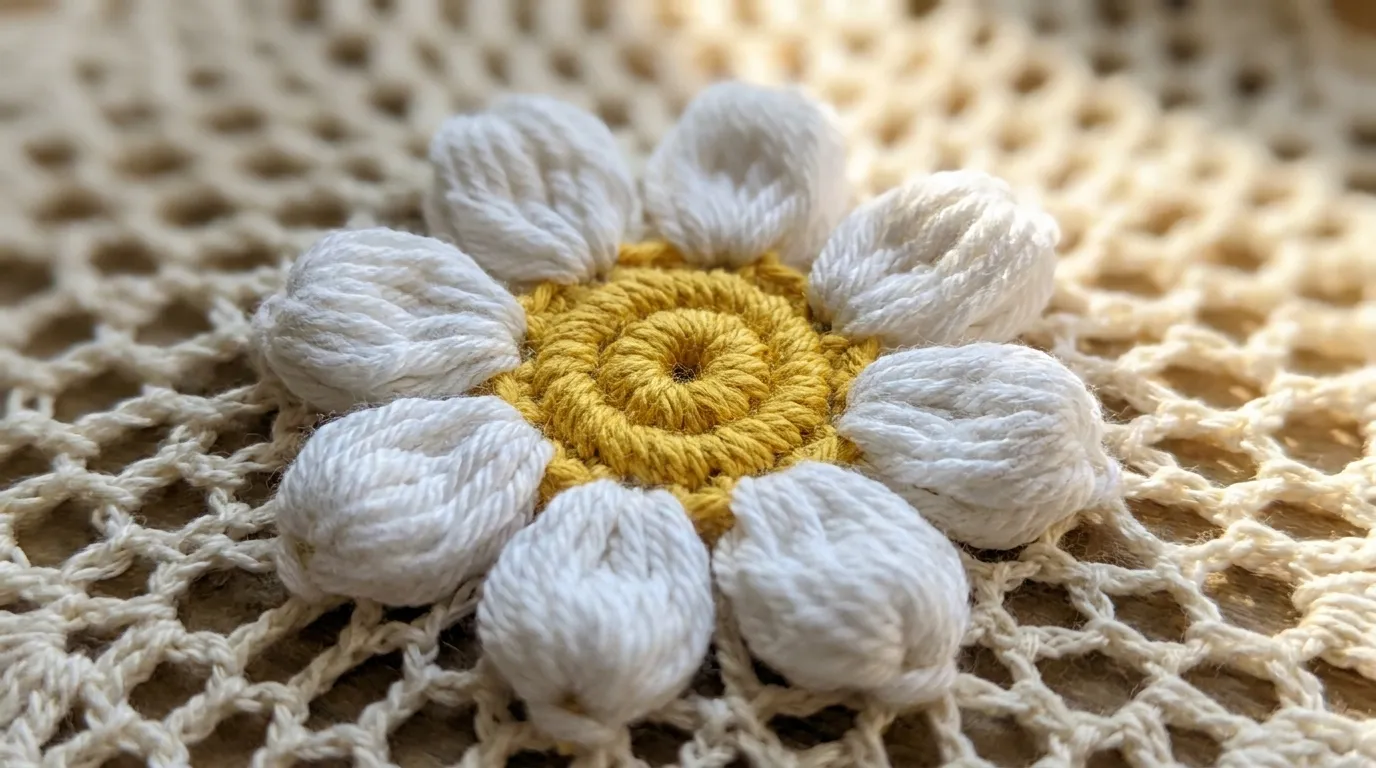
No hardware is used in this design. The only embellishments are the integral daisy motifs and leaf accents, both crocheted from the project yarns. If you wish to add a subtle sparkle for holiday use, sew 3–4 mm clear glass beads into the center of each yellow spiral (one per motif) using a fine beading needle and matching yellow thread — but the matte cotton beauty stands fully on its own.
Blocking, Care & Maintenance
- Washing: Hand wash cool (max 30°C / 85°F) with pH-neutral wool wash. Press water out — never wring.
- Drying: Lay flat on towel, reshape to blocked dimensions, air dry. Do not tumble dry.
- Ironing: If needed, steam press wrong side only, using a press cloth. Do not press motifs directly — steam around them.
- Stain Treatment: Spot-treat immediately with cool water and a dab of wool wash. For red wine or oil, sprinkle cornstarch, let sit 1 hour, brush off, then wash.
- Long-Term: Re-block annually or after washing to maintain open mesh and scallop definition. Cotton softens beautifully with age and use.
Frequently Asked Questions (FAQ)
Q: Can I make this runner narrower or wider?
A: Absolutely. The mesh ground works on any multiple of 4 chains +
3. For an 8-inch width, ch 35 (8 clusters). For 14-inch width, ch 59 (14 clusters). Adjust motif placement accordingly — keep motifs centered in the middle 60% of the width for visual balance.
Q: My puff clusters are flattening after washing. What went wrong?
A: Two common causes: (1) Not enough loops in the puff — ensure you have 9 loops on hook before pulling through (4 yarn-overs). (2) Skipping the closing ch 1 — that chain locks the puff’s height. Also, cotton puff stitches relax slightly after first wash; block aggressively to re-open them.
Q: The spiral center looks hexagonal, not round. How do I fix this?
A: This happens when increases stack vertically. In Rounds 2–5, stagger your increases: instead of always increasing in the first stitch of each repeat, shift the increase position by one stitch each round (e.g., Rnd 2: inc in st 1; Rnd 3: inc in st 2; Rnd 4: inc in st 3; Rnd 5: inc in st 4). The pattern as written spaces increases evenly, but tension variations can cause stacking — the stagger trick forces roundness.
Q: Can I use variegated or gradient yarn for the mesh ground?
A: Yes, but choose a subtle variegation (tonal white/cream) so the white petals don’t get lost. Avoid high-contrast speckles — they visually compete with the motifs. The yellow border and centers should remain solid to anchor the design.
Community Call-to-Action
You’ve crocheted a piece of spring that will grace your table for years — maybe decades. I’d love to see how your Yellow White Flowers Tablerunner turns out: the way your particular cotton catches the light, the exact shade of yellow you chose, the table you styled it on. Share your finished make on Instagram or Pinterest with @NailItHome and #NailItHomeCrochet — your version might inspire someone else to pick up a hook.
If you found this pattern helpful, consider leaving a comment below with your yarn choice, modifications, or a tip for fellow makers. And if you’re not already subscribed, join our newsletter for monthly pattern drops, fiber deep-dives, and behind-the-scenes studio notes.
Happy stitching,
Aurelia Thorne
Master Fiber Artist & Lead Pattern Curator, Nail It Home


