

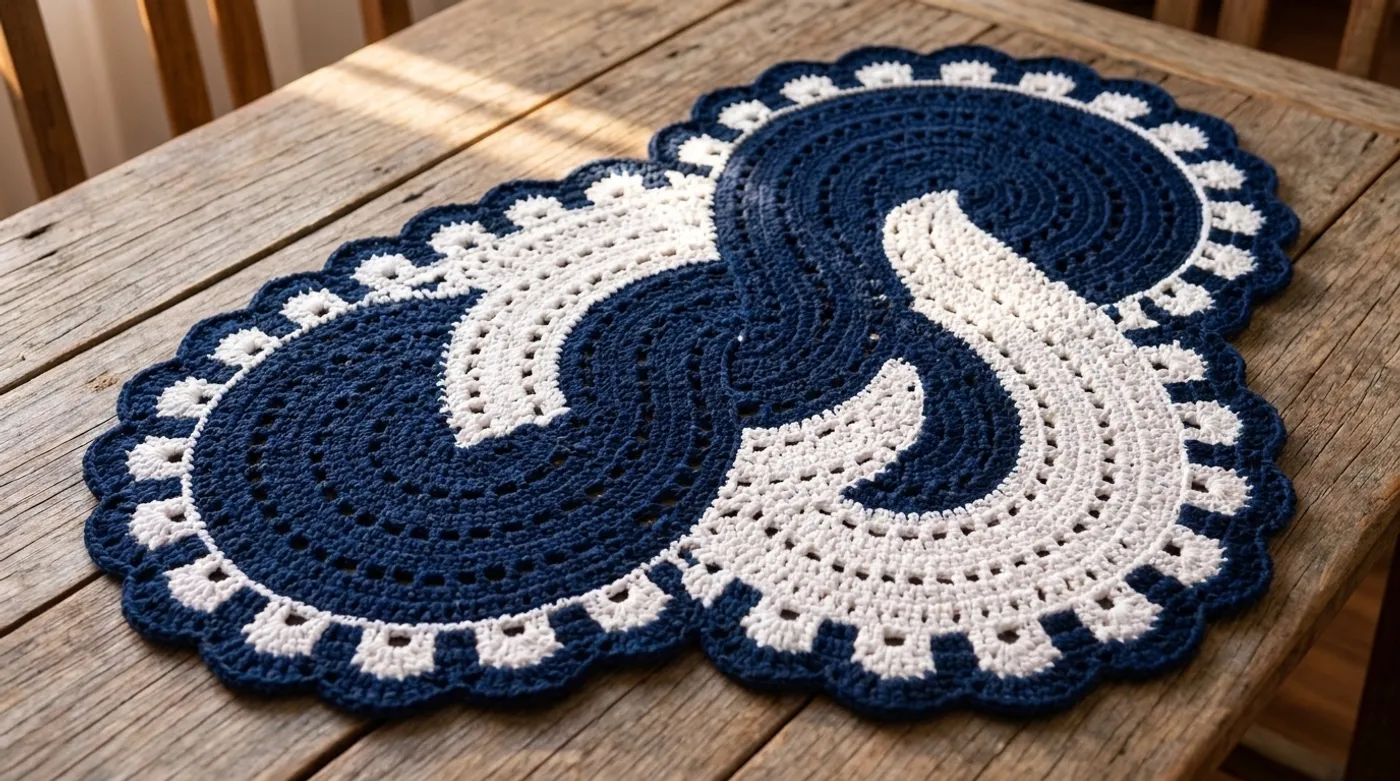
Swirl Pattern Floor Mop Mat: Free Crochet Pattern & Tutorial
Create a stunning interlocking S-curve floor mat using bulky cotton yarn in navy and white. This free pattern features concentric spiral rows, openwork mesh, and a dramatic scalloped shell border for a luxurious lie-flat rug.

Pattern Specifications
1. Introduction & Design Inspiration
Born from a desire to bring gallery-worthy fiber art to the hardest-working floors in the home, the Swirl Pattern Floor Mop Mat transforms the humble entryway rug into a sculptural centerpiece. The interlocking S-curves evoke the fluid motion of water over stone, while the deep navy and crisp white palette anchors any room with timeless sophistication. Each concentric spiral row is a meditation in tension and release, building a fabric dense enough to withstand daily traffic yet supple enough to caress bare feet.
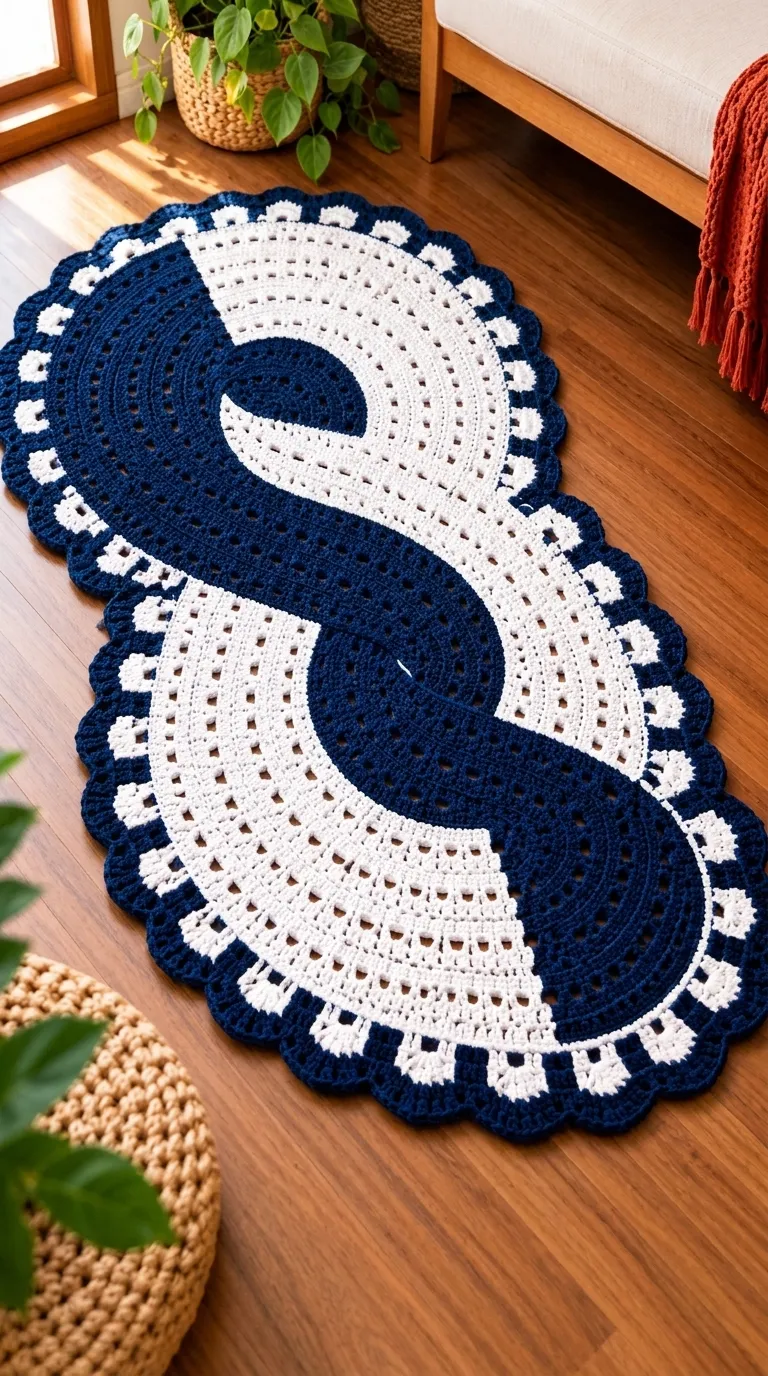
The matte navy cotton absorbs light for a velvety depth, while the white yarn catches it with a subtle pearlescent sheen. The fabric has a firm, almost woven hand with zero curl, thanks to the balanced mesh-and-solid architecture. Style it on warm honey hardwood for high contrast, or layer over a neutral jute rug for textural dimension.
Completed Make Showcase Gallery
Examine the finished handcrafted piece from every vantage point before picking up your hook—from overall symmetry to textural stitch relief and organic drape.
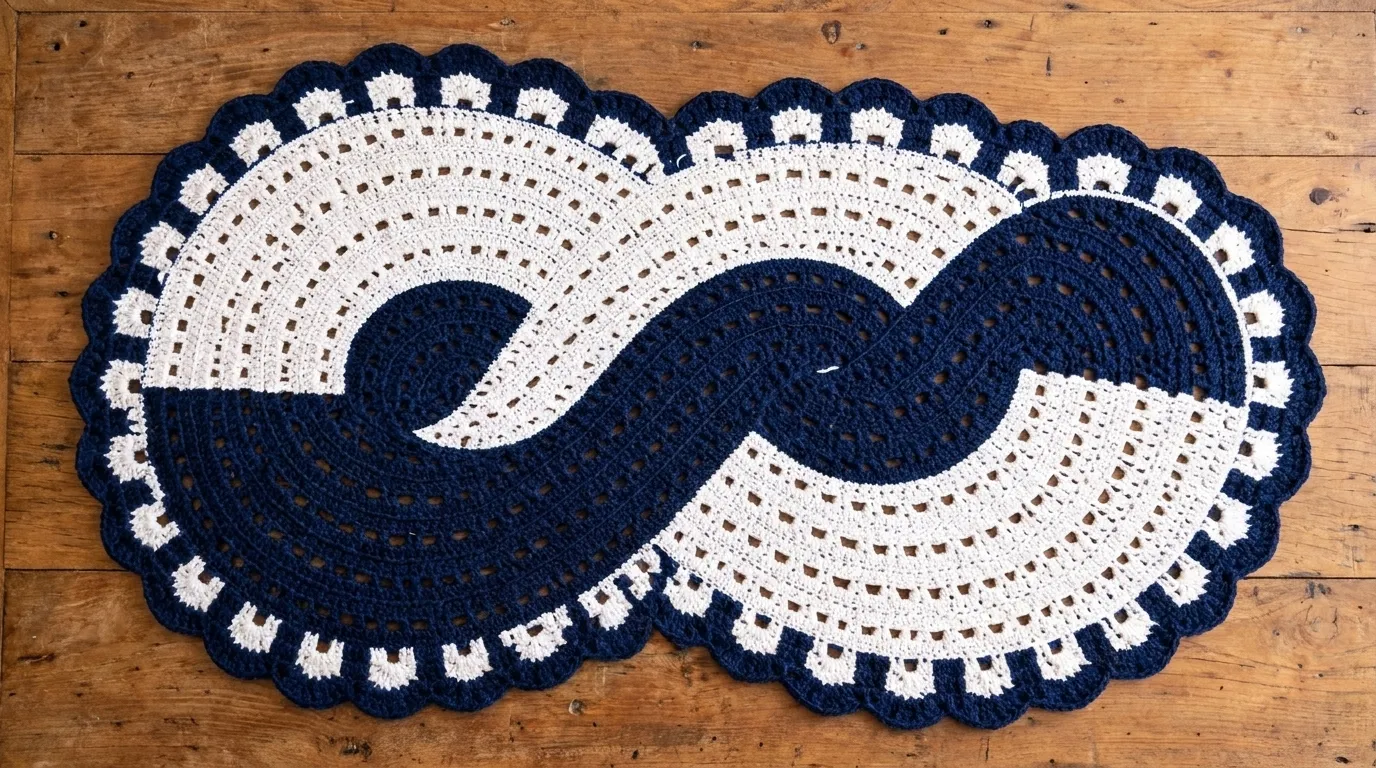
Full silhouette & geometric balance
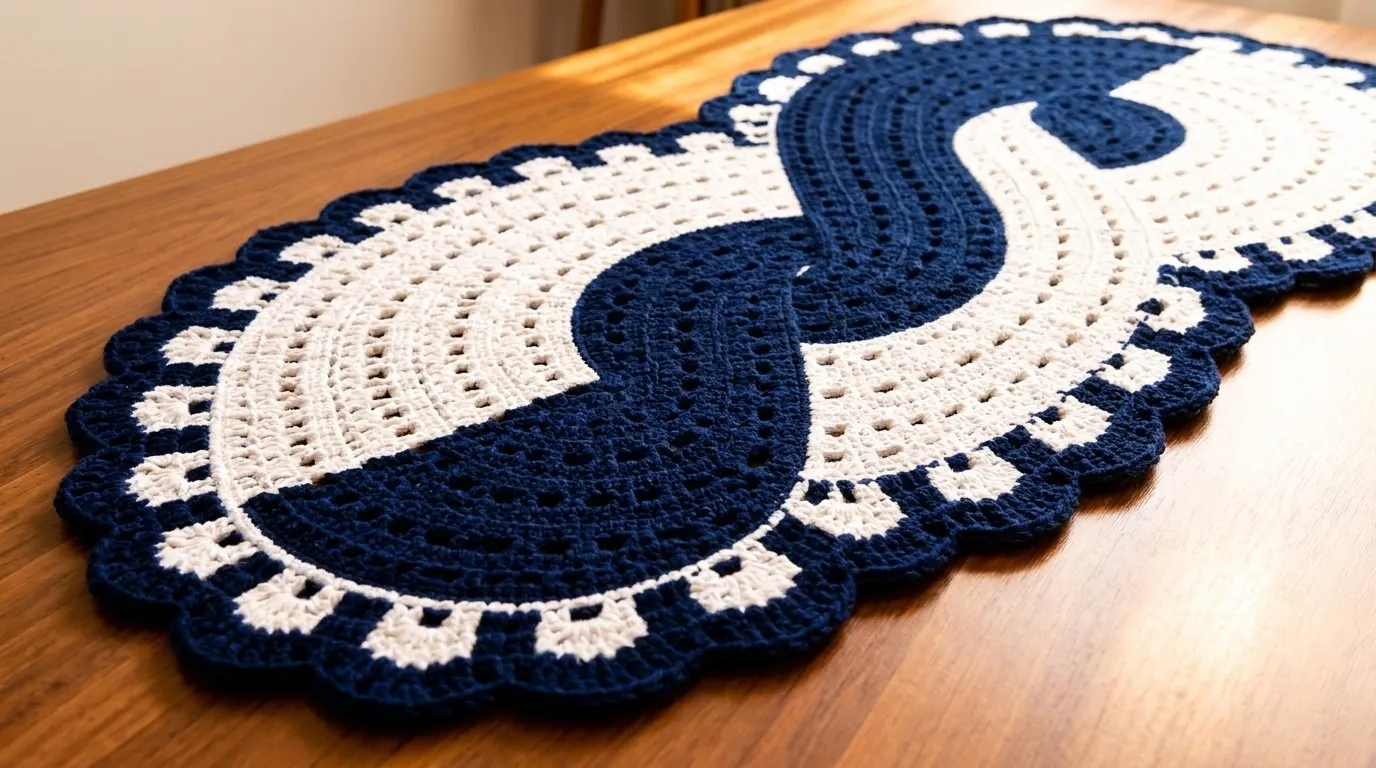
Tactile stitch relief & ribbing depth
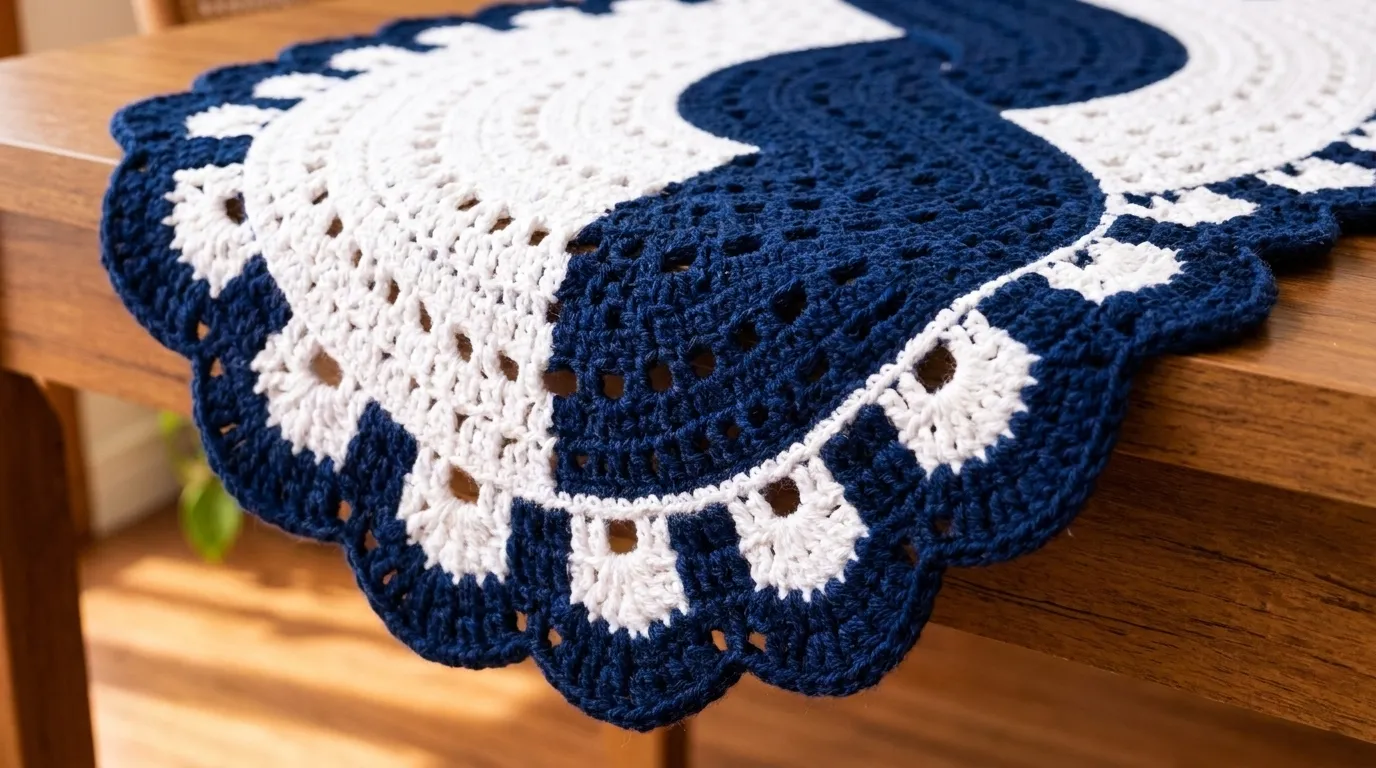
Scalloped edging & natural fall
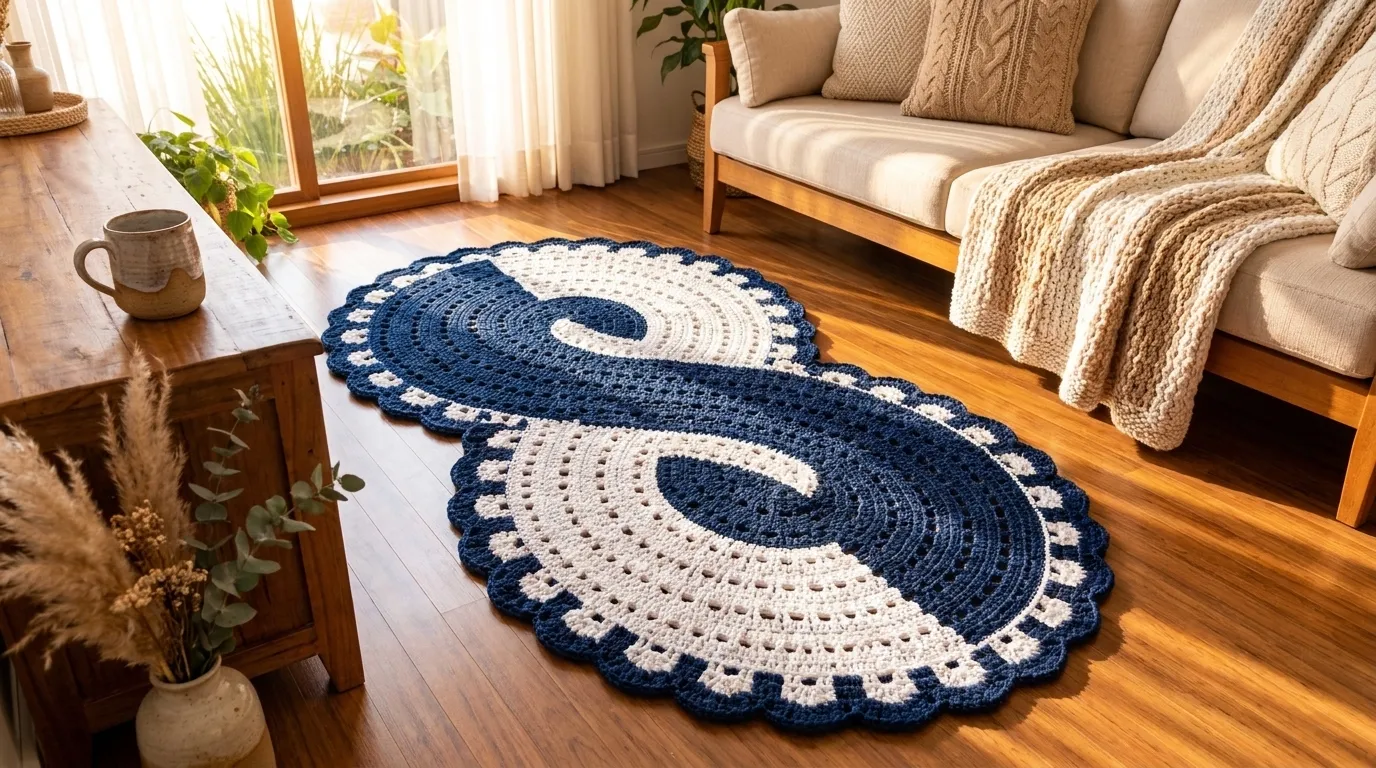
Living space ambient styling
2. Pattern Overview & Finished Dimensions
Silhouette & Architecture: Elongated S-shaped interlocking figure-eight oval mat with lie-flat construction. Two spirals mirror each other along a central axis, joined by ladder-block transition rows.
Drape & Texture: Firm, dense fabric with 0.35-inch thickness; self-supporting and non-curling. The double-crochet mesh creates micro-air pockets for cushioning while the solid stitch ribs provide structural integrity.
Maker Adaptation Tip: Adjust length by adding or removing spiral repeats; each full S-curve repeat adds ~6 inches. For wider mat, increase foundation chain by multiples of 4 stitches per side. Border depth can be modified by adding/subtracting scallop rounds.
3. Materials, Fiber & Tools Checklist
Yarns & Palette Requirements:
100% combed cotton cord yarn; heavyweight for durability and stitch definition
100% combed cotton yarn; same weight for consistent gauge
Hook & Essential Notions:
- Crochet Hook: 6.5 mm (K-10.5) (or size needed to meet gauge)
4. Standard Crochet Abbreviations (US Terms)
This pattern follows standard Craft Yarn Council (CYC) US crochet terminology. Refer to this quick-reference visual dictionary as you work through each round:
5. Architectural Mechanics & Special Stitches
The mat is constructed as two interlocking logarithmic spirals worked simultaneously from a shared foundation chain. Each spiral grows via concentric rounds of alternating solid-dc ribs (3 dc in each ch-1 sp) and openwork mesh blocks (dc, ch 1, skip 1). The spirals are joined at the waist by a ladder-block transition row (white: ch-3 arches over navy dc posts) creating the figure-eight waist. The border is worked perpendicular to the final round: a setup round of sc establishes the perimeter stitch count, followed by white ladder arches (ch 5, sc in next 3 sc) and a final navy 7-dc scalloped shell round (skip 2, 7 dc in next, skip 2, sc) that adds 1.5 inches of decorative depth.
Special Stitches for This Project:
With slip knot on hook, yarn over, insert hook in indicated stitch, yarn over and pull up loop, [yarn over, pull through 2 loops] twice. Counts as first dc of round.
*Dc in next dc, ch 1, skip next ch-1 sp; repeat from * across. Creates openwork grid.
*3 dc in next ch-1 sp; repeat from * across. Creates dense vertical rib.
Ch 5, skip next 3 sc, sc in next sc. Forms open arch for border transition.
Skip 2 sts, 7 dc in next st, skip 2 sts, sc in next st. Creates deep scallop.
6. Step-by-Step Pattern Instructions
Follow each round card in sequence. Click or tap any row card once you complete it to check it off and automatically track your progress across the 5 Pattern Checkpoints!
Phase 1: Foundation Chain & Dual Spiral Initiation
Establish the shared foundation chain and work the first 4 rounds of both spirals simultaneously to create the interlocking centers.With Navy, ch 88. Place marker at ch 1 and ch 45 (center points for two spirals). Do not join; work in turned rows for foundation only.
💡 NB: Chain loosely; this chain forms the central axis of the figure-eight.
Starting at marked ch 1 (Spiral A center), work into back bumps: sc in 2nd ch from hook, sc in next 21 ch, 3 sc in next ch (center turn), sc in next 21 ch. Rotate work 180°, continue on opposite side of chain: sc in next 22 ch, 3 sc in marked ch 45 (Spiral B center), sc in next 21 ch. Join with sl st to first sc. (Spiral A: 46 sc each side + 3+3 turns = 98 sc)
💡 NB: Mark the 3-sc turn stitches at each end with locking markers.
Info:
You now have two oval centers (Spiral A right, Spiral B left) joined at the waist by the foundation chain. All subsequent rounds are worked in continuous spirals (no joining, no turning) around each center independently, using stitch markers to track rounds.
Spiral A: Standing dc in first sc, dc in next 22 sc, [dc, ch 1, dc] in marked turn st (increase), dc in next 22 sc, [dc, ch 1, dc] in other turn st. Spiral B: Repeat same pattern starting at its first sc. Move markers to new turn sts (the ch-1 spaces).
💡 NB: Work both spirals before moving to next round to maintain even tension.
Spiral A: *Dc in next dc, ch 1, skip next dc; repeat from * around, working (dc, ch 1, dc) in each ch-1 turn sp. Spiral B: Same. This establishes the openwork mesh.
💡 NB: Mesh gauge check: 13 dc per 4 inches across flat.
Spiral A: *3 dc in next ch-1 sp; repeat from * around, working 3 dc in each turn ch-1 sp. Spiral B: Same. This creates the first solid rib.
💡 NB: Ribs should feel firm and slightly raised.
Phase 2: Spiral Expansion & Mesh/Rib Alternation
Grow both spirals to full width (22 inches) by alternating mesh and solid rib rounds, maintaining the interlocking figure-eight shape.Repeat Rounds 3-4 seven more times (7 mesh rounds, 7 rib rounds). Each mesh round adds ~0.5 inch width per side; each rib round adds ~0.5 inch. After 14 rounds, each spiral measures ~22 inches wide at widest point. End on a rib round (Round 18).
💡 NB: Measure width every 2 rounds. If spiral exceeds 22 inches, stop early; if short, add one mesh+rib pair.
Info:
At Round 18, the two spirals touch along the central 12 inches (the waist). Do not join them yet. The next phase creates the ladder-block transition that locks them together.
Join White at waist center (between spirals). Sc evenly around entire perimeter of both spirals as one piece: sc in each dc and 2 sc in each ch-1 sp around outer edges, 3 sc in each turn ch-1 sp at ends. At waist, sc in each dc across the 12-inch join (approx 36 sc). Join with sl st.
💡 NB: Use stitch markers every 50 sc to keep count.
Phase 3: Ladder-Block Transition Row (White)
Work the two-tone ladder-block transition row that bridges the spirals and prepares for the scalloped border.Ch 1 (does not count), sc in same st. *Ch 5, skip next 3 sc, sc in next sc; repeat from * around entire perimeter. Join with sl st to first sc.
💡 NB: Arches should span ~1.25 inches each; adjust skip count if needed to keep arches even.
Info:
This round creates the white openwork ladder that visually separates the navy spirals from the navy scalloped border. It also adds 1 inch to the overall dimensions.
Phase 4: Scalloped Shell Border (Navy)
Work the deep 7-dc scalloped shell stitch border in navy around the white ladder arches.Join Navy at any ch-5 arch. Ch 3 (counts as dc), 3 dc in same arch (half-shell), *skip next arch, sc in next sc (the sc between arches), skip next arch, 7 dc in next arch (full shell); repeat from * around. At final arch: skip next arch, sc in next sc, skip next arch, 3 dc in joining arch (half-shell). Join with sl st to top of ch-3.
💡 NB: Shells should fan outward; block aggressively to open.
Sl st in next 3 dc, *ch 1, sc in center dc of next shell (5th dc), ch 1, sc in next sc between shells; repeat from * around. Fasten off.
💡 NB: This round locks shells flat and prevents flaring.
Phase 5: Finishing, Blocking & Optional Anti-Slip Backing
Wet block to exact dimensions, weave ends, and apply optional anti-slip backing.Submerge mat in cool water 15 minutes. Press out water (do not wring). Lay on blocking mats, stretch to 48 x 22 inches, pin every 2 inches along perimeter and at waist. Ensure scallops are fully opened and pinned. Dry completely (24-48 hours).
💡 NB: Use a fan to speed drying; cotton stretches when wet.
Weave all tails through adjacent stitches on wrong side using tapestry needle. Trim flush.
💡 NB: Weave in direction of stitch path for invisibility.
Cut clear latex sheet to 47 x 21 inches (1 inch smaller than mat). Apply to wrong side per manufacturer instructions (usually peel-and-stick or spray adhesive). Press firmly.
💡 NB: Test adhesion on a corner first.
Info:
The mat is now ready for use. The cotton will soften with washing but retain shape. The scalloped border adds 1.5 inches beyond the ladder arches, making the final decorative width ~25 inches at scallop tips.
7. Assembly, Mounting & Structural Integration
Wet block aggressively to 48 x 22 inches using T-pins every 2 inches. Pin scallop tips downward to set the shell shape. Allow 24-48 hours drying time. The cotton will relax ~5% after first wash; block to 49 x 22.5 inches initially to compensate.
8. Accents, Hardware & Finishing Details
Inspect all outer margins, secure tails with a blunt tapestry needle through dense stitch posts on the Wrong Side, and steam press gently to lock fiber memory.
9. Common Mistakes & How to Fix Them
Even seasoned makers run into tension hiccups or stitch drift. Here are the top troubleshooting solutions for this design:
Working one spiral many rounds ahead of the other causes tension differences and mismatched stitch counts at the waist.
Incorrect skip count between arches for the actual stitch count of Round 19.
Insufficient blocking or missing the stabilization round (Round 22).
Not enough spiral expansion rounds (Phase 2) worked before transition.
10. Blocking, Care & Maintenance
Wet block aggressively to 48 x 22 inches using T-pins every 2 inches. Pin scallop tips downward to set the shell shape. Allow 24-48 hours drying time. The cotton will relax ~5% after first wash; block to 49 x 22.5 inches initially to compensate.
Care & Longevity Guidelines:
11. Frequently Asked Questions (FAQ)
Can I use worsted weight yarn instead of bulky?
Not recommended. Worsted weight at the same hook size will produce a much smaller, denser mat (~30 x 14 inches). To achieve the stated dimensions with worsted, you would need to double the strand or significantly increase hook size and round counts, altering the fabric density and border proportions.
How do I join the two spirals at the waist without a seam?
The spirals are not joined with a seam. Round 19 (white sc round) is worked continuously around the entire perimeter of both spirals as one piece, effectively fusing them. The ladder arches (Round 20) and shells (Round 21) are then worked over this unified edge.
My mat is curling at the ends after blocking. What went wrong?
End curling usually indicates the turn increases (3 dc in ch-1 sp at spiral tips) were not worked consistently, or the final rib round was too tight. Ensure you work the full 3-dc increase in every turn ch-1 sp on every rib round. Re-block with extra pins at the tips, pulling them flat.
Can I make this mat rectangular instead of oval?
The interlocking S-curve is integral to the design. For a rectangular mat, you would need a completely different construction (e.g., worked in rows with short-row shaping). This pattern’s architecture relies on the spiral geometry; modifying it to a rectangle would require rewriting Phases 1-3 entirely.
Is the anti-slip backing necessary?
The dense cotton fabric has good natural grip on hardwood and tile, but on polished stone or vinyl it may slide. The backing is optional but recommended for safety in high-traffic entryways. If omitted, consider a separate rug pad.
12. Community & Maker Showcase
✨ Share Your Handcrafted Make
There is a quiet satisfaction in watching two spirals grow from a single chain, interlocking like a secret handshake between yarn and hook. This mat will greet your feet daily with texture and intention. Share your finished Swirl Mat with #NailItHomeSwirl — I cannot wait to see the colors you choose and the homes you warm. Happy stitching, Aurelia.
Pattern © 2026 Nail It Home / Aurelia Thorne. For personal maker use only. Do not reproduce, redistribute, or resell without written permission.


