Cyan S-Shape Crochet Table Runner: Free Crochet Pattern & Tutorial
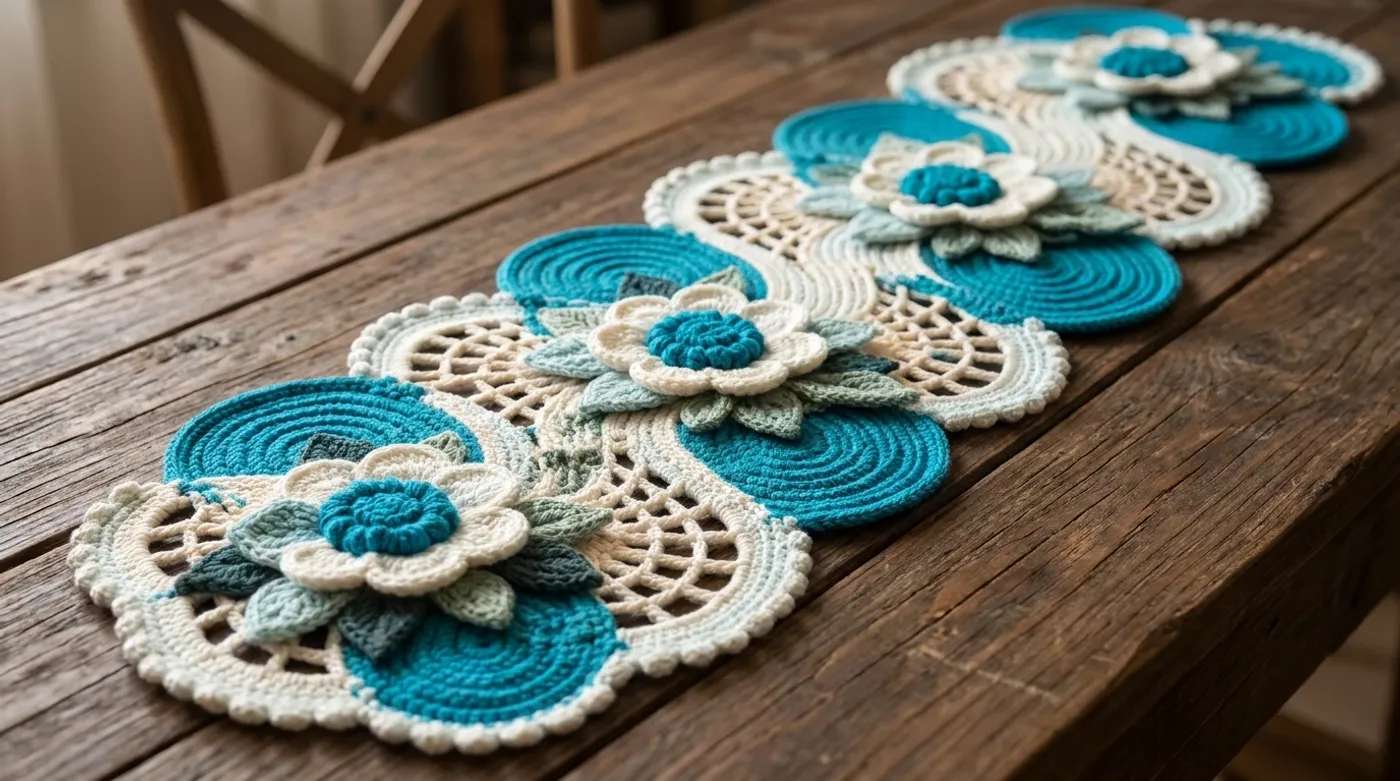
Handcraft an exquisite serpentine S-shaped table runner in mercerized cotton featuring 3D floral medallions, spiraling cyan discs, and delicate cream picot lace.

Pattern Specifications
1. Introduction & Design Inspiration
Drawn from the rhythmic undertow of Mediterranean coastal shallows, this serpentine runner captures tidal flow frozen in structural fiber. The alternating S-curves wind down a banquet table like an undulating ocean wave, shifting from profound midnight teal through vivid aqua to crests of antique cream. Five focal three-dimensional blossoms emerge from the current, anchoring the undulating movement with sculptural tactile presence.
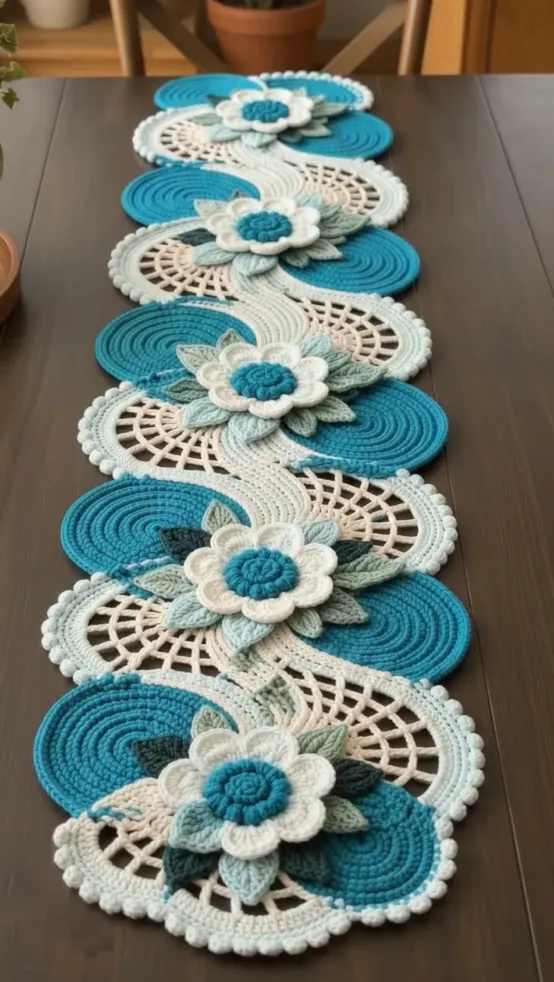
Sport-weight mercerized cotton delivers crisp stitch definition with zero pilling, creating a firm yet supple drape that lies perfectly flat on polished dark timber. The cool cyan palette contrasts cleanly against warm wooden grains.
Completed Make Showcase Gallery
Examine the finished handcrafted piece from every vantage point before picking up your hook—from overall symmetry to textural stitch relief and organic drape.
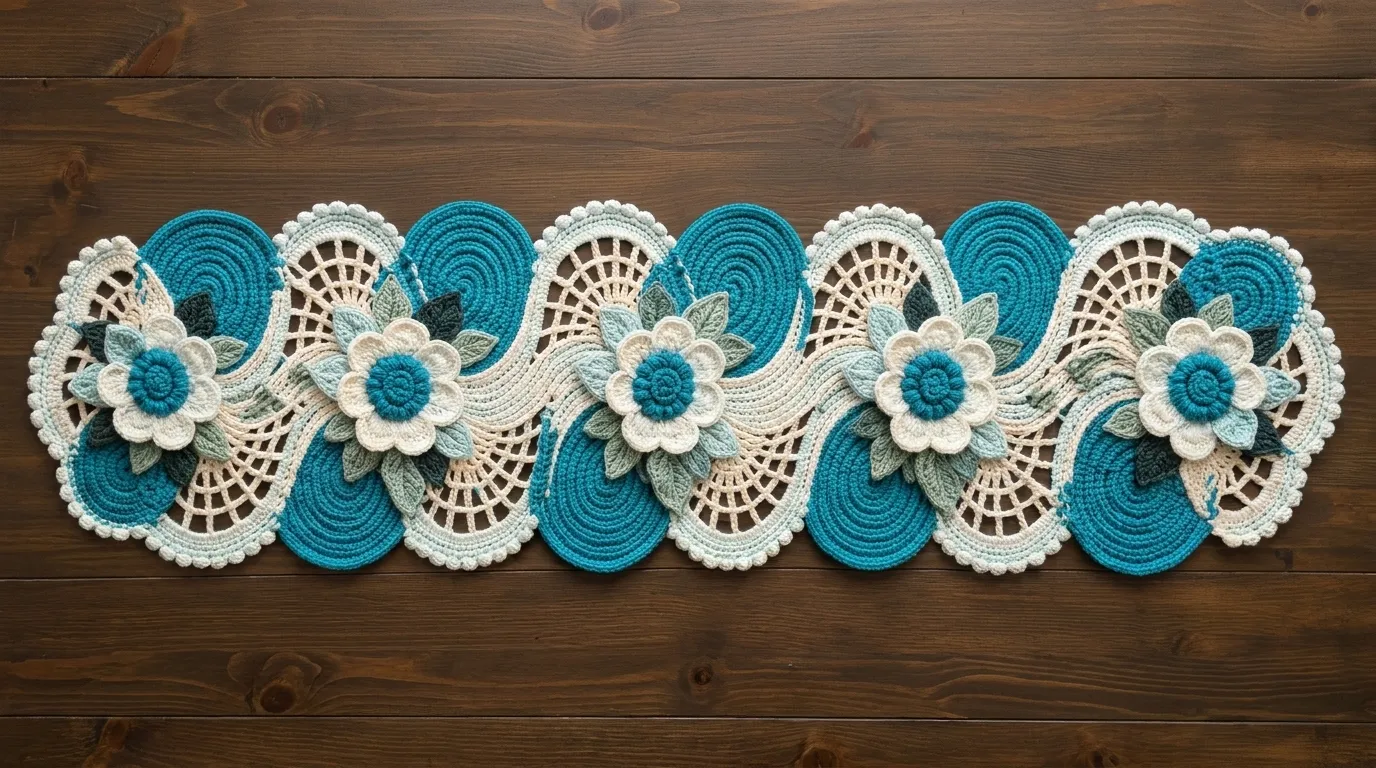
Full silhouette & geometric balance
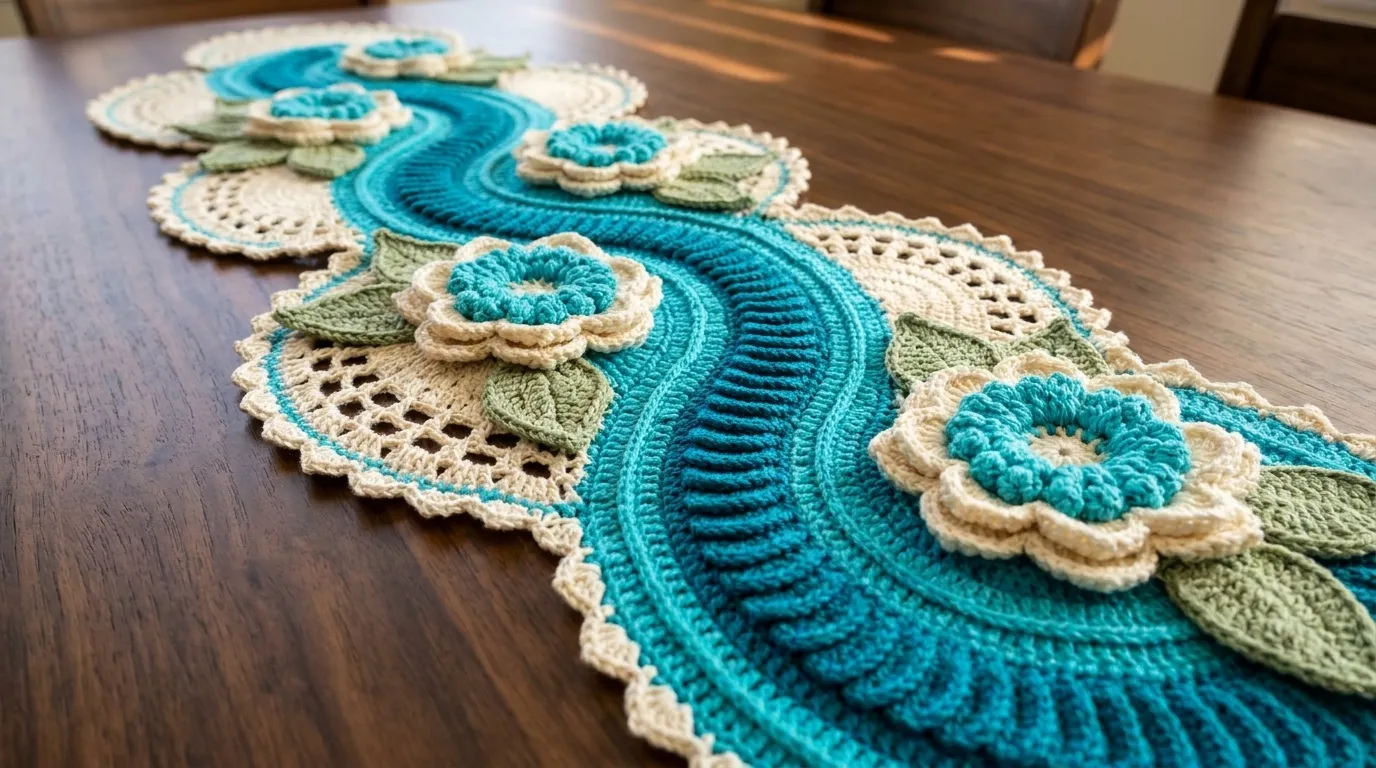
Tactile stitch relief & ribbing depth
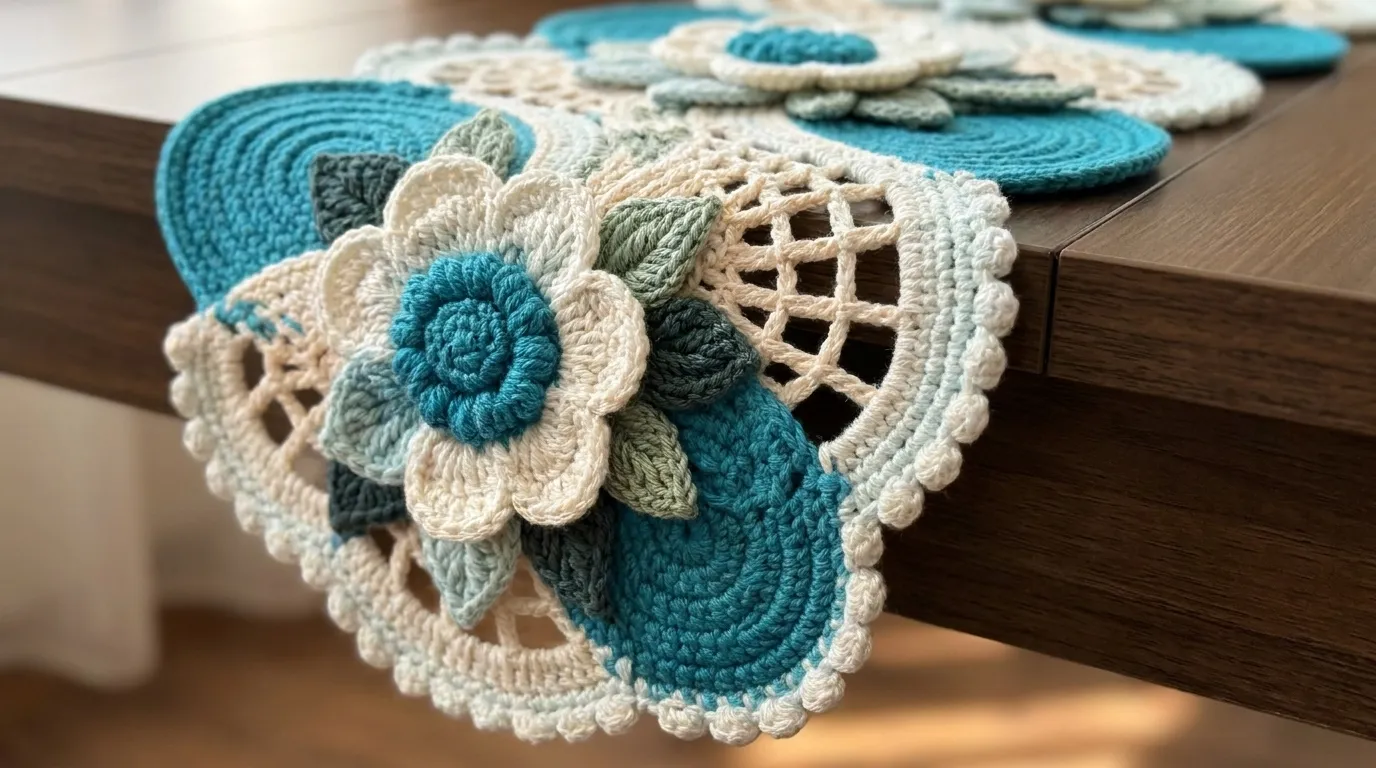
Scalloped edging & natural fall
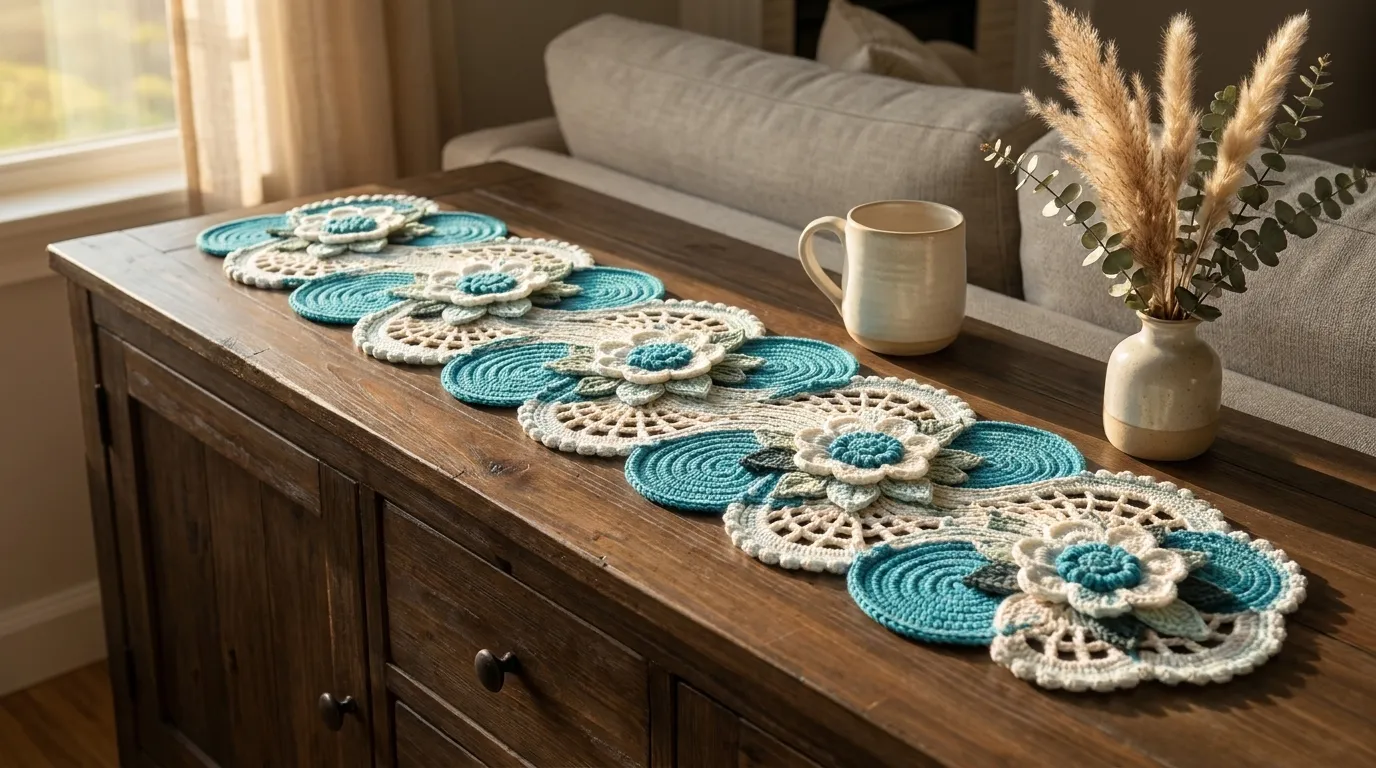
Living space ambient styling
2. Pattern Overview & Finished Dimensions
Silhouette & Architecture: Serpentine alternating S-curve silhouette composed of 5 interlocking circular and orbital medallion zones, contoured by asymmetric side gussets and scalloped arches.
Drape & Texture: Firm architectural structure across the dimensional flower pads transitioning to fluid open lace along the outer wave arches, engineered to resist curling once steam blocked.
Maker Adaptation Tip: Length is adjustable in increments of 12 inches by adding or subtracting one complete floral wave repeat and its accompanying curved fan gussets.
3. Materials, Fiber & Tools Checklist
Yarns & Palette Requirements:
Used for spiraling concentric discs and serpentine foundation spine.
Used for inner petal gradients and secondary medallion rings.
Used for openwork treble fan lattice, outer flower petals, and border scallops.
Used for leaf calyxes and framing vine branches.
Used for central blossom stamen buds and contrast framing.
Hook & Essential Notions:
- Crochet Hook: 3.5 mm (E-4) (or size needed to meet gauge)
4. Standard Crochet Abbreviations (US Terms)
This pattern follows standard Craft Yarn Council (CYC) US crochet terminology. Refer to this quick-reference visual dictionary as you work through each round:
5. Architectural Mechanics & Special Stitches
The serpentine flow is created by joining 5 independent circular 3D blossom motifs offset along alternating left and right axes. Back-loop single crochet spirals generate rigid structural anchor discs, while offset fan networks expand convex curves and contract concave coves without puckering.
Special Stitches for This Project:
Work 5 dc into indicated st. Drop loop from hook, insert hook front-to-back through top of first dc, grab dropped loop, pull through, ch 1 to secure.
[Tr, ch 1, tr, ch 1, tr, ch 1, tr, ch 1, tr] all worked into the specified chain-space or center ring.
Ch 3, sl st into the front loop and front vertical bar of the preceding single crochet.
6. Step-by-Step Pattern Instructions
Follow each round card in sequence. Click or tap any row card once you complete it to check it off and automatically track your progress across the 5 Pattern Checkpoints!
Phase 1: Dimensional 3D Floral Medallion Centers (Make 5)
Crochet five raised 3D floral medallion cores with textured popcorn centers and two tiers of layered petals.Using Color E (Slate Teal), make a magic adjustable loop, ch 1. Work 8 sc into loop. Pull tail firmly to close. Sl st to first sc.
💡 NB: Ensure the center is pulled tightly so no center aperture remains.
Ch 3 (counts as dc). Work 4 dc in same st, complete popcorn. Ch 2. [Popcorn in next st, ch 2] 7 times. Join with sl st into top of first popcorn closing ch. Fasten off Color E.
💡 NB: Keep ch-2 spaces uniform to prevent cup distortion.
Join Color B (Bright Turquoise) with sl st in any ch-2 sp. *(Sc, hdc, 3 dc, hdc, sc) all in ch-2 sp; rep from * around in all 8 ch-2 spaces. Sl st to first sc.
💡 NB: Push petal bulk forward to keep the popcorns protruding.
Ch 1, working entirely behind Tier 1 petals, *(ch 4, sl st around post of popcorn stamen from Round 2); rep from * around 8 times. Sl st to initial base.
💡 NB: Maintain loose tension on the back chains so the second tier lies flat.
Fasten off Color B. Join Color C (Cream) with sl st in any back ch-4 loop. *(Sc, hdc, 2 dc, 2 tr, 2 dc, hdc, sc) in loop; rep from * around in all 8 loops. Sl st to first sc. Fasten off.
💡 NB: Petals should radiate cleanly behind Tier 1.
Info:
Inspect all 5 finished floral medallions. Each should measure precisely 4.75 inches across the outer cream petal tips before assembling the surrounding discs.
Phase 2: Concentric Cyan Discs & Foliage Calyxes
Encase each floral core within spiraling ribbed cyan rings and integrate sculpted sage leaves.Join Color D (Sage Green) with standing sc in top tr of any outer petal. *Ch 6, sl st in 2nd ch from hook, sc in next ch, hdc in next ch, dc in next 2 chs (leaf formed), sl st into top of next petal, ch 5, sc in top of next petal; rep from * 3 times more around circumference. Fasten off Color D.
💡 NB: Leaves should project outward between the petal lobes.
Join Color A (Deep Cyan) with standing dc in tip of any leaf. Work 4 dc down side of leaf, 5 dc into ch-5 bridge, 4 dc up side of next leaf, 3 dc into leaf tip; repeat around perimeter. Sl st to first dc.
💡 NB: Count accurately; these 64 dc are the geometric baseline for the radial disc.
Ch 1, working in BLO throughout: *sc in next 7 sts, 2 sc in next st; rep from * around 8 times. Sl st to first sc.
💡 NB: Working exclusively in the back loop creates the crisp oceanic ribbing.
Ch 1, in BLO: *sc in next 8 sts, 2 sc in next st; rep from * around 8 times. Sl st to first sc.
💡 NB: Keep sc height even to maintain a perfectly circular boundary.
Ch 1, in both loops: *hdc in next 4 sts, 2 hdc in next st; rep from * around 16 times. Fasten off on motifs 1, 3, and 5. Leave working yarn intact on motifs 2 and 4.
💡 NB: Each motif should now measure approximately 9.5 inches in diameter.
Phase 3: Structural S-Spine Interlocking & Asymmetric Join
Interlink the 5 circular medallion modules in an offset zig-zag configuration to establish the serpentine spine.Alignment Check:
Lay motifs 1 through 5 in a vertical sequence. Offset Motif 2 three inches to the right of Motif 1; offset Motif 3 three inches to the left of Motif 2; repeat alternating offsets to construct the undulating S-geometry.
With Color A, pin Medallion 1 and 2 right sides facing, aligning an overlap sector of exactly 16 hdc on the lower right flank of Motif 1 and upper left flank of Motif 2. Join yarn, working through both layers: sl st across 16 aligned stitches. Fasten off.
💡 NB: Do not pull seam stitches tight or the join will buckle.
Count 32 unjoined sts clockwise along the edge of Medallion 2 to locate the lower left flank. Align an overlap sector of 16 hdc with the upper right flank of Medallion 3. Join with sl st through both layers across 16 sts. Fasten off.
💡 NB: Double-check that Motifs 1, 2, and 3 create an authentic S-curve and not a straight line.
Repeat the alternating 16-st joining sequences: join Motif 3 to Motif 4 on lower right flank, then Motif 4 to Motif 5 on lower left flank.
💡 NB: The central framework now spans 55 inches along its curved path.
Join Color A at the start of the serpentine track. Sc in each unjoined outer st along the open edges of the spine, placing 1 sc in each st and working a sc2tog across the interior junction crevices where motifs meet. Sl st to first sc.
💡 NB: The sc2tog at interior joints draws the concave bends flat.
Phase 4: Cream Treble Lace Fans & Serpentine Gussets
Fill concave indentations and sculpt outer wave crests using openwork treble fan lattices.Join Color C (Cream) in 12th st preceding first concave dip between Motifs 1 and 2. Ch 4 (counts as tr), tr in next 2 sts, [ch 2, sk 2, tr in next st] 3 times, tr3tog across joint junction, [ch 2, sk 2, tr in next st] 3 times, tr in next 2 sts. Turn.
💡 NB: This short row bridges the deep indentation to establish an organic wave line.
Ch 3, dc in next 2 sts, [ch 1, dc in next sp] 2 times, sk joint st, [ch 1, dc in next sp] 2 times, dc in last 3 sts. Turn.
💡 NB: Levels the interior cove so the border flows without pinching.
Repeat Steps 1 and 2 for the remaining 3 concave indentations (between Motifs 2 & 3, 3 & 4, and 4 & 5) on both sides of the runner.
💡 NB: Ensure tension matches across all gussets to maintain bilateral balance.
With Color C, rejoin at outer end of Motif 1. Work around continuous outer edge: *sc in st, ch 3, sk 2 sts, tr-fan in next st, ch 3, sk 2 sts; rep from * continuously around the entire perimeter of the table runner, adjusting skips over gusset ends to maintain flat lace. Sl st to start.
💡 NB: If lace begins to ruffle excessively on convex curves, increase skips from 2 to 3 sts.
Phase 5: Sculpted Scallop Border & Wet Blocking Architecture
Establish the exact perimeter single crochet foundation, apply the picot scalloped edge, and block to finished dimensions.Join Color C with standing sc in any center ch-space of an outer tr-fan. Work 3 sc into each ch-3 sp, 1 sc into each tr post, and 1 sc in each base sc around the entire undulating perimeter, maintaining exact stitch count across the serpentine boundary. Sl st to first sc.
💡 NB: Count carefully. This 540-sc foundation guarantees a ripple-free picot border.
Ch 1, sc in first st. *Sk 2 sts, 5 dc in next st, ch 3, sl st into top of 5th dc (picot made), 2 dc in same base st, sk 2 sts, sc in next st; rep from * around entire perimeter of 540 sts. Join with sl st to first sc.
💡 NB: Work the picot sl st snugly so the bead point remains perky.
Fasten off all colors leaving 6-inch tails. Thread tapestry needle and securely weave all working ends through solid single crochet back-loops on wrong side, splitting yarn fibers to lock ends against wash wear.
💡 NB: Do not weave ends into open lace mesh; bury them within the solid cyan BLO discs.
Submerge finished runner in lukewarm water with mild wool wash for 20 minutes. Gently press moisture between clean towels without wringing. Pin out on blocking mats to finished dimensions of 59 in length by 14.5 in width. Pin every single picot point with stainless T-pins. Allow to dry 24 hours.
💡 NB: Use a straight ruler along the table centerline to verify symmetric S-curve amplitude.
7. Assembly, Mounting & Structural Integration
Wet block runner by soaking for 20 minutes in tepid water with delicate wash. Pin firmly to blocking mats along the serpentine curves, extending every picot tip outward with rustproof T-pins. Let dry completely over 24-36 hours before unpinning.
8. Accents, Hardware & Finishing Details
Inspect all outer margins, secure tails with a blunt tapestry needle through dense stitch posts on the Wrong Side, and steam press gently to lock fiber memory.
9. Common Mistakes & How to Fix Them
Even seasoned makers run into tension hiccups or stitch drift. Here are the top troubleshooting solutions for this design:
Tension was pulled too tightly during the back-loop single crochet rounds of Phase 2, causing radial contraction.
Working too many stitches into the inner corners during the Phase 3 join and Phase 4 gusset short-rows.
The perimeter base count drifted above 560 stitches before starting the picot shell round.
10. Blocking, Care & Maintenance
Wet block runner by soaking for 20 minutes in tepid water with delicate wash. Pin firmly to blocking mats along the serpentine curves, extending every picot tip outward with rustproof T-pins. Let dry completely over 24-36 hours before unpinning.
Care & Longevity Guidelines:
11. Frequently Asked Questions (FAQ)
Can I use mercerized crochet thread size 10 instead of sport weight yarn?
Yes, but your finished dimensions will scale down to approximately 36 inches long by 8 inches wide using a 1.75 mm hook. For banquet table coverage, sport weight cotton produces the necessary visual presence.
Do the 3D flower centers flatten out under serving bowls?
The popcorn stamens are structural and spring back easily, but for practical tabletop use, position centerpieces inside the open S-curves or flank the blossoms rather than placing heavy dishware directly on top of the popcorn clusters.
How do I make this runner longer for an 8-person or 10-person dining table?
Add repeats of 2 additional medallions (one left curve, one right curve) to preserve the balanced S-flow. Two medallions add approximately 24 inches to the overall length.
Can I work this table runner in a single monochromatic shade?
Absolutely. Working the piece in all-natural cream or pure linen white highlights the textural contrast between the tight ribbed single-crochet discs, puffy popcorns, and airy openwork fans.
12. Community & Maker Showcase
✨ Share Your Handcrafted Make
Every undulating curve of this table runner tells a story of balance, tension, and patience. Lay it with pride across your table, and share your finished colorways with our fiber community using #NailItHomeCrochet. With love and yarn, Aurelia Thorne.
Pattern © 2026 Nail It Home / Aurelia Thorne. For personal maker use only. Do not reproduce, redistribute, or resell without written permission.