Terracotta And Blush Floral Blossom Table Runner: Free Crochet Pattern & Tutorial
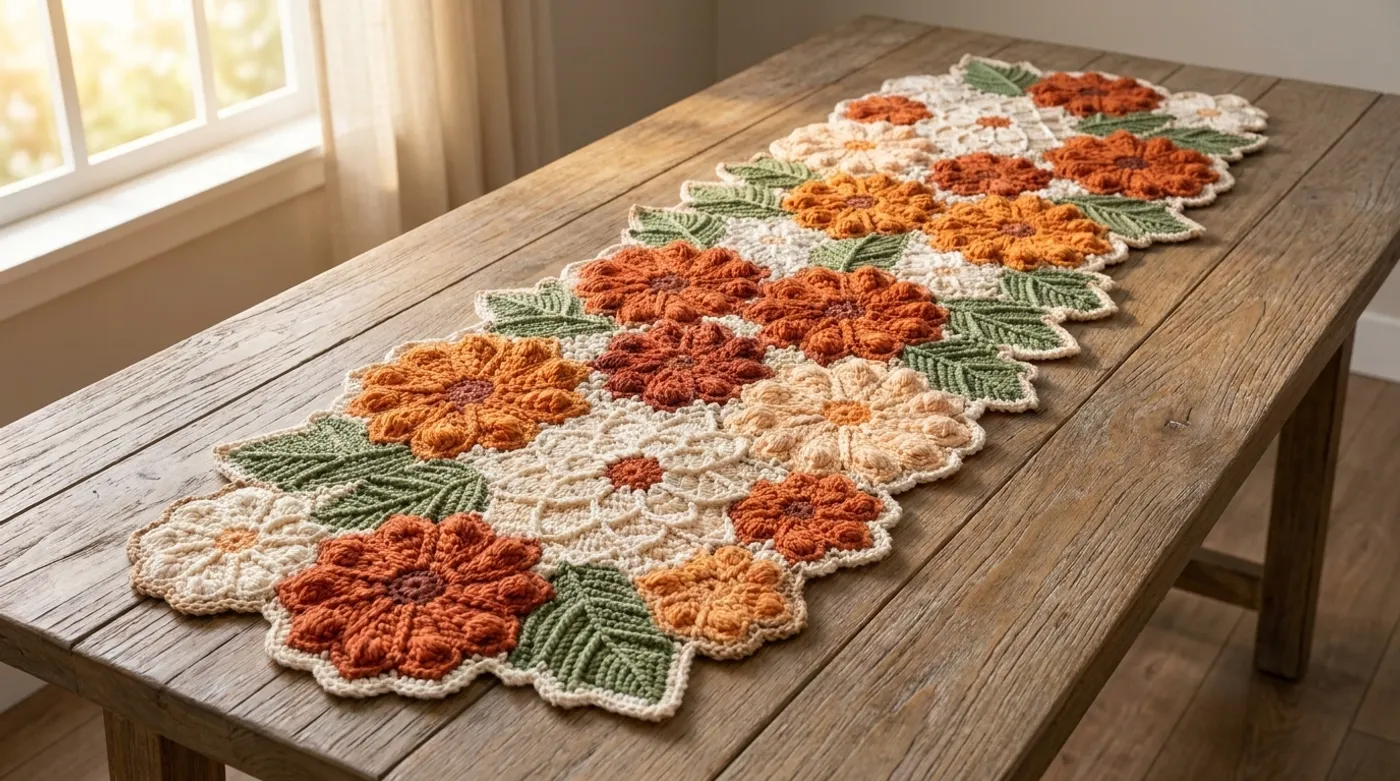
Create a stunning botanical table runner with 3D floral motifs in warm terracotta, blush, and sage tones. This modular design features puff stitch centers, front-post cluster petals, and scalloped picot edges for a lush, dimensional finish.

Pattern Specifications
1. Introduction & Design Inspiration
Inspired by a late-summer garden where terracotta roses blush against sage foliage, this runner captures the moment sunlight filters through petals. Each puff stitch center holds the warmth of a sunbaked clay pot, while front-post treble clusters unfurl like velvet petals catching light. The ribbed leaves echo the crisp veins of living greenery, and the picot scallops mimic the delicate serration of leaf edges. Designed for the maker who wants to bring the garden indoors, this piece transforms a dining table into a cultivated sanctuary.
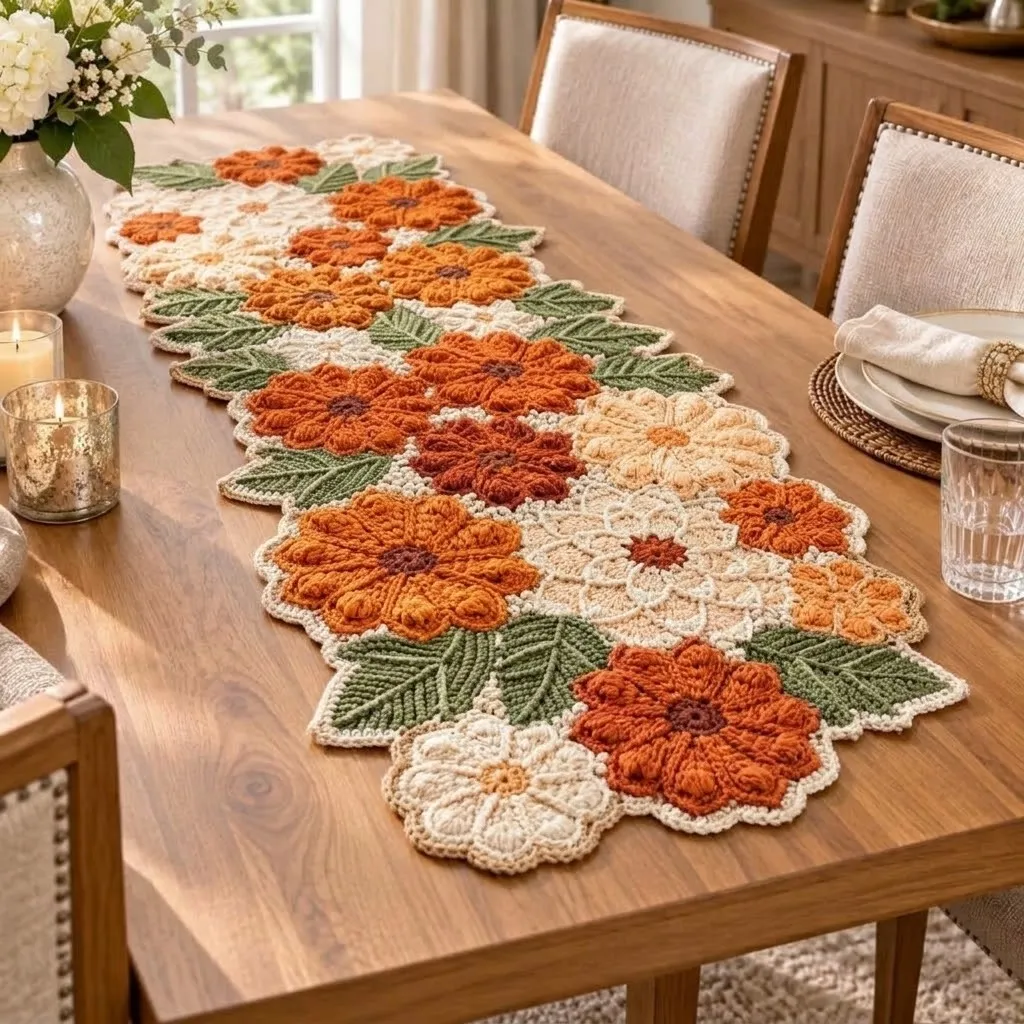
The palette moves from deep burnt rust through apricot to pale blush, grounded by cream and sage. Cotton yarn gives crisp stitch definition and a matte finish that absorbs light rather than reflecting it. The fabric has enough structure to lie flat without curling, yet drapes softly over table edges. Adjust length by adding or repeating floral motif sections; widen by working additional leaf ribs on each side.
Completed Make Showcase Gallery
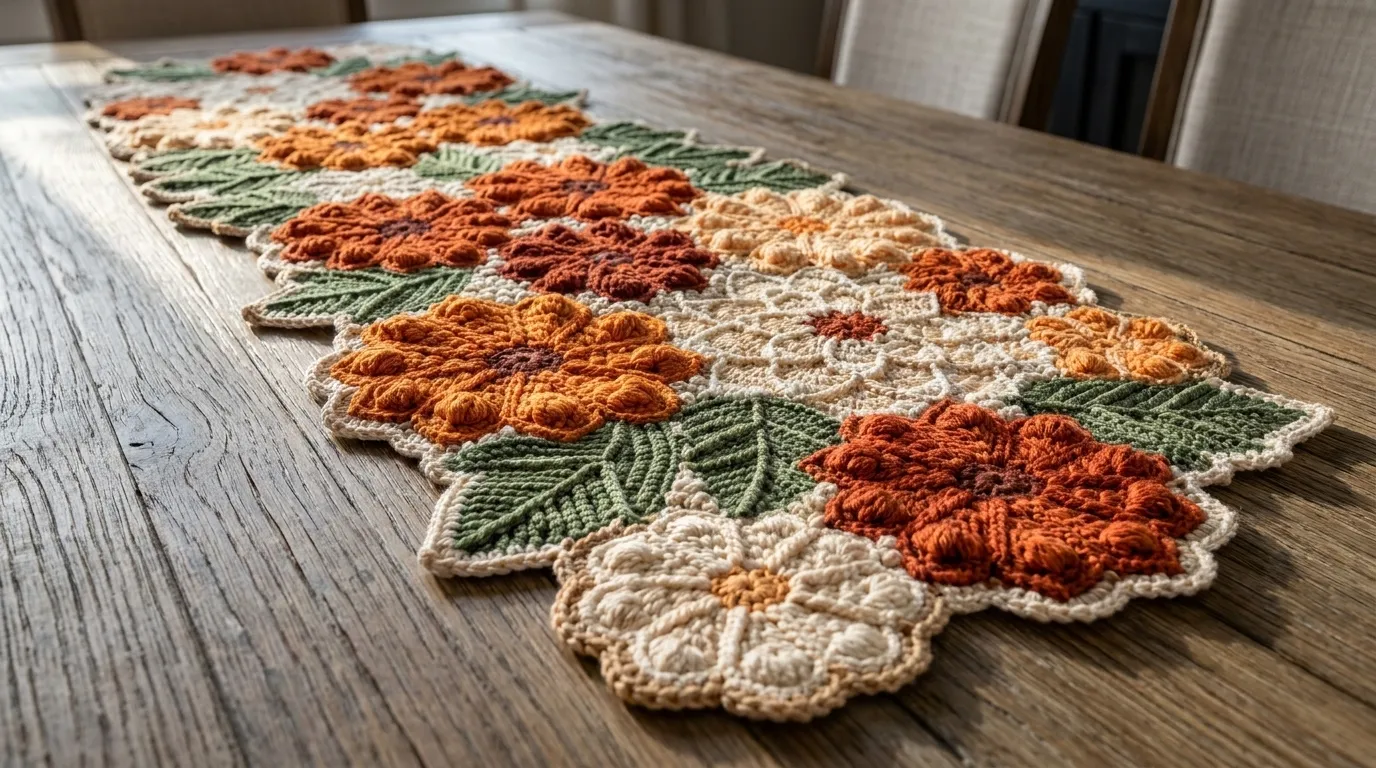
Examine the finished handcrafted piece from every vantage point before picking up your hook—from overall symmetry to textural stitch relief and organic drape.
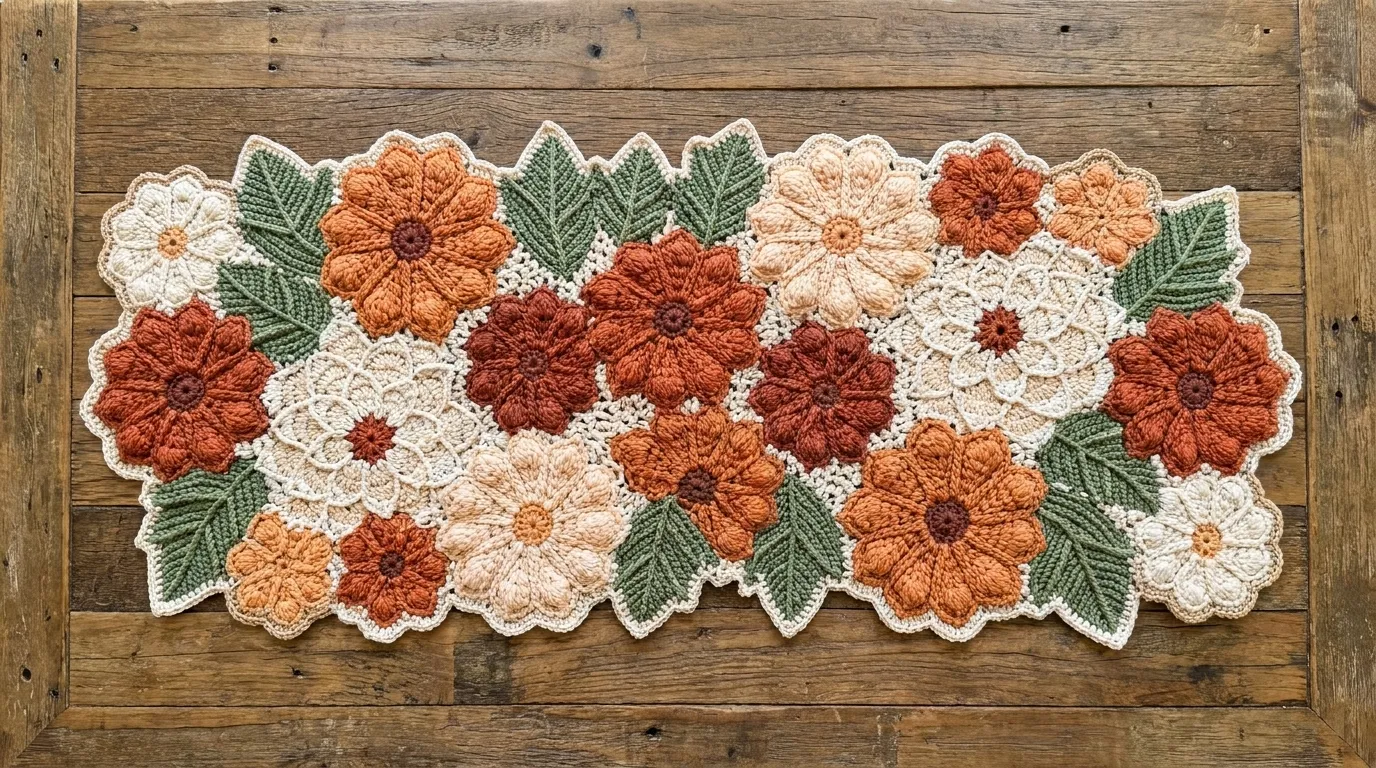
Full silhouette & geometric balance
Tactile stitch relief & ribbing depth
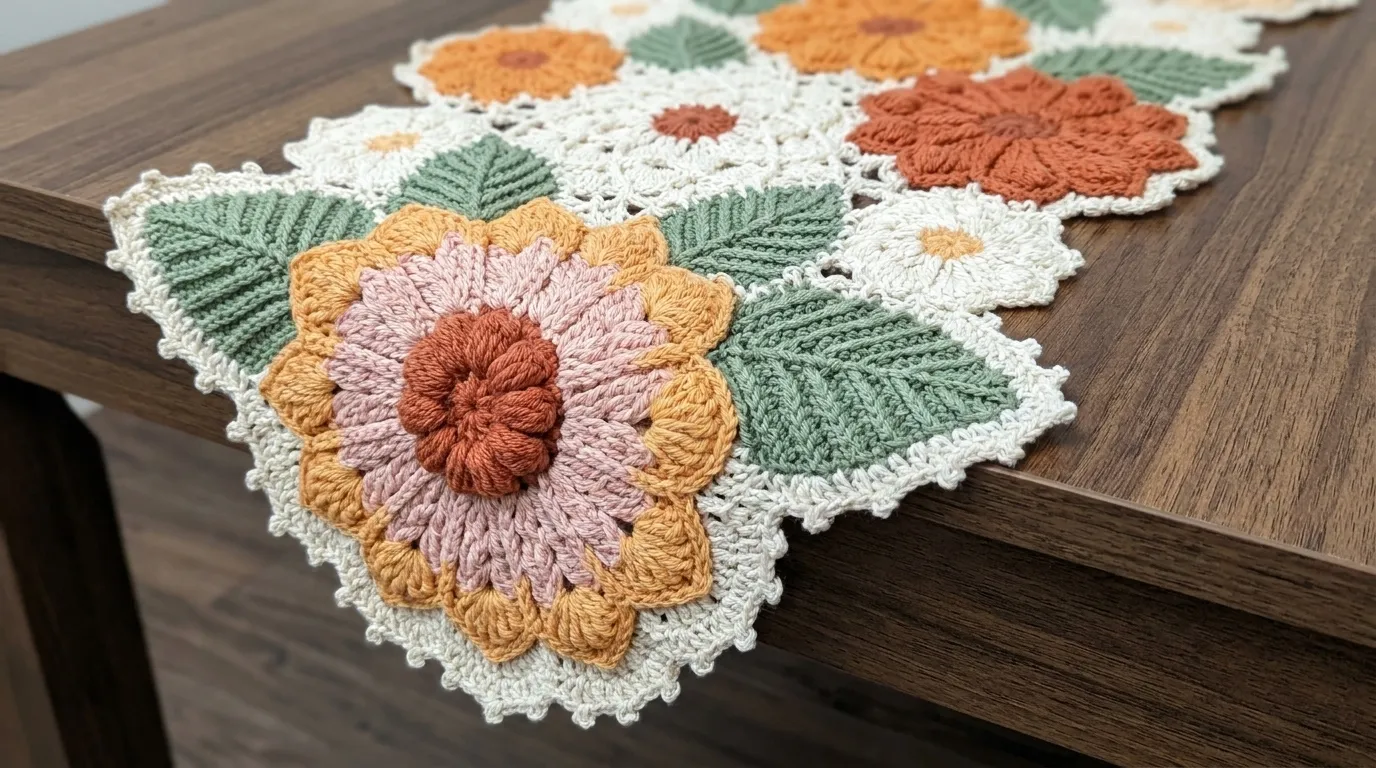
Scalloped edging & natural fall
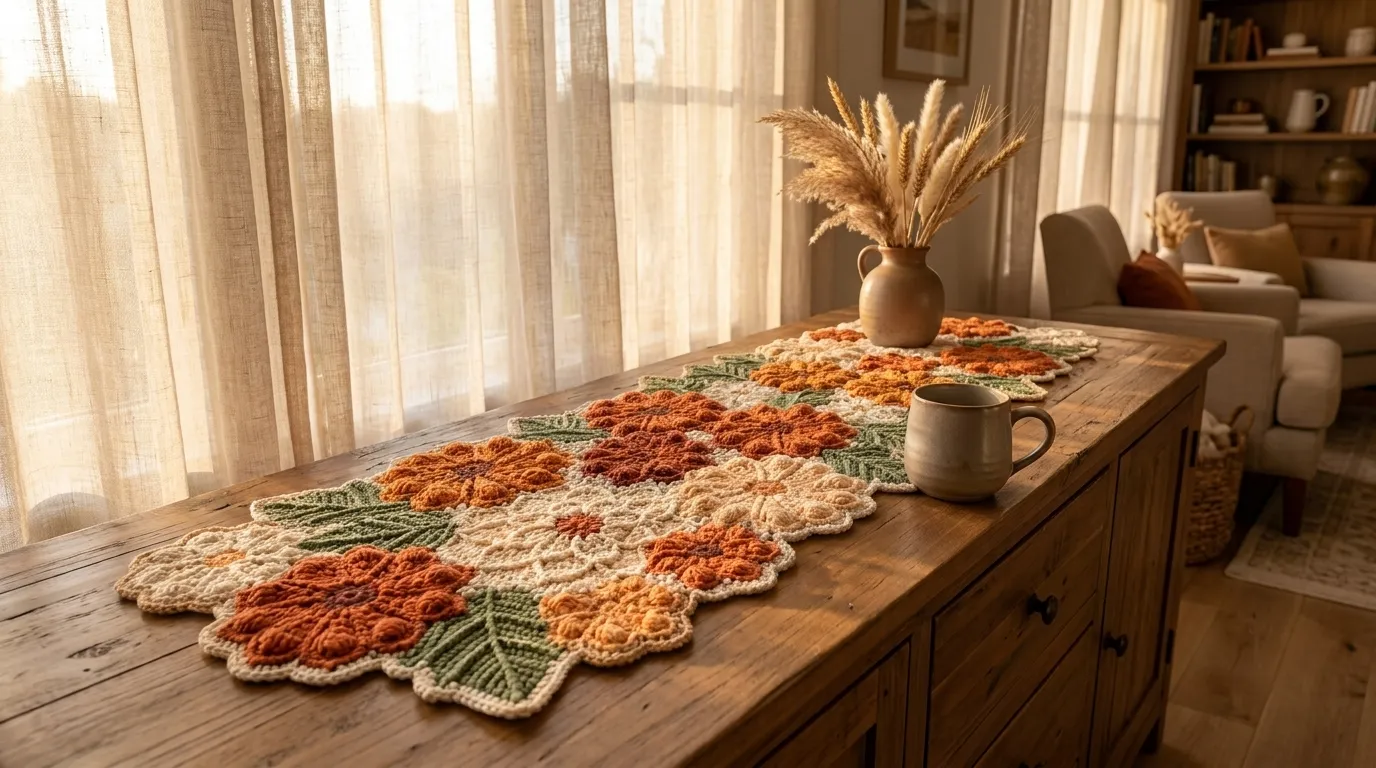
Living space ambient styling
2. Pattern Overview & Finished Dimensions
Silhouette & Architecture: Rectangular runner composed of seven large floral motifs joined by six lace rosette connectors, flanked by ribbed leaf panels on both long edges. Scalloped picot border frames all four sides.
Drape & Texture: Medium-density fabric with raised 3D motifs; lies flat with slight cushioning under dishes. Cotton provides minimal stretch, ensuring the runner holds its shape through use and washing.
Maker Adaptation Tip: For a shorter runner, omit one floral motif and its connecting rosettes. For a wider runner, add two extra leaf rib repeats per side. Change colorway by substituting any worsted cotton shades; maintain contrast between flower centers, petals, leaves, and background.
3. Materials, Fiber & Tools Checklist
Yarns & Palette Requirements:
Used for puff stitch flower centers
Used for inner petal layer
Used for middle petal layer
Used for outer petal layer
Used for lace rosette connectors
Used for ribbed leaves and joining
Used for picot scalloped border
Hook & Essential Notions:
- Crochet Hook: 5.0 mm (H-8) (or size needed to meet gauge)
4. Standard Crochet Abbreviations (US Terms)
This pattern follows standard Craft Yarn Council (CYC) US crochet terminology. Refer to this quick-reference visual dictionary as you work through each round:
5. Architectural Mechanics & Special Stitches
The runner builds from seven independent floral motifs worked in the round, each anchored by a magic ring. Petals are created with front-post treble clusters worked around the posts of the previous round, creating dimensional layers that stand away from the base. Leaf panels are worked in rows of back-loop-only half double crochet to form vertical ribs that mimic leaf veins. Motifs are joined by crocheting lace rosettes directly into the outer petal stitches, eliminating seaming. The final border is worked in a single continuous round around the entire perimeter, with picot shells spaced to follow the organic contours.
Special Stitches for This Project:
[Yarn over, insert hook in indicated stitch, yarn over, pull up a loop] 4 times in same stitch (9 loops on hook), yarn over, pull through all 9 loops, ch 1 to close.
*Yarn over twice, insert hook from front to back around post of indicated stitch, yarn over, pull up a loop, [yarn over, pull through 2 loops] twice; repeat from * 3 more times in same stitch (5 loops on hook), yarn over, pull through all 5 loops.
Yarn over, insert hook under back loop only of next stitch, yarn over, pull up a loop, yarn over, pull through all 3 loops on hook.
(Sc, ch 3, sc) in same stitch; skip next 2 stitches.
6. Step-by-Step Pattern Instructions
Follow each round card in sequence. Click or tap any row card once you complete it to check it off and automatically track your progress across the 5 Pattern Checkpoints!
Phase 1: Foundation Ring & Center Motif
Create the first floral motif with puff center and three petal layersWith Terracotta, make a magic ring. Ch 2 (counts as first dc), 11 dc into ring. Pull ring tight. Join with sl st to top of beginning ch-2. Fasten off.
💡 NB: Leave a 6-inch tail for weaving in later.
Join Burnt Rust with standing sc in any dc. *Ch 1, puff in next dc, ch 1, sc in next dc; repeat from * around. Join with sl st to first sc. Fasten off.
💡 NB: Keep puff stitches loose enough to sit proudly.
Info:
The puff stitches form the flower’s central boss. Each puff sits directly over a dc from Round 1, creating a raised ring of texture.
Join Apricot with standing sc in any ch-1 space before a puff. *Ch 3, FPTrCl around post of next dc (from Round 1) behind the puff, ch 3, sc in next ch-1 space; repeat from * around. Join with sl st to first sc. Fasten off.
💡 NB: Work FPTrCl around the Round 1 dc posts, reaching behind the Round 2 puff stitches.
Join Blush with standing sc in any ch-3 space before a cluster. *Ch 4, FPTrCl around same post as previous cluster (Round 1 dc), ch 4, sc in next ch-3 space; repeat from * around. Join with sl st to first sc. Fasten off.
💡 NB: These clusters sit slightly taller, creating a second petal layer.
Join Cream with standing sc in any ch-4 space before a cluster. *Ch 5, FPTrCl around same post again, ch 5, sc in next ch-4 space; repeat from * around. Join with sl st to first sc. Do not fasten off.
💡 NB: This final layer gives the flower its full diameter (~5 inches).
Phase 2: Main Body & Textures
Crochet Motifs 2 through 7 (7 total) & Ribbed Side PanelsRepeat Phase 1 (Rounds 1–5) six more times for a total of seven completed floral motifs. Block each motif lightly to 5.5 inches (14 cm) across before joining.
💡 NB: Working all 7 motifs first establishes the full 38.5-inch floral foundation before adding connector rosettes.
Info:
Motifs are laid out in a straight runner sequence but remain separate until connected with lace rosettes in Phase 3.
With Sage Green, ch 17. Row 1: Hdc in 3rd ch from hook and each ch across. Turn. (15 hdc = approx 4.25 inches / 11 cm wide)
💡 NB: This 15-hdc width, combined with the opposite side panel (4.25 in) and the central floral strip (5.5 in), perfectly equals the target 14-inch total width.
Row 2: Ch 2 (counts as first hdc), BLO hdc across. Turn. (15 sts) Repeat Row 2 until panel measures 58–60 inches long (approx 148 rows total). Fasten off. Make a second identical panel for the opposite long edge.
💡 NB: Working into the Back Loop Only (BLO) creates raised vertical veins with organic horizontal stretch.
Phase 3: Structural Shaping & Interlocking Ribs
Join 7 motifs with 6 lace rosettes and attach leaf panelsWith Cream, ch 6, join with sl st to form ring. Round 1: Ch 3 (counts as dc), 15 dc into ring. Join with sl st to top of ch-3. (16 dc) Round 2: Ch 1, *sc in next dc, ch 4, skip next dc; repeat from * around. Join with sl st to first sc. (8 ch-4 loops) Round 3: *Sc in next ch-4 space, ch 5, dc in next sc, ch 5; repeat from * around. Join with sl st to first sc. Fasten off. Repeat to make 6 identical rosette connectors.
💡 NB: Each rosette spans approx 3.25 inches, bridging adjacent floral motifs into a cohesive 58-inch central runner strip.
Lay out all 7 motifs in a straight runner sequence, placing one cream rosette connector between each motif pair: Motif 1 – Rosette 1 – Motif 2 – Rosette 2 – Motif 3 – Rosette 3 – Motif 4 – Rosette 4 – Motif 5 – Rosette 5 – Motif 6 – Rosette 6 – Motif 7. With Sage Green and a tapestry needle, whipstitch each rosette’s outer ch-5 loops to the outer petal ch-5 loops of adjacent motifs (3 whipstitches per connection point, 4 connection points per junction). Fasten off securely.
💡 NB: Align motifs so petals radiate outward; rosettes nestle into the valleys between flowers.
Position one 60-inch leaf rib panel along each long edge of the assembled floral/rosette centerpiece (Right Sides together). With Sage Green, join with sl st at one corner and sl st through both layers along the entire 60-inch length: insert hook through the edge loops of the leaf panel and into the adjacent motif/rosette edge arches. Work 1 sl st per row end of the leaf panel (~148 sl sts). Fasten off. Repeat for the opposite side.
💡 NB: Pin every 10 inches with locking stitch markers before slip stitching to prevent uneven fabric pull.
Phase 4: Sculpted Border & Edge Treatment
Work continuous scalloped picot border around entire runnerWith Soft Off-White, join with standing sc in any corner stitch of the runner. Work sc evenly around the entire 148-inch perimeter: work (sc, ch 2, sc) in each of the 4 outer corners, approx 210 sc along each 60-inch long edge (working 1 sc into each row end / stitch), and approx 45 sc across each 14-inch short end. Join with sl st to the first sc. Do not turn. (Total: ~518 sc)
💡 NB: Corner (sc, ch 2, sc) turns keep the runner corners flat and square without cupping.
Info:
This setup round creates a smooth, continuous perimeter for the picot shells. Check that total stitch count along each side is a multiple of 3.
Ch 1, *picot-shell in next sc (sc, ch 3, sc in same st, skip 2 sc); repeat from * along each side. At the 4 corners: work (picot-shell, ch 1, picot-shell) in the corner ch-2 space to round the turn cleanly. Continue around entire perimeter. Join with sl st to first sc. Fasten off.
💡 NB: The extra corner shell fanning around the curve prevents pulling or edge rippling.
Phase 5: Finishing, Blocking & Accents
Weave ends, wet block to final dimensions, and add optional dimensional accentsUsing tapestry needle, weave all yarn tails on wrong side following stitch paths. Secure color changes by weaving in opposite directions for 2 inches. Trim excess.
💡 NB: Leave no loose ends; cotton can work loose with washing.
Submerge runner in cool water with mild wool wash for 15 minutes. Gently squeeze out water (do not wring). Roll in towel to remove excess moisture. Pin to blocking mats to 60 x 14 inches, stretching picot shells open and shaping leaf ribs straight. Allow to dry completely (24-48 hours).
💡 NB: Blocking sets the 3D petals and evens the ribbed panels.
For extra texture, add a small cream puff stitch to the center of each lace rosette: join Cream, puff in center of rosette, fasten off. Add a single sage green BLO hdc leaf stem at each motif base by surface crocheting a 3-stitch chain.
💡 NB: These tiny details elevate the botanical realism.
7. Assembly, Mounting & Structural Integration
After weaving all ends, wet block the runner by soaking in cool water with gentle detergent for 15 minutes. Press out water in a towel, then pin to blocking mats at exact finished dimensions (60 x 14 inches), using T-pins to open each picot shell and straighten leaf ribs. Allow to air dry completely before use; this sets the 3D petal structure and ensures the runner lies perfectly flat.
8. Accents, Hardware & Finishing Details
Inspect all outer margins, secure tails with a blunt tapestry needle through dense stitch posts on the Wrong Side, and steam press gently to lock fiber memory.
9. Common Mistakes & How to Fix Them
Even seasoned makers run into tension hiccups or stitch drift. Here are the top troubleshooting solutions for this design:
Pulling the closing chain too tight or not leaving enough loops on hook before final pull-through.
Working around the wrong post or inserting hook at an angle rather than straight front-to-back.
Row gauge mismatch between panel length and motif perimeter, or joining too tightly.
Insufficient corner stitches in setup round or skipping the extra corner shell.
10. Blocking, Care & Maintenance
After weaving all ends, wet block the runner by soaking in cool water with gentle detergent for 15 minutes. Press out water in a towel, then pin to blocking mats at exact finished dimensions (60 x 14 inches), using T-pins to open each picot shell and straighten leaf ribs. Allow to air dry completely before use; this sets the 3D petal structure and ensures the runner lies perfectly flat.
Care & Longevity Guidelines:
11. Frequently Asked Questions (FAQ)
Can I use acrylic yarn instead of cotton?
Yes, but the fabric will have more drape and less stitch definition. Acrylic may not hold the 3D petal structure as crisply after washing. Blocking is still recommended but use steam blocking instead of wet blocking for acrylic.
How do I adjust the runner length for a shorter table?
Omit one floral motif and its two connecting rosettes. Work only two motifs with one rosette between them. Shorten leaf panels by working fewer rib rows (each row adds ~1.25 inches).
What if my front-post treble clusters are too tight to work into on the next round?
Use a larger hook (5.5 mm) just for the cluster rounds, or consciously loosen your tension. You can also work the clusters around the post of the stitch two rounds below if the immediate post is inaccessible.
Can I make this runner without the leaf panels for a simpler look?
Absolutely. Simply omit Phase 2 leaf panels and Phase 3 attachment. Work the border directly around the joined motifs. The runner will be narrower (~10 inches) but equally beautiful.
How do I keep the magic ring from coming undone?
After completing Round 1, pull the tail firmly to close the ring, then weave the tail through the Round 1 stitches in two directions before trimming. For extra security, work the first round over the tail.
12. Community & Maker Showcase
✨ Share Your Handcrafted Make
May your stitches bloom as beautifully as a terracotta garden at golden hour. Share your finished runner with #NailItHomeFloral — I can’t wait to see how your colors dance across the table. Happy hooking, Aurelia.
Pattern © 2026 Nail It Home / Aurelia Thorne. For personal maker use only. Do not reproduce, redistribute, or resell without written permission.