Gothic Bat & Web Halloween Tablerunner: Free Crochet Pattern & Tutorial
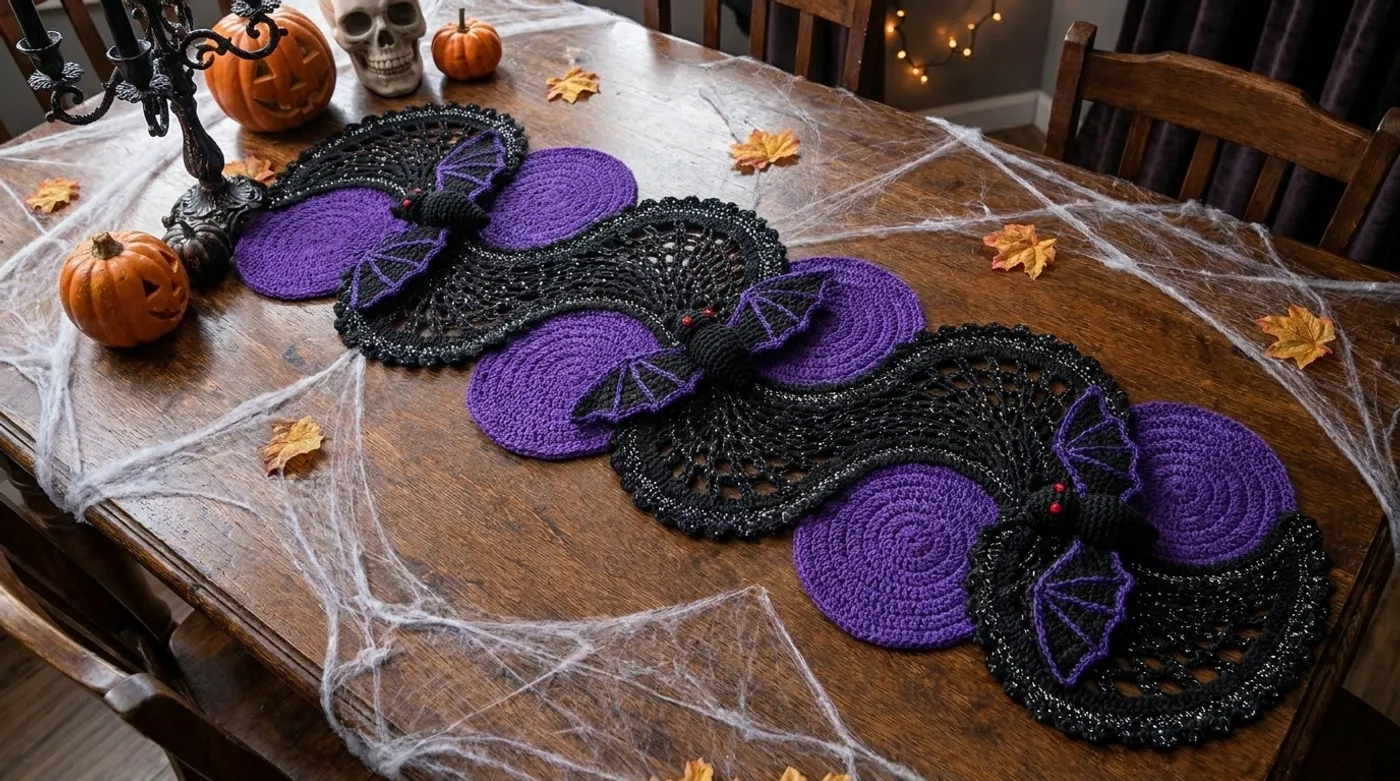
Craft an heirloom gothic Halloween table runner featuring six royal purple single crochet discs, ethereal jet-black openwork spiderweb lace arches with metallic silver picots, and three sculpted amigurumi bats.

Pattern Specifications
1. Introduction & Design Inspiration
Evoking the haunted grandeur of Victorian gothic manors, this table runner captures midnight moonlight breaking through skeletal cobwebs. Six deep purple moondust discs provide an anchor against an intricate sea of jet-black spiderweb openwork lace, culminating in three watchful amigurumi bats perched along the center line. Crisp mercerized cotton gives the lace structural authority, while a filament of metallic silver catches candlelight like morning dew on midnight silk.
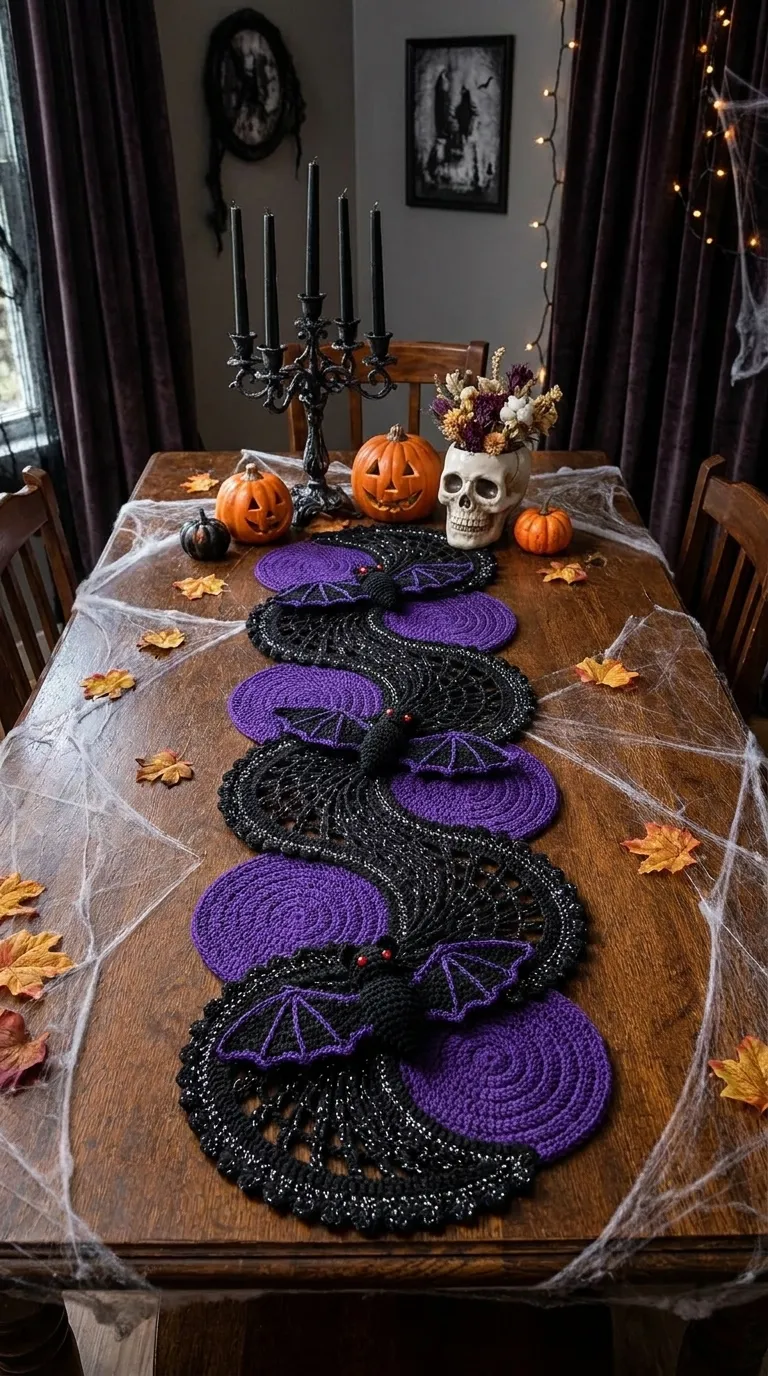
The runner balances geometric discipline with flowing organic curves. Dense single-crochet rounds keep the circular motifs perfectly flat and substantial, preventing tabletop curl. The airy treble-crochet spiderweb fans billow outwards to create dramatic scalloped borders, and the tactile 3D bats add an engaging centerpiece element without interfering with place settings.
Completed Make Showcase Gallery
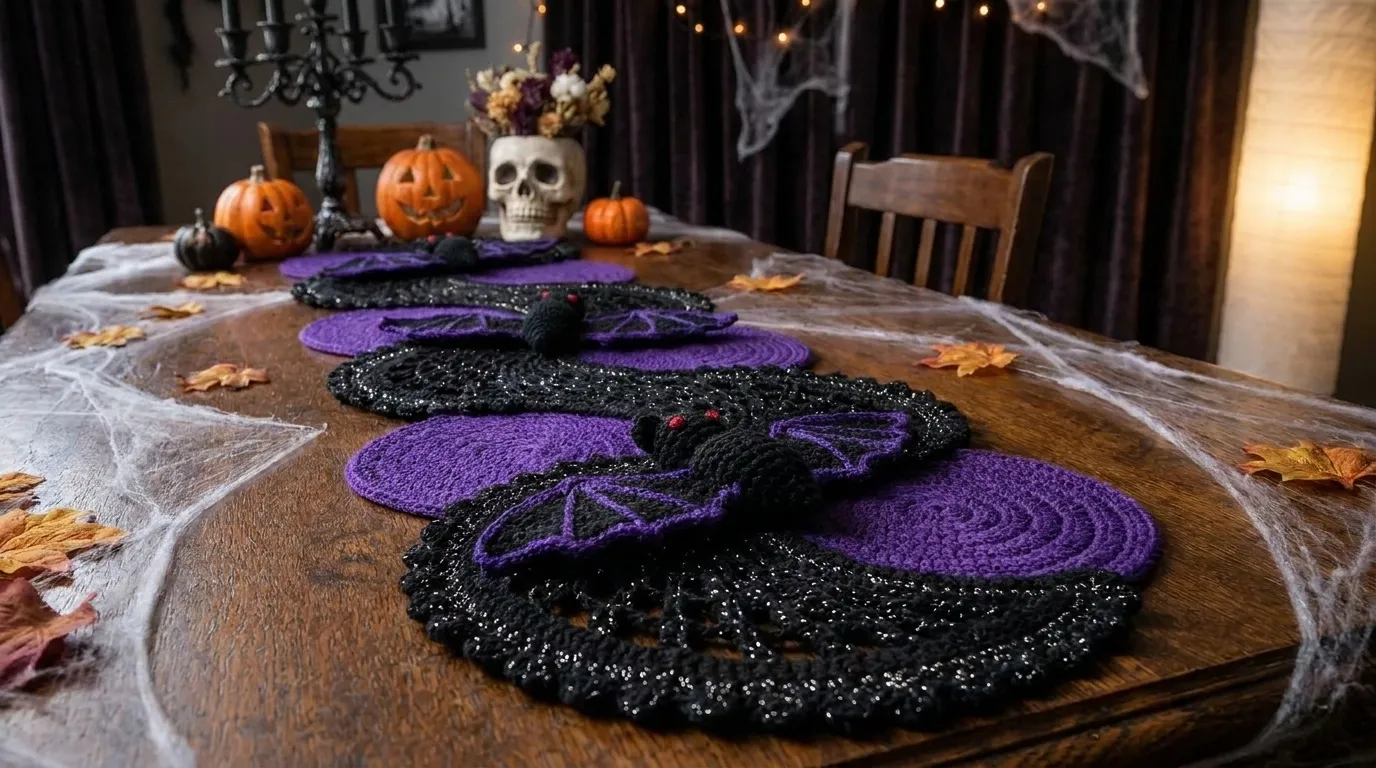
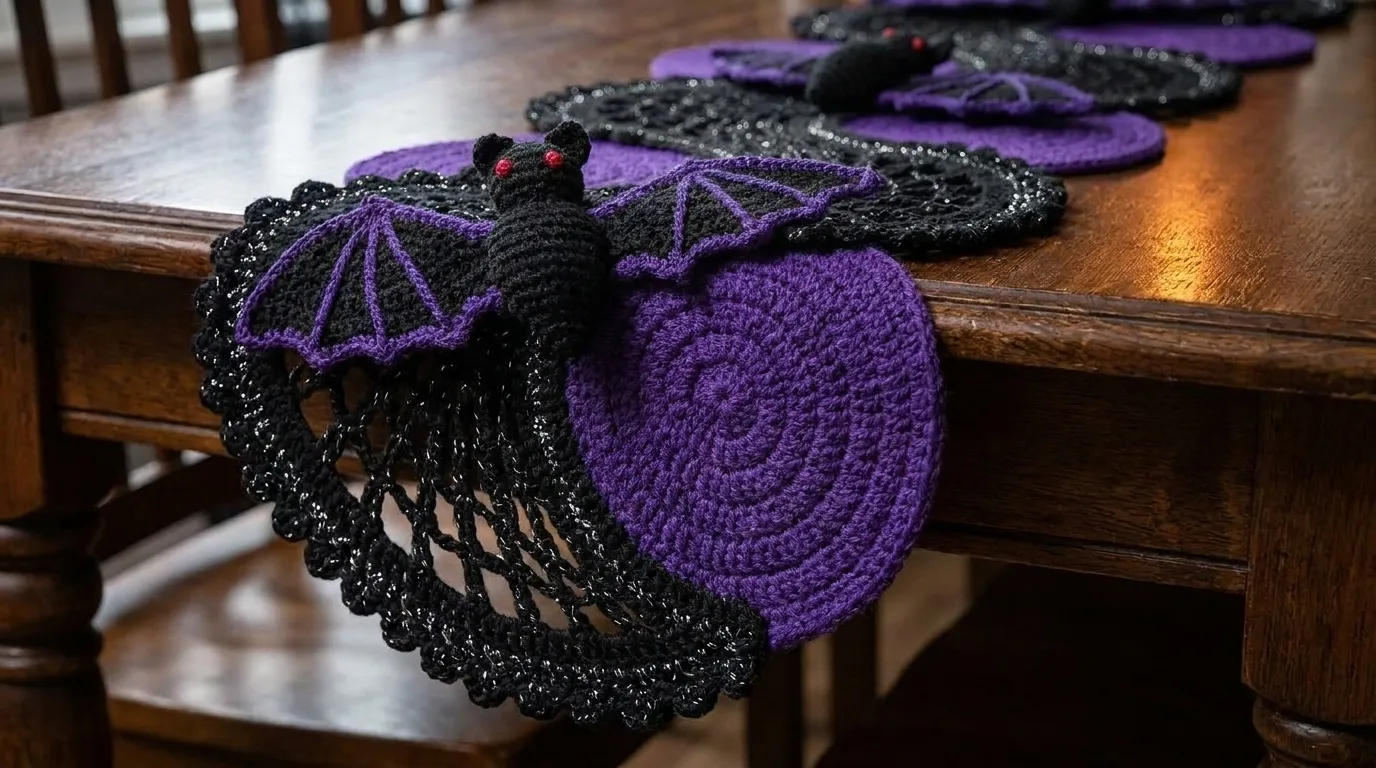
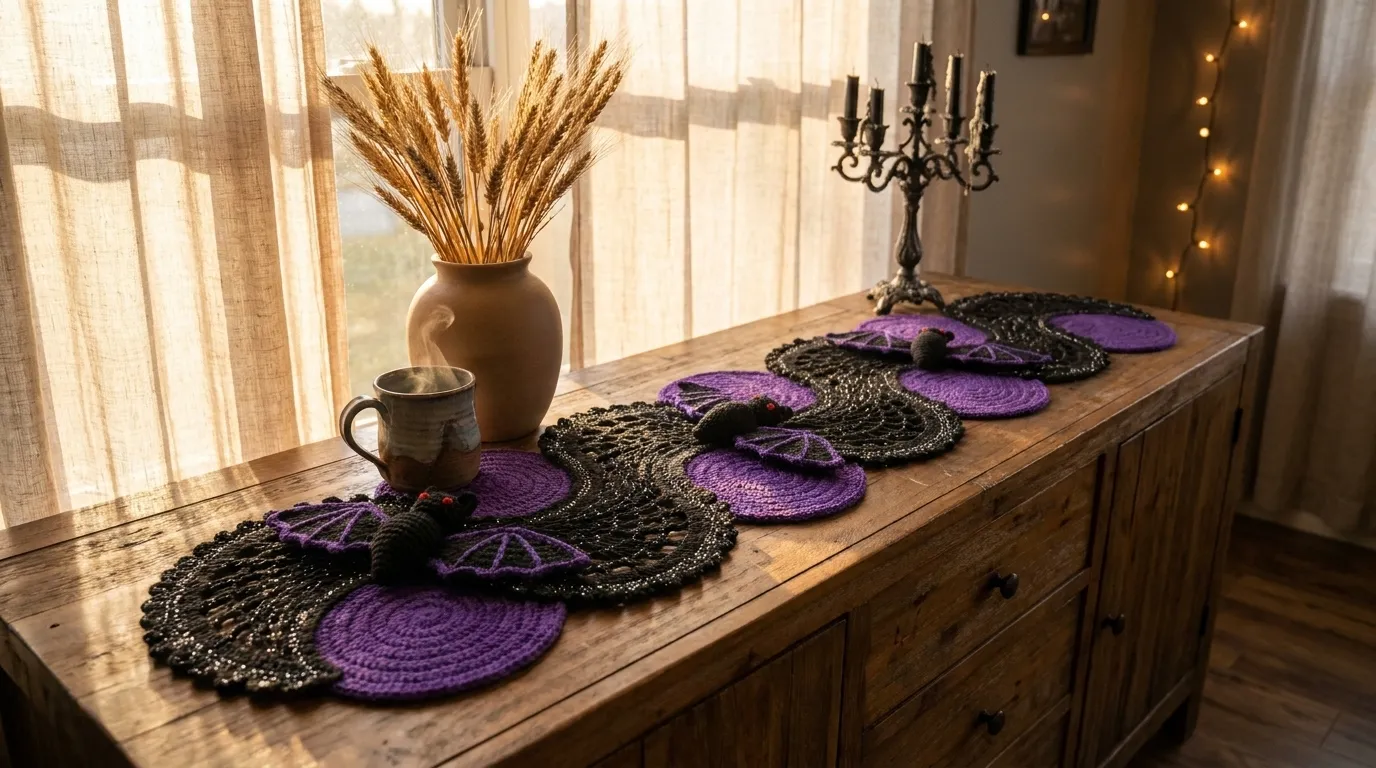
Examine the finished handcrafted piece from every vantage point before picking up your hook—from overall symmetry to textural stitch relief and organic drape.
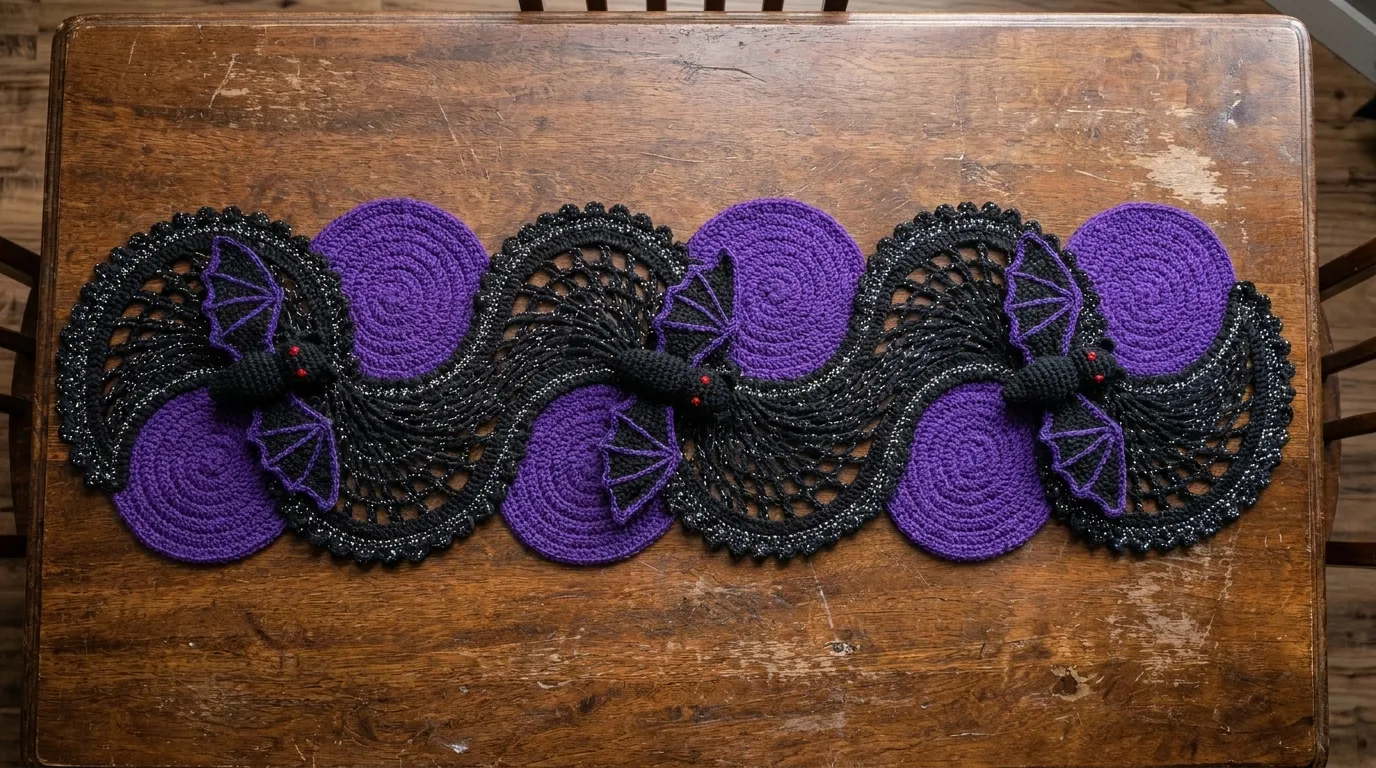
Full silhouette & geometric balance
Tactile stitch relief & ribbing depth
Scalloped edging & natural fall
Living space ambient styling
2. Pattern Overview & Finished Dimensions
Silhouette & Architecture: Serpentine linear runner composed of 6 circular disc medallions arranged in an alternating subtle S-curve offset, united by openwork lace bridging arches and flanked by 12 scalloped outer spiderweb panels.
Drape & Texture: Firm and flat through the central discs and amigurumi bat bodies; light, drapey, and crisp through the treble-crochet lace netting and picot perimeter.
Maker Adaptation Tip: To extend length for larger banquet tables, add pairs of purple discs and connecting web arches in increments of 8 inches (20 cm) per additional disc. To use as a flat dresser scarf without 3D elements, omit the amigurumi bats and work flat embroidered spider silhouettes in Phase 4.
3. Materials, Fiber & Tools Checklist
Yarns & Palette Requirements:
Firm twist ensures crisp lace definition without splitting.
Used for the solid foundation circular moon discs and bat wing surface accents.
Held double with black cotton yarn solely along the outer border picot row.
For hand-embroidering bat eyes with dimensional French knots.
Hook & Essential Notions:
- Crochet Hook: 4.5 mm (US 7) and 3.5 mm (US E-4) (or size needed to meet gauge)
4. Standard Crochet Abbreviations (US Terms)
This pattern follows standard Craft Yarn Council (CYC) US crochet terminology. Refer to this quick-reference visual dictionary as you work through each round:
5. Architectural Mechanics & Special Stitches
The runner maintains structural flatness via mathematical increase distribution in Phase 1, shifting increase points each round to eliminate hexing. Phase 2 joins the medallions using extended treble crochet bridging arches that absorb tension differentials between the dense central fabric and the delicate openwork border.
Special Stitches for This Project:
Ch 3, sl st into the front loop and front vertical bar of the preceding single crochet stitch, holding black cotton and metallic silver thread together.
Yarn over twice, insert hook into indicated ch-sp, yo and pull up a loop, [yo, pull through 2 loops] twice (2 loops on hook). Yarn over twice, insert hook into same ch-sp, yo, pull up a loop, [yo, pull through 2 loops] twice (3 loops on hook). Yo, pull through all 3 loops on hook.
Insert hook strictly under the back loop of the designated stitch, leaving the front ridge exposed to create accordion ribbing.
Insert hook through front loops of next two stitches consecutively, yarn over and pull through both front loops, yarn over and draw through remaining two loops.
6. Step-by-Step Pattern Instructions
Follow each round card in sequence. Click or tap any row card once you complete it to check it off and automatically track your progress across the 5 Pattern Checkpoints!
Phase 1: Foundation Moon Discs
Crochet 6 structurally flat, identical royal purple circular medallions measuring 6.5 inches in diameter each.Using 4.5 mm hook and Deep Royal Purple yarn, start with a magic ring. Round 1: Ch 1 (does not count as st), 8 sc into ring, sl st to first sc to join. [8 sc] Round 2: Ch 1, 2 sc in each st around, sl st to join. [16 sc]
💡 NB: Pull magic ring tail firmly to ensure zero center opening.
Round 3: Ch 1, [sc in next st, 2 sc in next st] 8 times, sl st to join. [24 sc] Round 4: Ch 1, [sc in next 2 sts, 2 sc in next st] 8 times, sl st to join. [32 sc] Round 5: Ch 1, [sc in next st, 2 sc in next st, sc in next 2 sts] 8 times, sl st to join. [40 sc] Round 6: Ch 1, [sc in next 4 sts, 2 sc in next st] 8 times, sl st to join. [48 sc]
💡 NB: Offsetting increases on odd-numbered rounds eliminates corners and maintains a circle.
Info:
Check disc flatness at Round 6. If disc cups upward, loosen tension slightly; if it ripples, drop down one hook size.
Round 7: Ch 1, [sc in next 2 sts, 2 sc in next st, sc in next 3 sts] 8 times, sl st to join. [56 sc] Round 8: Ch 1, [sc in next 6 sts, 2 sc in next st] 8 times, sl st to join. [64 sc] Round 9: Ch 1, [sc in next 3 sts, 2 sc in next st, sc in next 4 sts] 8 times, sl st to join. [72 sc] Round 10: Ch 1, [sc in next 8 sts, 2 sc in next st] 8 times, sl st to join. [80 sc]
Round 11: Ch 1, [sc in next 4 sts, 2 sc in next st, sc in next 5 sts] 8 times, sl st to join. [88 sc] Round 12: Ch 1, [sc in next 10 sts, 2 sc in next st] 8 times, sl st to join. [96 sc] Round 13: Ch 1, [sc in next 5 sts, 2 sc in next st, sc in next 6 sts] 8 times, sl st to join. Fasten off with invisible join. [104 sc]
💡 NB: Repeat Steps 1 through 4 to produce exactly 6 purple moon discs. Each finished disc must measure 6.5 inches across.
Phase 2: Spiderweb Interlocking Lattice
Join the 6 purple discs into a 48-inch long serpentine spine using jet-black openwork treble chain webbing.Lay out the 6 discs in a linear row labeled Disc 1 through Disc 6. On Discs 2 through 5, place markers at stitch 1, stitch 27, stitch 53, and stitch 79. On terminal Discs 1 and 6, place markers at stitch 1 and stitch 53. Spacing between disc centerlines is exactly 8 inches.
💡 NB: Locking stitch markers ensure balanced web tension between motifs.
With 4.5 mm hook and Jet Black yarn, join with sl st to stitch 20 of Disc 1. *Ch 7, skip 4 sts on Disc 1, tr in next st, ch 5, skip 4 sts, tr in next st. Ch 8 bridging chain to Disc 2; tr into stitch 96 of Disc 2, ch 5, skip 4 sts, tr in next st, ch 7, skip 4 sts, sl st into next st on Disc 2. Turn.
Ch 1, sl st into first 3 chs of ch-7 loop, ch 9, tr-cluster into central ch-8 bridge, ch 5, tr-cluster in same bridge space, ch 9, sl st into ch-7 loop of Disc 1. Fasten off. Repeat bridging sequence between Discs 2 & 3, Discs 3 & 4, Discs 4 & 5, and Discs 5 & 6.
💡 NB: Keep chains untwisted to preserve clean spiderweb lines.
Info:
At this stage, the central spine measures 46 inches unstretched. The flanking scalloped web arches in Phase 3 will stabilize the spine to exactly 48 inches by 14 inches.
Phase 3: Flanking Scalloped Web Wings & Silver Edging
Construct the 14-inch wide outer spiderweb scalloped fans along both sides and finish with a metallic silver picot border.With 4.5 mm hook and Jet Black yarn, join with standing sc at the outer flank edge of Disc 1 (stitch 40). *[Ch 6, skip 3 sts, sc in next st] 8 times across the unjoined perimeter of the disc, ch 8 over the bridging gap, sc in stitch 40 of next disc; repeat from * down the entire length of the first side to Disc 6. Do not turn.
Round 2 of Lace Border: Sl st into first ch-6 loop, ch 4 (counts as tr), [2 tr, ch 3, 3 tr] into same loop. *Ch 4, sc in next ch-6 loop, ch 5, sc in next ch-6 loop, ch 4, [3 tr, ch 3, 3 tr] in next loop; repeat from * around the entire perimeter of all 6 discs, pivoting around terminal ends with [4 tr, ch 5, 4 tr] corner shells. Sl st to 4th ch of beginning ch-4 to join.
Join Sterling Silver Metallic Lace thread held together with Jet Black cotton yarn. Ch 1, sc in each of next 3 tr, *(2 sc, picot, 1 sc) in ch-3 space of shell, sc in next 3 tr, 3 sc in ch-4 space, sc in next sc, 4 sc in ch-5 space, sc in next sc, 3 sc in ch-4 space, sc in next 3 tr; repeat from * continuously around the entire 124-inch outer perimeter, working (3 sc, picot, 3 sc) into each terminal corner fan. Sl st to first sc to join. Fasten off and weave in ends.
💡 NB: Block out picot loops with stainless steel pins during finishing for maximum crystalline sparkle.
Phase 4: Sculptural Amigurumi Bats
Crochet 3 three-dimensional bats with ribbed wings and embroidered crimson eyes to mount along the central discs.Using 3.5 mm hook and Jet Black yarn, work in continuous spiral: Round 1: 6 sc in magic ring. [6 sc] Round 2: 2 sc in each st around. [12 sc] Round 3: [Sc in next st, 2 sc in next st] 6 times. [18 sc] Rounds 4–9 (6 rounds): Sc in each st around. [18 sc] Stuff head firmly with fiberfill. Round 10: [Sc in next st, inv-dec] 6 times. [12 sc] Rounds 11–15 (5 rounds): Sc in each st around. [12 sc] Stuff torso lightly. Round 16: [Inv-dec] 6 times. [6 sc] Fasten off leaving a 14-inch tail; thread needle through front loops of remaining 6 sts, cinch shut.
💡 NB: Use a stitch marker to track the first stitch of each spiral round.
Using 3.5 mm hook and Jet Black yarn: Ch 4, sc in 2nd ch from hook, hdc in next ch, dc in last ch. Fasten off leaving an 8-inch tail. Sew two ears to the crown of each bat head between Rounds 2 and 4, spaced 3 stitches apart.
Using 3.5 mm hook and Jet Black yarn: Row 1: Ch 13, sc in 2nd ch from hook and in each ch across, turn. [12 sc] Row 2: Ch 1, BLO sc in first 10 sts, leave last 2 sts unworked, turn. [10 sc] Row 3: Ch 1, BLO sc across 10 sts, turn. [10 sc] Row 4: Ch 1, BLO sc in first 8 sts, leave last 2 sts unworked, turn. [8 sc] Row 5: Ch 1, BLO sc across 8 sts, ch 3, turn. [8 sc, 3 ch] Row 6: Sc in 2nd ch from hook, sc in next ch, BLO sc in next 8 sts, sc into side of skipped step from Row 4, sc into side of skipped step from Row 2, turn. [12 sc] Fasten off black yarn.
With 3.5 mm hook and Deep Royal Purple yarn, surface slip stitch along the raised back-loop ridges of each wing to delineate wing digits. Stitch wing root firmly to the side of the bat torso across Rounds 11–13. Thread tapestry needle with Crimson Red yarn; embroider two 3-wrap French knots on the face of each bat between Rounds 4 and 5, spaced 2 stitches apart.
💡 NB: Keep surface slip stitches relaxed to prevent the wings from curling into cups.
Phase 5: Assembly, Perching & Wet Blocking
Attach the 3 bats securely to Discs 2, 4, and 6, then wet block the entire runner to exact 14 by 48-inch dimensions.Position one finished bat at the center of Disc 2, Disc 4, and Disc 6. Using the long tail from the bat body and a tapestry needle, tack the lower torso and underbelly firmly to the center of the purple disc. Pin the wing tips spread out across the adjacent black web fans and secure each outer wing tip with 2 hidden whip stitches into the lace framework.
💡 NB: Securing the wing tips ensures the bats remain poised with wings spread even during table laundering.
Submerge the table runner in lukewarm water with no-rinse delicate wool wash for 20 minutes (keep amigurumi bat heads above water line if preferred, or soak entirely). Gently press water out in a rolled towel without wringing. Lay onto interlocking foam blocking mats. Pin the 6 purple discs into exact 6.5-inch circles. Pin each of the 30 silver picots outward under moderate tension, using a measuring tape to align total length to exactly 48 inches and maximum width to 14 inches.
Allow runner to air dry completely for 24 to 36 hours in a well-ventilated space away from direct sunlight. Once bone dry, remove all T-pins. Bat wings will retain their dynamic ribbed tension, and the lace web will lay completely flat without rippling or distortion.
💡 NB: A light mist of steam over the black lace webbing from a handheld steamer held 4 inches away crisps the mercerized cotton edges.
7. Assembly, Mounting & Structural Integration
Wet blocking is mandatory for this piece. Soak runner in cool water, press in a towel, and stretch onto blocking boards. Pin each silver picot point taut to establish clean spiderweb arches, confirming the 14-inch by 48-inch bounding rectangle before leaving to dry for 24 hours.
8. Accents, Hardware & Finishing Details
Inspect all outer margins, secure tails with a blunt tapestry needle through dense stitch posts on the Wrong Side, and steam press gently to lock fiber memory.
9. Common Mistakes & How to Fix Them
Even seasoned makers run into tension hiccups or stitch drift. Here are the top troubleshooting solutions for this design:
Working increases directly above previous increases creates sharp corners (hexing), while working too tightly causes cupping.
Crocheting chain loops too tightly contracts the openwork mesh when joined across disc spans.
Mercerized cotton wings lack internal boning, and gravity causes unanchored wing tips to curl inward.
10. Blocking, Care & Maintenance
Wet blocking is mandatory for this piece. Soak runner in cool water, press in a towel, and stretch onto blocking boards. Pin each silver picot point taut to establish clean spiderweb arches, confirming the 14-inch by 48-inch bounding rectangle before leaving to dry for 24 hours.
Care & Longevity Guidelines:
11. Frequently Asked Questions (FAQ)
Can I substitute acrylic yarn for mercerized cotton?
While acrylic yarn can be used, 100% mercerized cotton is strongly recommended. Cotton delivers the crisp structural stitch definition necessary for open spiderweb lace and blocks into rigid, flat geometric points that acrylic cannot match without extreme heat killing.
How do I keep the metallic silver thread from snagging while working the border?
Hold the metallic thread parallel to the black cotton yarn and wind both together onto a single working cake or bobbin prior to crocheting Phase 3 Step 3. Keep tension relaxed to prevent the metallic thread from bunching up on the hook shank.
Are the bats removable for easier washing and off-season storage?
Yes! Instead of sewing the bats permanently to the discs in Phase 5, sew small sew-on metal snap fasteners or clear plastic snaps to the underside of the bats and the center of Discs 2, 4, and 6.
Can I make this table runner wider than 14 inches?
To widen the runner, add a second repeating round of the spiderweb fan expansions from Phase 3 Step 2 before executing the silver picot perimeter. Each additional lace shell round adds approximately 2 inches to overall width.
12. Community & Maker Showcase
✨ Share Your Handcrafted Make
May this Gothic Bat & Spiderweb runner cast a spell of handmade elegance across your autumn gatherings! Share your completed midnight heirloom with our crafting coven using #NailItHomeCrochet. With love, Aurelia Thorne.
Pattern © 2026 Nail It Home / Aurelia Thorne. For personal maker use only. Do not reproduce, redistribute, or resell without written permission.