

Vintage Rose Garden Crochet Table Runner: Free Crochet Pattern & Tutorial
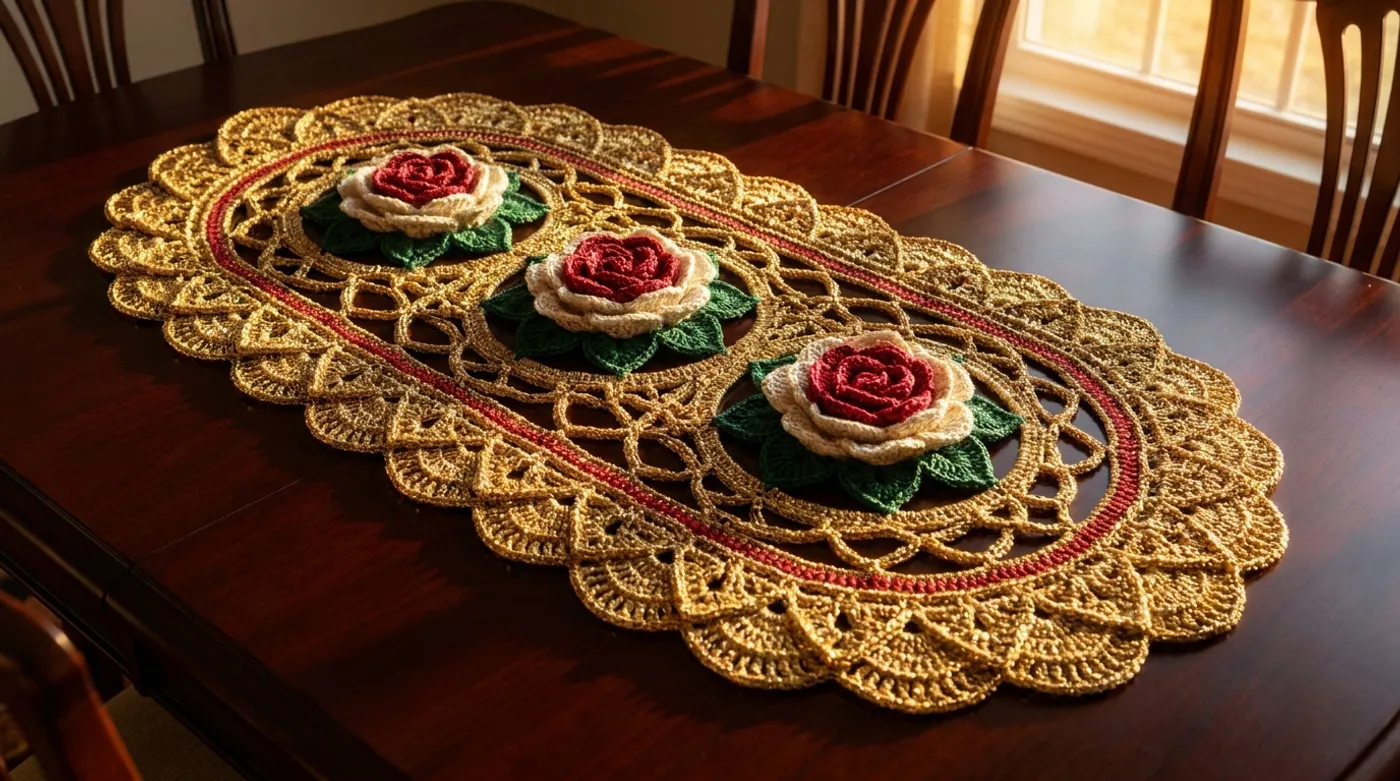
Create an heirloom-quality elongated oval table runner featuring three dimensional 3D roses, intricate vine scrollwork, and a magnificent multi-tiered metallic gold scalloped border. Free pattern with detailed tutorials.

Pattern Specifications
1. Introduction & Design Inspiration
There is a particular hush that falls over a dining table when a handmade runner graces its surface — a quiet declaration that this space is tended, cherished, and alive with intention. The Vintage Rose Garden Crochet Table Runner was born from my own longing to capture that fleeting moment when morning light catches the dew on rose petals in an old English garden, each bloom unfurling in layered perfection against a lattice of climbing vines.
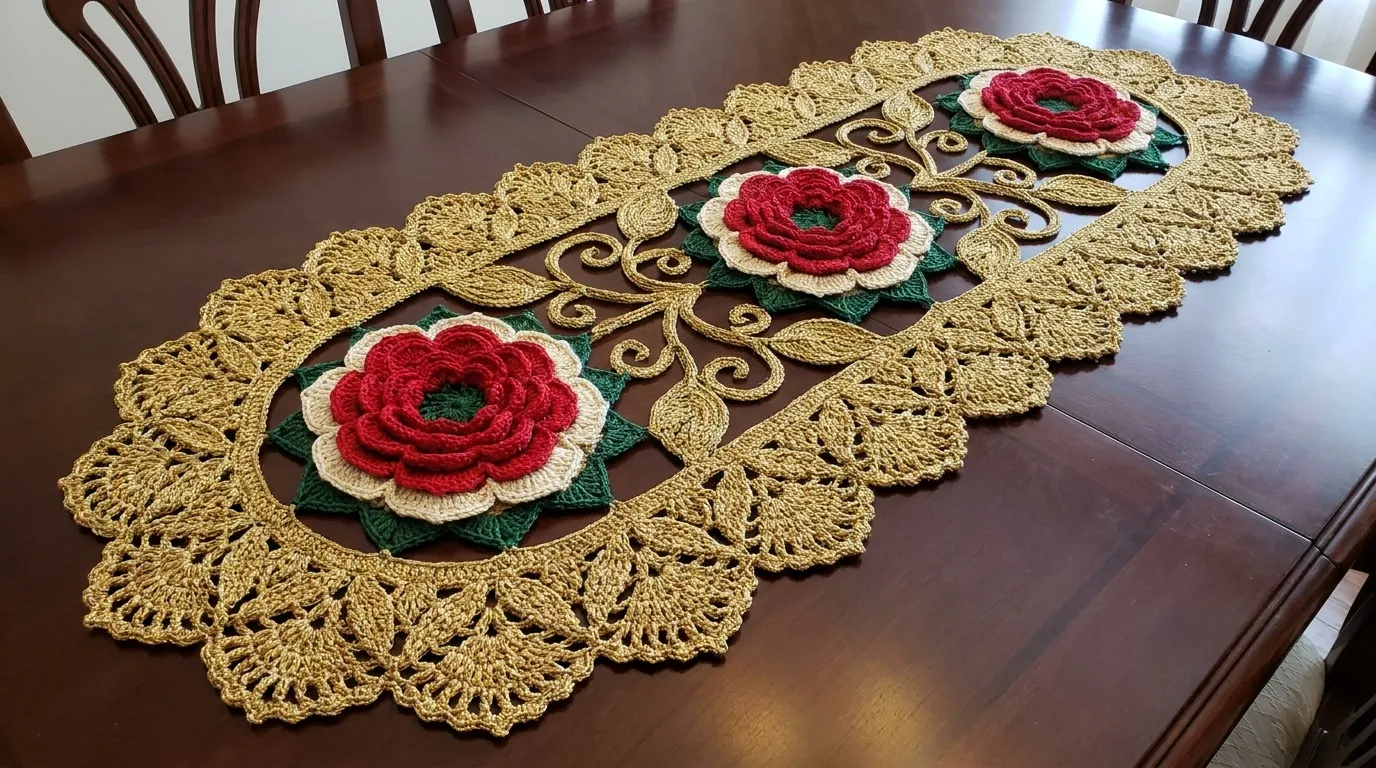
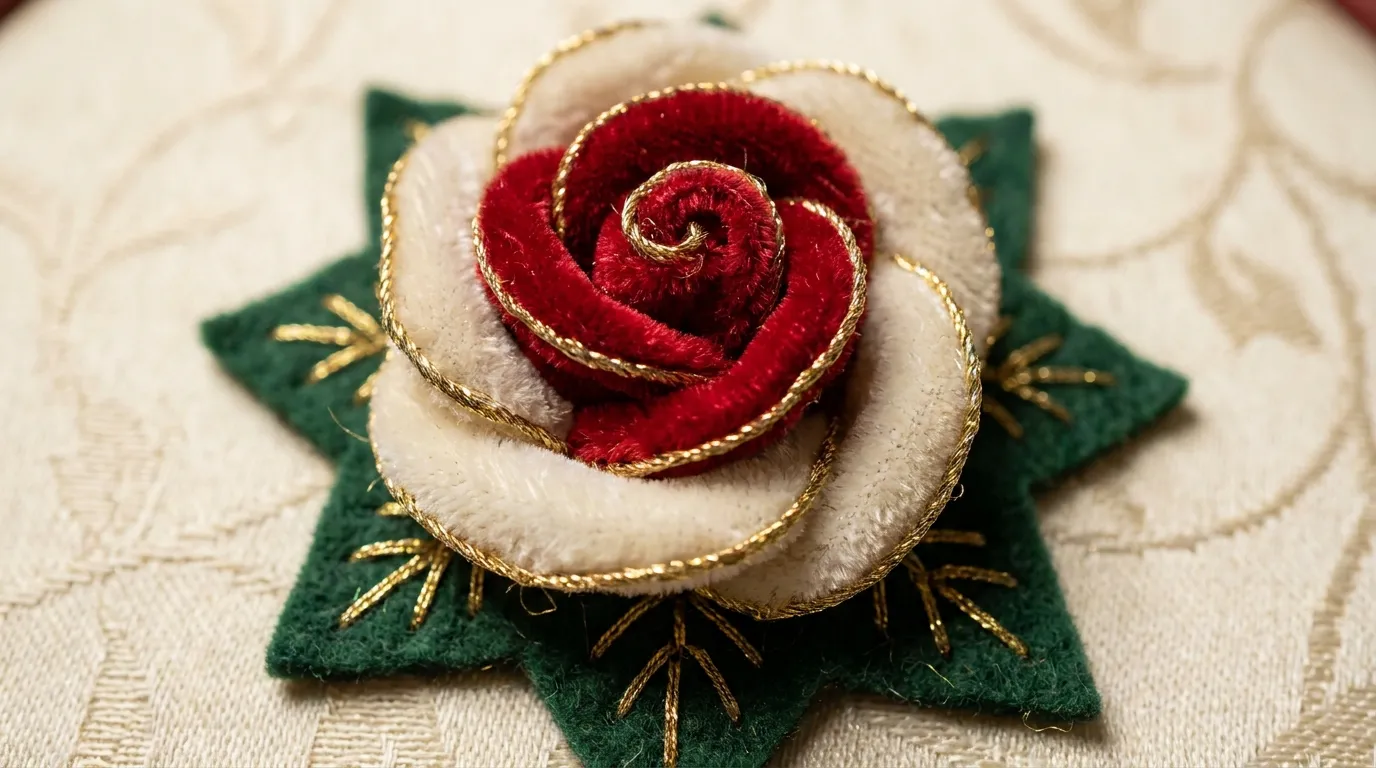
This design draws directly from the romantic language of Victorian floriography, where the crimson rose speaks of deep love, the cream rose whispers of charm and thoughtfulness, and the deep forest green leaves represent constancy. I have translated these sentiments into stitch architecture: three fully dimensional roses — each constructed with crimson red inner petals that curl inward like a guarded secret, cream outer petals that open generously to the light, and a star-shaped dark green calyx base that grounds each bloom in botanical authenticity — suspended within an undulating lattice of gold metallic vine scrollwork.
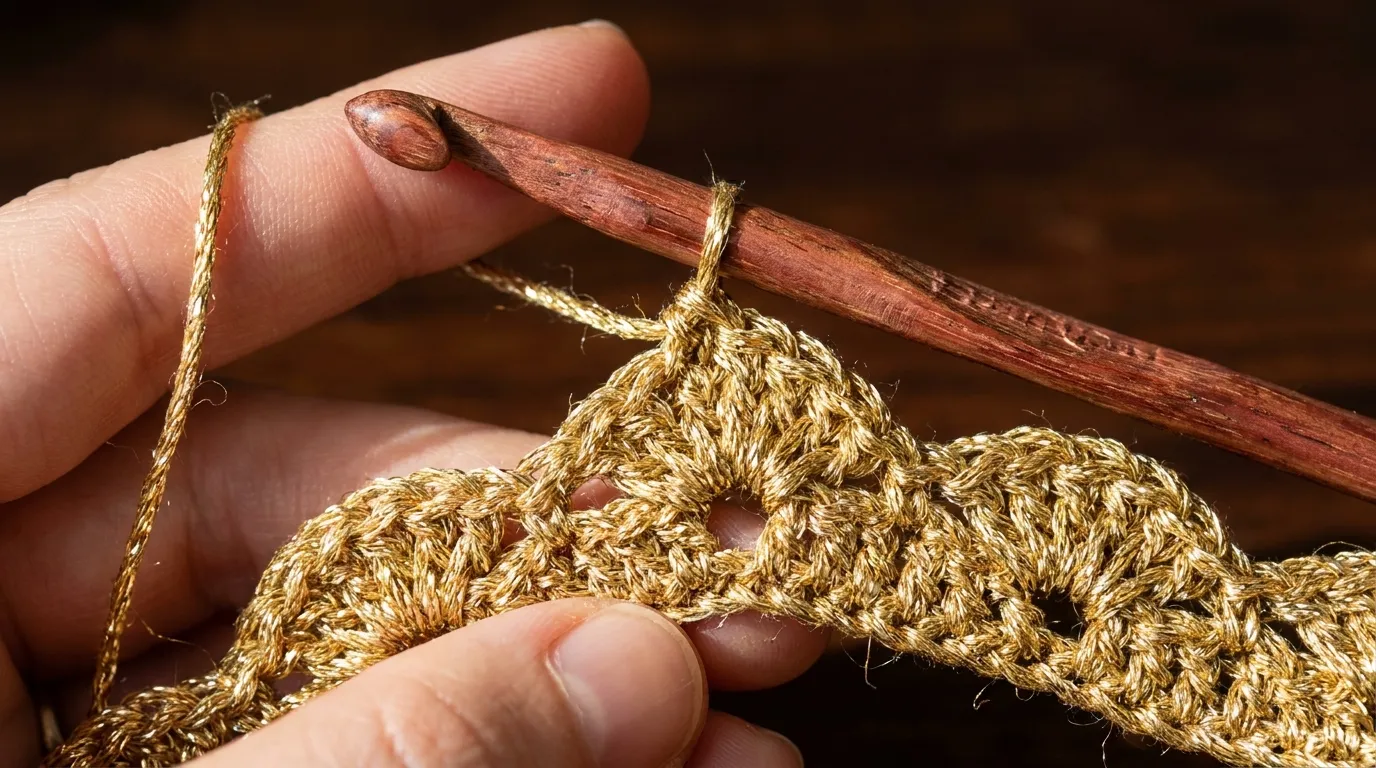
The crowning glory is the border: a multi-tiered fan and shell scallop edging worked entirely in shimmering gold metallic DK yarn, interlaced with a fine metallic gold accent thread that catches candlelight with every shift of the cloth. This border does not merely frame the piece; it creates a luminous halo, transforming the runner into a ceremonial centerpiece worthy of holiday feasts, anniversary dinners, or the simple luxury of a Tuesday morning tea.
Whether you are an intermediate crocheter ready to master 3D floral construction or an advanced maker seeking a meditative project that yields a genuine heirloom, this pattern will guide you through every petal, every tendril, every golden scallop with the precision and warmth this piece deserves.
2. Pattern Overview & Finished Dimensions
-
Finished Dimensions: 47 inches (120 cm) long × 17.75 inches (45 cm) wide at widest point (center); tapered ends measure 12 inches (30.5 cm) wide
-
Shape: Elongated oval with gracefully tapered ends
-
Structure: Three distinct layers — (1) gold metallic vine lattice foundation, (2) three 3D rose motifs appliquéd at center, left-center, and right-center positions, (3) multi-tiered gold fan/shell scalloped border worked around entire perimeter
-
Rose Dimensions: Each completed rose measures approximately 3.5 inches (9 cm) diameter × 1.25 inches (3 cm) height at center
-
Border Depth: Scalloped border extends 2.5 inches (6.5 cm) from lattice edge at deepest point of fan tiers
-
Weight: Approximately 185 g (6.5 oz) — substantial drape without stiffness
-
Skill Level: Intermediate (requires comfort with working in rounds, front/back post stitches, 3D shaping, and complex border architecture)
-
Construction Method: Vine lattice worked in rows from center outward; roses worked separately in continuous rounds and sewn on; border worked in rounds around entire assembled piece
3. Materials, Fiber & Hardware Checklist
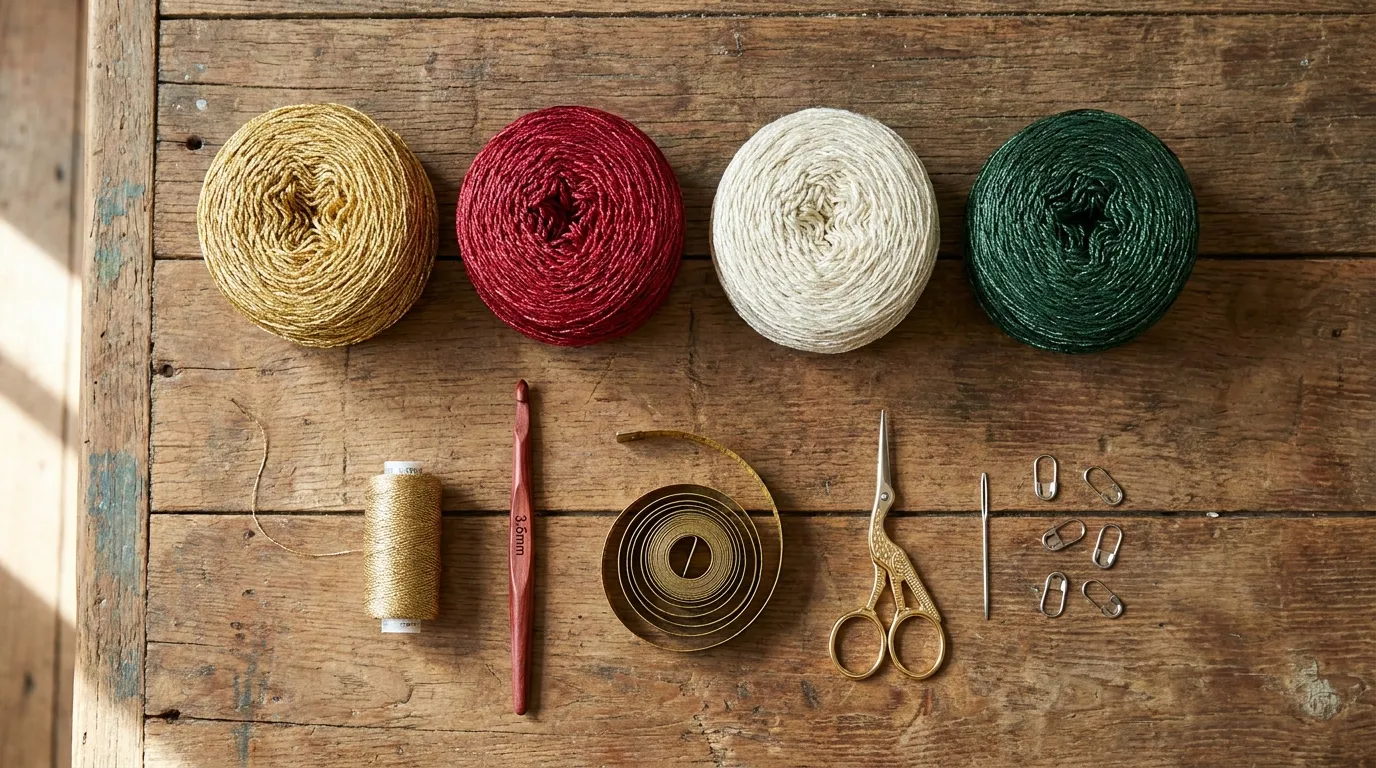
Yarns (All DK Weight / Category 3)
| Color | Role | Yardage | Suggested Brands |
|---|---|---|---|
| Shimmering Gold (metallic DK) | Vine lattice, border, rose centers, accent thread carrier | 280 yds (256 m) | King Cole Merino Blend DK Metallic Gold, Scheepjes Metropolis DK 801, Lion Brand Mandala Sparkle |
| Crimson Red (solid DK) | Rose inner petals (3 roses × 4 petals each) | 160 yds (146 m) | Cascade 220 Superwash DK 8902, Malabrigo Rios 862, Knit Picks Swish DK |
| Cream (solid DK) | Rose outer petals (3 roses × 5 petals each) | 140 yds (128 m) | Cascade 220 Superwash DK 8900, Malabrigo Rios 860, Knit Picks Swish DK |
| Deep Forest Green (solid DK) | Rose calyx bases, leaf tendrils in lattice | 100 yds (91 m) | Cascade 220 Superwash DK 8918, Malabrigo Rios 868, Knit Picks Swish DK |
Accent Thread
- Fine Metallic Gold Accent Thread (approx. 50 yds / 46 m) — carried alongside Shimmering Gold for border tiers 3–5; DMC Diamant Metallic #8 or Kreinik Very Fine #4 Braid in Gold
Tools & Notions
-
Crochet Hook: 4.0 mm (G-6) — use 3.75 mm for tighter tension, 4.5 mm for looser tension
-
Tapestry Needles: Two blunt-tip (one for seaming roses, one for weaving ends)
-
Blocking Supplies: 30+ T-pins, blocking mats (minimum 50 × 20 inches), spray bottle, steam iron with press cloth
-
Stitch Markers: 12 locking markers (for rose petal placement, border repeat tracking)
-
Measuring Tape: Flexible 60-inch
-
Scissors: Sharp embroidery scissors for metallic thread
Yarn Substitution Notes
The metallic shimmer in the gold yarn is non-negotiable for the border’s luminous quality. If substituting, choose a DK-weight yarn with genuine metallic ply (not just sparkle flecks). For the solid colors, any smooth, non-fuzzy DK-weight wool or wool-blend will hold the 3D petal structure beautifully. Avoid cotton — it lacks the memory to maintain petal curl.
4. Stitch Abbreviations (US Terms)
| Abbreviation | Meaning |
|---|---|
ch | chain |
sl st | slip stitch |
sc | single crochet |
hdc | half double crochet |
dc | double crochet |
tr | treble crochet |
dtr | double treble crochet |
BLO | back loop only |
FLO | front loop only |
FPdc | front post double crochet |
BPdc | back post double crochet |
inc | increase (2 sts in same st) |
dec | decrease (sc2tog or dc2tog as specified) |
RS | right side |
WS | wrong side |
rep | repeat |
sk | skip |
sp | space |
* * | repeat instructions between asterisks |
[ ] | stitch group worked in same stitch/space |
() | total stitch count for row/round |
Special Stitches:
-
3-dc Cluster:
[yo, insert hook, yo, pull up loop, yo, pull through 2] 3 times in same st, yo, pull through all 4 loops -
5-dc Shell:
[dc, hdc, sc, hdc, dc]all in same stitch/space -
7-tr Fan:
[tr, tr, tr, tr, tr, tr, tr]all in same stitch/space (used in border tiers) -
Picot-3:
ch 3, sl st in 3rd ch from hook -
Rose Petal Curl (RPC):
ch 1, sc in next st, hdc in next, dc in next, tr in next, dtr in next, tr in next, dc in next, hdc in next, sc in next, sl st in next— creates a single curled petal unit
5. Architectural Mechanics / Technique Deep-Dive
This runner’s architecture relies on three distinct structural systems working in harmony. Understanding the why behind each will make the execution intuitive rather than merely mechanical.
The Vine Lattice: Negative Space as Design
The foundation is not a solid fabric but an openwork lattice of gold metallic yarn — a network of ch-5 arches anchored by dc posts and FPdc/BPdc ribs that create a subtle ribbed texture catching the light. This lattice serves three purposes: it provides the structural “soil” from which roses appear to grow; its open geometry allows the mahogany table beneath to show through, integrating the runner with its surface; and its rhythmic ch-5 arches create the precise attachment points for the border’s fan tiers. Work this lattice loosely — the metallic yarn has no elasticity, and a tight gauge will cause the finished piece to cup.
The 3D Rose: Layered Petal Engineering
Each rose is built from the center outward in five concentric rounds of petals, each round larger and more open than the last. The magic lies in the Rose Petal Curl (RPC) stitch: a single-stitch-wide strip that progresses from sc through dtr and back down, creating a natural curl without wiring. The inner three rounds use Crimson Red (tight, protective), the outer two rounds use Cream (generous, receptive). Each petal is worked directly into the previous round’s stitches — not onto a separate base — so the rose grows organically, each layer hugging the one beneath. The star-shaped calyx (Deep Forest Green) is worked last in BLO to create a flat, five-pointed base that seats the rose flush against the lattice.
The Multi-Tiered Scalloped Border: Graduated Architecture
The border is not a single edging but five distinct tiers, each building on the last like architectural cornices:
-
Tier 1 (Foundation):
scevenly around entire perimeter, anchoring into everych-5arch anddcpost of the lattice -
Tier 2 (Structure):
FPdc/BPdcribbing around Tier 1 — creates a firm “corset” that prevents the scallops from flaring uncontrollably -
Tier 3 (First Fan):
5-dc Shellin every 3rdscof Tier 2 — establishes the primary scallop rhythm -
Tier 4 (Expansion):
7-tr Fancentered over each Tier 3 shell, withch-3picots between fans — the gold accent thread joins here -
Tier 5 (Crowning Glory):
9-dtr Fanover each Tier 4 fan, eachdtrseparated bych-1, finished withPicot-3at each peak — the finest, most delicate tier, worked only with gold + accent thread held together
The graduated stitch height (dc → tr → dtr) and increasing fan width create a natural flare that mimics a rose opening — the border is the final, largest bloom.
6. Step-by-Step Stitch Instructions
Phase 1: Vine Lattice Foundation (Shimmering Gold)
Foundation Row: Ch 182 (multiple of 6 + 2). This yields 30 ch-5 arches across the center width.
Row 1 (RS): Dc in 4th ch from hook (counts as ch-3 + dc), ch 5, sk 5 ch, dc in next ch; rep from * to last ch, dc in last ch. Turn. — 30 arches, 31 dc (31 dc, 30 ch-5 arches)
Row 2: Ch 3 (counts as dc), dc in same st, ch 5, FPdc around next dc (working around the post of the dc below), ch 5, BPdc around next dc; rep from * across, ending with 2 dc in last dc. Turn. — (31 dc, 30 ch-5 arches, 15 FPdc, 15 BPdc)
Rows 3–42: Rep Row 2 exactly. The FPdc/BPdc alternation creates a subtle ribbed column at each arch anchor. After Row 42, you have a lattice 42 rows tall (approx. 47 inches). Do not fasten off.
Shaping Tapered Ends (Rows 43–54):
-
Row 43: Work Row 2 pattern across first 20 arches only. Turn.
-
Row 44: Work across first 15 arches. Turn.
-
Row 45: Work across first 11 arches. Turn.
-
Row 46: Work across first 8 arches. Turn.
-
Row 47: Work across first 6 arches. Turn.
-
Row 48: Work across first 4 arches. Turn.
-
Row 49: Work across first 3 arches. Turn.
-
Row 50: Work across first 2 arches. Turn.
-
Row 51: Work 1 arch. Turn.
-
Rows 52–54: Work 1 arch each row (3 rows straight). Fasten off.
Return to Row 42, join gold at opposite end, and work Rows 43–54 identically for the second tapered end. Block lattice lightly before proceeding (steam block, do not press — metallic yarn melts).
Phase 2: 3D Rose Motifs (Make 3 Identical)
Each rose uses: Crimson Red (inner), Cream (outer), Deep Forest Green (calyx). Work in continuous rounds — do not join rounds, use a stitch marker to track round beginnings.
Calyx Base (Deep Forest Green):
-
Rnd 1: Ch 2, 10 sc in 2nd ch from hook. Place marker. (10 sc)
-
Rnd 2: Inc in next sc 10 times. (20 sc)
-
Rnd 3: Sc in next, inc in next 10 times. (30 sc)
-
Rnd 4: Sc in next 2, inc in next 10 times. (40 sc)
-
Rnd 5: Sc in next 3, inc in next 10 times. (50 sc)
-
Rnd 6 (BLO): Sc in next 4, inc in next 10 times. (60 sc)
-
Rnd 7 (BLO): Sc in each st around. (60 sc)
-
Rnd 8 (Star Points): Ch 4, sl st in 2nd ch from hook, sc in next ch, hdc in next ch, sk 5 sc on base, sl st in next sc 10 times. Fasten off, leaving 12-inch tail for sewing. — 10 star points
Inner Petals — Round 1 (Crimson Red): Join red with sl st in any BLO st of Rnd 7 (the round before star points).
- Work 1 RPC (see Special Stitches) in each of next 5 sts, sl st in next base st — rep 10 times around. (10 petals)
- Do not fasten off. Sl st into first petal’s base to position for next round.
Inner Petals — Round 2 (Crimson Red):
- Ch 1, work 1 RPC in each of next 6 sts (working into the sl st bases between Round 1 petals), sl st in next base st — rep 10 times. (10 petals, slightly larger)
Inner Petals — Round 3 (Crimson Red):
- Ch 1, work 1 RPC in each of next 7 sts, sl st in next base st — rep 10 times. (10 petals, largest inner layer)
- Fasten off red. Weave in ends securely at base.
Outer Petals — Round 4 (Cream): Join cream with sl st in any unworked BLO st of Rnd 7 (between inner petal clusters).
- Ch 1, work 1 RPC in each of next 8 sts, sl st in next base st — rep 10 times. (10 petals)
Outer Petals — Round 5 (Cream):
- Ch 1, work 1 RPC in each of next 9 sts, sl st in next base st — rep 10 times. (10 petals, fullest layer)
- Fasten off cream. Weave in ends.
Rose Center (Shimmering Gold): With gold, make a magic ring. Rnd 1: Ch 1, 8 sc in ring. Pull tight. Rnd 2: Inc in next sc 8 times. (16 sc). Rnd 3: Sc in each st. Fasten off, leaving long tail. Sew center into middle of rose, catching a few stitches from each inner petal round for stability.
Phase 3: Rose Placement & Appliqué
Position roses on blocked lattice:
-
Center Rose: Centered at Row 21 (exact middle of 42 rows), centered horizontally (arch 15)
-
Left Rose: Row 21, arch 6 (9 arches left of center)
-
Right Rose: Row 21, arch 24 (9 arches right of center)
Using gold yarn and tapestry needle, sew each rose calyx to lattice by whipstitching through the 10 star points into the ch-5 arches and dc posts beneath. Ensure roses sit flat but petals remain free and dimensional. Weave all ends.
Phase 4: Multi-Tiered Scalloped Border (Shimmering Gold + Accent Thread)
Join gold at any corner of tapered end. Work in rounds around entire perimeter.
Tier 1 — Foundation Round: Ch 1, sc in each dc post, 3 sc in each ch-5 arch, 3 sc in each tapered-end edge stitch; sl st to first sc. (Approx. 380 sc) Do not turn — work all border tiers in same direction (RS facing).
Tier 2 — Ribbing Round: Ch 2 (counts as dc), FPdc around next sc, BPdc around next sc; rep around, sl st to top of beg ch-2. (190 FPdc, 190 BPdc)
Tier 3 — First Fan Round: Ch 3 (counts as dc), sk 2 sts, 5-dc Shell in next st, sk 2 sts, sc in next st; rep around, ending with sk 2, sl st to 3rd ch of beg ch-3. (Approx. 63 shells)
Tier 4 — Expansion Fan Round (Add Accent Thread): Hold gold + accent thread together. Ch 4 (counts as tr), sk to center dc of next shell, 7-tr Fan in that dc, ch 3, Picot-3, ch 3; rep around, sl st to 4th ch of beg ch-4. (63 fans, 63 picots)
Tier 5 — Crowning Glory Round: Still holding both threads. Ch 5 (counts as dtr), sk to center tr of next fan, [dtr, ch 1] 8 times in that tr (9 dtr total with ch-1 between), Picot-3 in last dtr; rep around, sl st to 5th ch of beg ch-5. Fasten off both threads. (63 grand fans)
Weave in all border ends invisibly into the tier stitches.
7. Assembly, Mounting & Structural Integration
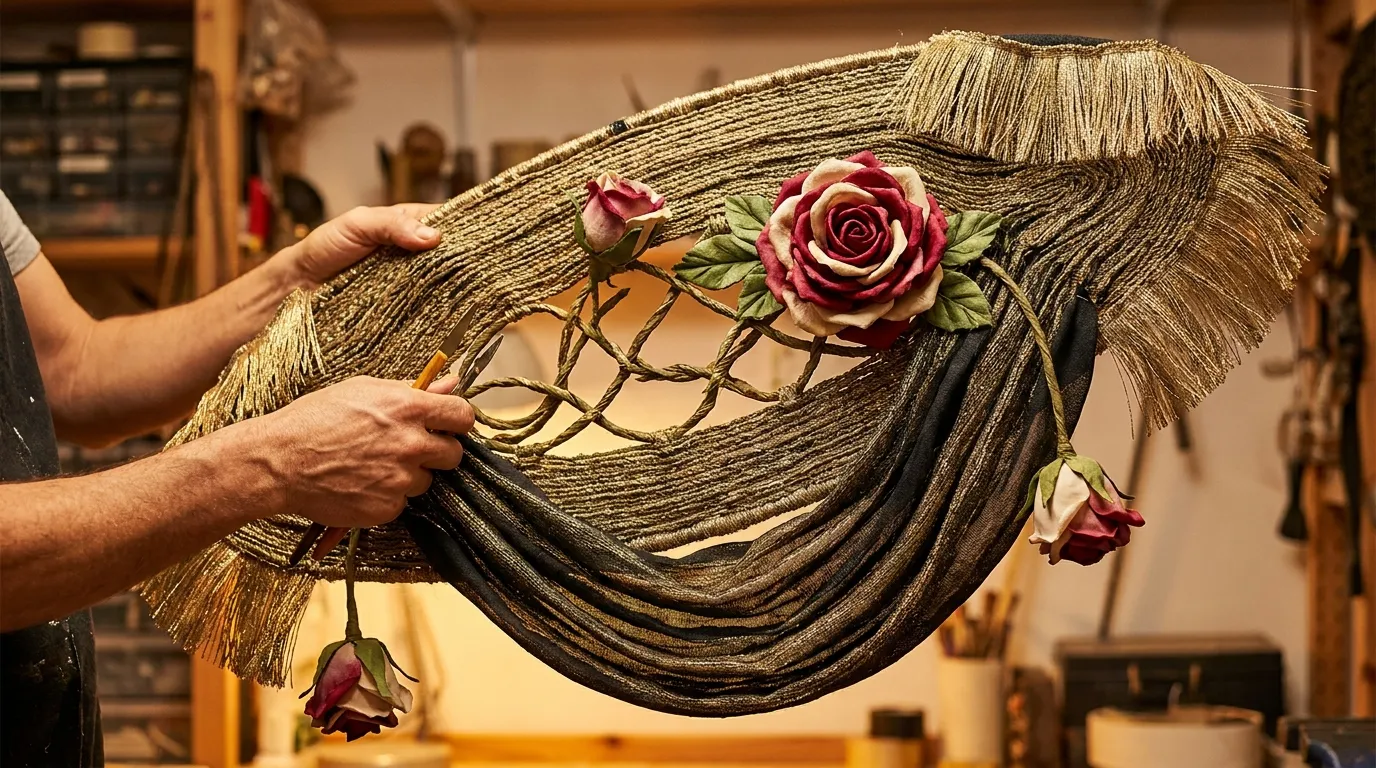
This piece requires no lining, no hardware, and no mounting — it is a self-contained textile designed to lie flat on a table surface. However, the assembly integrity of the three roses to the lattice is critical for both aesthetics and longevity.
Appliqué Technique:
- Thread a 24-inch length of gold yarn onto a tapestry needle.
- Position rose on lattice. Insert needle from WS of lattice up through a
ch-5arch, catching one star point of the green calyx. - Take needle down through adjacent
dcpost, up through next arch, catching next star point. - Continue around all 10 points. The star points align naturally with the lattice’s 10-arch repeat at the placement positions.
- On final stitch, bring needle to WS, knot securely around a
dcpost, and bury tail in lattice ribs. - Repeat for all three roses.
Structural Check: After sewing, gently lift runner by one tapered end. The roses should not shift, pull, or distort the lattice. If any movement occurs, add 2–3 supplementary stitches at that rose’s calyx.
Final Blocking (Essential):
- Pin runner to blocking mats at full dimensions (47” × 17.75” at center).
- Pin each scallop peak of Tier 5 individually — this defines the border’s architecture.
- Steam heavily (hover iron 1 inch above, do not touch metallic yarn).
- Allow to dry completely (24 hours) before unpinning.
- The metallic gold will relax into a permanent, luminous wave.
8. Hardware, Accents & Embellishment Assembly
This design intentionally omits hardware, clasps, straps, or attached embellishments. The fine metallic gold accent thread — incorporated only in Border Tiers 4 and 5 — serves as the sole embellishment, and its integration is structural rather than decorative: the thread’s slight stiffness supports the tallest dtr stitches of Tier 5, preventing them from collapsing under their own weight.
Accent Thread Handling Tips:
- Wind the accent thread onto a small bobbin or card before starting Tier 4.
- Hold it loosely alongside the gold yarn — tension it independently so it never pulls the gold stitches tight.
- If the thread kinks, pause and let the bobbin dangle to self-untwist.
- The thread ends are woven into the Tier 4/5 stitches only — never into the lattice or roses.
No beads, sequins, charms, or additional embroidery are needed. The roses are the jewels; the gold border is the setting.
9. Blocking, Care & Maintenance
Blocking (First Time & After Washing)
-
Method: Wet blocking or steam blocking. Never press metallic yarn with a hot iron directly.
-
Pins: Use T-pins at every Tier 5 fan peak (63 pins minimum) plus perimeter pins every 2 inches.
-
Drying: Flat, 24–48 hours. Do not hang — the weight will distort the lattice.
Washing
- Hand wash only in cool water (max 30°C / 86°F) with pH-neutral wool wash (e.g., Soak, Eucalan).
- Submerge fully, soak 15 minutes. Do not agitate, wring, or twist.
- Rinse in same-temperature water until clear.
- Press water out between towels — roll in towel, press firmly, unroll.
- Re-block to original dimensions.
Storage
- Store flat, rolled (not folded) around an acid-free cardboard tube.
- Wrap in unbleached cotton muslin or a cotton pillowcase.
- Avoid plastic bags — metallic fibers need breathability.
- Keep away from direct sunlight (fades crimson and degrades metallic ply).
Repair Notes
-
Snagged metallic thread: Gently coax back with a blunt tapestry needle from WS. Do not cut.
-
Loose rose petal: Re-tack with a single stitch of matching yarn at petal base.
-
Border fan collapse: Re-block with extra pins at that fan’s peak.
10. Frequently Asked Questions (FAQ)
Q: Can I use non-metallic DK yarn for the gold sections? A: You can, but the piece loses its defining luminosity. The border’s graduated tiers rely on metallic reflection to read as distinct layers; matte yarn flattens the architecture visually. If budget requires substitution, use a gold yarn with a silk or bamboo blend for sheen, and add 10% more yardage for the border (matte yarn lacks the “body” of metallic ply).
Q: My roses are cupping upward instead of lying flat. How do I fix this?
A: This indicates your RPC tension is too tight on the dtr/tr stitches. Block the individual roses before appliqué: pin each rose face-down on a towel, steam heavily, and pin each petal tip flat. Let dry completely. Then appliqué to the lattice. Going forward, work the RPC with a deliberately relaxed tension on the tall stitches — imagine you’re “laying” them down, not pulling them up.
Q: The border Tier 5 fans are floppy and won’t hold their shape.
A: Two likely causes: (1) Accent thread not carried consistently — it must run through every dtr of Tier 5. (2) Hook too large for Tier 5 — drop to 3.5 mm for Tier 5 only. The dtr stitches are tall and need the structural support of the finer hook + accent thread combo.
Q: Can I make this runner longer/shorter?
A: Yes. The lattice length is determined by Row 1 chain count. Each additional 6 chains = 1 more ch-5 arch = ~1.5 inches length. Adjust in multiples of 6. For rose placement, keep the center rose at the exact midpoint row; place side roses at 1/4 and 3/4 of total row count. Border stitch counts will auto-adjust — work Tier 1 sc evenly around whatever perimeter results.
Q: The metallic gold yarn splits constantly on my hook. Help?
A: Use a hook with a deep, inline throat (e.g., Susan Bates, Furls Odyssey) — tapered throats (Boye, Clover Amour) split metallic plies. Also, rotate the hook slightly toward you on each yo to keep plies aligned. If splitting persists, run the yarn through a light beeswax coating (optional, but effective).
11. Community Call-to-Action
You’ve crocheted more than a table runner — you’ve cultivated a garden that will never fade, woven in gold and crimson and cream, rooted in the quiet confidence of your own hands. I would be honored to see your Vintage Rose Garden bloom on your table.
Share your finished make:
- 📸 Instagram: Tag
@NailItHomeand#VintageRoseGardenRunner— I personally feature makers in our monthly “Garden Gallery” stories. - 📌 Pinterest: Pin your project photos to your “Crochet Home Decor” or “Heirloom Crochet” boards with the pattern link.
- 💬 Comments: Leave a note below with your yarn choices, any modifications, or the occasion you’re stitching for — your insights help fellow makers.
Questions as you stitch? Drop them in the comments or DM @NailItHome — I answer every pattern query within 48 hours.
May your stitches be even, your roses lush, and your table always set for beauty.
— Aurelia Thorne, Master Fiber Artist & Lead Pattern Curator, Nail It Home


