

Vintage Daisy And Burgundy Lace Tablerunner Unroll: Free Crochet Pattern & Tutorial
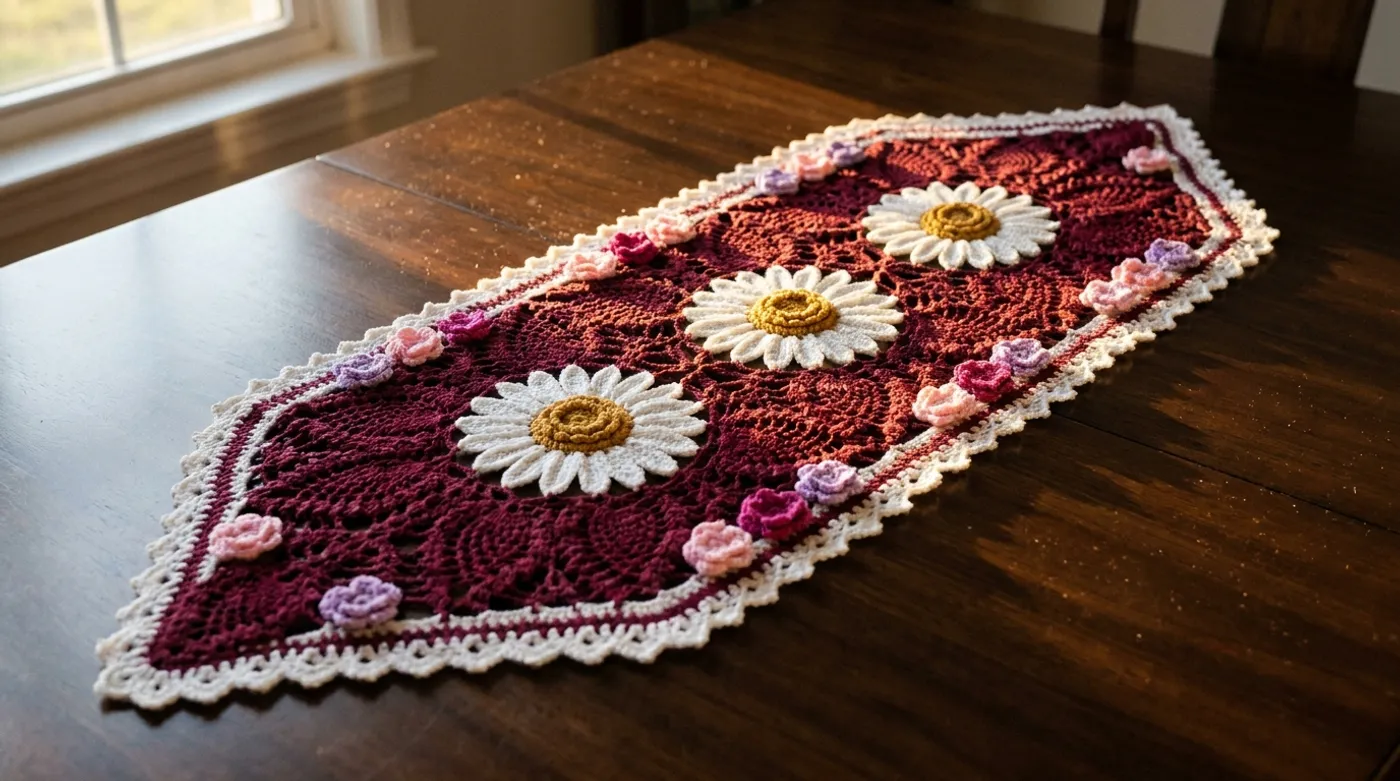
Create an heirloom-quality vintage table runner featuring three white daisy medallions with golden centers, surrounded by deep burgundy pineapple lace and leaf motifs, finished with delicate picot edging and micro-crochet floral appliqués.

Pattern Specifications
1. Introduction & Design Inspiration
There is a particular hush that settles over a dining table when a hand-crocheted runner graces its surface — a whisper of generations past, of Sunday suppers and afternoon tea, of hands that worked patiently through evenings to create beauty that outlasts trends. This Vintage Daisy and Burgundy Lace Tablerunner was born from that same quiet devotion, a piece that carries the DNA of 1920s and 30s filet and pineapple lace traditions while speaking fluently to the modern maker’s desire for structure, clarity, and heirloom quality.
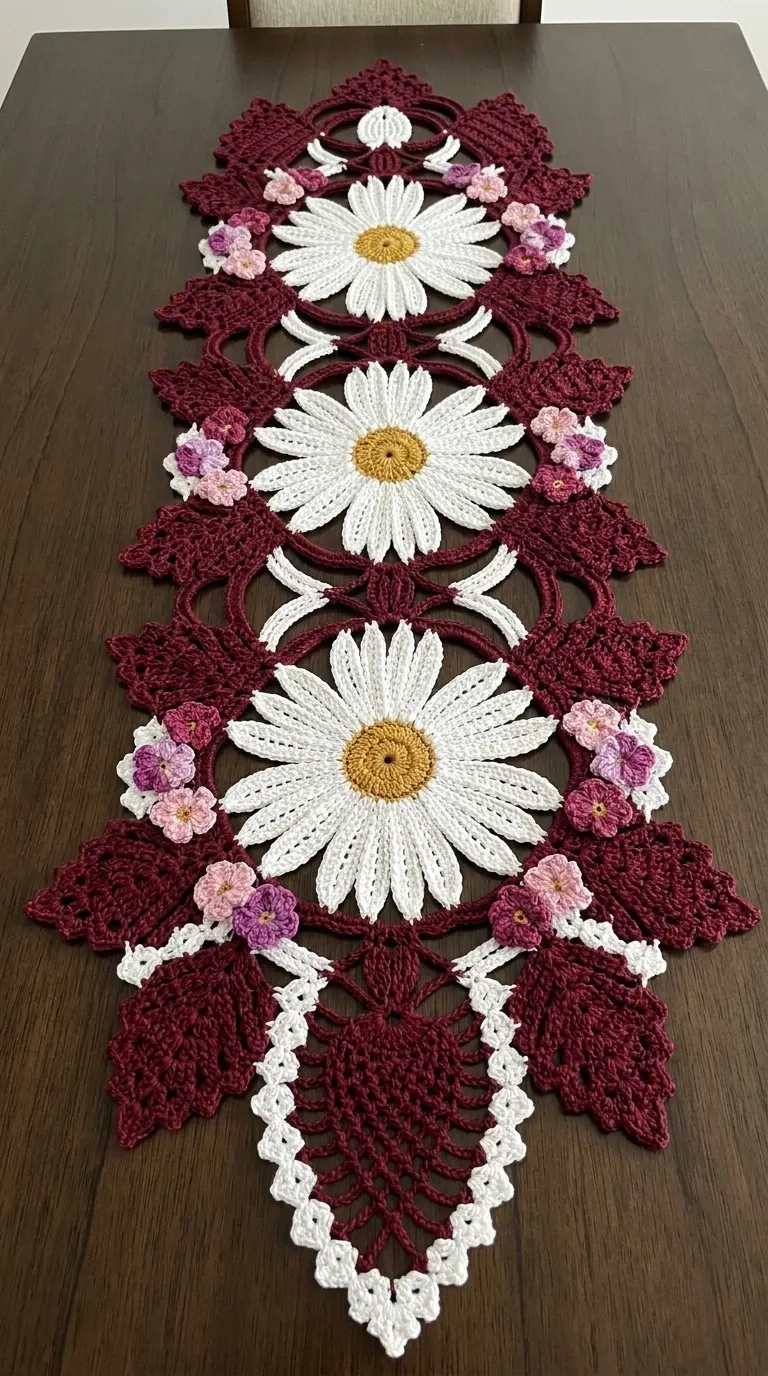
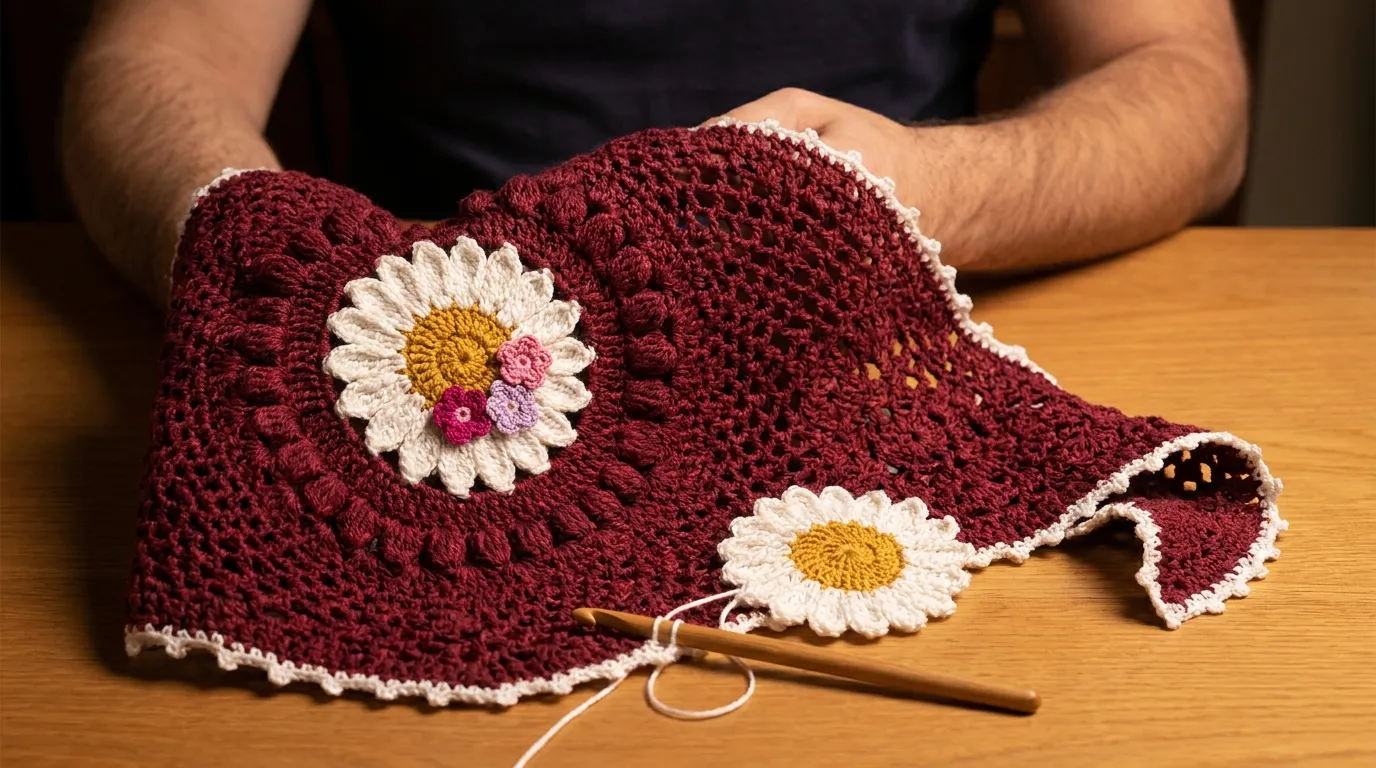
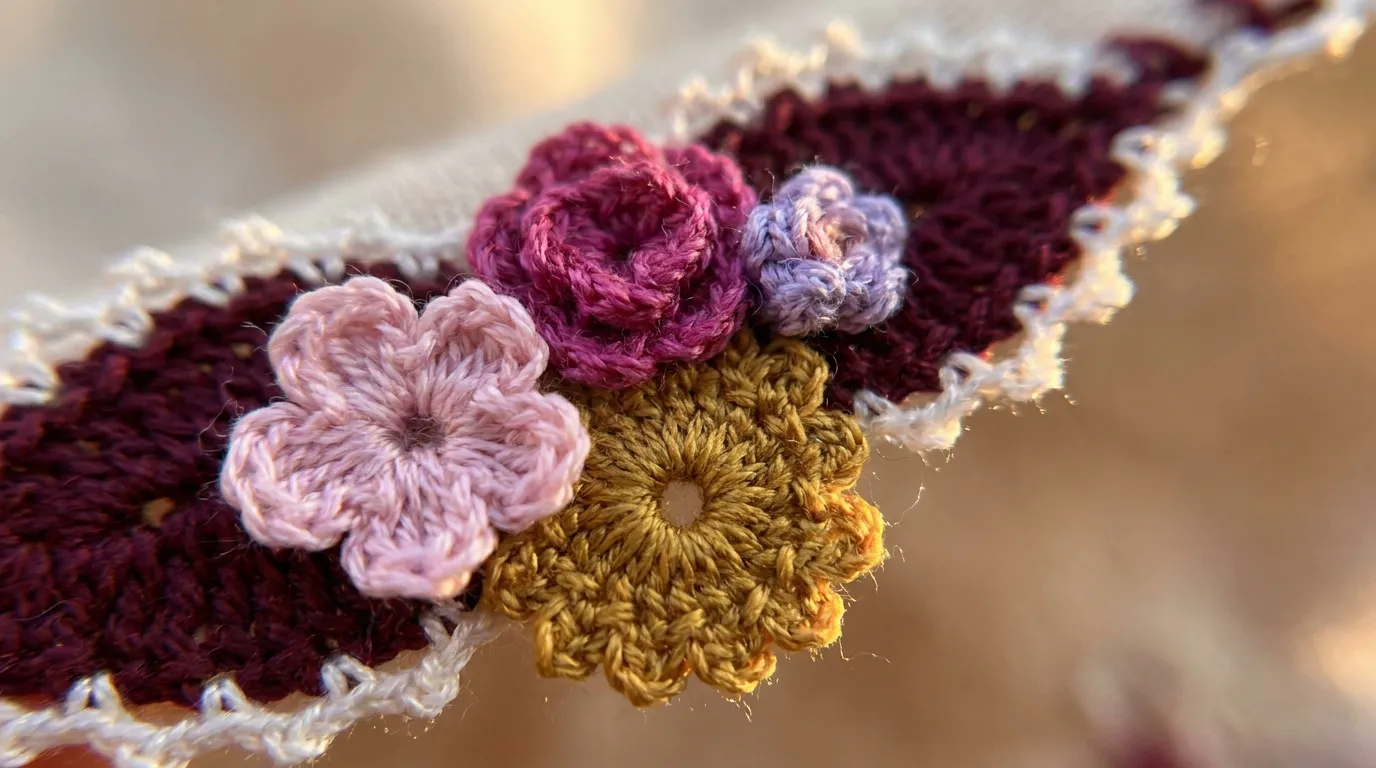
The design centers on three commanding daisy medallions, each worked in crisp white Size 10 mercerized cotton using double treble (dtr) stitches that fan outward like sunbursts. Their centers glow with mustard gold — a warm, honeyed amber that catches the light differently than pure yellow, lending an antique patina even to a freshly finished piece. Deep burgundy pineapple motifs and sweeping leaf structures cradle each daisy, their architectural density providing gravitational weight to the airy white blossoms. Along the inner borders of these leaves, you’ll discover a secret garden: micro-crochet blossoms in pastel pink, magenta, and lilac, each no larger than a fingernail, applied like scattered petals on a spring breeze.
The runner’s silhouette is intentionally elongated — approximately 15 inches wide by 38 inches long — with gracefully tapered ends that echo the pointed tips of the burgundy leaves. A final flourish of white picot scalloped edging traces the entire perimeter, each tiny peak catching candlelight at dinner. Worked flat on a dark polished walnut table, the piece reads like a vintage botanical illustration brought to life in fiber.
This pattern assumes comfort with thread crochet fundamentals: maintaining even tension on fine cotton, reading stitch charts for pineapple lace, and executing double treble stitches without splitting plies. If you’ve completed a few doilies or lace edgings, you have the foundation. The reward is a piece that will grace your table — or a beloved friend’s — for decades.
2. Pattern Overview & Finished Dimensions
-
Finished Dimensions: 15 inches (38 cm) wide × 38 inches (96.5 cm) long at longest points
-
Center Width (at daisy medallions): 15 inches (38 cm)
-
Tapered End Width: 4 inches (10 cm) at narrowest point
-
Daisy Medallion Diameter: 5.5 inches (14 cm) each
-
Spacing Between Medallion Centers: 11 inches (28 cm)
-
Structure: Single-piece construction worked from center outward in three joined medallion sections with connecting lace panels
-
Border: Continuous white picot scallop edging worked in the round after assembly
-
Appliqués: 18 micro-floral blossoms (6 per medallion section) applied post-blocking
-
Drape: Medium-firm; holds shape on table without stiffening, softens beautifully with washing
-
Reversible: Yes — both sides present identically
Fit & Placement Notes: Designed for tables 36–48 inches long. On longer tables, the tapered ends leave elegant wood exposed. For round tables, center the middle medallion and allow ends to drape. The burgundy cotton provides enough weight to prevent sliding on polished surfaces.
3. Materials, Fiber & Hardware Checklist
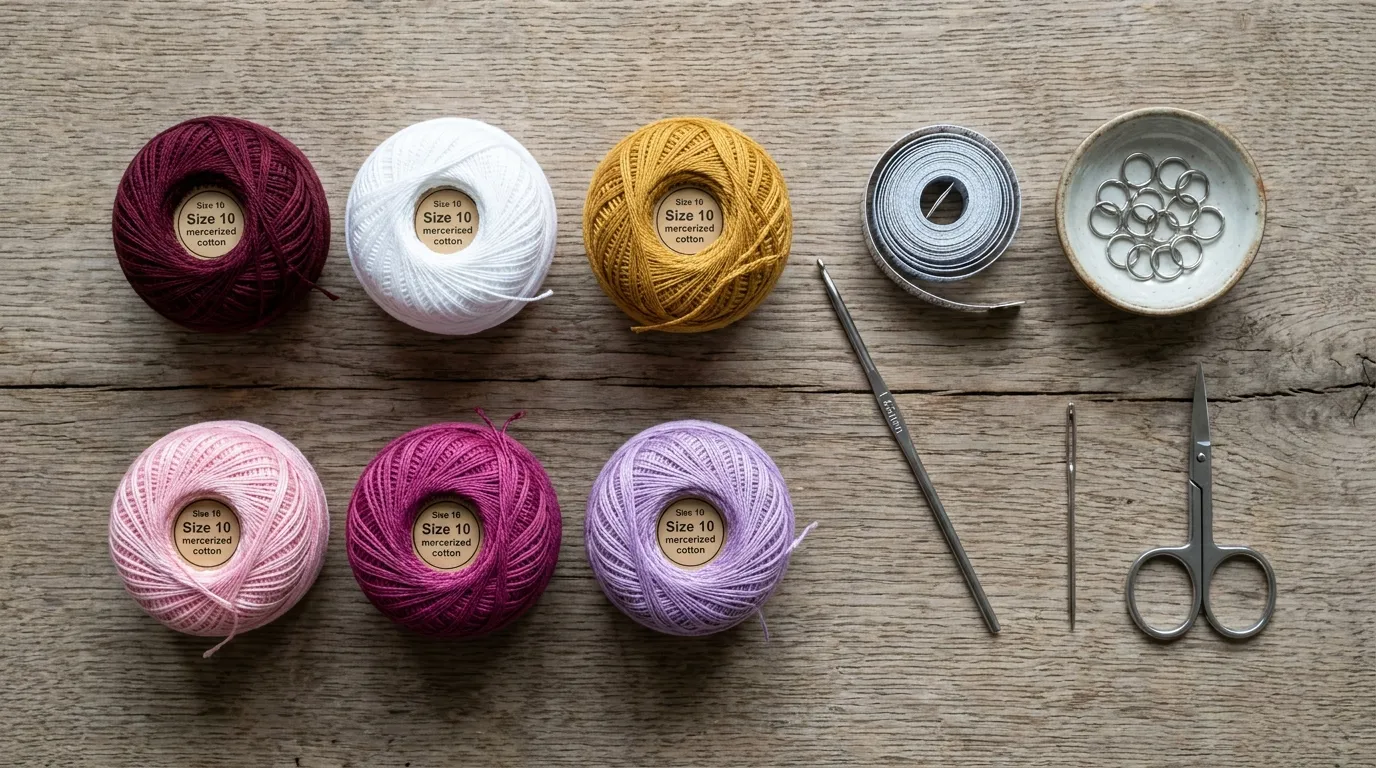
Thread (Size 10 Mercerized Cotton — all amounts include 15% overage for sampling and tension adjustments):
-
Burgundy (Color A): 180 yds / 165 m — 2 balls (DMC Cebelia Size 10 #321 or Anchor #892)
-
White (Color B): 160 yds / 146 m — 2 balls (DMC Cebelia Size 10 #100 or Anchor #001)
-
Mustard Gold (Color C): 80 yds / 73 m — 1 ball (DMC Cebelia Size 10 #720 or Anchor #268)
-
Pastel Pink (Color D): 30 yds / 27 m — 1 ball (DMC Cebelia Size 10 #315)
-
Magenta (Color E): 30 yds / 27 m — 1 ball (DMC Cebelia Size 10 #326)
-
Lilac (Color F): 30 yds / 27 m — 1 ball (DMC Cebelia Size 10 #342)
Tools & Notions:
- Steel crochet hook: 1.75 mm (US 00) — critical for gauge; do not substitute aluminum
- Tapestry needle: Size 24 blunt tip (for weaving ends and appliqué attachment)
- Blocking board: 24 × 48 inches minimum, with grid lines
- Stainless steel T-pins: 50+ (for aggressive lace blocking)
- Spray bottle with distilled water
- Rust-proof measuring tape
- Sharp embroidery scissors (4-inch)
- Magnifying lamp or headband magnifier (recommended for micro-florals)
- Stitch markers: 6 locking (for medallion join points)
Optional but Recommended:
- Fabric stiffener spray (for picot border only, if extra crispness desired)
- Cotton glove (to prevent oils from hands transferring to white thread during long sessions)
4. Stitch Abbreviations (US Terms)
| Abbreviation | Stitch Name |
|---|---|
| ch | chain |
| sl st | slip stitch |
| sc | single crochet |
| hdc | half double crochet |
| dc | double crochet |
| tr | treble crochet |
| dtr | double treble crochet (yo 3 times, pull through 2 loops 4 times) |
| trtr | triple treble crochet (yo 4 times) |
| picot | ch 3, sl st in 3rd ch from hook |
| cl | cluster (dc 3 tog in same st/sp) |
| shell | (2 dc, ch 2, 2 dc) in same st/sp |
| pineapple | (1 dc, ch 3, 1 dc) × 4 in same st, then join with sl st to form fan |
| BLO | back loop only |
| FLO | front loop only |
| RS | right side |
| WS | wrong side |
| sp(s) | space(s) |
| st(s) | stitch(es) |
| rep | repeat |
| sk | skip |
| inc | increase (2 sts in same st) |
| dec | decrease (2 sts tog) |
Special Techniques Referenced:
-
Magic Ring (MR): Adjustable loop start for medallion centers
-
Standing Stitch: Join new yarn with a stitch already at working height (e.g., standing dc = sl st to join, ch 3, dc in same sp)
-
Invisible Join: Cut yarn, pull through last st, thread needle, insert under both loops of first st of round, then back into center of last st — eliminates visible seam
-
Join-As-You-Go (JAYG): Connecting motifs during final round rather than sewing after
5. Architectural Mechanics / Technique Deep-Dive
This runner’s architecture relies on three interlocking geometric systems: radial symmetry (the daisy medallions), bilateral expansion (the pineapple lace panels), and tapered termination (the pointed ends). Understanding how these systems distribute tension will transform your crochet from mechanical repetition to intentional engineering.
The Daisy Medallion — Radial Tension Management:
Each medallion begins with a Magic Ring of 12 dtr stitches (Color B). Double trebles are tall — approximately 4× the height of a dc — which means the circumference expands rapidly. Round 2 places 2 dtr in each stitch (24 sts). Round 3 works dtr, ch 2, sk 1 around, creating the first lace grid. By Round 5, you’ll have 48 dtr stitches. The key is consistent golden-loop height: on every dtr, after the third yarn-over pull-through, pause and gently tug the working thread to standardize the loop size before completing the stitch. This prevents the “ruffle effect” that plagues large-thread medallions.
The Gold Center — Color Transition Integrity:
Round 6 switches to Color C (Mustard Gold) for a single round of sc, ch 3, sk 1 picot edging around the medallion perimeter. Work this round loosely — the picots must sit flat, not curl. Use a standing sc to join Color C, and finish with an invisible join. The gold round acts as a structural “rim” that stabilizes the white dtr spokes before the burgundy lace attaches.
Pineapple Lace Panels — Bilateral Geometry:
The burgundy (Color A) pineapple motifs grow outward from the medallion’s gold rim in mirror-image pairs. Each pineapple unit spans 7 stitches at its base and fans to 15 stitches at its widest row (Row 5 of the pineapple). The critical insight: pineapple lace creates its own internal tension curve. As you work the fan rows (increasing ch-3 spaces), the fabric naturally wants to cup. Counter this by blocking each panel individually before joining — pin the base edge straight, fan the top edge to its full width, and let dry completely. This pre-sets the curve so panels meet flat at the center seam.
Leaf Motifs — Directional Stitch Architecture:
The burgundy leaves flanking each medallion use a short-row wedge technique: Row 1 works 15 dc across the medallion edge; each subsequent row works 2 fewer stitches at the outer edge while maintaining the inner edge, creating a triangular wedge. The leaf tip forms over 8 rows. The inner edge of each leaf receives the micro-floral appliqués post-blocking — plan placement now by placing a locking stitch marker every 1.5 inches along the inner leaf edge.
Tapered Ends — Exponential Deceleration:
The runner’s ends taper from 15 inches to 4 inches over 12 inches of length. This is achieved by decreasing 1 stitch per side every 3rd row on the connecting lace panels. The math: (15″ – 4″) / 2 = 5.5″ width reduction per side. At gauge (18 sts = 4″), that’s 25 stitches per side. Over 36 rows (12″ at 3 rows/inch), decrease every 1.44 rows — rounded to every 3rd row for 12 decreases, then every 2nd row for the final 13. The pattern simplifies this to a clean formula in Phase 3.
Picot Border — Perimeter Stabilization:
The final white picot round serves as a tension ring. Worked in sc with picots every 3 stitches, it distributes edge stress evenly. The secret: work the border on the RS only, never turning. This means you’ll crochet “backwards” (left-handed if right-handed) on two sides — a technique worth practicing on a swatch. The result is a perfectly flat, non-rolling edge.
6. Step-by-Step Stitch Instructions
Phase 1: Three Daisy Medallions (Work 3 Identical)
Medallion Center — Color B (White)
Rnd 1 (RS): MR, ch 4 (counts as first dtr), 11 dtr in ring, pull ring tight, sl st to top of beg ch-4. — 12 dtr
Rnd 2: Ch 4 (counts as dtr), dtr in same st, 2 dtr in each st around, sl st to top of beg ch-4. — 24 dtr
Rnd 3: Ch 4, dtr in same st, ch 2, sk 1 st, 2 dtr in next st; rep from * around, ending ch 2, sk 1, sl st to top of beg ch-4. — 24 dtr, 12 ch-2 sps
Rnd 4: Sl st into first ch-2 sp, ch 4, dtr in same sp, ch 3, (2 dtr, ch 2, 2 dtr) in next ch-2 sp (shell made); rep from * around, ending ch 3, sl st to top of beg ch-4. — 12 shells, 12 ch-3 sps
Rnd 5: Sl st into ch-2 sp of first shell, ch 4, dtr in same sp, ch 3, sk ch-3 sp, (2 dtr, ch 2, 2 dtr) in ch-2 sp of next shell; rep around, ending ch 3, sl st to top of beg ch-4. — 12 shells (expanded), 12 ch-3 sps
Rnd 6 (Color C — Mustard Gold): Standing sc in any ch-2 sp of shell, ch 3, sk 2 dtr, sc in next dtr (center of shell), ch 3, sk 2 dtr, sc in ch-2 sp of next shell; rep around, invisible join. — 24 picots
Fasten off Color B and C. Weave ends securely — these medallions bear structural load.
Medallion Count: Make 3. Block each to 5.5″ diameter before Phase 2.
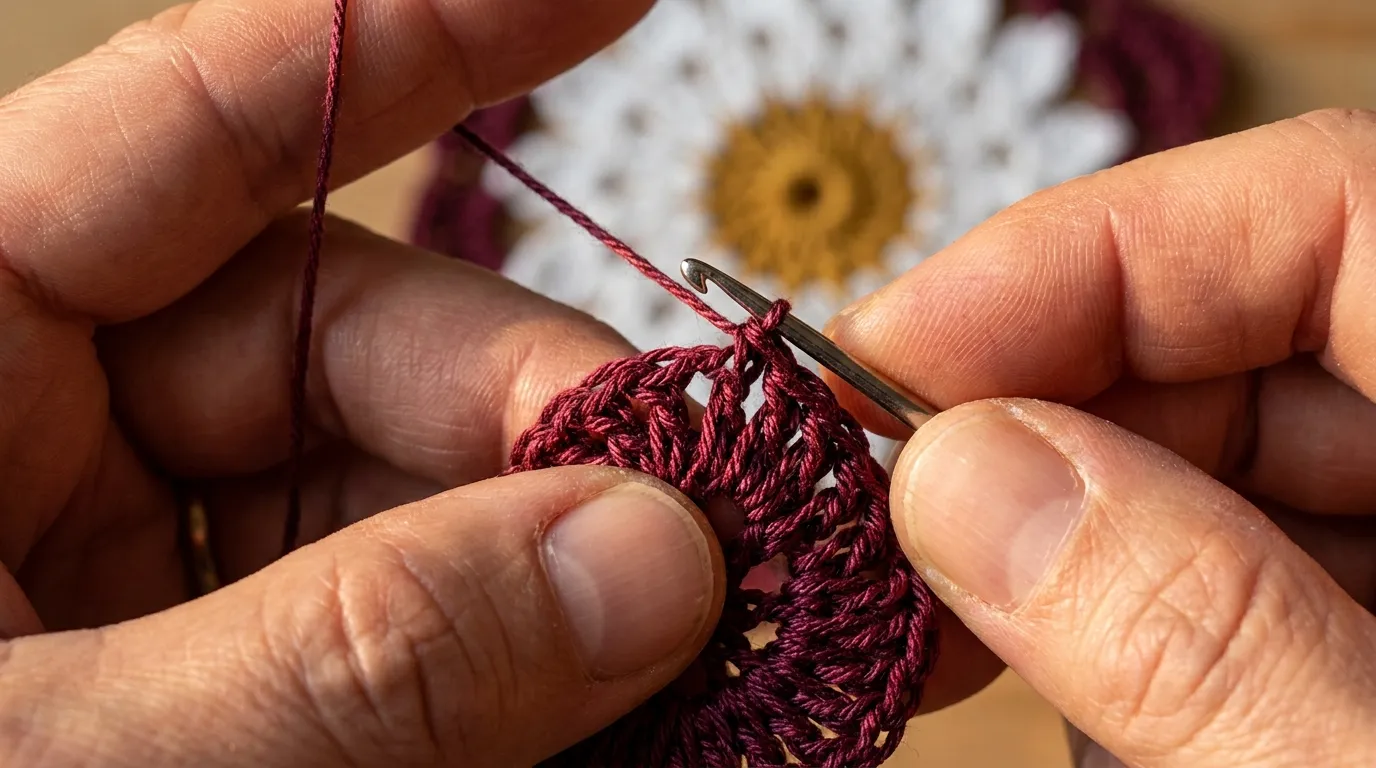
Phase 2: Burgundy Pineapple Panels & Leaf Motifs (Connecting Medallions)
Layout: Place 3 blocked medallions in a line, centers 11″ apart. You will work 4 connecting panels: Left End → Medallion 1 → Medallion 2 → Medallion 3 → Right End. Each panel consists of a central pineapple lace strip flanked by leaf motifs.
Panel Foundation (Color A — Burgundy):
Join Color A with standing dc to any gold picot sc of Medallion 1 (mark this as Join Point A).
Row 1 (RS): Ch 3 (counts as dc), dc in next 5 picot sps around medallion edge (6 dc total), turn.
Row 2: Ch 3, dc in next 5 dc, turn. — 6 dc
Row 3 (Pineapple Base): Ch 3, dc in next 2 dc, ch 3, sk 1 dc, dc in next dc × 2, ch 3, sk 1, dc in last dc, turn. — 4 dc, 3 ch-3 sps
Rows 4–8 (Pineapple Fan): Each row: ch 3, dc in first dc, ch 3, dc in next ch-3 sp across, ending dc in last dc, turn. Each row adds 1 ch-3 sp. Row 8 has 7 ch-3 sps.
Row 9 (Pineapple Join): Ch 1, sc in first dc, ch 5, sc in next ch-3 sp across, ch 5, sc in last dc. Do not turn. This row creates the arched top of the pineapple.
Leaf Motif (Work 2 per panel — one each side of pineapple):
From Row 3 of panel, identify the 2nd dc from left edge (left leaf) and 2nd dc from right edge (right leaf).
Leaf Row 1: Join Color A with standing dc in marked st, dc in next 13 sts/sp across medallion edge (14 dc), turn.
Leaf Rows 2–8: Ch 3, dc in each dc across to last 2 sts, dc2tog, turn. (Each row loses 1 st at outer edge.)
Leaf Row 9: Ch 3, dc2tog across to last st, dc in last st, fasten off. — Leaf tapers to point.
Repeat Panel Construction for all 4 panels (Left End, Between 1–2, Between 2–3, Right End). For end panels, work only 1 leaf (inner side) and extend pineapple base rows to 12 dc wide for structural width.
Join-As-You-Go (Medallions 2 & 3):
When working panels between medallions, join the final pineapple row (Row 9) to the next medallion’s gold picots: sc in next ch-5 sp of pineapple, sl st to next picot sc of medallion around. This creates a seamless structural bond.
Phase 3: Tapered Ends & Continuous Picot Border
Tapered End Shaping (Color A — Burgundy):
At each end panel, after completing leaf and pineapple, continue in rows along the outer edge:
Rows 1–12: Ch 3, dc in each st across, dec 1 st at end of row (dc2tog last 2 sts), turn.
Rows 13–24: Ch 3, dc in each st across, dec 1 st at end of every 2nd row, turn.
Row 25: Ch 1, sc in each st across, fasten off.
End width measures ~4″. Block ends to sharp points.
Continuous White Picot Border (Color B — White):
With RS facing at all times, join Color B with standing sc at bottom tip of left end.
Round 1: Sc in next 2 sts/row ends, picot in next st/row end; rep around entire perimeter (all 4 sides), navigating corners with 3 sc in corner st, picot in center sc. Join with invisible join.
Stitch Count Target: ~420 sc + 140 picots total. Adjust spacing slightly at curves — the border must lie flat without ruffling or pulling.
7. Assembly, Mounting & Structural Integration
Micro-Floral Appliqués (Colors D, E, F — Pink, Magenta, Lilac):
Work 18 total (6 per medallion section: 2 pink, 2 magenta, 2 lilac).
Micro-Flower Pattern (make 18):
MR, ch 2, 5 hdc in ring, pull tight, sl st to first hdc. — 5 hdc
Petal Round: Ch 2, tr in next hdc, ch 2, sl st in same hdc, sl st in next hdc; rep 4 more times (5 petals). Fasten off leaving 6″ tail for sewing.
Block flowers flat on towel, pinning each petal tip.
Placement & Attachment:
After full runner is blocked (see Section 9), position flowers along inner edges of burgundy leaves flanking each medallion. Use locking stitch markers placed in Phase 2 as guides. Space flowers ~1.5″ apart, alternating colors in sequence: Pink → Magenta → Lilac → Pink → Magenta → Lilac per leaf side.
Thread tapestry needle with matching color thread. Anchor at flower center back, take 3 tiny stitches through center hdc cluster into leaf fabric. Knot securely on WS. Trim tails to ¼″.
Structural Integration Check:
- Verify all 3 medallions sit level (no tilting)
- Confirm pineapple panels meet at center with no gap or overlap
- Ensure picot border tension is uniform — no tight spots pulling corners
- Check appliqué security: tug gently on each flower; re-stitch any loose
8. Hardware, Accents & Embellishment Assembly
This piece requires no hardware, clasps, or straps — its function is pure textile presence. The “embellishment assembly” here refers to the final integration of all decorative elements into a cohesive visual whole.
Final Embellishment Audit:
- Gold Center Integrity: Inspect each medallion’s mustard gold picot round. Any loose picots? Re-tack with single thread of Color C.
- Burgundy Leaf Veining (Optional Subtle Accent): Using a single strand of Color A and a sharp tapestry needle, embroider a single stem stitch vein down the center of each leaf, from base to tip. Work on RS only, catching only the top ply of the dc stitches. This adds botanical realism without heaviness.
- Picot Border Crispness: If any picots have softened during handling, re-block the border section locally: mist, pin each picot peak to a 45° angle, dry.
- Thread End Audit: Run fingers along entire perimeter and all join lines. Any prickly ends? Re-weave with tapestry needle, burying 3″ minimum in stitch cores.
Presentation Fold:
For gifting or storage, fold runner in thirds lengthwise (burgundy sides together), then roll from one tapered end. Tie loosely with burgundy cotton ribbon. Never crease sharply — the pineapple lace remembers folds.
9. Blocking, Care & Maintenance
Initial Blocking (Critical — Do Not Skip):
- Fill basin with cool water + 1 tsp wool wash (Eucalan or Soak). Submerge runner fully, soak 20 minutes.
- Gently press water out — never wring. Roll in clean towels, press firmly.
- Lay on blocking board (grid side up). Pin center medallion first: 5.5″ diameter, every ½″ around perimeter.
- Pin pineapple panels: base edges straight, top arcs fanned to full width (measure 7″ at widest).
- Pin leaf motifs: inner edges straight against medallion, tips sharp.
- Pin tapered ends: straight lines from 15″ to 4″ over 12″.
- Pin picot border: every picot peak pinned at 45° angle.
- Mist heavily with distilled water. Dry 48 hours minimum (thread holds moisture in core).
- Remove pins. Steam lightly on WS only if any puckering remains.
Washing Protocol:
-
Hand wash only, cool water, pH-neutral detergent
-
Soak 15 min, rinse until water runs clear
-
Press in towels, block to original dimensions (pins optional for maintenance washes)
-
Dry flat 24 hours
-
Never machine wash, never dry clean, never iron directly
Storage:
Roll on acid-free tissue paper around acid-free cardboard tube (2″ diameter). Store flat in cotton pillowcase. Avoid plastic — cotton needs to breathe. Re-fold differently each year to prevent permanent creases.
Annual Refresh:
Light steam on WS, re-block picot border if needed. The burgundy cotton deepens in richness over decades — this is a feature, not a flaw.
10. Frequently Asked Questions (FAQ)
Q: Can I use Size 20 or Size 30 thread instead of Size 10?
A: Not without complete pattern recalculation. Size 10 provides the structural heft for 15″ width and 38″ length. Finer threads would require proportionally more stitches, tighter gauge, and likely a smaller hook — effectively a different pattern. If you want a smaller runner, scale all dimensions by the thread size ratio (e.g., Size 20 ≈ 50% scale → 7.5″ × 19″).
Q: My double treble stitches look uneven — some taller, some shorter. How do I fix this?
A: This is the #1 challenge with dtr in thread. The fix: standardize your “golden loop” height. After the 3rd yarn-over pull-through (when you have 4 loops on hook), pause. Gently pull the working thread until the loop on your hook matches the height of your thumbnail (approx. ¼″). Complete the stitch. Practice 20 dtr in a row until rhythm locks in. Consistency > speed.
Q: The pineapple panels are cupping upward and won’t lie flat against the medallions.
A: You likely worked the fan rows too tightly. Pineapple lace must be blocked individually before joining (see Phase 2 notes). If already joined: steam heavily on WS, pin aggressively to blocking board with panels fanned wide, let dry 24 hrs. For future panels: work ch-3 spaces loosely — insert hook, yo, pull up a loop taller than normal before completing the dc.
Q: How do I join new thread invisibly mid-row on the picot border?
A: Use the standing stitch + invisible join method. At end of old thread: complete last sc, cut yarn leaving 6″, pull through loop. Thread new yarn on needle, insert under both loops of next st, pull through leaving 6″ tail. Insert hook in same st, yo, pull up loop (standing sc), continue. Weave both tails into border stitches later. No knot, no bump.
Q: Can I add beads to the gold medallion centers?
A: Absolutely — 2mm gold-lined seed beads (approx. 72 total, 24 per medallion) can be added on Rnd 6: string all beads onto Color C before starting, then sc, ch 1, slide bead to hook, ch 2, sk 2 dtr, sc in next dtr for beaded picots. Adds ~$8 and 1 hour. Stunning in candlelight.
11. Community Call-to-Action
You’ve crocheted more than a table runner — you’ve woven a quiet rebellion against the disposable. Three daisy medallions, burgundy pineapples reaching toward each other, micro-blossoms guarding the leaves, a picot border that catches the light just so. This piece will witness holiday feasts, homework sessions, late-night tea, and generations of fingers tracing its stitches.
I’d be honored to see your finished runner in the wild. Share it on Instagram with @NailItHome and #NailItHomeDaisyRunner — tag the thread colors you chose, the table it graces, the story it’s already telling. On Pinterest, pin your project photos to your “Heirloom Crochet” board and tag @NailItHome for a repin to our community gallery.
Questions? Stuck on a pineapple row? Want to show off your micro-floral placement? Drop a comment below — I read every one. And if this pattern brought beauty to your hands and home, consider supporting the studio so we can keep drafting patterns that honor the slow, the skilled, the made-to-last.
Happy stitching,
Aurelia Thorne
Master Fiber Artist & Lead Pattern Curator, Nail It Home


