

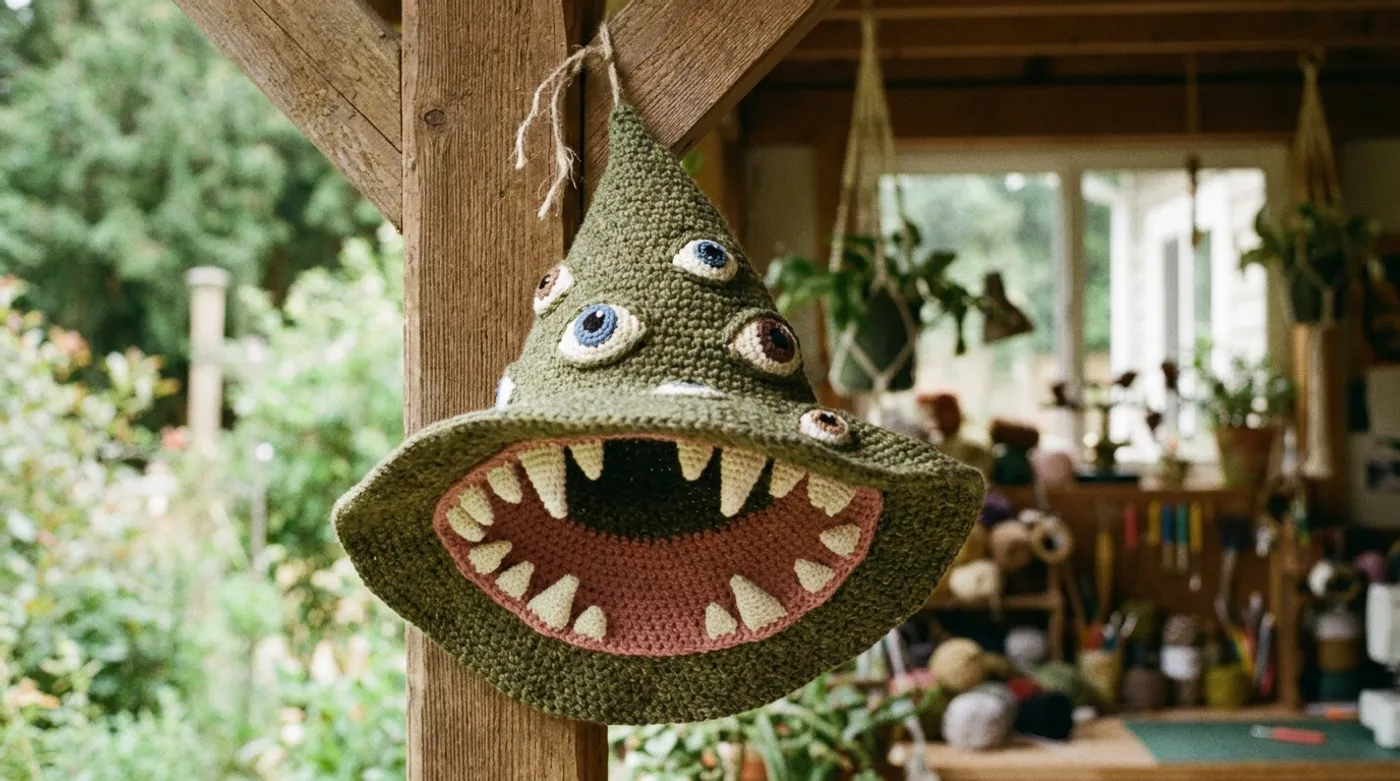
The Mimic Toothy Grin Hat: Free Crochet Pattern & Tutorial
Crochet a whimsical wearable witch hat with a mischievous toothy grin, dusty rose mouth interior, and a constellation of watching eyes. This free pattern includes step-by-step instructions for the pointed crown, floppy brim, 3D fangs, and surface-applied eyes.

Pattern Specifications
1. Introduction & Design Inspiration
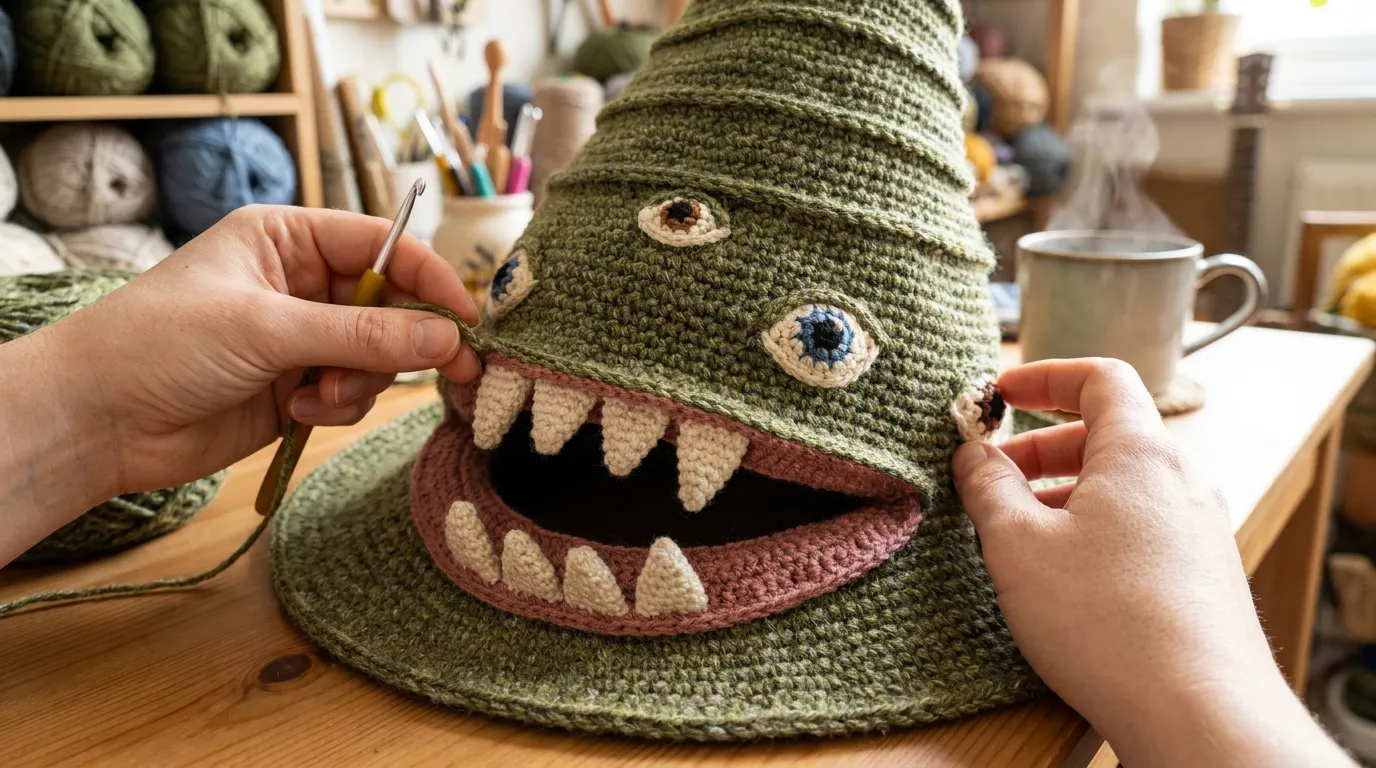
There is a particular delight in making something that watches you back. The Mimic Toothy Grin Hat began as a sketch in my studio journal — a tall, pointed crown that tapers like a classic witch’s hat, but with a wide, floppy brim that decides to speak. The front of the brim lifts upward, forming a cavernous mouth lined with dusty rose and two rows of cream-colored fangs. Across the crown and brim, a constellation of crocheted eyes peers out, each one unique: some with sage irises, others with warm amber, all anchored by tiny black embroidered pupils.
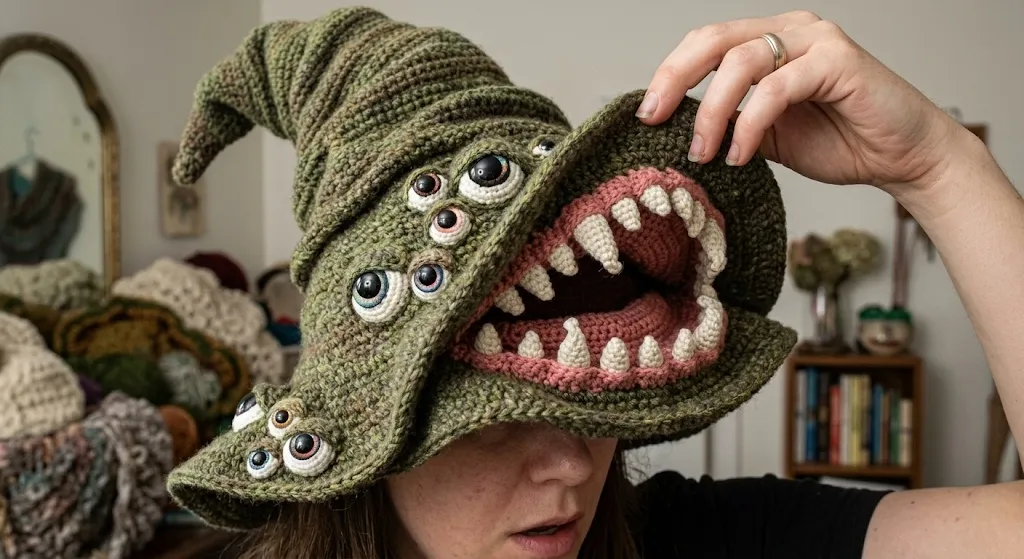
The inspiration draws from folklore mimics — creatures that disguise themselves as ordinary objects — and the playful grotesquerie of medieval marginalia. I wanted a wearable that felt alive, something that straddles the line between cozy accessory and minor character in your daily costume. The heathered moss-olive green yarn, with its forest and sage flecks, evokes lichen on old stone. The matte, slightly fuzzy texture catches light beautifully across the vertical ridges of the crown, while the brim drapes with a soft, obedient weight.
This pattern is written for the adventurous intermediate crocheter. You’ll work the crown in a continuous spiral using back-loop-only single crochet to create those distinctive vertical ridges, then transition to joined rounds for the brim. The mouth opening is shaped with strategic decreases and a dusty rose interior worked in the round. The fangs are tiny 3D cones — essentially miniature amigurumi teeth — and the eyes are flat circles applied with surface slip stitch and embroidery. No lining, no hardware, no seams on the main body. Just yarn, hook, and a willingness to be watched.
2. Pattern Overview & Finished Dimensions
-
Crown Height (tip to brim junction): 35–45 cm (14–18 in), adjustable by adding/reducing crown rounds
-
Brim Span (widest point): 50–60 cm (20–24 in)
-
Brim Depth (from crown junction to outer edge): 18–22 cm (7–9 in)
-
Mouth Opening Width: ~22 cm (8.5 in) at widest point
-
Mouth Opening Height: ~14 cm (5.5 in) from brim edge to top of upper lip
-
Fang Count: 14 total (7 upper, 7 lower), each ~2.5 cm (1 in) tall
-
Eye Count: 9–11 distributed across crown and brim, each ~3 cm (1.25 in) diameter
-
Head Circumference Fit: 54–58 cm (21–23 in) — the brim’s natural drape accommodates a range; add a hidden elastic thread in the final brim round for a snugger fit
-
Construction: Single continuous piece (crown + brim worked top-down), mouth interior worked separately and joined, fangs and eyes made separately and appliquéd
-
Gauge Note: Gauge is not critical for fit but affects yardage and final dimensions. Tighter gauge = sturdier crown, less floppy brim. Looser gauge = taller crown, drapier brim.
3. Materials, Fiber & Hardware Checklist
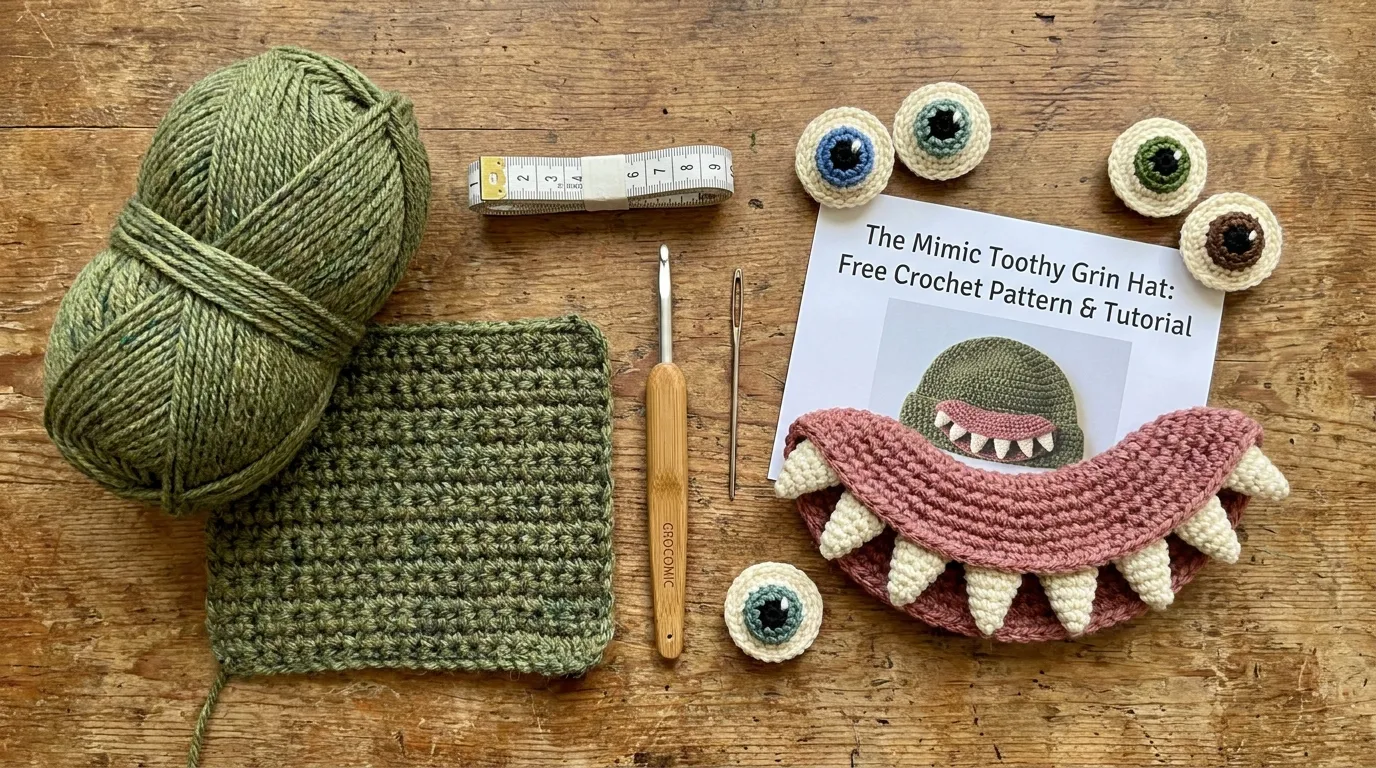
Yarn (all worsted/aran weight, approx. 200 yds / 183 m per 100g skein):
-
Color A (Moss-Olive Green): 320 yds (293 m) — heathered mottled with forest/sage flecks, matte slightly fuzzy texture (e.g., Cascade 220 Heathers #9434 “Olive Heather” or Malabrigo Rios “Frank Ochre” overdyed)
-
Color B (Off-White/Cream): 80 yds (73 m) — for eye sclera and fangs (e.g., Cascade 220 #2201 “Natural”)
-
Color C (Dusty Rose/Coral): 50 yds (46 m) — for mouth interior lining (e.g., Malabrigo Rios “Azalea” or Cascade 220 #2473 “Dusty Rose”)
-
Color D (Tan/Light Brown): 20 yds (18 m) — for iris detailing (e.g., Cascade 220 #2470 “Taupe”)
-
Color E (Black): 10 yds (9 m) — fine embroidery yarn or 4-ply fingering held double for pupils (e.g., DMC Cotton Perlé #5 or embroidery floss 6-strand)
Tools & Notions:
-
5.0 mm (H-8) crochet hook — or size needed to obtain gauge
-
3.5 mm (E-4) crochet hook — for fangs and eyes (tighter gauge for small 3D shapes)
-
Tapestry needle (blunt tip, large eye)
-
Sharp embroidery scissors
-
6–8 locking stitch markers
-
Measuring tape
-
Blocking mats and T-pins (optional, for brim shaping)
-
No hardware, lining fabric, stabilizer, or elastic required (optional: 1/4” clear elastic for brim edge if desired)
4. Stitch Abbreviations (US Terms)
| Abbreviation | Meaning |
|---|---|
| ch | chain |
| sl st | slip stitch |
| sc | single crochet |
| hdc | half double crochet |
| dc | double crochet |
| inc | increase (2 sc in same stitch) |
| dec | invisible decrease (insert hook in FLO of next 2 sts, yo, pull through both, yo, pull through 2) |
| BLO | back loop only |
| FLO | front loop only |
| RS | right side |
| WS | wrong side |
| rnd(s) | round(s) |
| st(s) | stitch(es) |
| rep | repeat |
| […] x N | work instructions in brackets N times |
| ( ) | stitch count at end of round/row |
Special Techniques:
-
Continuous Spiral: Do not join rounds with sl st; use a stitch marker to mark the first stitch of each round, moving it up as you go.
-
Surface Slip Stitch (surf sl st): Insert hook through fabric from RS to WS, yo on WS, pull loop through to RS, pull through loop on hook. Used for iris outlines and pupil placement.
-
Invisible Decrease: Insert hook under FLO of next st, then FLO of following st, yo, pull through both FLOs (2 loops on hook), yo, pull through both loops.
-
3D Cone (Fang): Worked in continuous spiral with rapid increases then straight rounds, stuffed lightly before closing.
5. Architectural Mechanics / Technique Deep-Dive
The Mimic Hat’s architecture relies on three distinct stitch strategies working in concert.
Crown — Vertical Ridges via BLO Spiral:
Working single crochet in the back loop only (BLO) while crocheting in a continuous spiral creates a fabric with pronounced horizontal ribs that, because the work spirals upward, appear as vertical ridges on the finished cone. Each round sits slightly offset from the previous, and the unworked front loops form a visible “ridge line” that catches light. The spiral method eliminates a visible seam — critical for a smooth, conical crown. Increases are distributed evenly (8 per round) to maintain a consistent 45° taper. If you switched to joined rounds, the seam would disrupt the ridge flow; if you worked both loops, the ridges would flatten.
Brim — Drape via Joined Rounds in Both Loops:
The brim transitions to joined rounds worked in both loops. This creates a flatter, more stable fabric with natural drape. The join creates a subtle radial line that actually enhances the “floppy brim” aesthetic — it becomes a structural radius. Increases slow dramatically (4 per round, then 2, then none) to flare the brim outward without ruffling. The final rounds are worked without increases to add weight and encourage the brim to fall under its own gravity.
Mouth — Shaped Opening with Interior Lining:
The mouth is not a simple cut-out. It is shaped during the brim rounds by pausing increases on the front sector, working short-row-style turns to build the upper lip upward, then joining the dusty rose interior as a separate tube that is whipstitched into place. This creates a true 3D maw with depth. The fangs are anchored by stitching their base loops into the upper and lower lip edges — they are not merely surface-applied but structurally integrated.
Eyes & Fangs — Modular Appliqué:
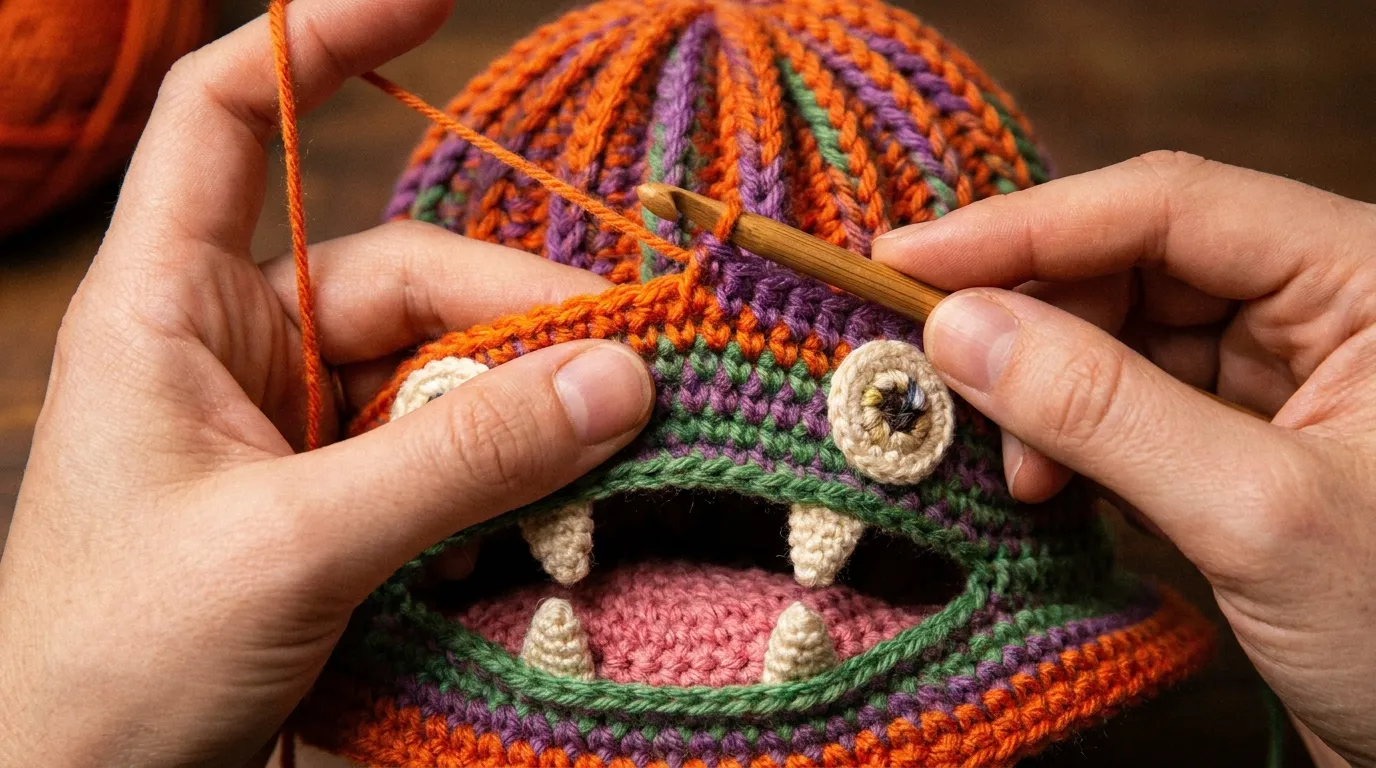
Eyes are flat circles (Color B) with Color D iris rounds and Color E embroidered pupils. They are attached with a combination of whipstitch (perimeter) and surface slip stitch (iris outline), creating a secure but slightly raised profile. Fangs are tiny stuffed cones (Color B, 3.5 mm hook) with a flat base circle that is whipstitched to the lip edges. Their 3D form catches light and shadow, making the grin legible from a distance.
6. Step-by-Step Stitch Instructions
Phase 1: Crown — Continuous Spiral (Color A, 5.0 mm hook)
Place a locking stitch marker in the first stitch of each round and move it up as you work. Do not join rounds.
Rnd 1: Magic ring, 6 sc in ring. (6)
Rnd 2: [inc] x 6. (12)
Rnd 3: [sc, inc] x 6. (18)
Rnd 4: [sc 2, inc] x 6. (24)
Rnd 5: [sc 3, inc] x 6. (30)
Rnd 6: [sc 4, inc] x 6. (36)
Rnd 7: [sc 5, inc] x 6. (42)
Rnd 8: [sc 6, inc] x 6. (48)
Rnd 9: [sc 7, inc] x 6. (54)
Rnd 10: [sc 8, inc] x 6. (60)
Rnds 11–35 (or until crown measures 30–38 cm from tip):
Work even in BLO sc around (60 sts).
Designer’s note: The BLO texture begins to show clearly after Rnd 12. Measure from the tip (center of magic ring) along the ridge line. For a taller, more dramatic point, work up to 45 rounds even. For a shorter crown, stop at Rnd 25.
Transition Round (Rnd 36 or your final crown round):
Switch to working in both loops for this round only: sc in each st around (60). This creates a stable transition row for the brim join. Sl st to first st to join. Ch 1 (does not count as st). Crown complete.
Phase 2: Brim — Joined Rounds (Color A, 5.0 mm hook)
From this point forward, join each round with sl st to first st, ch 1 (does not count), work in both loops unless noted.
Rnd 1 (Brim Base): Sc in each st around (60). Join.
Rnd 2: [sc 14, inc] x 4. (64)
Rnd 3: Sc around (64).
Rnd 4: [sc 15, inc] x 4. (68)
Rnd 5: Sc around (68).
Rnd 6: [sc 16, inc] x 4. (72)
Rnd 7: Sc around (72).
Rnd 8: [sc 17, inc] x 4. (76)
Rnd 9: Sc around (76).
Rnd 10: [sc 18, inc] x 4. (80)
Rnds 11–18: Sc around (80).
These 8 rounds build brim depth. For a wider brim, continue increase pattern: Rnd 19 [sc 19, inc] x 4 (84), Rnd 20 sc around, Rnd 21 [sc 20, inc] x 4 (88), etc., then work 4–6 rounds even.
Mouth Shaping Begins — Front Sector (approx. 22 sts centered at front):
Identify the center-front 22 stitches (mark with contrasting markers). The mouth will occupy this sector. The remaining 58 stitches (back/sides) continue brim increases.
Rnd 19 (Mouth Shaping Row 1):
Back/Sides: Work established increase pattern on the 58 non-mouth sts.
Front (Mouth): Sc in each of the 22 marked sts (no increases).
Join. (Total sts: ~84–88 depending on your increase schedule)
Rnd 20:
Back/Sides: Sc around (with increases per your schedule).
Front: Sc in each of the 22 sts.
Join.
Rnds 21–24: Repeat Rnd 20. The front sector remains 22 sts while the brim flares outward around it, creating a natural “lip” shape.
Rnd 25 (Upper Lip Turn):
Back/Sides: Sc around (with final increases if any).
Front: Ch 1, turn. Working in rows across the 22 front sts only: sc in each st across (22). Turn.
Do not join. You are now working the upper lip in short rows.
Rows 26–32 (Upper Lip — 7 rows):
Ch 1, turn, sc in each st across (22).
After Row 32, do not turn. Sl st into the next unworked brim stitch (side of mouth) to rejoin the round.
Rnd 33 (Rejoin & Lower Lip Setup):
Sc around entire circumference, working 22 sts across the upper lip top edge, then continuing around back/sides. The lower lip will be formed by the dusty rose interior (Phase 3). Join. Fasten off Color A. Brim complete.
Phase 3: Mouth Interior (Color C — Dusty Rose, 5.0 mm hook)
Worked in joined rounds into the upper lip edge and the front brim edge.
Setup: With RS facing, join Color C with sl st to the left corner of the upper lip (where Row 32 ended). Ch 1.
Rnd 1: Sc evenly around the entire mouth opening: 22 sts across upper lip top edge, ~18 sts down right side, 22 sts across lower brim edge (front sector), ~18 sts up left side. Join. (~80 sts)
Adjust stitch count to lie flat; the goal is a smooth oval perimeter.
Rnds 2–6: Sc around (80). Join each round.
This creates a 5-round deep tube — the mouth interior depth.
Rnd 7 (Fang Anchor Row):
Upper Lip: [sc 2, mark next st for fang placement] x 7 (7 marked sts evenly spaced across upper lip). Sc in remaining sts to corner.
Lower Lip: [sc 2, mark next st for fang placement] x 7 (7 marked sts evenly spaced across lower lip). Sc in remaining sts to join.
These marked stitches are where fang bases will be whipstitched.
Rnd 8: Sc around. Join. Fasten off, leaving long tail for whipstitching interior to brim wrong side.
Phase 4: Fangs — 14 Total (Color B — Cream, 3.5 mm hook)
Each fang is a tiny stuffed cone. Make 14.
Rnd 1: Magic ring, 4 sc in ring. (4)
Rnd 2: [inc] x 4. (8)
Rnd 3: [sc, inc] x 4. (12)
Rnd 4: Sc around (12).
Rnd 5: [sc 2, inc] x 4. (16)
Rnds 6–8: Sc around (16).
Rnd 9: [sc 2, dec] x 4. (12)
Rnd 10: [sc, dec] x 4. (8)
Lightly stuff with yarn scraps.
Rnd 11: [dec] x 4. (4)
Fasten off, leaving 12” tail. Thread tail through remaining 4 sts, pull tight, knot. Use remaining tail to whipstitch fang base to marked stitch on mouth interior (7 upper, 7 lower). Arrange upper fangs pointing down, lower fangs pointing up.
Phase 5: Eyes — Make 9–11 (Color B — Cream base, Color D — Tan iris, Color E — Black pupil, 3.5 mm hook)
Each eye: 3-piece construction (sclera circle + iris round + embroidered pupil).
Sclera (Color B):
Rnd 1: Magic ring, 6 sc. (6)
Rnd 2: [inc] x 6. (12)
Rnd 3: [sc, inc] x 6. (18)
Rnd 4: [sc 2, inc] x 6. (24)
Sl st to next st, fasten off, leaving 12” tail for attachment.
Iris (Color D — worked directly onto sclera RS):
Join Color D with sl st to any st on Rnd 3 of sclera (the 18-st round). Ch 1.
Rnd 1: Sc in each st around (18). Join with sl st to first sc. Fasten off, leaving tail for securing.
Pupil (Color E — embroidery):
Using tapestry needle and Color E (held double if using embroidery floss), embroider a 4-stitch wide satin stitch pupil in the center of the iris. Add a single straight stitch highlight in off-white if desired.
Eye Assembly & Placement:
Arrange eyes on hat crown and brim (RS) in an asymmetrical constellation: 3–4 on crown, 5–7 on brim (avoiding mouth area). Whipstitch sclera perimeter to hat fabric. Surface slip stitch around iris edge with Color D to secure iris and add definition. Weave in all ends on WS.
7. Assembly, Mounting & Structural Integration
Mouth Interior Attachment:
Turn hat to WS. Align the Color C mouth tube so its upper edge sits just behind the upper lip (Color A) and its lower edge sits behind the lower brim edge. Using the long tail from Rnd 8, whipstitch the mouth tube to the WS of the brim/fabric, stitching through the back loops of the mouth tube and the corresponding WS loops of the hat. Work carefully around the fang anchor points — the fang bases are already whipstitched to the marked stitches on the mouth tube RS; ensure they align with the lip edges. Knot and bury tail.
Fang Final Secure:
Check each fang from RS. If any wobble, add a few stabilizing stitches through the fang base into the lip fabric. The fangs should stand proud at a slight angle (upper fangs angled down/out, lower fangs angled up/out).
Eye Final Secure:
Verify all eyes are firmly attached. The combination of perimeter whipstitch + iris surface slip stitch creates a durable mount that withstands wear. No glue needed.
Optional Elastic for Fit:
If the brim feels too loose, thread 1/4” clear elastic through the final brim round (work a casing by sc in FLO of final round, then thread elastic, overlap ends 1”, zigzag stitch, close casing). This is invisible from RS and adds security for active wear.
8. Hardware, Accents & Embellishment Assembly
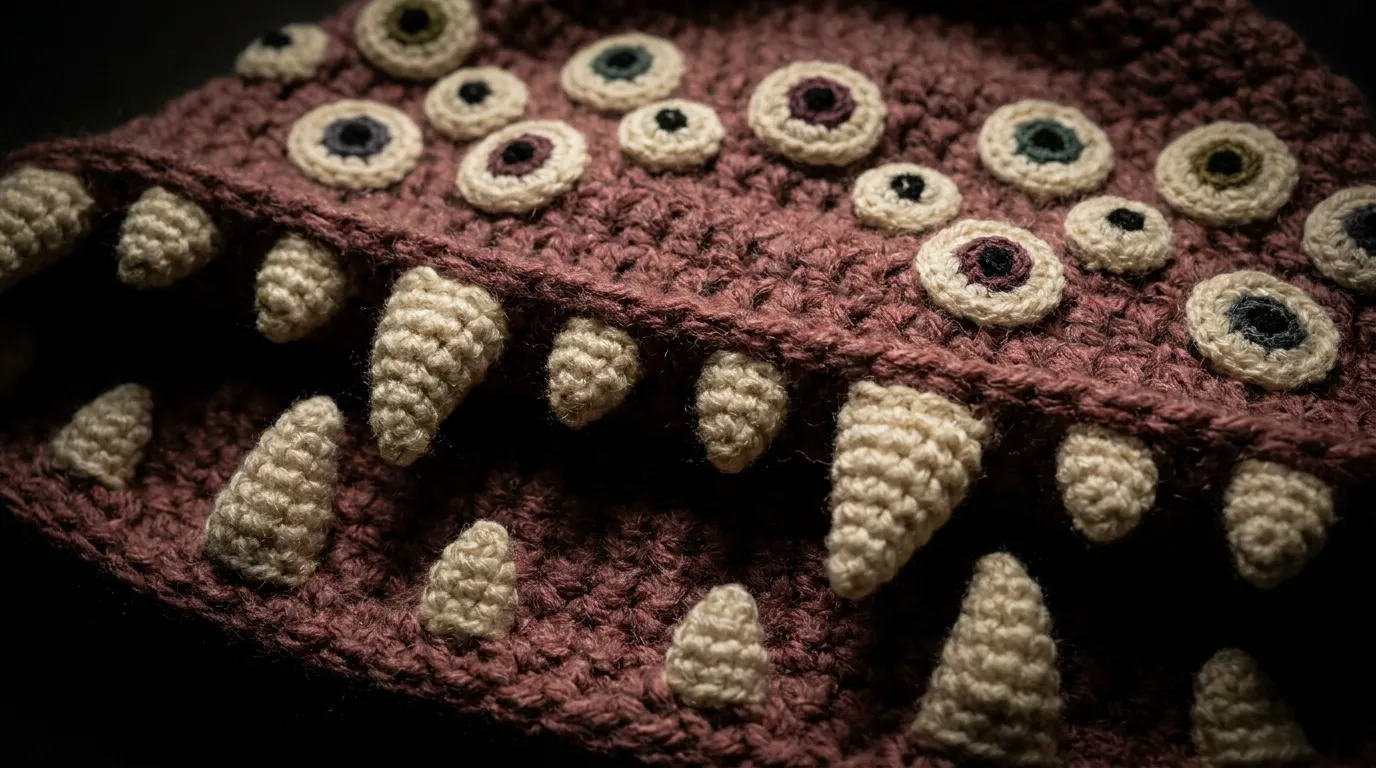
This piece requires no hardware — no D-rings, chains, clasps, snaps, or buttons. The embellishments are the structure: the fangs, the eyes, the mouth interior.
Final Embellishment Check:
- All 14 fangs secured, evenly spaced, tips pointing correctly
- All eyes attached with dual-method (whipstitch + surface sl st)
- No loose yarn ends visible on RS
- Mouth interior smoothly anchored, no puckering
- Crown tip firm and pointed (add a tiny bit of stuffing in the tip if it flops)
9. Blocking, Care & Maintenance
Blocking (Recommended for Brim Drape):
Wet-block the finished hat. Submerge in cool water with wool wash (e.g., Soak or Eucalan) for 15 minutes. Gently squeeze — do not wring. Roll in towel to remove excess water. Lay flat on blocking mats. Pin the crown tip to maintain point. Pin the brim edge in a gentle wave pattern to encourage the floppy drape. Pay special attention to the mouth opening — pin it open in its oval shape. Allow to dry completely (24–48 hours).
Washing:
Hand wash only in cool water with wool wash. Press water out; do not wring. Reshape crown point and mouth opening while damp. Dry flat.
Storage:
Store flat or crown-down on a shelf. Do not hang — the brim will stretch. If storing long-term, stuff crown lightly with acid-free tissue to maintain cone shape. Keep away from direct sunlight (prevents fading of heathered tones).
Mending Notes:
- Loose fang: Re-whipstitch base with matching cream yarn.
- Eye detachment: Re-whipstitch perimeter; re-do surface sl st iris outline.
- Crown ridge distortion: Re-block with steam iron (hover, don’t press) on wool setting.
- Mouth interior wear: The dusty rose tube can be carefully snipped and replaced if needed — it is only whipstitched in.
10. Frequently Asked Questions (FAQ)
Q: Can I use a different yarn weight?
A: Yes, but dimensions will shift. For DK (3), use 3.5–4.0 mm hook and expect a ~25% smaller hat; add crown rounds for height. For Bulky (5), use 6.5–7.0 mm hook for a larger, quicker make — but the fangs and eyes will need scaling up (use 5.0 mm hook for those). The moss-olive heathered texture is key to the aesthetic; a solid color loses the “lichen on stone” depth.
Q: My crown ridges aren’t vertical — they spiral.
A: That’s the nature of a continuous spiral! The ridges are a spiral, but because the cone tapers, they read as vertical on the finished piece. If you want perfectly vertical ridges, you’d need to work in joined rounds with a seam — but the seam would be visible. The spiral method is intentional for a seamless crown.
Q: The mouth interior puckers when I attach it.
A: Your stitch count on the mouth perimeter (Rnd 1 of Phase 3) is too high or low for the opening. Unpick and adjust: the upper lip has 22 sts, the lower brim edge has 22 sts, each side needs ~16–18 sts. Distribute evenly. Pin first, then stitch.
Q: How do I make the hat fit a child / larger adult?
A: The brim circumference is determined by the final brim round stitch count. For child (50–52 cm head): stop brim increases at Rnd 8 (76 sts) and work 6 rounds even. For large adult (60+ cm): continue increase pattern to 92–96 sts, then work 8 rounds even. The mouth sector (22 sts) stays constant; only the back/sides scale.
Q: Can I skip the eyes / fangs for a simpler version?
A: Absolutely. The hat is charming as a plain moss-olive witch hat with just the mouth opening (no fangs, no eyes). Work Phases 1–3 only. The dusty rose interior alone gives a sweet “surprise” flash of color.
11. Community Call-to-Action
You’ve crocheted a hat that grins back. That’s no small feat — you’ve shaped a crown with spiraling ridges, coaxed a brim into floppy obedience, built a 3D mouth with a dusty rose throat, and populated the whole thing with a watchful chorus of hand-stitched eyes. That is fiber sculpture as wearable mischief.
Now I want to see yours.
Share your Mimic on Instagram with @NailItHome and #MimicToothyGrinHat — tag the yarn you used, show us your fang arrangement, tell us if your eyes are judging your yarn stash.
Pin your project on Pinterest to the “Crochet Wearables” or “Whimsical Hat Patterns” boards.
Leave a comment below with your modifications: a shorter crown? More eyes? Glow-in-the-dark pupils? (I see you, and I love it.)
Every maker’s Mimic develops its own personality. I can’t wait to meet them.
Pattern © 2026 Aurelia Thorne / Nail It Home. Free for personal use. Do not reproduce or sell the pattern. Finished items may be sold in small quantities with credit: “Pattern by Aurelia Thorne @ Nail It Home.”


