

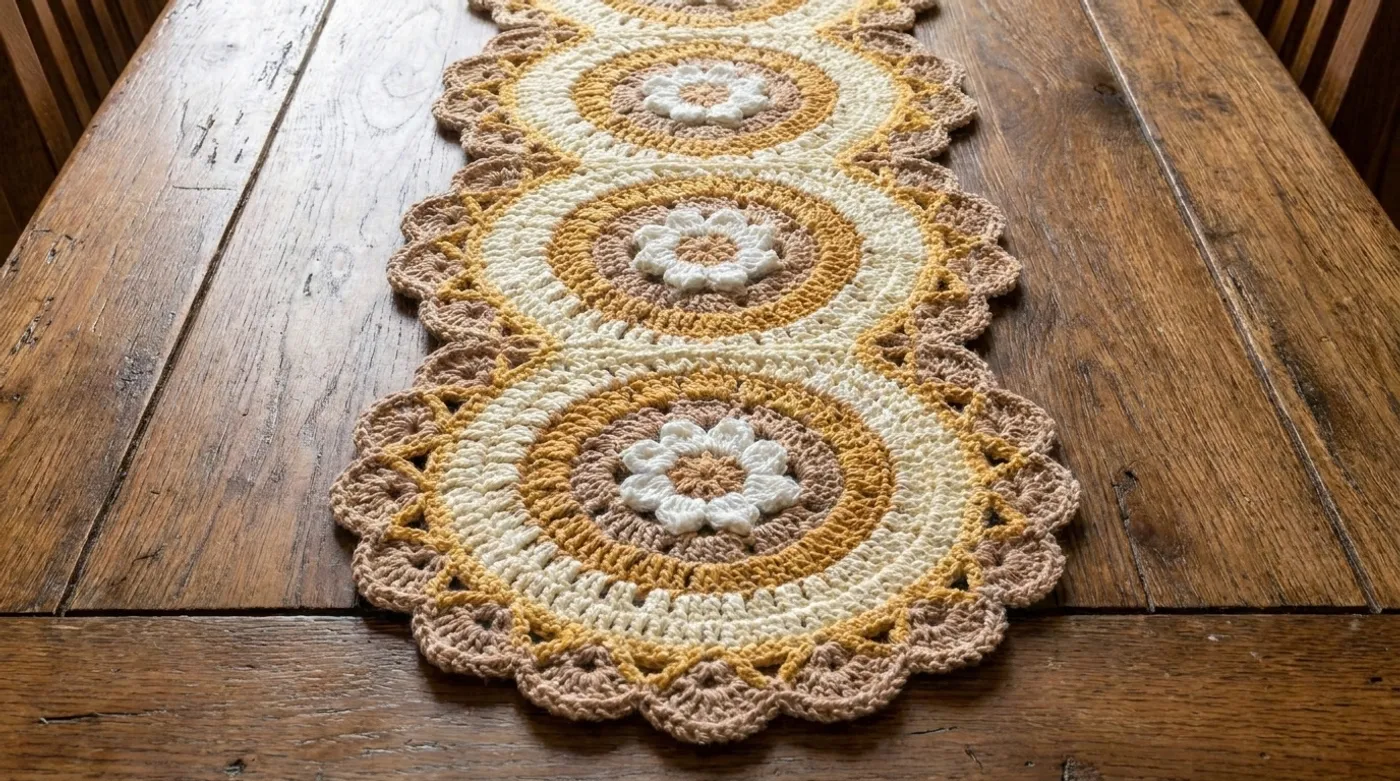
Sunflower Granny Medallion Tablerunner: Free Crochet Pattern & Tutorial
A stunning 68-inch table runner featuring seven 3D popcorn sunflower medallions in mercerized DK cotton, joined with a delicate scalloped taupe border. Perfect for rustic farmhouse charm.

Pattern Specifications
1. Introduction & Design Inspiration
Inspired by late-summer sunflower fields stretching along country lanes, this runner captures the golden hour glow in seven hand-crafted medallions. Each blossom begins with a raised off-white popcorn center—reminiscent of pollen-dusted florets—then radiates through concentric rings of chestnut brown, golden ochre, and soft cream, echoing the natural gradient of a sunflower’s face. The mushroom taupe scalloped border adds a vintage linen feel, while the join-as-you-go construction ensures a seamless, heirloom-quality piece that drapes beautifully over a honey-oak table.
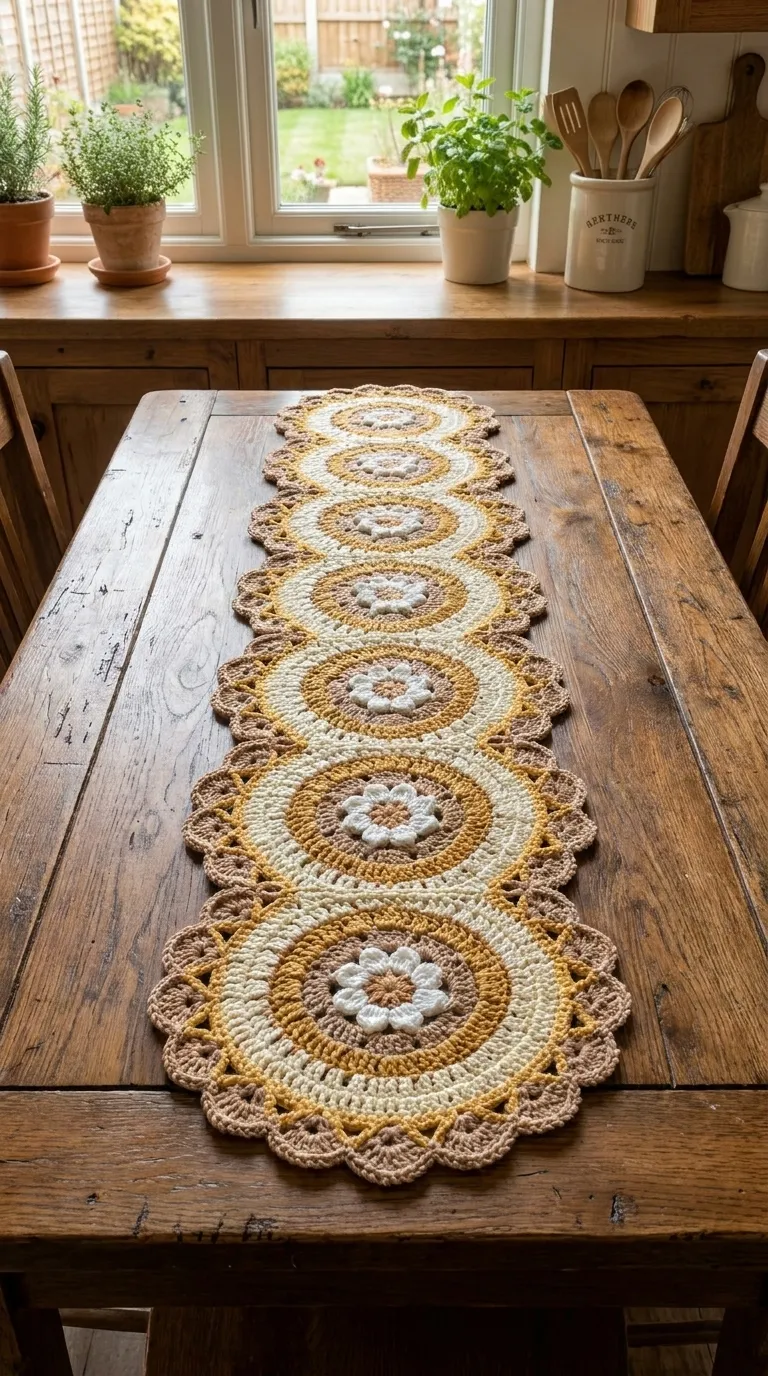
The palette balances warm golds with neutral taupe for versatile styling. Mercerized cotton gives a subtle satin sheen and excellent stitch definition for the 3D popcorns and front-post ridges. The runner has a firm, structured drape that holds its scalloped edge after wet blocking. Adjust length by adding or removing medallions (each adds ~8.5 inches joined).
Completed Make Showcase Gallery
Examine the finished handcrafted piece from every vantage point before picking up your hook—from overall symmetry to textural stitch relief and organic drape.
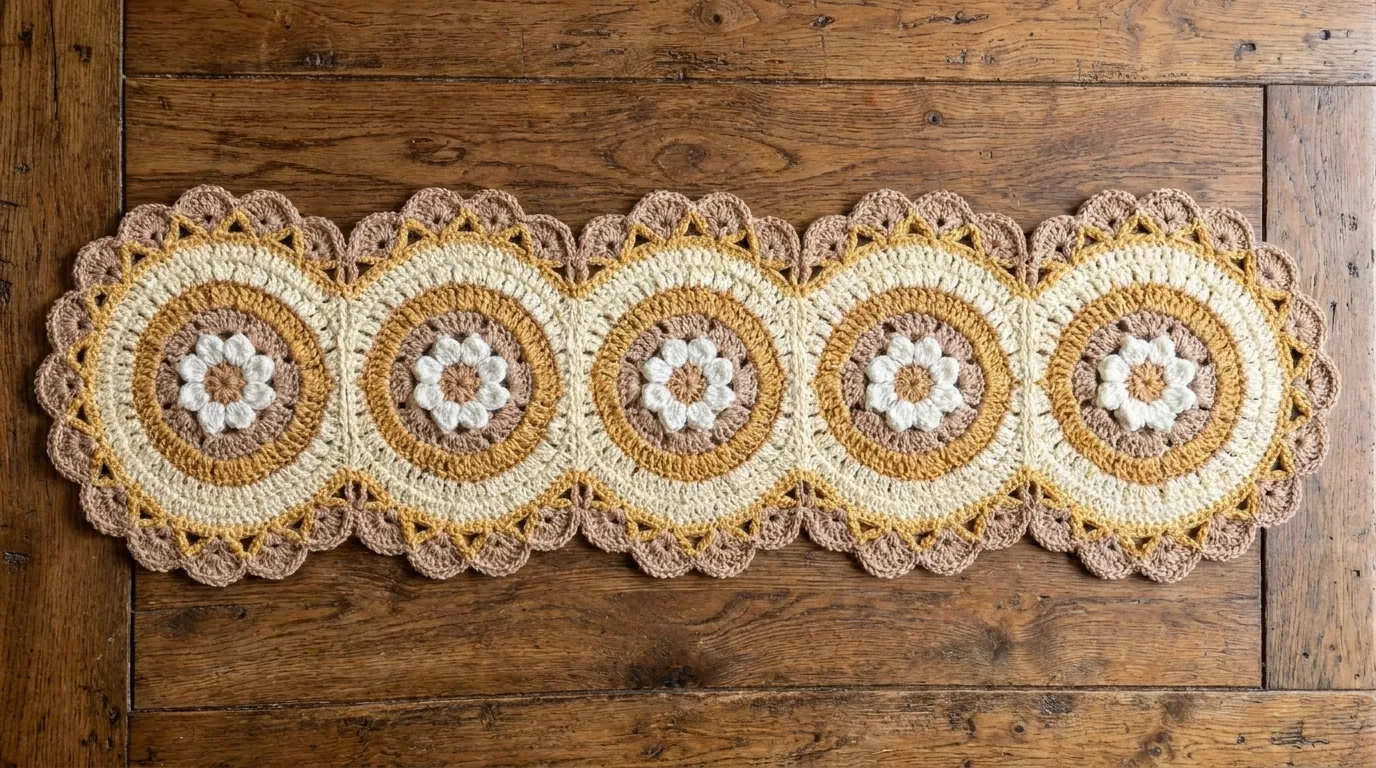
Full silhouette & geometric balance
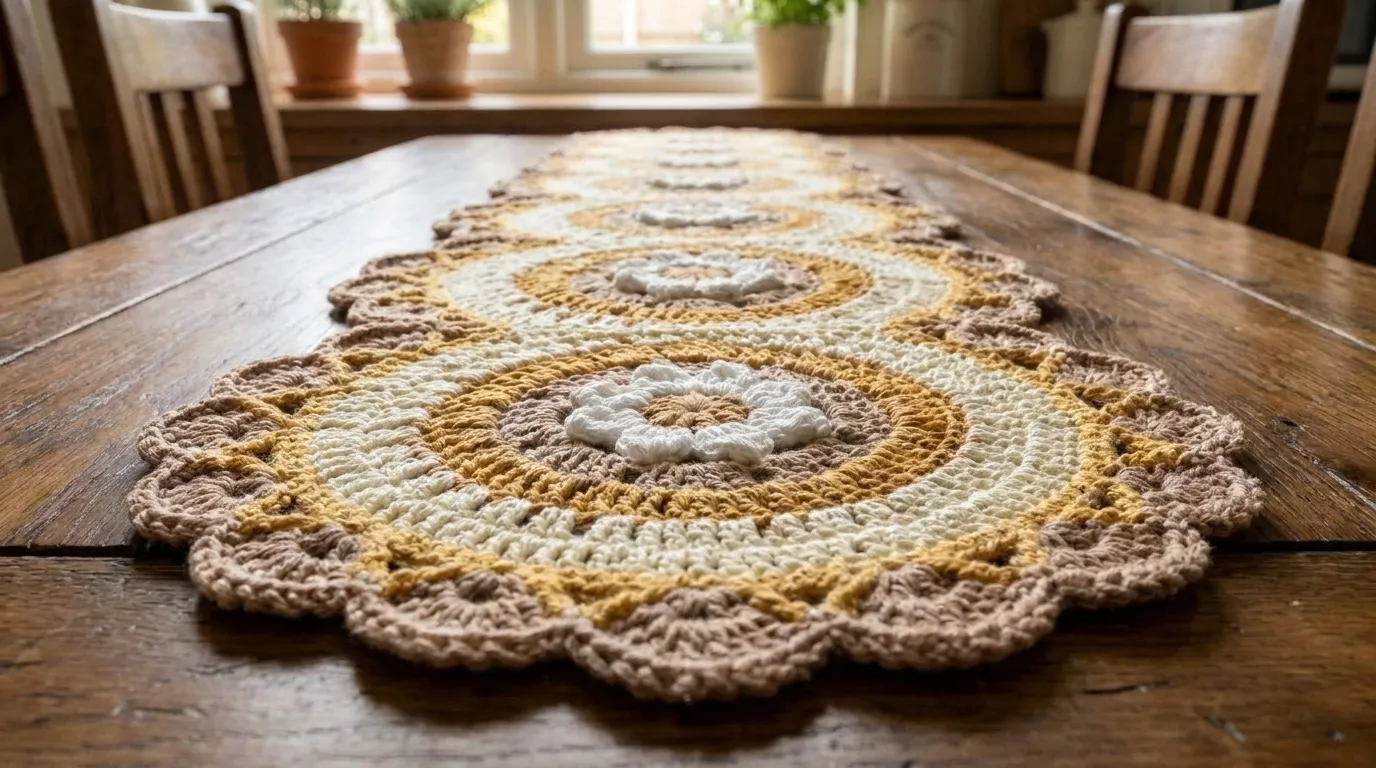
Tactile stitch relief & ribbing depth
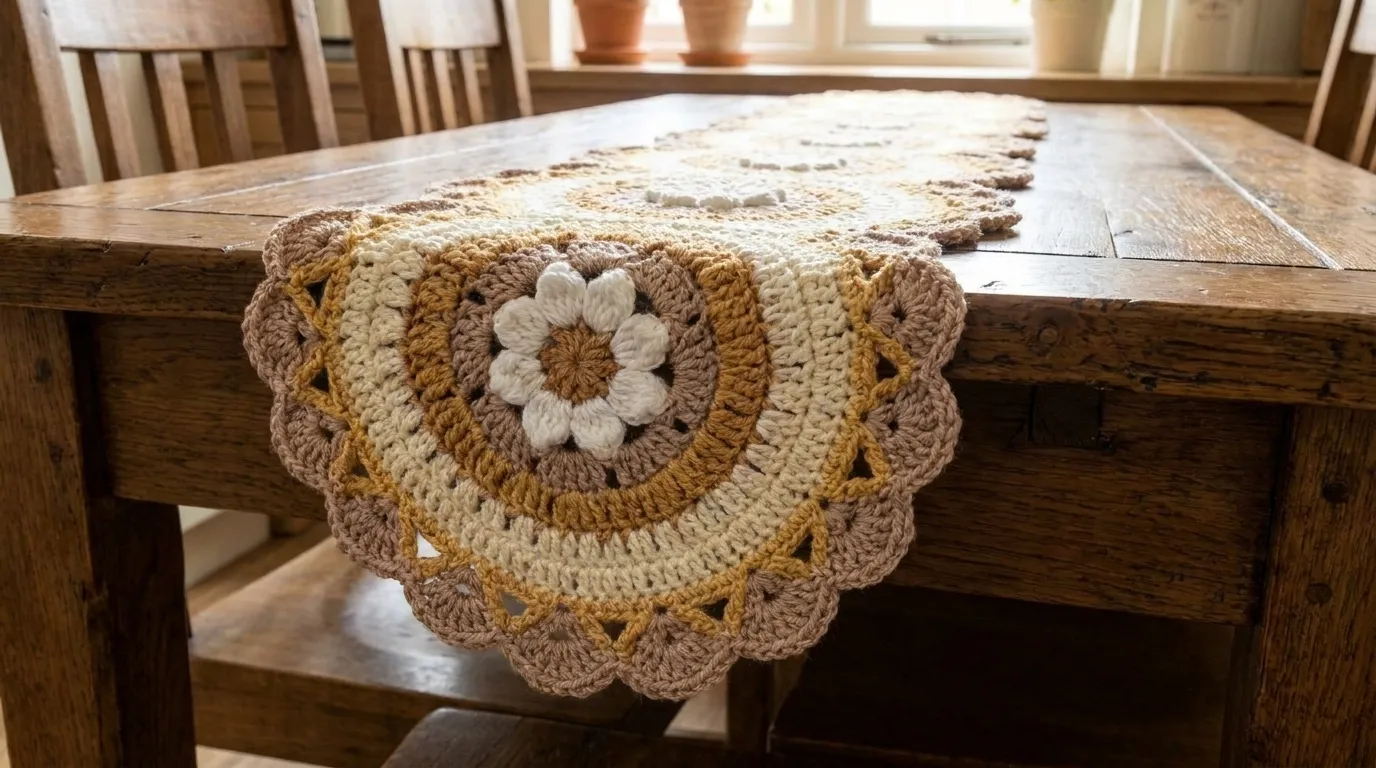
Scalloped edging & natural fall
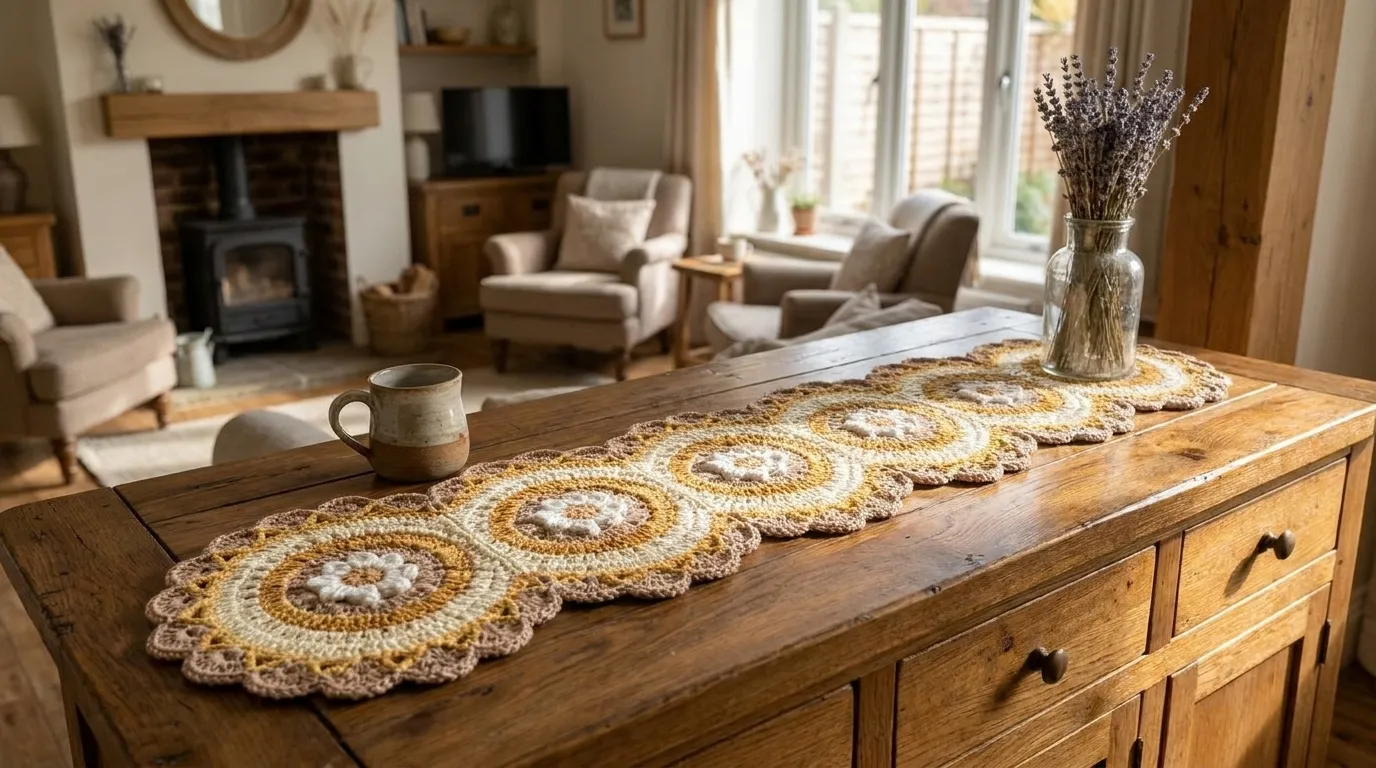
Living space ambient styling
2. Pattern Overview & Finished Dimensions
Silhouette & Architecture: Linear arrangement of seven circular medallions (8” diameter each) joined at their sides with slip-stitch connectors, creating a continuous runner with gentle undulating edges. The outer border adds 1.5” to width at scallop peaks.
Drape & Texture: Medium-firm fabric with slight stiffness from front-post ridges; softens after washing. Lies flat with minimal curling. Scalloped border adds delicate flexibility at edges.
Maker Adaptation Tip: For a shorter runner, work fewer medallions (each medallion + connector = 8.5” length). For wider runner, add an extra round of dc to each medallion before joining. Change color sequence for seasonal variations (e.g., rust/orange/cream for autumn).
3. Materials, Fiber & Tools Checklist
Yarns & Palette Requirements:
100% mercerized combed cotton; used for Rounds 1-2 of each medallion
100% mercerized combed cotton; used for Rounds 3-4 of each medallion
100% mercerized combed cotton; used for Rounds 5-6 of each medallion
100% mercerized combed cotton; used for Round 7 of each medallion
100% mercerized combed cotton; used for all joining rounds, perimeter setup, and scalloped shell border
Hook & Essential Notions:
- Crochet Hook: 4.0 mm (G-6) (or size needed to meet gauge)
4. Standard Crochet Abbreviations (US Terms)
This pattern follows standard Craft Yarn Council (CYC) US crochet terminology. Refer to this quick-reference visual dictionary as you work through each round:
5. Architectural Mechanics & Special Stitches
Each medallion is worked in concentric rounds from center outward. The 3D popcorn petals (Round 2) are anchored into the front loops of Round 1, creating a raised floral core. Front-post double crochet (FPdc) rounds (Rounds 4 & 6) form tactile ridges that catch light and add structural stability. Medallions are joined as-you-go during Round 7 (Soft Cream) using slip stitches into corresponding stitches of the previous medallion’s Round 7, eliminating seaming. The final mushroom taupe border consists of a setup round of sc around the entire runner perimeter, followed by a 7-dc scalloped fan shell round with picot tips for a delicate undulating edge.
Special Stitches for This Project:
[Yarn over, insert hook in indicated stitch, yarn over, pull up loop, yarn over, pull through 2 loops] 3 times in same stitch (4 loops on hook), yarn over, pull through all 4 loops. Ch 1 to close popcorn.
Yarn over, insert hook from front to back to front around the post of the indicated stitch, yarn over, pull up loop, (yarn over, pull through 2 loops) twice.
With slip knot on hook, yarn over, insert hook in indicated stitch/space, yarn over, pull up loop, (yarn over, pull through 2 loops) twice. Used to start a round without a turning chain.
At designated join point, drop loop from hook, insert hook into corresponding stitch of completed medallion, pick up dropped loop, pull through both loops on hook. Continues round seamlessly.
Ch 3, insert hook into 3rd chain from hook (the first chain made), yarn over, pull through all loops.
Skip 2 sc, [7 dc in next sc, picot in top of 4th dc of shell, skip 2 sc, sl st in next sc] repeat around.
6. Step-by-Step Pattern Instructions
Follow each round card in sequence. Click or tap any row card once you complete it to check it off and automatically track your progress across the 5 Pattern Checkpoints!
Phase 1: First Medallion – Center to Outer Ridge
Complete the first sunflower medallion through Round 7 (Soft Cream), establishing the template for all seven medallions.With Off-White, make a magic ring. Ch 2 (counts as first dc), 11 dc into ring. Join with sl st to top of beginning ch-2. Pull ring tight. — 12 dc
💡 NB: Mark the first dc of each round with a stitch marker to track rounds.
Ch 1 (does not count as st). *Pc in next dc (working in front loop only), ch 1, skip next dc; repeat from * around. Join with sl st to top of first pc. — 6 popcorns, 6 ch-1 spaces
💡 NB: Work popcorns tightly; the ch-1 after each pc creates the petal separation.
Info:
Round 2 creates the 3D flower center. The popcorns are worked in the front loops only of Round 1, leaving the back loops free for Round 3.
Join Chestnut Brown with standing dc in any back loop of Round 1 (the loops left free behind the popcorns). Dc in each back loop around. Join with sl st to standing dc. — 12 dc
💡 NB: Ensure you work into the back loops only; this raises the popcorns further.
Ch 2 (counts as first FPdc). *FPdc around next dc, dc in next dc; repeat from * around. Join with sl st to top of beginning ch-2. — 12 FPdc, 12 dc
💡 NB: The FPdc rounds create the concentric ridges. Keep tension even to avoid puckering.
Join Golden Ochre with standing dc in any dc of previous round. *2 dc in next dc (increase), dc in next 2 sts; repeat from * around. Join with sl st. — 32 dc
💡 NB: Increase round expands the medallion to ~4.5” diameter.
Ch 2 (counts as first FPdc). *FPdc around next dc, dc in next 3 sts; repeat from * around. Join with sl st. — 8 FPdc, 24 dc
💡 NB: Second ridge adds texture and stability.
Join Soft Cream with standing dc in any dc. *Dc in next 3 sts, 2 dc in next st (increase); repeat from * around. Join with sl st. — 40 dc. Fasten off Off-White, Chestnut, Golden Ochre. Do not fasten off Soft Cream if joining next medallion immediately; otherwise fasten off and leave 12” tail for later joining.
💡 NB: This round has 40 dc. For the first medallion, complete the round and fasten off. For subsequent medallions, you will join during this round (see Phase 2).
Phase 2: Medallions 2–7 – Join-As-You-Go
Create six additional medallions, joining each to the previous one during Round 7 to form a continuous line of seven medallions.Repeat Rounds 1–6 exactly as in Phase 1 for each new medallion, changing colors as specified. Fasten off each color after its round. Keep Soft Cream attached for Round 7 joining.
💡 NB: Work all six medallions through Round 6 before starting Round 7 joins to maintain consistent tension.
Info: Join-As-You-Go Method
During Round 7 of each new medallion, you will replace 4 dc along one side with JAYG slip stitches into the corresponding 4 dc of the previous medallion’s Round 7. This creates a flat, seamless connection. Each join spans 4 dc (approx 1.5”).
Join Soft Cream with standing dc in any dc of Medallion 2. Work 18 dc (halfway around). *At join point: JAYG sl st into next dc of Medallion 1’s Round 7, dc in next dc of Medallion 2; repeat from * 3 more times (total 4 JAYG joins). Complete remaining 18 dc of Medallion 2. Join with sl st to standing dc. — 40 dc (including 4 JAYG sl sts)
💡 NB: Align medallions so the popcorn centers are in a straight line. Use stitch markers to mark the 4 join stitches on Medallion 1.
Repeat Medallion 2 Round 7 joining to the previous medallion each time. After Medallion 7, fasten off Soft Cream. You now have a line of 7 joined medallions measuring ~68” end-to-end.
💡 NB: Check alignment after each join; adjust tension if the line curves.
Phase 3: Perimeter Setup Round – Mushroom Taupe
Work a continuous single crochet round around the entire outer edge of the joined medallions to prepare for the scalloped border.Join Mushroom Taupe with standing sc at any point on the outer edge of Medallion 1 (at a join point between medallions). Sc evenly around the entire perimeter of the 7-medallion piece, working 3 sc in each outer corner dc of the end medallions, and 2 sc in each join gap between medallions. Join with sl st to first sc. — Approx 520 sc
💡 NB: Distribute stitches evenly: aim for ~3.5 sc per inch. Use stitch markers every 50 sc to keep count. The exact count may vary slightly with tension; consistency matters more than exact number.
Info: Perimeter Stitch Distribution
Each medallion contributes ~60 sc along its outer curve (half circumference). 7 medallions x 60 = 420 sc. Two end caps: 3 sc in each of 4 corner dcs = 12 sc. Six join gaps: 2 sc each = 12 sc. Total ~444 sc. Additional sc worked along straight edges between medallions (top/bottom) to smooth the line: ~76 sc. Final count ~520 sc.
Phase 4: Scalloped Shell Border – Mushroom Taupe
Create the delicate 7-dc fan shell border with picot tips around the entire runner.Ch 1 (does not count as st). *Skip 2 sc, 7 dc in next sc, picot in 4th dc of shell, skip 2 sc, sl st in next sc; repeat from * around entire perimeter. Join with sl st to first sl st. Fasten off, leaving 12” tail for weaving.
💡 NB: The skip-2, shell, skip-2, sl st pattern consumes 6 sc per shell. 520 sc / 6 ≈ 86 shells, but the corners and joins adjust the count. Work the pattern as written; the last few shells may need slight adjustment (skip 1 or 3) to meet evenly.
Info: Corner & Join Adjustments
At the two end medallions, the 3-sc corners become the center of a shell. At the six join gaps, the 2-sc gaps may be worked as: skip 1, shell in next, skip 1, sl st in next. This maintains the scallop rhythm.
Phase 5: Finishing, Blocking & Care
Weave in all ends, wet block to final dimensions, and prepare for use.Using tapestry needle, weave in all yarn tails on the wrong side, following stitch paths for at least 3 inches. Trim excess.
💡 NB: Weave popcorn tails into the back of the popcorn stitches for invisibility.
Submerge runner in cool water with mild wool wash for 15 minutes. Gently squeeze out water (do not wring). Roll in towel to remove excess moisture. Lay flat on blocking mats, pin to 68” x 15” dimensions, stretching scallops gently to open fans. Pin every 2 inches along edges and at each shell tip. Allow to dry completely (24–48 hours).
💡 NB: Use T-pins at an angle to avoid splitting yarn. Check measurements after 2 hours and adjust if needed.
Remove pins. Lightly steam press if desired (low heat, pressing cloth). The runner is now ready for your table.
💡 NB: Store flat or rolled to preserve scallop shape.
7. Assembly, Mounting & Structural Integration
After weaving in all ends, wet block the runner by soaking in cool water with gentle detergent for 15 minutes. Remove excess water by pressing in a towel. Pin to blocking mats at 68” length x 15” width, opening each scallop fan fully with pins at the picot tips. Allow to air dry completely (24–48 hours) before unpinning. This sets the 3D popcorns, defines the front-post ridges, and ensures the scalloped border holds its graceful wave.
8. Accents, Hardware & Finishing Details
Inspect all outer margins, secure tails with a blunt tapestry needle through dense stitch posts on the Wrong Side, and steam press gently to lock fiber memory.
9. Common Mistakes & How to Fix Them
Even seasoned makers run into tension hiccups or stitch drift. Here are the top troubleshooting solutions for this design:
Working the popcorn in both loops of Round 1 instead of front loop only, or not pulling the closing ch-1 tight enough.
Inconsistent tension on JAYG joins, or joining at mismatched stitch counts causing one side to pull tighter.
Incorrect stitch count in the setup round (too many or too few sc) causing the shell repeat (6 sc per shell) to not fit evenly.
Hook inserted around the wrong part of the stitch post, or yarn over not completed before pulling through.
10. Blocking, Care & Maintenance
After weaving in all ends, wet block the runner by soaking in cool water with gentle detergent for 15 minutes. Remove excess water by pressing in a towel. Pin to blocking mats at 68” length x 15” width, opening each scallop fan fully with pins at the picot tips. Allow to air dry completely (24–48 hours) before unpinning. This sets the 3D popcorns, defines the front-post ridges, and ensures the scalloped border holds its graceful wave.
Care & Longevity Guidelines:
11. Frequently Asked Questions (FAQ)
Can I use worsted weight yarn instead of DK?
Yes, but the finished runner will be larger (approx 85” long x 19” wide) and require more yarn (~850 yds). Use a 5.0 mm (H-8) hook and check gauge. The popcorn petals will be more pronounced. Adjust border stitch count accordingly.
How do I make the runner shorter or longer?
Each medallion + join adds ~8.5” to the length. For a shorter runner, work fewer medallions (e.g., 5 medallions = ~48”). For longer, add more medallions (each requires ~50 yds of each main color + 15 yds taupe). The border setup round stitch count will change proportionally.
My popcorns are not popping—what am I doing wrong?
Three common issues: 1) Not working in front loops only of Round 1. 2) Closing ch-1 too loose—pull it tight after the popcorn. 3) Yarn too slippery or loosely spun; mercerized cotton gives the best pop. Practice on a swatch: 12 dc in ring, then 6 popcorns in front loops only.
Can I join the medallions after they’re all finished instead of join-as-you-go?
Yes. Complete all 7 medallions through Round 7 (Soft Cream) without joining. Then, with Mushroom Taupe, hold two medallions wrong sides together and slip stitch through both layers along 4 stitches per join. This creates a slight ridge on the back but is easier for beginners. The front looks identical.
How do I keep the scalloped border from flaring?
The setup round (sc) must have the correct stitch count. If your border flares, you have too many sc; if it pulls, too few. Aim for ~3.5 sc per inch of perimeter. After the setup round, measure the perimeter in inches, multiply by 3.5, and adjust your sc count by evenly adding/removing stitches before starting the shell round.
12. Community & Maker Showcase
✨ Share Your Handcrafted Make
May your stitches bloom like sunflowers in morning light. Share your finished runner with #NailItHomeSunflower and tag @AureliaThorneCrochet—I’d love to see your golden fields grace your table. Happy hooking, Aurelia
Pattern © 2026 Nail It Home / Aurelia Thorne. For personal maker use only. Do not reproduce, redistribute, or resell without written permission.


