

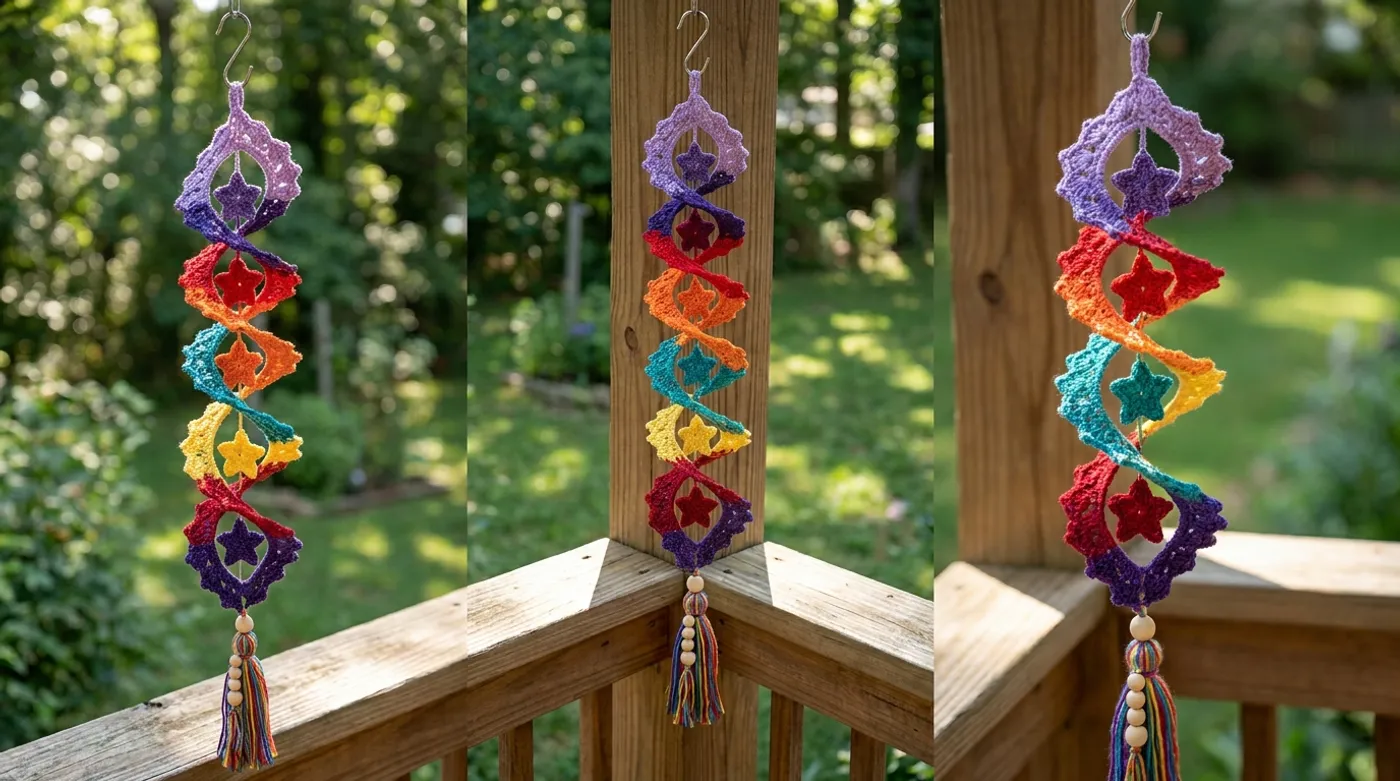
Rainbow Star Kinetic Spiral
The piece is a vertical, helical column of crocheted cotton yarn, each turn formed by a 5‑dc shell that spirals upward, displaying a seamless rainbow gradient from lavender‑purple at the top through indigo, scarlet, orange, teal, yellow, ruby red, to deep violet at the base. I...

Pattern Specifications
Introduction & Design Inspiration
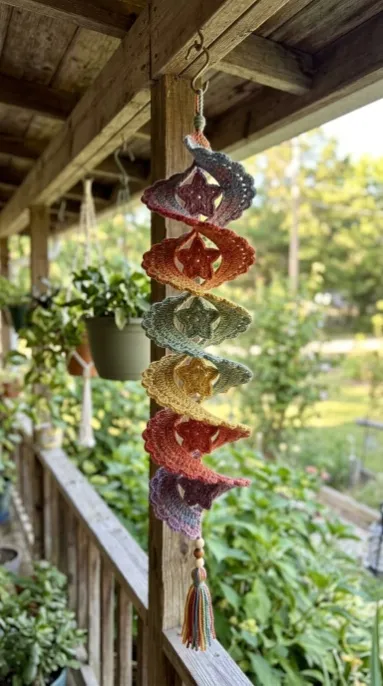
There is a particular magic in watching color travel through three-dimensional space. The Rainbow Star Kinetic Spiral was born from a desire to capture that magic — to let a rainbow not merely arc across a flat surface, but to climb, to twist, to breathe in helical motion. Imagine a vertical column of light, each turn a perfect 5-double-crochet shell, offset just enough from the last to create a continuous, graceful spiral that rises 12 to 14 inches into the air. The palette flows without interruption: lavender-purple at the crown, melting through indigo, scarlet, orange, teal, yellow, ruby red, and finally settling into deep violet at the base. Eight complete turns. Eight distinct hues. Zero visible joins.
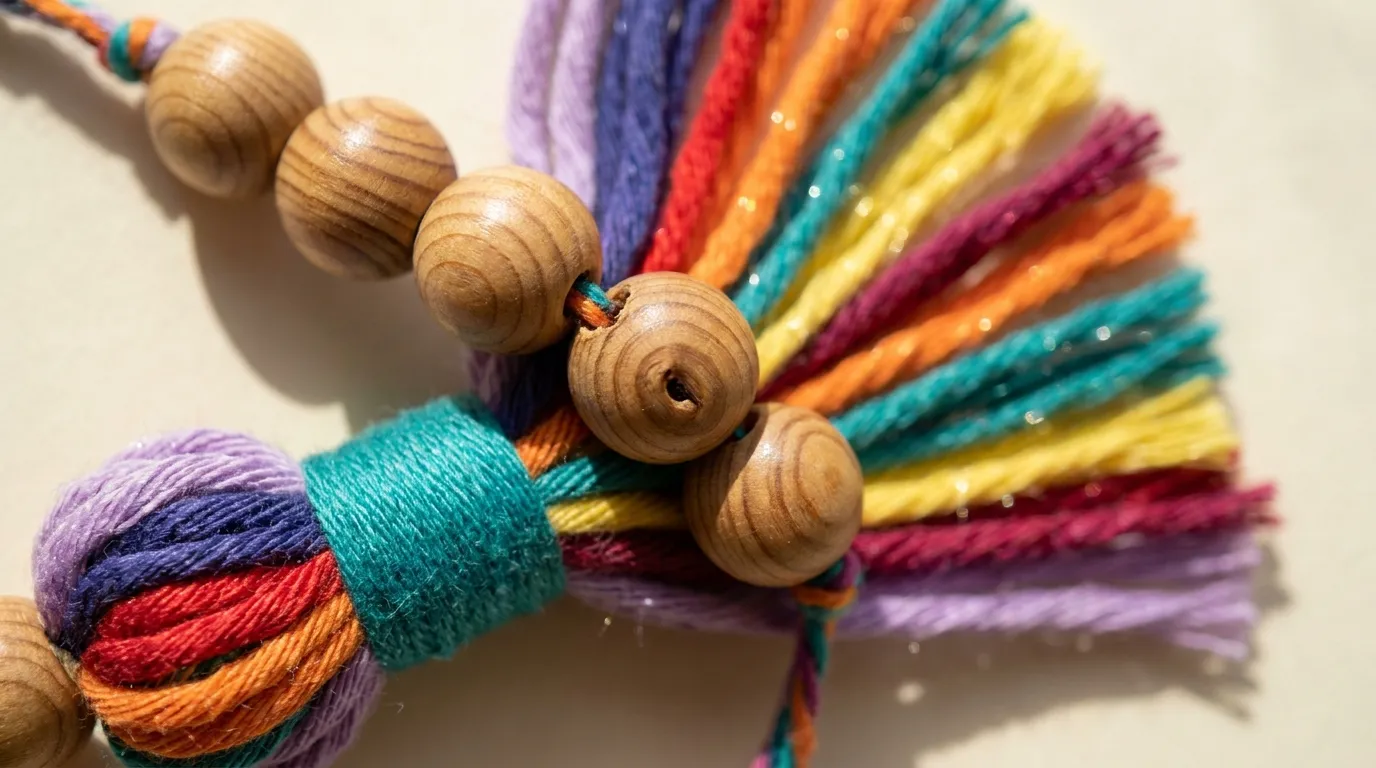
But the true enchantment lives inside each open crescent. Suspended within the negative space of every shell floats a solid five-pointed star, crocheted in the same hue as its host turn, catching light from both sides as the piece rotates on its cotton-thread suspension. Below, a multicolored tassel threaded with six natural wooden beads adds weight, movement, and a gentle percussive whisper when the breeze finds it. This is not merely decoration — it is a kinetic sculpture you can hold, a mobile that remembers the hands that made it.
I designed this piece for the maker who craves rhythm in their stitches and surprise in their colorwork. The spiral architecture teaches you to read your fabric in the round without joining, to trust the offset that creates the twist, and to place each star with intention. The result hangs from a simple stainless-steel S-hook on a porch, in a sunlit window, or above a reading nook — wherever air moves and light plays.
Pattern Overview & Finished Dimensions
- Structure: Vertical helical column worked in continuous spiral (no joining rounds), composed of 8 color-blocked turns, each turn = one 5-dc shell repeat
- Height: 12–14 inches (30–35 cm) from top loop to tassel crown
- Diameter: ~2.5 inches (6.5 cm) per turn; widest point at star centers ~3 inches (7.5 cm)
- Turns: 8 complete helical rotations (one per color)
- Stars: 8 floating 5-pointed stars (one per turn), each ~1.25 inches (3 cm) point-to-point
- Suspension: Crocheted loop at top + stainless steel S-hook (included in hardware list)
- Terminus: Multicolored tassel (all 8 colors) with 6 wooden beads (10 mm each) on cotton accent cord
- Weight: ~1.8 oz (50 g) total — light enough for delicate suspension, substantial enough to turn gracefully
- Skill Notes: Requires comfort with continuous spiral crochet, mid-row color changes (invisible join method), small motif work (stars), and tassel construction with bead threading
Materials, Fiber & Hardware Checklist
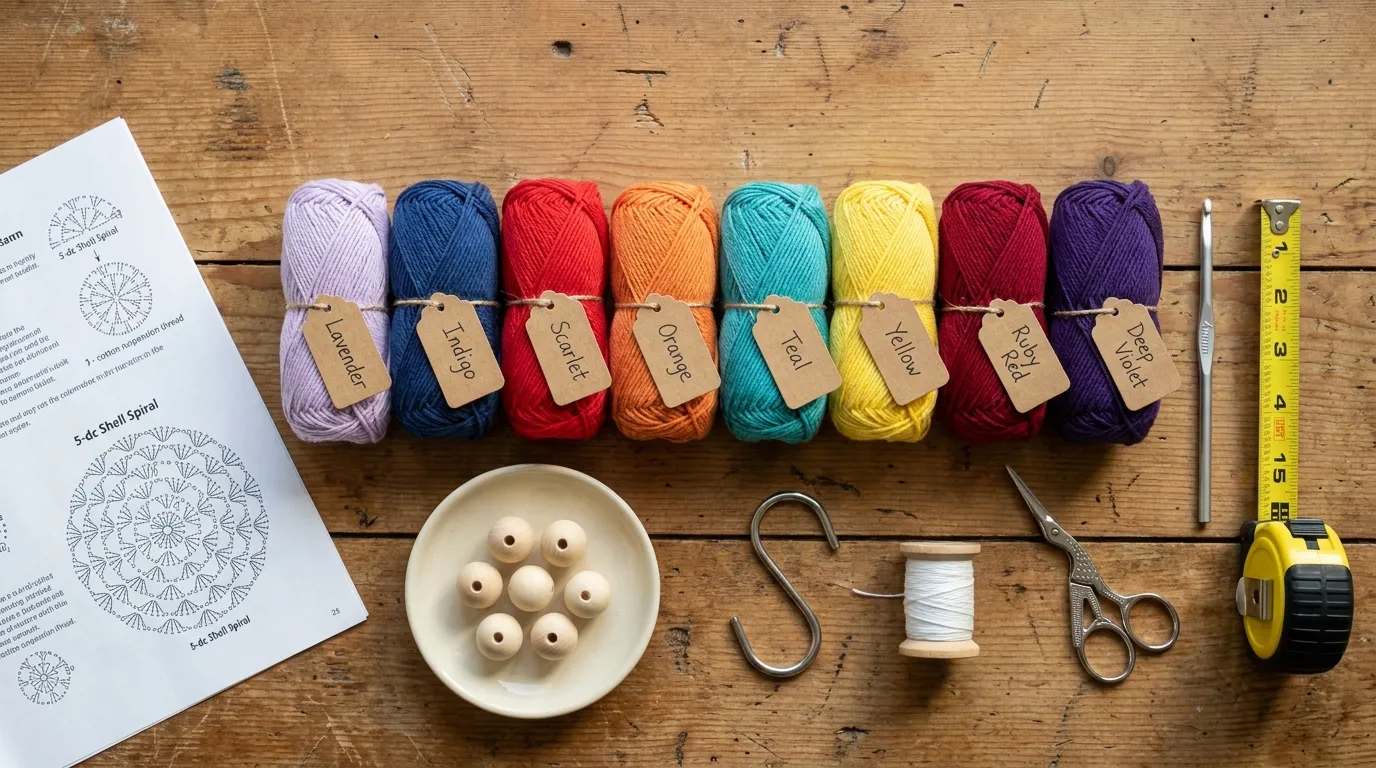
Yarn — Primary (Spiral Column & Stars)
- Weight: Worsted (4) / Medium — 100% mercerized cotton recommended for stitch definition and drape
- Colors (8 total, ~35 yds / 32 m each):
A — Lavender-Purple (top)
B — Indigo
C — Scarlet
D — Orange
E — Teal
F — Yellow
G — Ruby Red
H — Deep Violet (base)
Tip: Choose a gradient set with smooth tonal transitions; solid colors work best for star visibility. - Total Primary Yardage: ~280 yds (256 m)
Yarn — Accent (Tassel Cord)
- Weight: Fingering (1) or Sport (2) cotton — 20 yds (18 m) in a neutral cream or light gray
- Purpose: Tassel wrapping, bead threading, suspension loop reinforcement
Hardware & Notions
- Stainless steel S-hook, 1.5 in (3.8 cm) — 1 pc
- Natural wooden beads, 10 mm diameter, 6 mm hole — 6 pcs
- Tapestry needle (blunt tip, large eye)
- Sharp embroidery scissors
- Stitch markers (locking type) — 2 pcs
- Measuring tape
- Blocking mat and T-pins (optional, for star blocking)
Tools
- 5.0 mm (H-8) crochet hook — inline shaft preferred for consistent tension on dc clusters
- Optional: 4.0 mm (G-6) hook for tighter star motifs
Stitch Abbreviations (US Terms)
| Abbreviation | Meaning |
|---|---|
| ch | chain |
| sl st | slip stitch |
| sc | single crochet |
| hdc | half double crochet |
| dc | double crochet |
| tr | treble crochet |
| BLO | back loop only |
| FLO | front loop only |
| inc | increase (2 sts in same stitch) |
| dec | decrease (sc2tog or dc2tog as specified) |
| RS | right side |
| WS | wrong side |
| rep | repeat |
| … | repeat instructions between asterisks |
| [ ] | stitch count at end of round/row |
| 5-dc shell | 5 dc in indicated stitch or space |
| picot | ch 3, sl st in 3rd ch from hook (or base of ch) |
| inv join | invisible join: cut yarn, pull through last st, thread needle, insert under both loops of first st of round, pull through, insert into back loop of last st worked, pull through to WS |
Architectural Mechanics / Technique Deep-Dive
The Rainbow Star Kinetic Spiral relies on three interlocking geometric principles that transform flat crochet into a self-supporting helical column.
**
- Continuous Offset Spiral (No Joins, No Turning)**
Unlike traditional rounds joined with a slip stitch, this piece is worked in a true continuous spiral — the hook never leaves the fabric, and no joining seam interrupts the color flow. Each “turn” of the helix consists of a single 5-dc shell worked into the center dc of the shell two rounds below. This two-round offset is the engine of the twist: because the new shell sits forward and slightly upward relative to its ancestor, the column naturally rotates around its central axis. After 8 turns (16 shells total, 2 shells per color), the spiral completes a full 360° rotation per color block, creating the signature helical column.
**
2. The 5-dc Shell as Structural Rib**
A 5-dc shell (5 dc in one stitch) creates a pronounced, semi-circular flange. When stacked with the two-round offset, these flanges interlock like the scales of a pinecone, each one propping open the one above it. The result is a column with inherent rigidity — no wire armature, no stiffening, just stitch geometry. The ~12–14 stitches per shell circumference (measured at the outer edge) yields the 2.5-inch diameter. Your tension on the dc height directly controls the pitch of the spiral: taller dc = steeper helix; shorter dc = tighter coil.
**
3. Floating Stars via Negative-Space Anchoring**
Each star is worked after its host shell is complete, using the shell’s own stitches as anchor points. The star’s five points are worked into the 5 dc of the shell (one point per dc), but the star body is worked in rows back and forth, not in rounds. This creates a flat, two-sided motif that sits perpendicular to the spiral column, suspended in the crescent window. Because the star uses the shell’s dc posts as its foundation, it requires no separate attachment — it is literally crocheted into the architecture.
Color Transition Strategy
Color changes occur at the start of a new shell (i.e., when you begin the 5-dc cluster). Use the invisible join method: complete the last dc of the old color, cut yarn leaving 6-inch tail, pull through loop. With new color, make a standing dc (slip knot on hook, yo, insert into designated stitch, yo, pull up loop, [yo, pull through 2 loops] twice) as the first dc of the new shell. This eliminates the “jog” and keeps the spiral visually seamless.
Step-by-Step Stitch Instructions
Phase 1: Foundation Loop & First Turn (Color A — Lavender-Purple)
Round 0 (Setup): With Color A, ch 4, sl st in 4th ch from hook to form a ring.
Round 1 (First Shell): Ch 3 (counts as first dc), 4 dc in ring — 5 dc shell made. Place locking marker in 3rd dc (center dc) of this shell. This marker travels upward every 2 rounds to mark the next shell placement. [5 dc]
Round 2: Sc in next dc, ch 2, sc in next dc around the 5 dc shell (working into the tops of the dc), ending with sc in last dc. Do not join. [5 sc, 4 ch-2 spaces]
Round 3 (Shell Placement Round): Sc in next sc, 5-dc shell in next ch-2 space 4 times, sc in last sc. Move marker to center dc (3rd dc) of the last shell worked. [4 shells + 5 sc]
Round 4: Rep Round 2 around the 4 new shells. [20 sc, 16 ch-2 spaces]
Round 5: Rep Round 3 — work a shell in every ch-2 space. Move marker to center dc of last shell. [20 shells]
At this point you have completed Turn 1 (Color A). The column shows 2 full rounds of shells offset by one shell position.
Phase 2: Building the Helix — Turns 2–8 (Colors B–H)
General Repeat for Each New Color (Turns 2–8):
- Color Change: At the start of a Shell Placement Round (odd-numbered rounds: 3, 5, 7…), perform invisible join with old color, begin new color with standing dc as first dc of first shell.
- Shell Placement Round: Sc in next sc, 5-dc shell in next ch-2 space around entire circumference. The number of shells per round doubles each turn (4 → 8 → 16 → 32 → 64 → 128 → 256 → 512). However, to maintain the 2.5-inch diameter and prevent flaring, work shells ONLY in the ch-2 spaces that align with the traveling marker’s column. This means: each round, you work exactly 4 shells (one per “rib” of the helix), placed in the 4 ch-2 spaces that sit directly above the previous round’s 4 shells. The remaining ch-2 spaces receive sc only (no shell).
- Sc Round: Sc in each sc and each dc of shells around — this round simply connects and stabilizes.
- Marker Advance: After each Shell Placement Round, move the locking marker to the center dc of the last shell worked in the marked column. This marker traces a single continuous helical line up the column.
Practical Execution (Simplified):
- You will always have 4 active shell columns spiraling upward.
- Each Shell Placement Round: work 4 shells (one in each active column’s ch-2 space) + sc in all other stitches.
- Each Sc Round: sc in every stitch around.
- Repeat these 2 rounds 14 times per color (7 shell rounds + 7 sc rounds = 14 rounds per turn).
- After 14 rounds, switch to next color via invisible join at start of next Shell Placement Round.
- Total rounds: 8 colors × 14 rounds = 112 rounds (56 shell rounds, 56 sc rounds).
Stitch Count Verification:
- Shell Placement Round: 4 shells × 5 dc = 20 dc + ~40 sc = ~60 sts
- Sc Round: ~60 sc
- Circumference stabilizes at ~60 sts → ~2.5 in diameter at worsted weight / 5.0 mm hook.
Star Placement (Worked Immediately After Each Color’s Final Sc Round):
Before switching to the next color, work the star for the turn you just completed. See “Star Motif Instructions” below.
Phase 3: Star Motif Instructions (Make 8 — One Per Color)
Worked in the same color as the turn just finished. Use 4.0 mm hook for tighter fabric if desired.
Foundation: Identify the 5 dc of the topmost shell in the marked column (the shell you just completed in the final Shell Placement Round of that color). These 5 dc are the anchor points.
Row 1 (RS): With same color, join with standing sc in 1st dc of shell, sc in next 3 dc, 3 sc in last dc (center point), working down opposite side: sc in next 3 dc, sc in last dc. Turn. [11 sc]
Row 2: Ch 1, sc in first 4 sc, (sc, ch 2, sc) in center sc (point), sc in next 4 sc, sc in last sc. Turn. [12 sc + ch-2 sp]
Row 3: Ch 1, sc in first 5 sc, (sc, ch 2, sc) in ch-2 sp, sc in next 5 sc. Turn. [14 sc + ch-2 sp]
Row 4: Ch 1, sc in first 6 sc, (sc, ch 2, sc) in ch-2 sp, sc in next 6 sc. Turn. [16 sc + ch-2 sp]
Row 5: Ch 1, sc in first 7 sc, (sc, ch 2, sc) in ch-2 sp, sc in next 7 sc. Fasten off, leaving 8-inch tail for weaving. [18 sc + ch-2 sp]
Star Shaping: The ch-2 spaces at the center of Rows 2–5 create the five points. Block each star lightly on blocking mat: pin points outward, steam gently, let dry. Weave in ends through back of star only (do not attach to spiral — the star is already anchored via Row 1 worked into the shell dcs).
Assembly, Mounting & Structural Integration
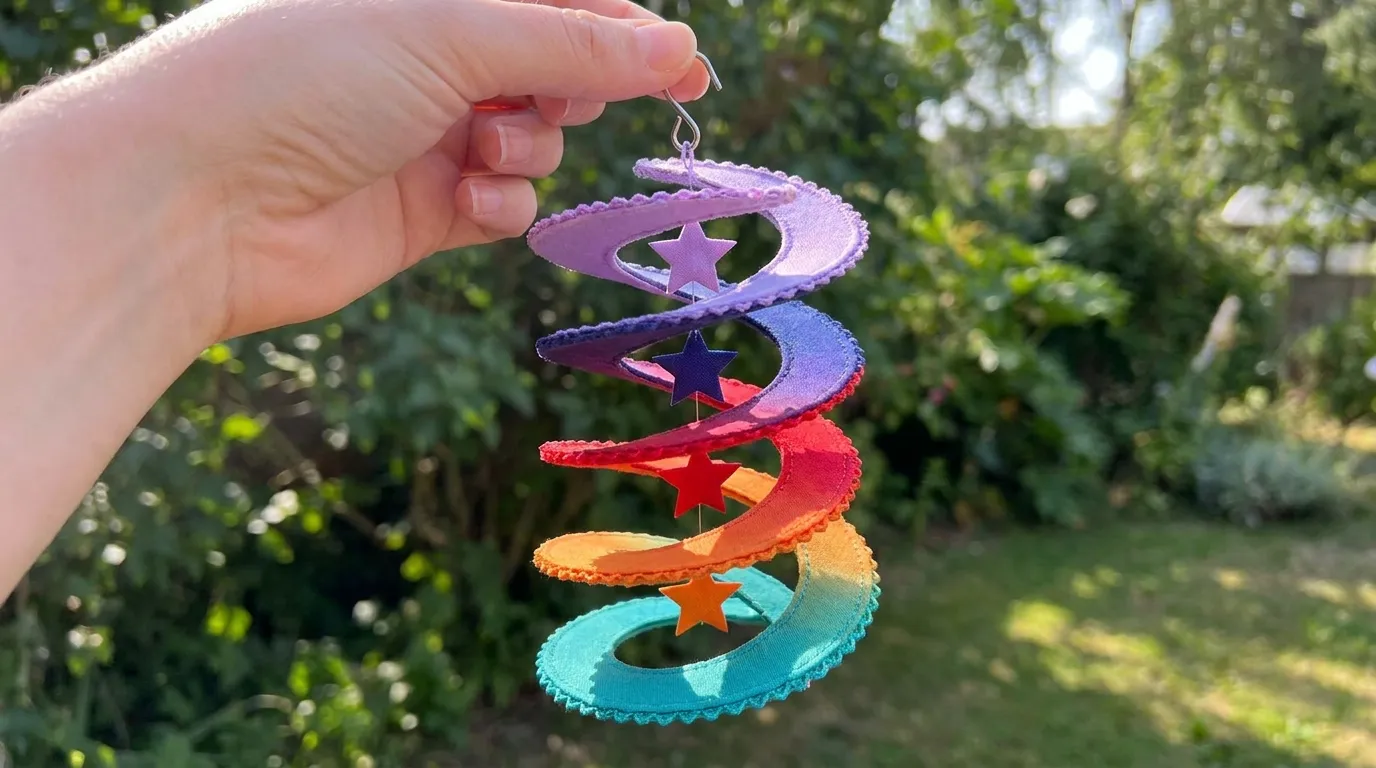
Top Suspension Loop (After Color H Final Sc Round):
Do not fasten off Color H. Ch 12, sl st in same stitch to form a loop. Ch 1, sc in each ch around loop (12 sc), sl st to join. Fasten off, leaving 12-inch tail. Thread tail through loop stitches to reinforce, then thread through S-hook eye, pull tight, and secure with several overhand knots. Trim and bury tail inside column.
Bottom Edge Finishing (Scalloped Picot Edge):
With Color H (or accent cord), join with standing sc at base of any shell column. Sc in next 2 sts, picot (ch 3, sl st in 3rd ch from hook), sc in next 2 sts around entire circumference. Join with sl st to first sc. Fasten off. This picot edge adds a delicate frill and prevents curling.
Tassel Construction:
- Cut 24 strands of accent cord, each 14 inches long.
- Fold bundle in half. Using a 10-inch piece of accent cord, wrap tightly 1/2 inch below fold 6 times, knot securely. This forms the tassel head.
- Thread the 6 wooden beads onto the two long tails of the wrapping cord (3 beads per tail). Slide beads up to sit just below the wrapped head. Knot below each bead to secure position.
- Trim tassel fringe to even 3-inch length.
- Using tapestry needle, thread the two wrapping tails up through the center of the spiral column (insert needle at bottom picot edge, exit at top of Color H section). Pull tassel snug against bottom edge. Knot tails securely around the central axis stitches inside the column. Trim and bury.
Final Assembly Check:
- Hang piece from S-hook. Verify spiral hangs vertically with even twist.
- Confirm all 8 stars float freely in their crescents (not caught on adjacent shells).
- Ensure tassel hangs straight and beads rattle gently.
- Rotate by hand — the spiral should turn smoothly on the cotton thread suspension.
Hardware, Accents & Embellishment Assembly
S-Hook Installation:
The stainless steel S-hook serves as both hanger and swivel. Its lower curve cradles the reinforced cotton loop; its upper curve accepts a nail, cup hook, or curtain rod. Stainless steel prevents corrosion in humid porch environments. If your S-hook has a sharp inner radius, file it smooth or wrap the contact point with a tiny scrap of cotton yarn to prevent cutting the suspension loop over time.
Bead Security:
Each wooden bead is trapped by an overhand knot above and below on the tassel cord. For extra security, place a dot of clear fabric glue (e.g., Aleene’s Original Tacky Glue) inside each knot before tightening. Let cure 24 hours before hanging.
Star Orientation:
Stars naturally orient perpendicular to the spiral column due to their anchor points. If a star tilts, gently manipulate its base stitches (the Row 1 sc worked into the shell dcs) to square it. A light steam block after assembly locks orientation.
Blocking, Care & Maintenance
Blocking (Optional but Recommended for Stars):
- Pin each star individually on blocking mat, points extended.
- Lightly mist with water or steam 2 inches above fabric (do not press iron to cotton).
- Dry completely before assembly.
- The spiral column itself does not require blocking — its structure is self-supporting.
Washing:
- Hand wash only in cool water with mild wool/cotton detergent (e.g., Soak, Eucalan).
- Submerge gently, soak 15 minutes. Do not agitate.
- Rinse in cool water until clear.
- Press water out in towel (do not wring).
- Reshape spiral column by hand, re-align stars, lay flat to dry on mesh rack.
- Re-hang only when fully dry.
Storage:
- Store flat in acid-free tissue, or hang in a garment bag to prevent dust.
- Avoid prolonged direct sunlight — mercerized cotton resists fading but 8-color gradient integrity is best preserved in indirect light.
- Wooden beads may darken slightly with age; this is natural patina.
Frequently Asked Questions (FAQ)
Q: Can I use DK (3) or Fingering (1) weight yarn instead of Worsted?
A: Yes, but adjust hook size down (DK: 4.0 mm / G-6; Fingering: 3.0 mm / D-3) and expect a smaller, more delicate spiral (~8–10 in tall, ~1.5 in diameter). You’ll need ~20% more yardage per color for the same number of turns because the stitches are smaller. The star motif will also shrink proportionally — consider adding an extra row to maintain point definition.
Q: My spiral is flaring / cupping / not twisting evenly. What went wrong?
A: Flaring (diameter increasing): You’re working shells in too many ch-2 spaces. Stick to exactly 4 shells per Shell Placement Round — one per active column. Cupping (diameter decreasing): You’re missing shell placements or your dc height is too short. Ensure each shell gets 5 full-height dc. Uneven twist: The marker migrated off its column. Re-identify the 4 shell columns by sight (they form visible ribs) and reposition marker on the correct center dc.
Q: How do I make the color transitions truly invisible?
A: Three keys: (1) Change color only at the first dc of a shell (never mid-shell). (2) Use the standing dc technique — no turning chain, no slip stitch join. (3) Pull the old color’s tail firmly before weaving so the last dc of the old color snugs against the first dc of the new color. Practice on a swatch first.
Q: The stars keep flipping to the wrong side (WS showing). Can I fix this?
A: The star is worked in rows, so it has a RS and WS. When joining Row 1, ensure you’re working into the shell dcs with the RS of the spiral facing you. If a star is already flipped, you can gently coax it by threading a tapestry needle through the Row 1 sc bases and tugging the star around — but it’s easier to frog and rework that star. Blocking after assembly helps lock correct orientation.
Community Call-to-Action
You’ve crocheted a rainbow that climbs. You’ve anchored stars in negative space. You’ve built a kinetic sculpture from a single strand of cotton and a hook. That is fiber alchemy.
Now — share the magic. Hang your Rainbow Star Kinetic Spiral where the light hits it just right. Film it turning in a slow porch breeze. Photograph the shadow it casts on a white wall at golden hour. Then post your make on Instagram or Pinterest with @NailItHome and #RainbowStarSpiral — we feature maker spotlights every Friday, and your colorway choices might inspire someone else’s gradient dream.
Have questions? Drop them in the comments below or DM us. Need a different palette? Try a monochrome ombré (8 shades of indigo), a pride gradient, or a “galaxy” version with speckled yarn and silver-lined beads. The architecture holds; the soul is yours to dye.
Happy hooking,
Aurelia Thorne
Master Fiber Artist & Lead Pattern Curator, Nail It Home


