

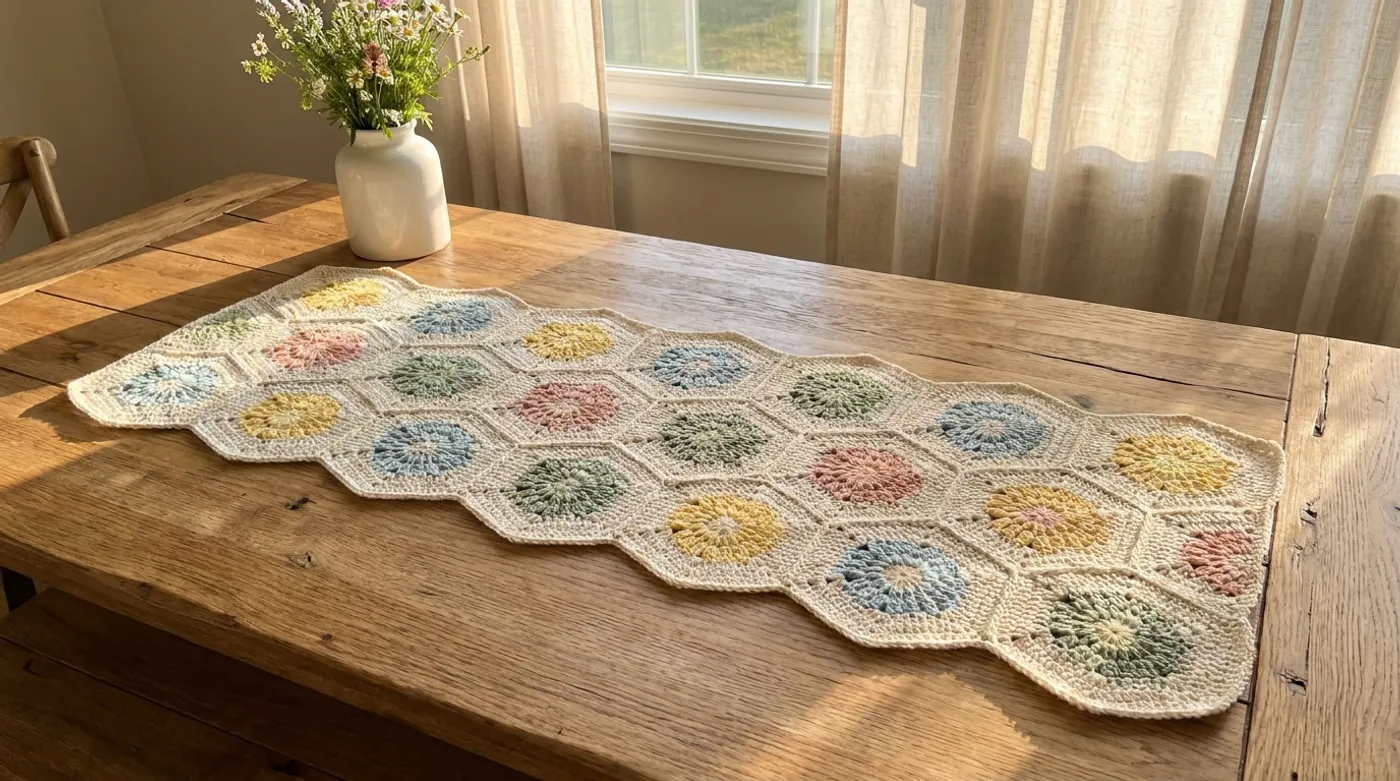
Pastel Floral Hexagon Honeycomb Crochet Tablerunner: Free Crochet Pattern & Tutorial
Create a stunning pastel floral hexagon honeycomb crochet table runner with this free pattern. Features radiating starburst centers in pale yellow, blush pink, sage green, and light blue, joined into a tessellated honeycomb layout perfect for cottagecore dining.

Pattern Specifications
1. Introduction & Design Inspiration
There is a particular quiet magic in watching separate blossoms grow into a unified meadow. This table runner was born from that exact impulse — the desire to capture the geometry of a honeycomb, the softness of a spring garden, and the warmth of a handmade heirloom in a single piece. Each hexagon begins as a tiny starburst, a radiant cluster of double crochet stitches blooming from a magic ring, then expands through solid rounds into a sturdy six-sided tile. When joined, these tiles lock together like cells in a hive, their edges forming a gentle zigzag perimeter that feels both structured and organic.
The palette — pastel yellow, blush pink, sage green, light blue, and cream — was chosen to echo the first flowers of April seen through a kitchen window at dawn. Cream cotton joins the motifs with near-invisible seams, allowing the pastel field to breathe. No lining, no hardware, no embellishments beyond the stitches themselves. The beauty lives entirely in the architecture: the way light catches the raised starburst centers, the subtle texture of double crochet fabric, the rhythm of color as your eye travels the honeycomb grid.
This pattern is written for the crocheter who enjoys modular construction — the satisfaction of completing one perfect hexagon, then another, then watching them assemble into something greater than the sum of their parts. It asks for patience in the joining phase, but rewards you with a piece that lies flat, drapes beautifully, and carries the unmistakable signature of handwork. Brew a pot of tea, settle into your favorite chair, and let’s grow a meadow together.
2. Pattern Overview & Finished Dimensions
-
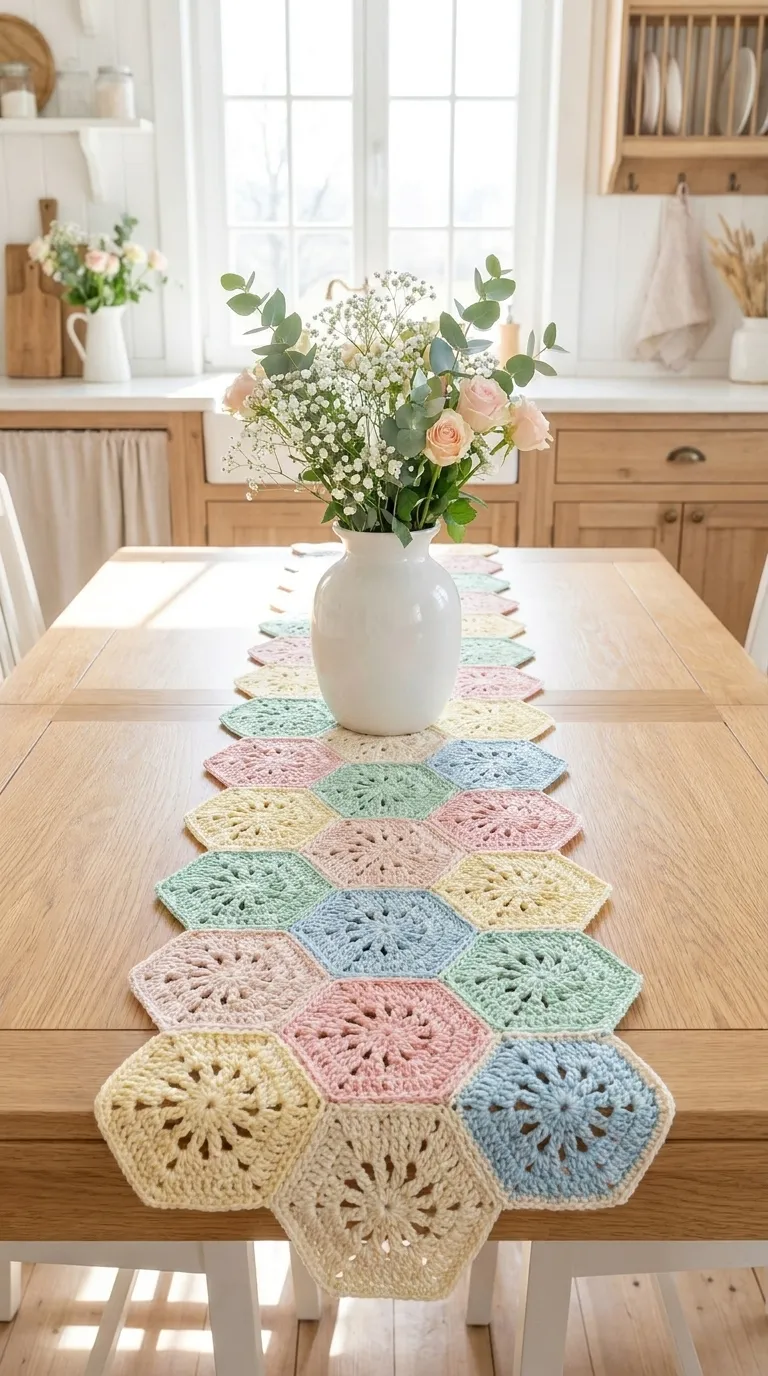
Finished Dimensions: 14 inches (35.5 cm) wide × 50 inches (127 cm) long, blocked
-
Hexagon Motif Size: 4.5 inches (11.5 cm) across flats (point-to-point: 5.25 inches / 13.5 cm)
-
Layout: 3 columns × 5 rows of hexagons in offset honeycomb arrangement (15 motifs total)
-
Edge Profile: Zigzag perimeter following honeycomb geometry; no added border
-
Structure: Modular motifs joined as-you-go (JAYGO) on final round; cream joining yarn creates nearly invisible seams
-
Drape: Firm but flexible; lies flat on table without curling
-
Reversible: Yes — both sides present clean stitch definition
-
Skill Level: Intermediate (requires comfort with magic ring, working in rounds, cluster stitches, and join-as-you-go technique)
-
Gauge Note: Gauge is measured per completed motif rather than stitches per inch. If your motif measures significantly larger or smaller than 4.5 inches across flats, adjust hook size by 0.5 mm before committing to all 15 motifs.
3. Materials, Fiber & Hardware Checklist
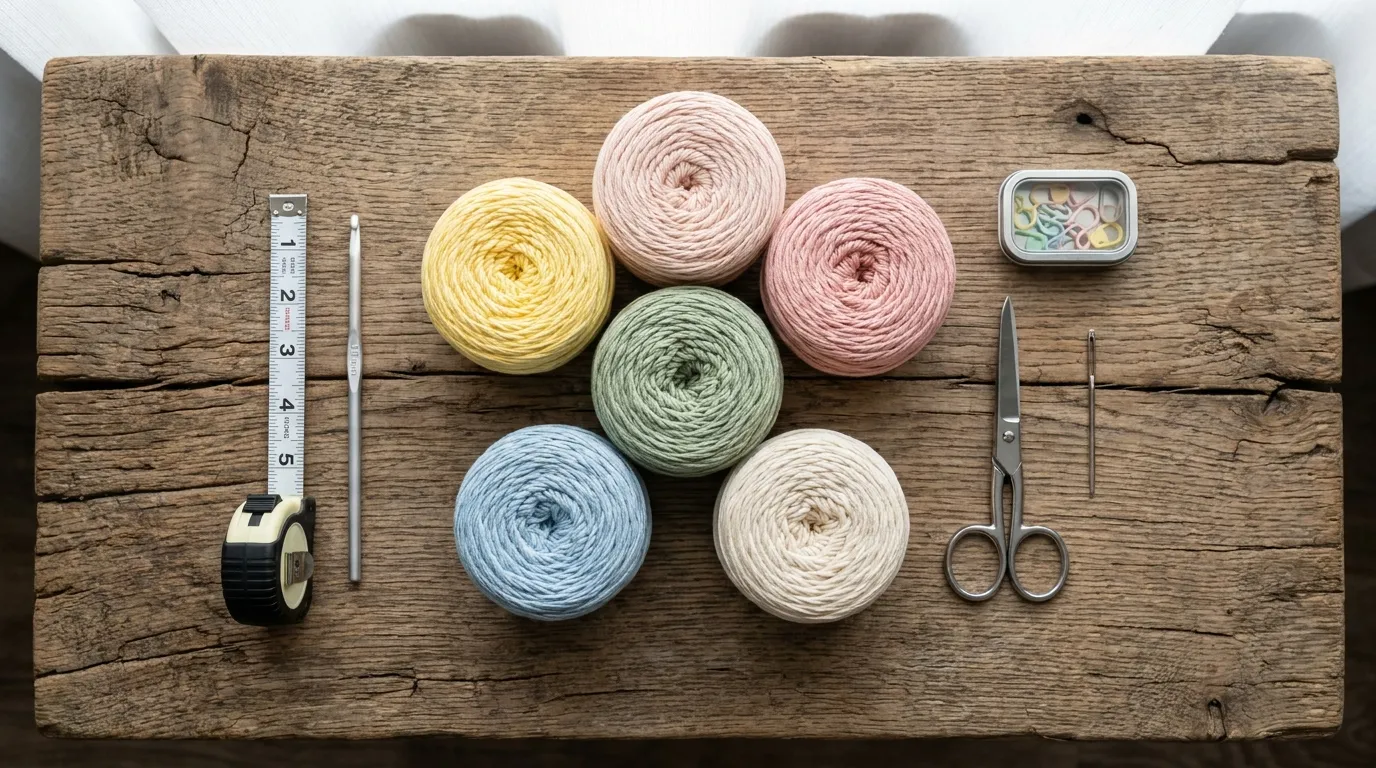
Yarn (DK-weight / Light #3 matte cotton, approx. 240 yds / 220 m per 100g skein):
-
Pastel Yellow (Color A): 120 yds (110 m) — ~1/2 skein — for 3 motifs
-
Blush Pink (Color B): 110 yds (100 m) — ~1/2 skein — for 3 motifs
-
Sage Green (Color C): 100 yds (91 m) — ~1/2 skein — for 3 motifs
-
Light Blue (Color D): 100 yds (91 m) — ~1/2 skein — for 3 motifs
-
Cream (Color E): 140 yds (128 m) total — ~3/4 skein
- 90 yds (82 m) for 3 cream motifs
- 50 yds (46 m) for all join-as-you-go seams
Tools & Notions:
- 4.0 mm (G-6) crochet hook — or size needed to achieve motif gauge
- Tapestry needle (blunt tip, large eye) for weaving ends
- Sharp scissors
- Blocking mats and T-pins (or rust-proof pins)
- Measuring tape
- Stitch markers (2–3, for marking join points on final round)
Yarn Substitution Guidance: Choose a DK cotton with minimal elasticity and a matte finish. Mercerized cotton, linen-cotton blends, or hemp-cotton blends work beautifully. Avoid superwash wool, acrylic, or shiny finishes — they will not block as crisply and the starburst texture will lose definition. If substituting a fingering-weight yarn held double, expect a slightly denser fabric and adjust hook to 3.5 mm.
4. Stitch Abbreviations (US Terms)
| Abbreviation | Meaning |
|---|---|
| ch | chain |
| sl st | slip stitch |
| sc | single crochet |
| hdc | half double crochet |
| dc | double crochet |
| tr | treble crochet |
| sp | space |
| st(s) | stitch(es) |
| rnd(s) | round(s) |
| rep | repeat |
| sk | skip |
| RS | right side |
| WS | wrong side |
| MR | magic ring (adjustable loop) |
| dc-cl | double crochet cluster: [yo, insert hook, yo, pull up loop, yo, pull through 2 loops] 3 times in same st/sp, yo, pull through all 4 loops on hook |
| JAYGO | join-as-you-go: slip stitch into corresponding stitch/space of adjacent completed motif instead of working a chain space |
Special Stitch — Double Crochet Cluster (dc-cl):
Work 3 incomplete dc in the same stitch or space (each dc worked to the last yarn-over, leaving 2 loops on hook per dc), then yarn over and pull through all 4 loops on hook. Creates a compact, raised “star point” with a subtle puff at the top.
5. Architectural Mechanics / Technique Deep-Dive
The structural logic of this runner rests on three interconnected systems: the starburst center, the hexagon expansion, and the honeycomb tessellation.
Starburst Center (Rounds 1–2):
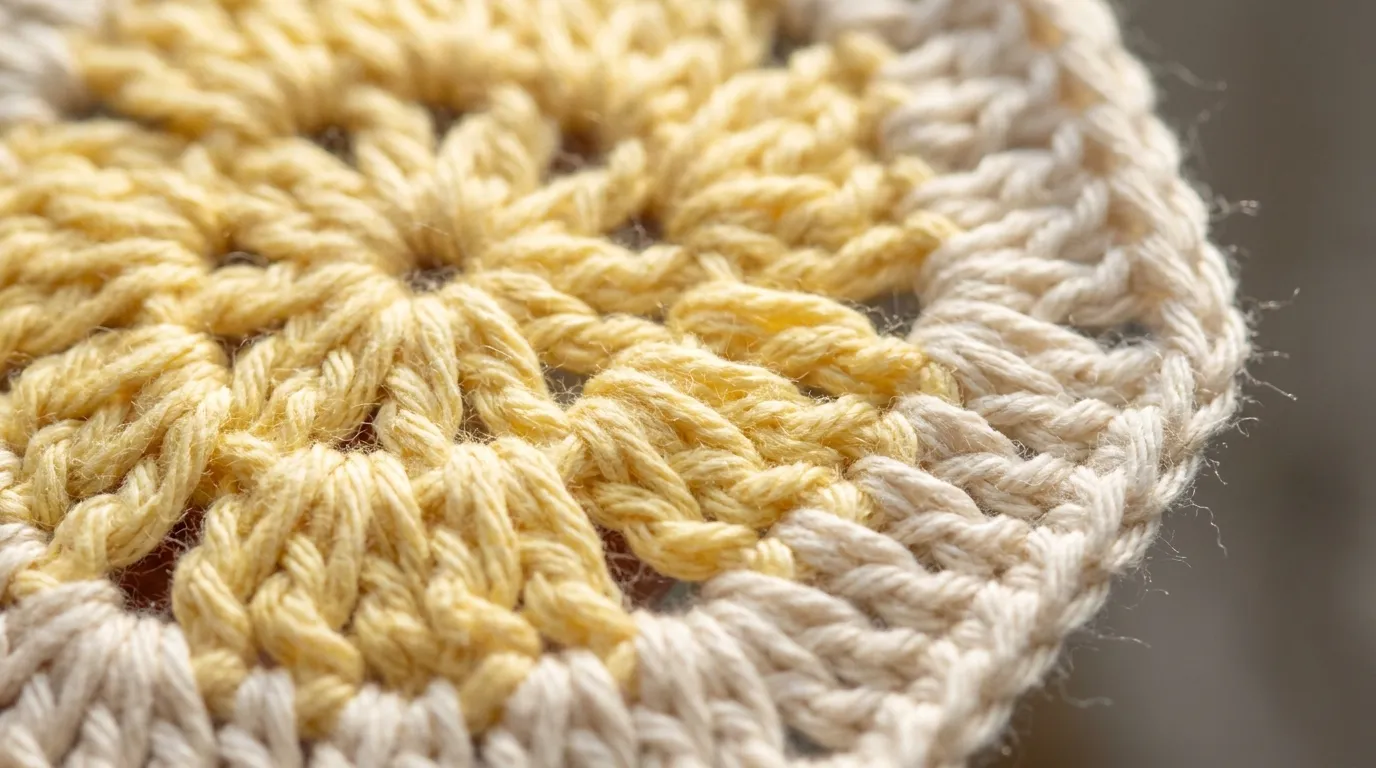
The motif begins with a magic ring. Round 1 establishes 12 dc — a multiple of 6, which is the geometric prerequisite for a clean hexagon. Round 2 introduces the signature dc-cl stitches, each worked into a dc of the previous round, separated by ch-3 spaces. These 12 clusters (6 clusters + 6 ch-3 corners) radiate outward like petals. The ch-3 spaces become the future corner anchors of the hexagon. Because clusters consume more yarn than standard dc, they create a raised, textured dome at the center — the “flower” that catches light.
Hexagon Expansion (Rounds 3–5):
Rounds 3 through 5 transform the 12-point starburst into a 6-sided polygon. Each round adds one dc to each side segment between corners, while corners remain consistent: (dc, ch 2, dc) in each ch-3 space. This is classic polygon geometry: a hexagon requires 6 increase points (the corners), each adding 2 stitches per round (one on each side of the corner). By Round 5, each side contains 5 dc between corners, yielding a 4.5-inch flat. The solid dc fabric ensures the motif holds its shape and joins cleanly.
Honeycomb Tessellation (JAYGO on Round 5):
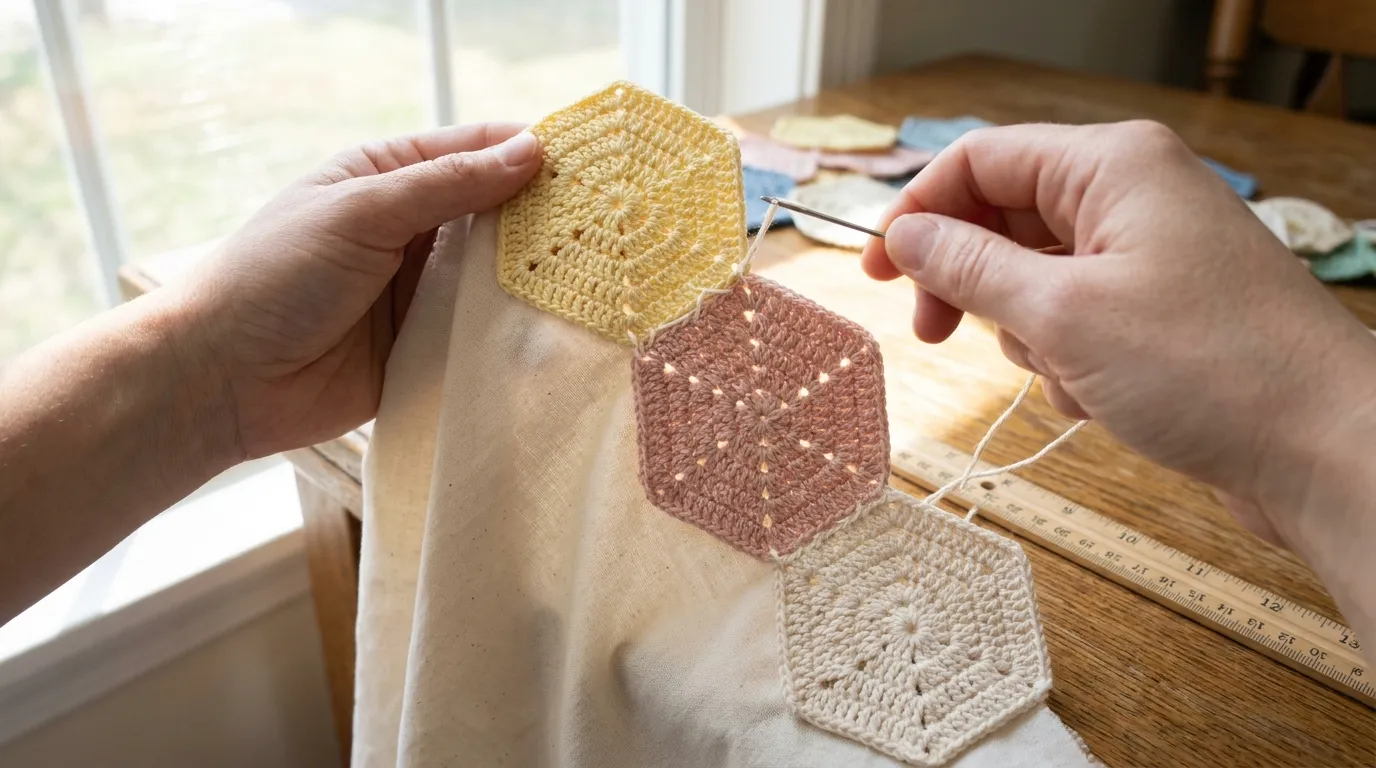
Hexagons tile the plane in an offset grid — each row nests into the valleys of the previous row. This means Motif 2 joins to Motif 1 along one full side; Motif 4 (start of Row 2) joins to Motif 1 along one side and to Motif 2 along a partial side. The JAYGO method replaces the ch-1 side spaces of Round 5 with sl sts into the corresponding ch-1 spaces of the neighbor motif. This creates a continuous fabric with no seaming required afterward. The cream joining yarn disappears into the stitch valleys, preserving the pastel field’s visual continuity.
Critical Insight: The offset layout means Row 2 motifs sit “lower” than Row 1 motifs by half a motif height. Your joining order must respect this: complete all Row 1 motifs first (joining side-to-side), then begin Row 2, joining each new motif to two neighbors (one above, one to the side). The pattern’s Phase 3 instructions sequence this precisely.
6. Step-by-Step Stitch Instructions
Phase 1: Foundation / Center Motif (Make 15 Total — Color Distribution Below)
Color Distribution for 15 Motifs:
- Row 1 (5 motifs): A, B, C, D, E (left to right)
- Row 2 (5 motifs): B, C, D, E, A (offset, nestled below Row 1 gaps)
- Row 3 (5 motifs): C, D, E, A, B (aligned with Row 1 columns)
Work each motif completely through Round 4. Round 5 is worked with JAYGO joins as described in Phase 3. Instructions below are for a single motif worked in its assigned color (Color X), with cream (Color E) used only for JAYGO slip stitches.
Round 1 (Center): With Color X, MR, ch 3 (counts as first dc), 11 dc into ring. Pull ring tight. Sl st to top of beg ch-3. — 12 dc
Round 2 (Starburst): Ch 3 (counts as first dc), dc in same st (first dc-cl base), ch 3, dc-cl in next dc, dc in next dc — wait, let me be precise:
Round 2 (Starburst — Corrected): Ch 3 (counts as dc), dc in same st (this forms the first half of a dc-cl? No — the cluster is a distinct stitch). Let’s write it cleanly:
Round 2 (Starburst): Ch 3 (counts as first dc), *dc-cl in next dc, ch 3, dc in next dc; rep from * around 5 more times (working into each of the 12 dc of Round 1). Sl st to top of beg ch-3. — 6 dc-cl, 6 ch-3 corner spaces, 6 dc (between clusters)
Clarification: The pattern (dc-cl, ch 3, dc) repeats 6 times around the 12-stitch base. Each repeat consumes 2 dc from Round 1: one for the cluster, one for the single dc. The ch-3 becomes the corner space.
Round 3 (First Hexagon Round): Sl st into next ch-3 sp (first corner). Ch 3 (counts as dc), dc in same sp (first corner made: dc, ch 2, dc all in same ch-3 sp). *Ch 1, dc in next dc (the single dc between clusters), ch 1, dc-cl in next dc-cl, ch 1, dc in next dc, ch 1, (dc, ch 2, dc) in next ch-3 sp; rep from * around 4 more times. Ch 1, dc in next dc, ch 1, dc-cl in next dc-cl, ch 1, dc in next dc, ch 1. Sl st to top of beg ch-3. — 6 corners (dc, ch 2, dc), 6 side segments of (dc, ch 1, dc-cl, ch 1, dc)
Round 4 (Second Expansion): Sl st into ch-2 corner sp. Ch 3 (counts as dc), dc in same sp, ch 2, dc in same sp (corner complete). *Ch 1, dc in next dc, ch 1, dc in next dc-cl, ch 1, dc in next dc, ch 1, dc in next dc, ch 1, (dc, ch 2, dc) in next ch-2 sp; rep from * around 4 more times. Ch 1, dc in next dc, ch 1, dc in next dc-cl, ch 1, dc in next dc, ch 1, dc in next dc, ch 1. Sl st to top of beg ch-3. — Each side now has 3 dc between corners (with ch-1 spaces between each dc)
Round 5 (Final Expansion + JAYGO — see Phase 3 for join logic):
If working a standalone motif (first motif of Row 1): Sl st into ch-2 corner sp. Ch 3 (counts as dc), dc in same sp, ch 2, dc in same sp. *Ch 1, dc in each of next 5 dc (with ch 1 between each), ch 1, (dc, ch 2, dc) in next ch-2 sp; rep from * around 4 more times. Ch 1, dc in each of next 5 dc (with ch 1 between each), ch 1. Sl st to top of beg ch-3. Fasten off. — Each side now has 5 dc between corners.
If joining: See Phase 3 for JAYGO substitutions on side ch-1 spaces.
Phase 2: Main Body — Complete All Motifs Through Round 4
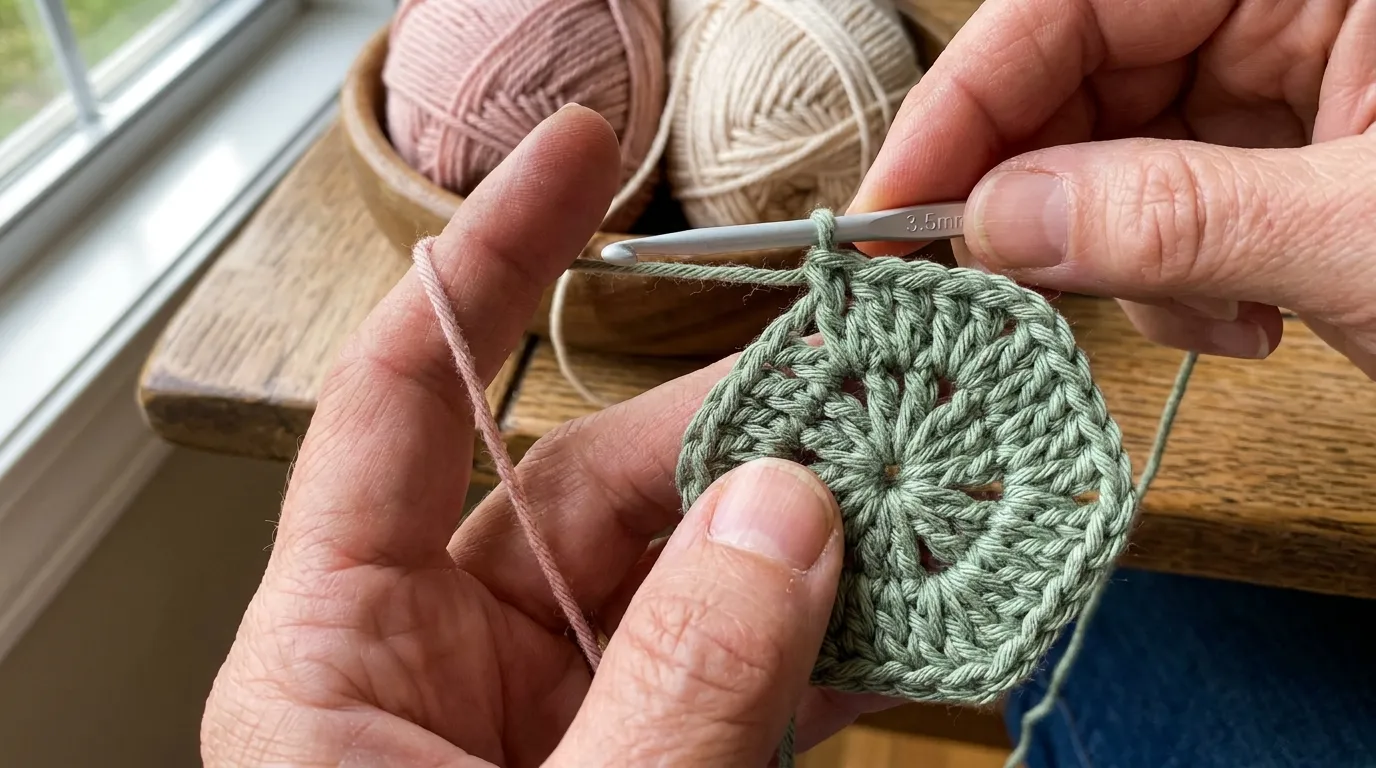
Work 15 motifs total, each in its assigned color per the distribution above. Complete Rounds 1–4 for all motifs before beginning any Round 5 joins. This ensures consistent tension and allows you to arrange the full grid before committing to joins. Block each motif lightly (steam or damp block to 4.5 inches across flats) before joining — this guarantees the honeycomb geometry locks perfectly.
Arrange Motifs on Blocking Surface:
Lay out in 3 rows of 5, offset:
Row 1: [A] [B] [C] [D] [E]
Row 2: [B] [C] [D] [E] [A]
Row 3: [C] [D] [E] [A] [B]
Each Row 2 motif sits centered below the gap between two Row 1 motifs. Each Row 3 motif aligns vertically with Row 1.
Phase 3: Assembly & Joining (Round 5 JAYGO)
Join Order:
- Motif 1 (Row 1, Col 1, Color A) — work Round 5 standalone, fasten off.
- Motif 2 (Row 1, Col 2, Color B) — join left side to Motif 1 right side.
- Motif 3 (Row 1, Col 3, Color C) — join left side to Motif 2 right side.
- Motif 4 (Row 1, Col 4, Color D) — join left side to Motif 3 right side.
- Motif 5 (Row 1, Col 5, Color E) — join left side to Motif 4 right side.
- Motif 6 (Row 2, Col 1, Color B) — join upper-right side to Motif 1 lower-left side.
- Motif 7 (Row 2, Col 2, Color C) — join upper-left to Motif 1 lower-right, upper-right to Motif 2 lower-left.
- Motif 8 (Row 2, Col 3, Color D) — join upper-left to Motif 2 lower-right, upper-right to Motif 3 lower-left.
- Motif 9 (Row 2, Col 4, Color E) — join upper-left to Motif 3 lower-right, upper-right to Motif 4 lower-left.
- Motif 10 (Row 2, Col 5, Color A) — join upper-left to Motif 4 lower-right, upper-right to Motif 5 lower-left.
- Motif 11 (Row 3, Col 1, Color C) — join upper-right to Motif 6 lower-left.
- Motif 12 (Row 3, Col 2, Color D) — join upper-left to Motif 6 lower-right, upper-right to Motif 7 lower-left.
- Motif 13 (Row 3, Col 3, Color E) — join upper-left to Motif 7 lower-right, upper-right to Motif 8 lower-left.
- Motif 14 (Row 3, Col 4, Color A) — join upper-left to Motif 8 lower-right, upper-right to Motif 9 lower-left.
- Motif 15 (Row 3, Col 5, Color B) — join upper-left to Motif 9 lower-right, upper-right to Motif 10 lower-left.
JAYGO Mechanics (Round 5 Side Joins):
When a side of the current motif abuts a completed neighbor, replace the ch 1, dc in next dc, ch 1 sequence for each of the 5 side dc with: sl st into corresponding ch-1 sp of neighbor, dc in next dc of current motif. Work from corner to corner. At the corner, work (dc, ch 2, dc) in current motif’s ch-2 sp as normal — corners are never joined (they remain free, forming the zigzag edge).
Example — Joining One Full Side (5 dc segments):
At corner: (dc, ch 2, dc) in ch-2 sp.
Sl st into neighbor’s first side ch-1 sp, dc in next dc of current motif, sl st into neighbor’s next side ch-1 sp, dc in next dc of current motif — repeat for all 5 dc segments.
End at next corner: ch 1, (dc, ch 2, dc) in next ch-2 sp.
Partial Side Joins (Row 2 & 3 motifs joining to two neighbors):
Work the first corner normally. Join first partial side to Neighbor 1 (upper-left or upper-right). Work center corner normally. Join second partial side to Neighbor 2. Work final corner normally. Each partial side has 2–3 dc segments depending on geometry — count the neighbor’s exposed side spaces and match them exactly.
Cream Joining Yarn:
Cut a 2-yard length of cream for each join session. Attach with a standing sl st at the first join point. Work all sl sts of that join in cream. Fasten off and weave in after each motif’s Round 5 is complete. This keeps tension even and prevents color bleed.
7. Assembly, Mounting & Structural Integration
This project requires no lining, mounting, or structural integration beyond the motif joining described in Phase 3. The JAYGO method produces a single continuous fabric. Once all 15 motifs are joined, the runner is structurally complete. Proceed directly to blocking.
8. Hardware, Accents & Embellishment Assembly
No hardware, straps, or embellishments are used in this design. The beauty of the piece rests entirely in the stitch architecture and color field. If you wish to add a personal touch, consider a single embroidered initial in one corner using a single strand of cream cotton and a sharp tapestry needle — worked after blocking, using duplicate stitch on the dc fabric.
9. Blocking, Care & Maintenance
Blocking (Essential — Do Not Skip):
- Fill a basin with cool water and a drop of wool wash (e.g., Soak or Eucalan). Submerge the completed runner. Soak 15 minutes.
- Gently press out water — do not wring. Roll in a clean towel and press firmly.
- Lay flat on blocking mats. Pin to finished dimensions: 14 × 50 inches. Use T-pins at every zigzag point along the perimeter and at each hexagon corner internally to open the starburst centers.
- Allow to dry completely (24–48 hours in a well-ventilated area). Remove pins.
Washing:
Hand wash cool with mild detergent. Press water out in towel. Reshape and lay flat to dry. No machine washing or drying.
Storage:
Store flat or loosely rolled (never folded sharply) in a cotton bag or acid-free tissue. Avoid plastic bags — cotton needs to breathe. Keep away from direct sunlight to prevent fading of pastel dyes.
Maintenance:
If a join loosens over time, re-sew with cream cotton using a whipstitch through the back loops only. The modular construction means individual motifs can be repaired or replaced without unraveling the entire runner.
10. Frequently Asked Questions (FAQ)
Q: My hexagon motifs are cupping (bowling upward) or ruffling (waving at edges). How do I fix this?
A: Cupping means your tension is too tight or your hook is too small — the fabric doesn’t have enough circumference to lie flat. Go up 0.5 mm hook size for Rounds 3–5. Ruffling means tension is too loose or hook too large — go down 0.5 mm. Blocking aggressively (pinning firmly to measurement) will correct minor issues, but gauge consistency across all 15 motifs is critical for clean joins.
Q: Can I use worsted weight yarn and a larger hook to make this faster?
A: You can, but the proportions will shift. Worsted at 5.5 mm yields motifs ~6 inches across, making the runner ~19 × 67 inches — a different scale entirely. The starburst texture also becomes less defined in thicker yarn. For the intended delicate cottagecore aesthetic, DK cotton is strongly recommended.
Q: The JAYGO joins look uneven — some sides pull tighter than others.
A: This usually means the neighbor motif’s side spaces aren’t perfectly aligned with your current motif’s stitches. Before joining, count the ch-1 spaces along the neighbor’s side — there should be exactly 11 (5 dc segments = 5 dc + 6 ch-1 spaces, but the corner ch-2 spaces are not joined). If counts differ, one motif was worked at a different tension. Lightly steam-block the neighbor to match dimensions before joining. Keep your joining slip stitches loose — they should sit flat, not pucker.
Q: How do I estimate yarn if I want to make this longer/shorter or wider/narrower?
A: Each motif uses ~30–35 yds of its main color + ~3–4 yds cream for joins (average). For length: add/subtract rows (each row = 5 motifs, adds ~9.5 inches length). For width: add/subtract columns (each column = 3 motifs, adds ~4.5 inches width). Multiply motif count by 35 yds for main colors, and by 4 yds for cream joining yarn. Always buy 10% extra.
11. Community Call-to-Action
Your meadow is blooming — now let it be seen. Share your finished Pastel Floral Hexagon Honeycomb Tablerunner on Instagram with @NailItHome and #NailItHomeHexagonRunner so we can celebrate your stitchwork. Pin the project to your Pinterest boards for future makers searching “pastel crochet table runner” or “honeycomb motif joining.” If you modified the palette, changed the scale, or discovered a clever joining hack, tell us in the comments on the blog post — your notes become part of the pattern’s living history.
Every handmade table runner carries the rhythm of its maker’s hands. Yours now holds a piece of spring, woven in cotton and patience. Thank you for making with us.
— Aurelia Thorne, Master Fiber Artist & Lead Pattern Curator, Nail It Home


