

Mustard And Charcoal Botanical Table Runner: Free Crochet Pattern & Tutorial
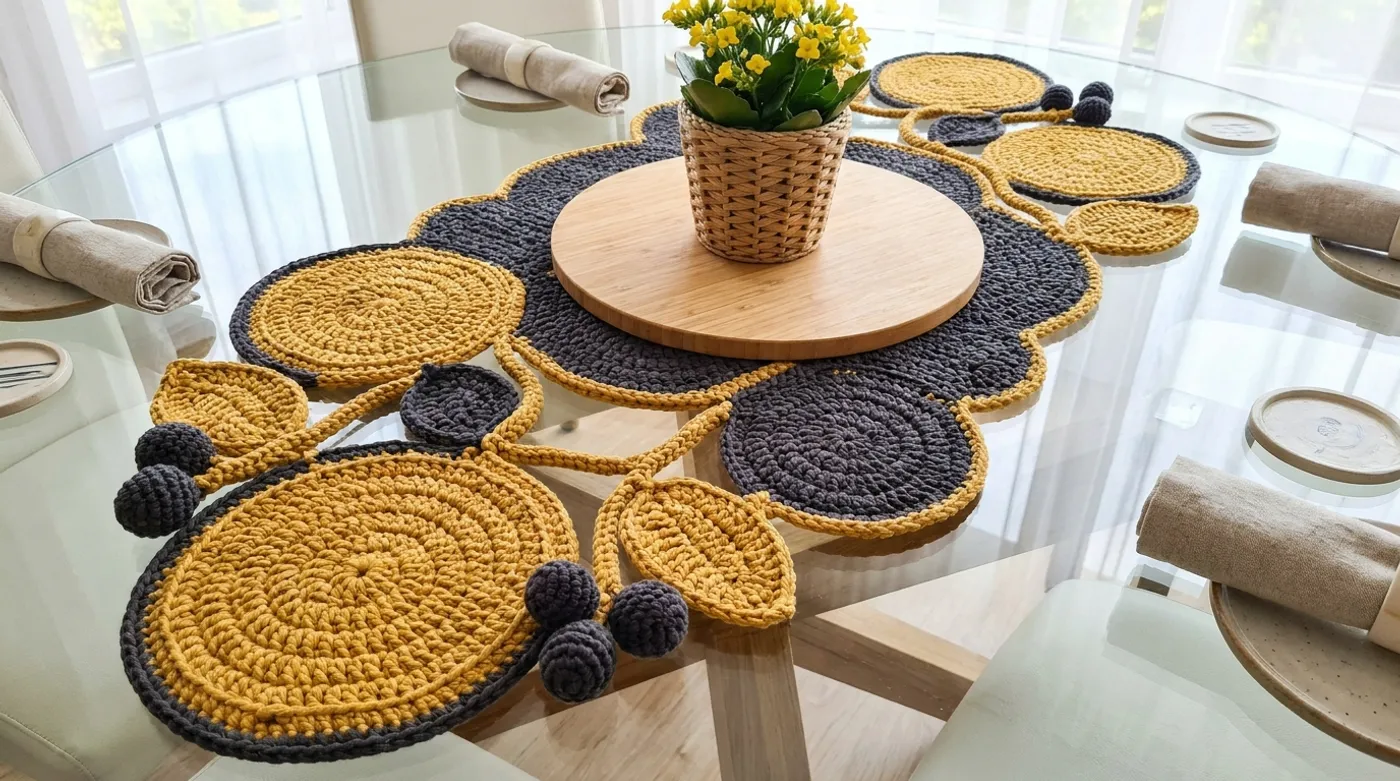
Create a striking asymmetrical botanical table runner using bulky cotton yarn in mustard yellow and charcoal grey. Features spiral crochet discs, ribbed leaves, 3D amigurumi berries, and corded surface stems.

Pattern Specifications
1. Introduction & Design Inspiration
There is a quiet drama in the way morning light catches the texture of a hand-crocheted surface — each ridge, each spiral, each tiny berry catching shadow differently as the day progresses. This runner was born from a desire to bring that living, breathing quality to the dining table: a piece that feels foraged rather than manufactured, asymmetrical rather than rigid, organic rather than ornamental.
The palette — matte mustard yellow and deep charcoal grey — came from a late-autumn walk through a city park where ginkgo leaves lay scattered against wet asphalt. That tension between warmth and gravity, between the golden and the grounded, became the emotional core of the design. The spiral discs echo seed pods and lichen colonies. The ribbed leaves unfurl with the deliberate slowness of new growth. The amigurumi berries cluster like rose hips after frost. And the corded stems? They are the quiet architecture holding it all together — surface crochet wandering across the table like vine tendrils seeking light.
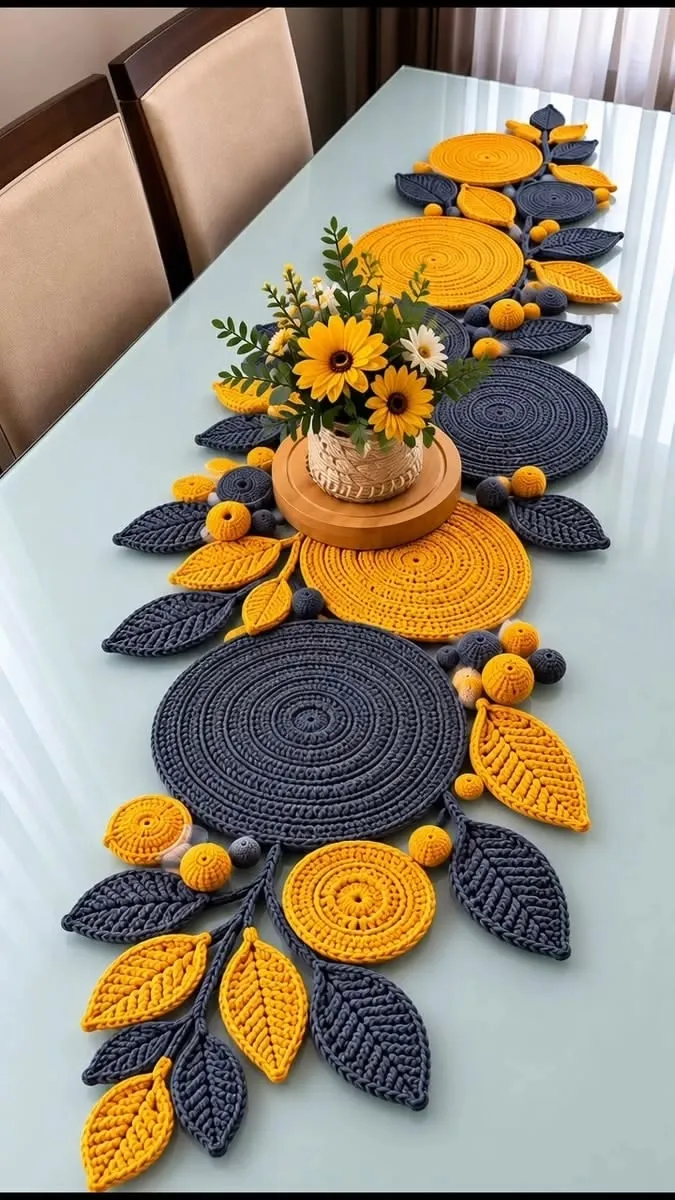
This is not a symmetrical runner. It is a landscape. You will crochet five primary discs of varying diameters, connect them with wandering stems, populate the negative space with layered leaves and berry clusters, and anchor the composition with a wooden trivet cradling a tiny woven planter. The result stretches approximately 160 cm (63 inches) along your table — long enough to span a six-person dining surface, asymmetrical enough to feel discovered rather than placed.
2. Pattern Overview & Finished Dimensions
-
Finished Length: 160 cm (63 in) along longest diagonal axis
-
Finished Width: Variable, 25–38 cm (10–15 in) at widest points
-
Disc Diameters: 18 cm (7 in), 15 cm (6 in), 12 cm (4.75 in), 10 cm (4 in), 8 cm (3.25 in)
-
Leaf Dimensions: Large 14 cm (5.5 in) length, Medium 10 cm (4 in), Small 7 cm (2.75 in)
-
Berry Diameter: 2.5 cm (1 in) each, worked in clusters of 3–5
-
Stem Path: Continuous surface crochet line approximately 140 cm (55 in) total
-
Structure Type: Modular motifs joined by surface crochet stems; no seaming required
-
Lay Flat: Yes — all pieces worked flat or in spiral rounds, blocked to relax
-
Reversible: No — right side features raised texture; wrong side is smooth
Fit & Placement Notes: Designed for rectangular or oval tables 180–220 cm (71–87 in) long. The asymmetrical layout means you can orient the runner either direction — the larger disc cluster can anchor the head of the table or sit off-center for a more dynamic composition. The wooden trivet (not crocheted) sits near the geometric center of the runner’s visual weight, not its measured midpoint.
3. Materials, Fiber & Hardware Checklist
Yarn — Bulky (5) Weight Cotton or T-Shirt Yarn
-
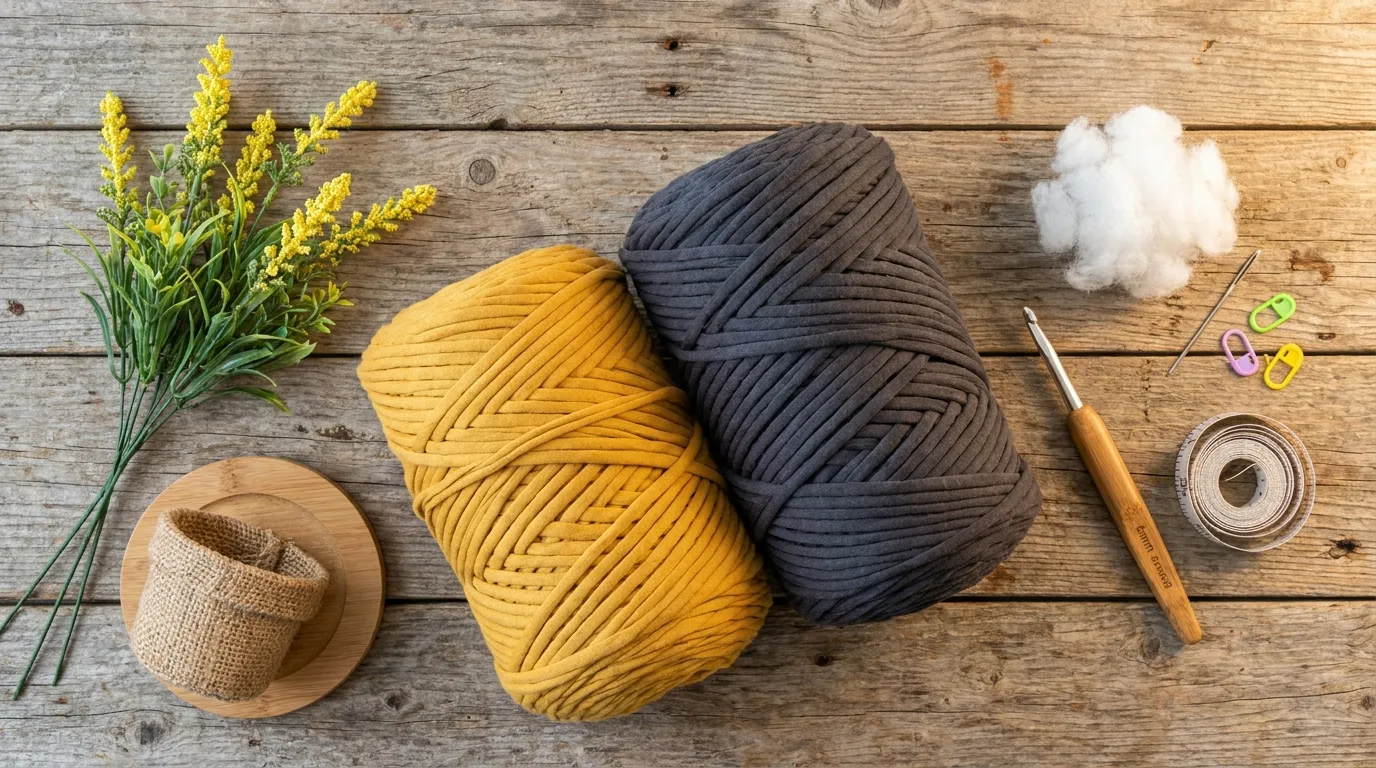
Color A (Mustard Yellow): 280 yds (256 m) — approx. 3 skeins at 95 yds each
-
Color B (Charcoal Grey): 200 yds (183 m) — approx. 2 skeins at 95 yds each
-
Recommended: Lion Brand 24/7 Cotton (Bulky), Drops Andes, or equivalent matte-finish bulky cotton. T-shirt yarn works beautifully for the discs and stems but is less ideal for the ribbed leaves due to reduced stitch definition.
Notions & Tools
- 6.0 mm (J-10) crochet hook — or size needed to obtain gauge
- 3.5 mm (E-4) crochet hook — for amigurumi berries (tighter fabric)
- Tapestry needle (large eye, blunt tip)
- Sharp scissors
- Blocking mats and T-pins
- Spray bottle for wet blocking
- Stitch markers (4–6, locking style preferred)
- Polyester fiberfill — small bag (approx. 50 g) for berry stuffing
Non-Crochet Elements (Sourced Separately)
- Round wooden trivet — 20 cm (8 in) diameter, natural finish
- Small woven planter — approx. 10 cm (4 in) diameter, fits on trivet
- Fresh or dried yellow flowers — ranunculus, billy buttons, or similar scale
- Optional: Clear-drying fabric glue for securing berries to stems if desired
4. Stitch Abbreviations (US Terms)
| Abbreviation | Meaning |
|---|---|
| ch | chain |
| sl st | slip stitch |
| sc | single crochet |
| hdc | half double crochet |
| dc | double crochet |
| tr | treble crochet |
| BLO | back loop only |
| FLO | front loop only |
| inc | increase (2 sc in same stitch) |
| dec | decrease (sc2tog — insert hook in next 2 sts, yarn over, pull through all 3 loops) |
| RS | right side |
| WS | wrong side |
| rnd(s) | round(s) |
| rep | repeat |
| sp | space |
| st(s) | stitch(es) |
| surface sl st | surface slip stitch (worked on fabric surface) |
| surface sc | surface single crochet (worked on fabric surface) |
Special Stitches
-
Ribbed Leaf Stitch (RLS): Row 1 (RS): Ch 2, hdc in 2nd ch from hook, turn. Row 2: Ch 1, sc in BLO across, turn. Row 3: Ch 1, hdc in BLO across, turn. Repeat Rows 2–3 for length.
-
Corded Surface Stem: Surface sc worked along a planned path, keeping tension loose enough to lie flat but firm enough to hold shape.
-
Magic Ring (MR): Adjustable loop start for spiral rounds.
5. Architectural Mechanics / Technique Deep-Dive
This runner relies on three distinct stitch architectures working in concert. Understanding why each behaves as it does will help you make confident tension and placement decisions.
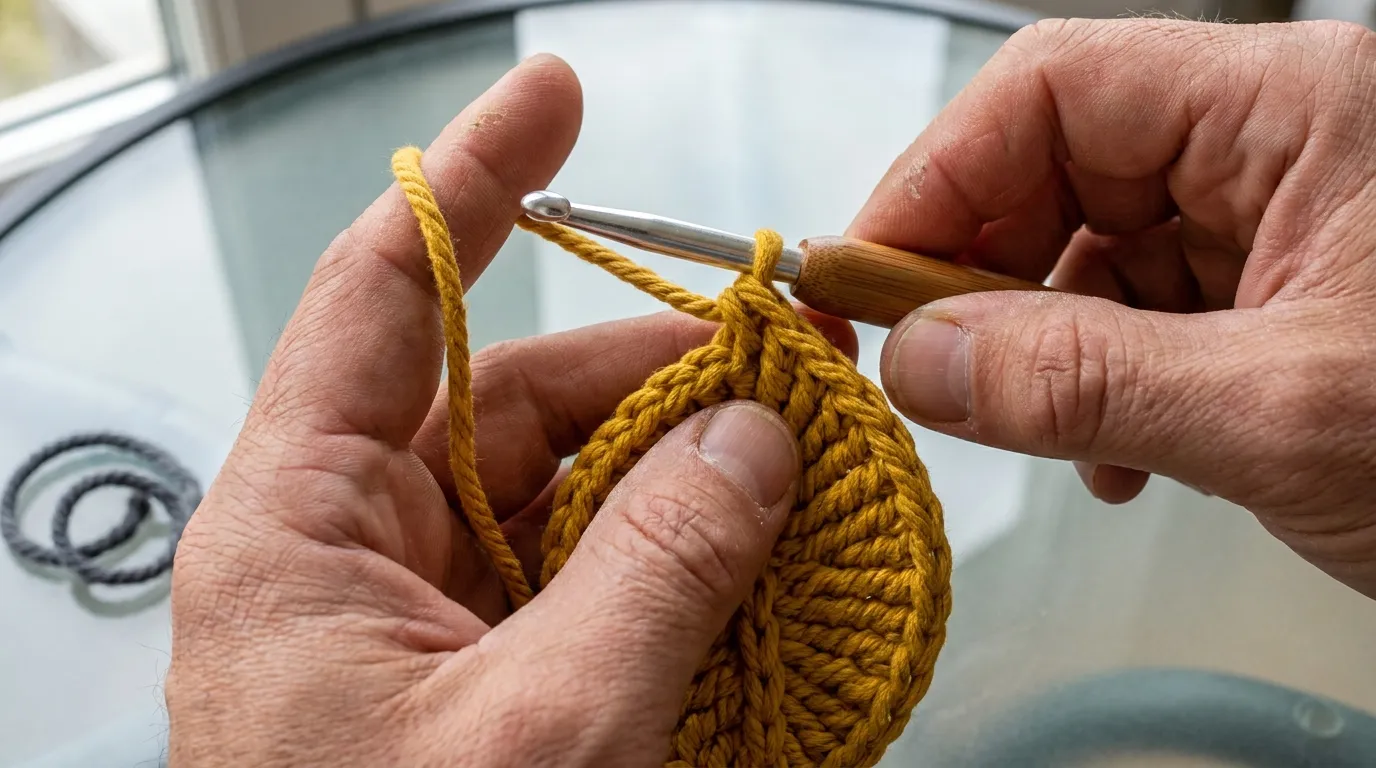
Spiral Single Crochet Discs (The Anchors) Worked in continuous spiral rounds without joining, these discs create the runner’s structural “islands.” The spiral method eliminates the visible seam of joined rounds, giving each disc a clean, organic perimeter. Increases are distributed evenly (6 per round) to maintain a flat circle — this is the same geometry as a basic amigurumi sphere base, but we stop before cupping begins. The key is consistent tension: too tight and the disc buckles; too loose and it ruffles. If your disc begins to cup before the target diameter, skip one increase round and resume the pattern. If it ruffles, add an extra plain round between increase rounds.
Back-Loop-Only Ribbed Leaves (The Movement) The RLS pattern (alternating sc BLO and hdc BLO rows) creates a fabric with pronounced horizontal ribs that mimic leaf venation. Working exclusively in the back loop pushes the front loop forward, creating a raised ridge every other row. The hdc rows add height and drape; the sc rows add density and structure. This stitch sequence naturally curls slightly at the edges — we exploit this by blocking the leaves with a gentle upward curve at the tip, as if reaching for light. The stem attachment point is always the cast-on edge (the leaf base), worked into the foundation chain loops.
Corded Surface Stems (The Connective Tissue) Surface crochet is worked onto the finished fabric (or directly onto the table surface if you’re composing in situ). Unlike traditional seaming, surface stems float above the base plane, casting subtle shadows that shift with lighting. The technique: insert hook through the fabric (or through the previous surface stitch), yarn over, pull up a loop to the surface, yarn over, pull through both loops. Maintain even tension — the stem should hug the surface without puckering it. Plan your stem path before beginning; light chalk marks or pinned thread can guide the route.
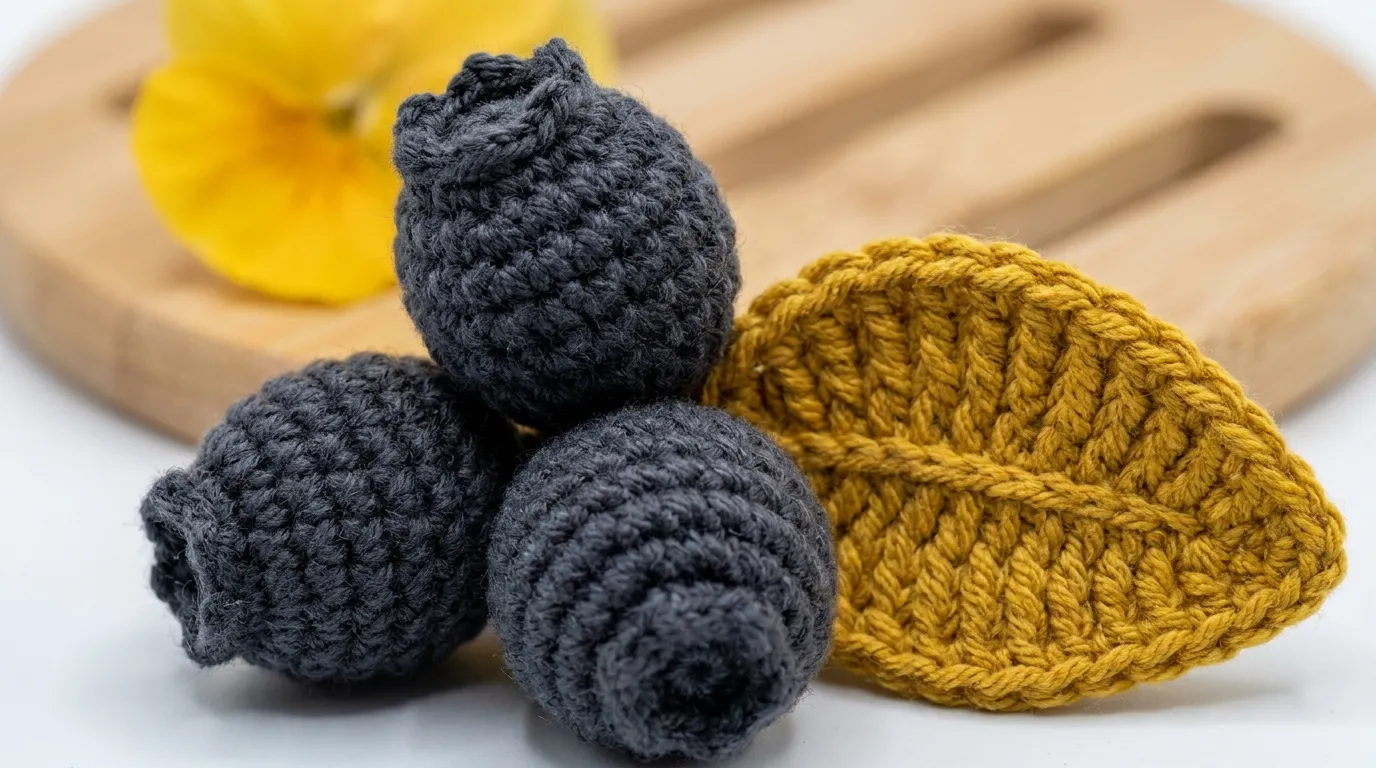
3D Amigurumi Berries (The Punctuation) Worked in tight spiral sc on a 3.5 mm hook with bulky yarn, these berries achieve a dense, firm fabric that holds stuffing without showing gaps. The small hook relative to yarn weight is intentional — it creates a stiff, sculptural form. Each berry is worked as a quick sphere (increase to 18 sts, work even, decrease to close), stuffed firmly, and sewn onto the stem path or tucked between disc edges.
6. Step-by-Step Stitch Instructions
Phase 1: Spiral Discs (Make 5)
Work all discs in continuous spiral rounds. Do not join rounds. Use a stitch marker to mark the first stitch of each round, moving it up as you go. Work in Color A (Mustard) for Discs 1, 3, 5; Color B (Charcoal) for Discs 2, 4.
Disc 1 — Large (18 cm / 7 in) — Color A
- Rnd 1: 6 sc in MR (6)
- Rnd 2: inc in each st around (12)
- Rnd 3: [sc, inc] 6 times (18)
- Rnd 4: [2 sc, inc] 6 times (24)
- Rnd 5: [3 sc, inc] 6 times (30)
- Rnd 6: [4 sc, inc] 6 times (36)
- Rnd 7: [5 sc, inc] 6 times (42)
- Rnd 8: [6 sc, inc] 6 times (48)
- Rnd 9: [7 sc, inc] 6 times (54)
- Rnd 10: [8 sc, inc] 6 times (60)
- Rnd 11–12: sc in each st around (60)
- Fasten off, leaving 30 cm tail for weaving. Block to 18 cm diameter.
Disc 2 — Medium-Large (15 cm / 6 in) — Color B
- Work Rnds 1–9 as Disc 1 (54 sts at end of Rnd 9)
- Rnd 10–11: sc in each st around (54)
- Fasten off, leave tail. Block to 15 cm diameter.
Disc 3 — Medium (12 cm / 4.75 in) — Color A
- Work Rnds 1–8 as Disc 1 (48 sts at end of Rnd 8)
- Rnd 9–10: sc in each st around (48)
- Fasten off, leave tail. Block to 12 cm diameter.
Disc 4 — Small-Medium (10 cm / 4 in) — Color B
- Work Rnds 1–7 as Disc 1 (42 sts at end of Rnd 7)
- Rnd 8–9: sc in each st around (42)
- Fasten off, leave tail. Block to 10 cm diameter.
Disc 5 — Small (8 cm / 3.25 in) — Color A
- Work Rnds 1–6 as Disc 1 (36 sts at end of Rnd 6)
- Rnd 7–8: sc in each st around (36)
- Fasten off, leave tail. Block to 8 cm diameter.
Blocking Discs: Pin each disc to blocking mats at target diameter. Lightly mist with water. Allow to dry completely (4–6 hours). This sets the stitch memory and ensures flat laying.
Phase 2: Ribbed Leaves (Make 12 Total)
Work leaves in Color B (Charcoal) using 6.0 mm hook. All leaves use the RLS pattern. Foundation chain length determines leaf length; width is always 5 sts.
Large Leaves (Make 4) — 14 cm / 5.5 in
- Ch 16. Row 1 (RS): hdc in 2nd ch from hook and each ch across (15 hdc), turn.
- Row 2: Ch 1, sc in BLO across (15 sc), turn.
- Row 3: Ch 1, hdc in BLO across (15 hdc), turn.
- Rep Rows 2–3 until piece measures 14 cm from cast-on edge, ending on a Row 3 (hdc row).
- Fasten off, leave 25 cm tail for stem attachment.
Medium Leaves (Make 4) — 10 cm / 4 in
- Ch 16. Work RLS pattern until piece measures 10 cm, ending on hdc row.
- Fasten off, leave 25 cm tail.
Small Leaves (Make 4) — 7 cm / 2.75 in
- Ch 16. Work RLS pattern until piece measures 7 cm, ending on hdc row.
- Fasten off, leave 25 cm tail.
Blocking Leaves: Pin each leaf flat, gently curving the tip upward (approx. 1 cm lift at tip). Mist lightly. Dry completely. The BLO ribs will sharpen beautifully.
Phase 3: Amigurumi Berries (Make 18 Total)
Work in Color A (Mustard) using 3.5 mm hook. Continuous spiral, no joining.
- Rnd 1: 6 sc in MR (6)
- Rnd 2: inc in each st around (12)
- Rnd 3: [sc, inc] 6 times (18)
- Rnd 4–6: sc in each st around (18) — 3 rounds even
- Rnd 7: [sc, dec] 6 times (12)
- Stuff firmly with fiberfill.
- Rnd 8: dec 6 times (6)
- Fasten off, leaving 20 cm tail. Thread tail through remaining 6 sts, pull tight to close. Knot securely. Use remaining tail to sew berry to stem or disc.
Berry Clusters: Group berries in clusters of 3 (two clusters), 4 (two clusters), and 5 (one cluster) for visual rhythm. Sew berries together at their sides using the closing tails before attaching to runner.
Phase 4: Surface Stem Path (The Composition)
This is where the runner becomes a composition. Lay your blocked discs on your table (or a clean floor space the same dimensions) in an asymmetrical arrangement:
[Disc 1] ---- [Disc 3] ---- [Disc 5] \ / / \ / / [Disc 2] ---- [Disc 4] Approximate center-to-center distances: Disc 1 to Disc 3 = 35 cm, Disc 3 to Disc 5 = 30 cm, Disc 1 to Disc 2 = 25 cm, Disc 2 to Disc 4 = 28 cm, Disc 3 to Disc 4 = 22 cm. The wooden trivet sits in the negative space near Disc 3.
Stem Execution: Using Color B (Charcoal) and 6.0 mm hook, work surface sc along the planned paths connecting disc perimeters. Begin at the edge of Disc 1, work toward Disc 3, then branch to Disc 5. Separate stem from Disc 2 to Disc 4. Add short lateral stems (5–8 cm) where leaves will attach — 2–3 per disc cluster. Keep tension relaxed; the stem should rest on the surface, not pull it. Fasten off at each branch end, weave tails into the stem itself (insert hook back through previous surface stitches).
Total stem length: Approx. 140 cm. Work in 2–3 sessions to avoid hand fatigue.
7. Assembly, Mounting & Structural Integration
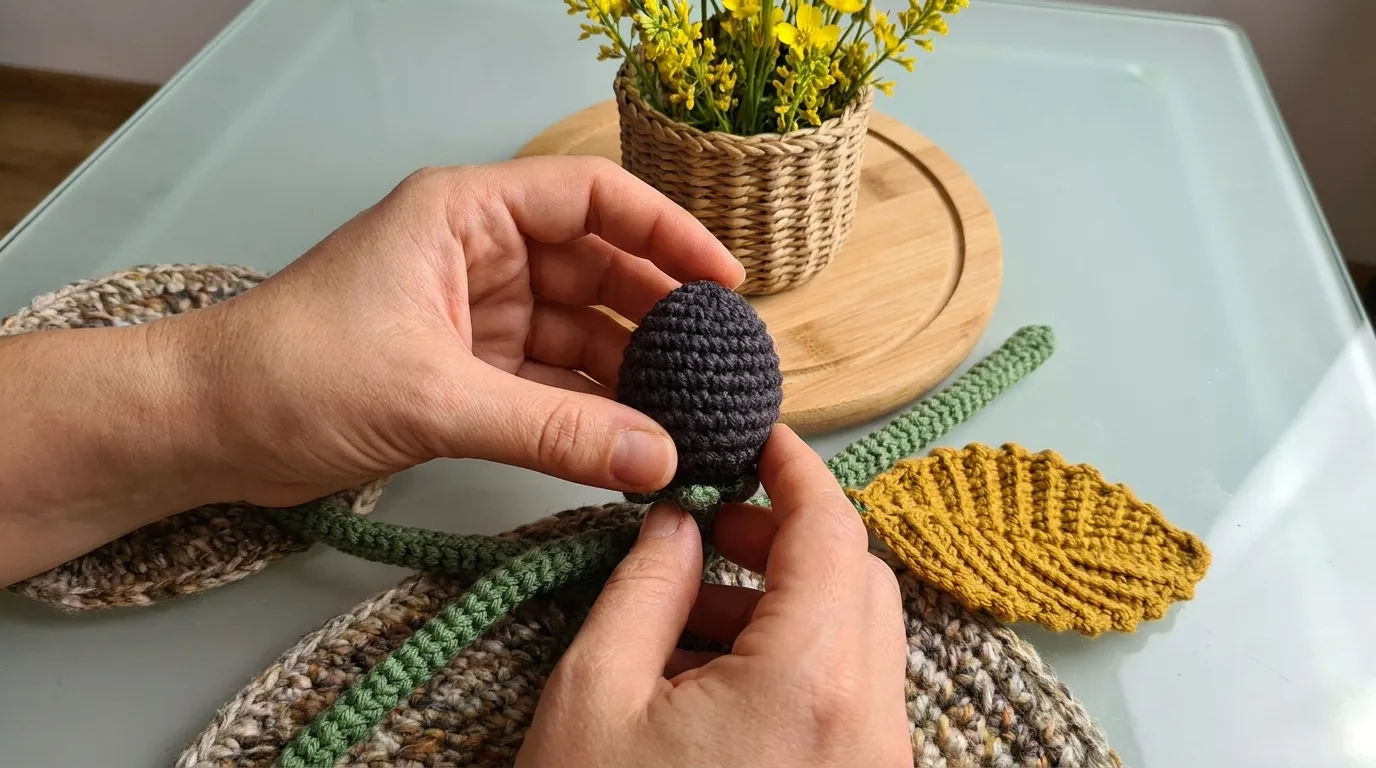
Attaching Leaves to Stems Thread a leaf’s 25 cm tail onto a tapestry needle. At the planned attachment point on a lateral stem, insert needle through the surface stem fabric (catching the back loop of a surface sc), then through the cast-on edge of the leaf (the foundation chain loops). Make 3–4 secure stitches, distributing them across the leaf base width. Knot on the underside of the stem. Trim excess. Repeat for all 12 leaves, varying angles — some pointing toward the table center, some outward, some overlapping slightly.
Attaching Berry Clusters Using the closing tails from each berry (or fresh yarn if tails are short), sew clusters onto the main stem paths at natural “nodes” — where stems branch or curve. Position clusters so berries sit slightly above the surface plane (the stuffing gives them height). Secure with 4–5 stitches per berry through the stem fabric. For the 5-berry cluster, arrange in a loose pentagon; for 4-berry, a rhombus; for 3-berry, a triangle.
Disc-to-Disc Stability (Optional) If your table surface is slippery (glass, polished stone), add 3–4 tiny dots of clear-drying fabric glue to the underside of each disc perimeter. This prevents shifting without permanent adhesion. Test on an inconspicuous area first.
Wooden Trivet & Planter Placement Place the wooden trivet in the composition’s visual center (near Disc 3 in the layout above). Nestle the woven planter on the trivet. Add fresh or dried yellow flowers. This element is not crocheted but is integral to the finished presentation — it provides verticality and a living counterpoint to the yarn botany.
8. Hardware, Accents & Embellishment Assembly
This pattern requires no traditional hardware (no D-rings, clasps, chains, or zippers). The “hardware” is the wooden trivet and planter — sourced elements that ground the textile in material contrast. If you wish to add a subtle signature accent:
-
Maker’s Mark: Embroider a tiny “AT” or your initials in Color B on the underside of Disc 1 using a single strand of yarn and a sharp embroidery needle.
-
Seasonal Swaps: The planter flowers can be changed seasonally — white hellebores in winter, purple asters in autumn, green wheat grass in spring. The runner itself remains constant.
9. Blocking, Care & Maintenance
Initial Blocking (Critical) Block all discs and leaves before assembly. Pin to target dimensions on blocking mats. Mist with cool water until damp (not soaking). Allow to air dry 24 hours. This sets the stitch architecture and prevents future distortion.
Washing Hand wash only in cool water (30°C / 86°F max) with wool-safe detergent (e.g., Soak, Eucalan). Submerge gently — do not agitate. Soak 15 minutes. Rinse in cool water until clear. Press water out between towels — never wring.
Drying & Re-Blocking Lay flat on fresh towels, reshaping discs to round, leaves to curved flat. Pin if needed. Dry flat, away from direct sun and heat. Re-block after every wash to maintain crisp ribs and flat discs.
Storage Store flat in a cotton pillowcase or acid-free tissue. Do not fold — the surface stems and berries will crease permanently. If space requires rolling, roll loosely around an acid-free tube with tissue between layers.
Spot Cleaning For small spills: blot (don’t rub) with cool damp cloth and a drop of detergent. Rinse cloth, blot again. Air dry flat.
10. Frequently Asked Questions (FAQ)
Q: Can I use worsted weight yarn instead of bulky? A: Yes, but you’ll need to adjust everything. Use a 5.0 mm (H-8) hook for discs and leaves, 3.0 mm for berries. Increase disc round counts by 2–3 rounds per size to reach target diameters. You’ll need approximately 30% more yardage. The texture will be finer, less chunky — still beautiful, but a different aesthetic.
Q: My disc is ruffling at the edges before I reach the target diameter. What do I do? A: Ruffling means too many increases for your tension. Skip the next scheduled increase round (work a plain sc round instead), then resume the increase pattern. If it ruffles again, skip another. The goal is a flat circle — your stitch count at each diameter matters more than the round number.
Q: The surface stems are puckering the table runner fabric. How do I fix this? A: Your surface tension is too tight. Frog the stem and rework with a looser hand — the loop pulled to the surface should sit comfortably, not pull the base fabric upward. Practice on a swatch first: work 20 surface sc, check that the swatch lies flat. Adjust until it does.
Q: Can I make this runner shorter for a smaller table? A: Absolutely. Reduce the number of discs (use 3 instead of 5: Large, Medium, Small) and shorten the stem paths proportionally. A 3-disc version runs approx. 100 cm (39 in) — perfect for a 4-person table. Keep the same leaf and berry counts for visual density.
11. Community Call-to-Action
You’ve crocheted a landscape. A runner that breathes across the table, changing with the light, the seasons, the meals shared upon it. That is the quiet power of fiber — it holds intention in every stitch.
I would love to see your Mustard & Charcoal Botanical Table Runner in its chosen home. Share your finished make on Instagram or Pinterest and tag @NailItHome with #NailItHomeBotanical — your composition, your table, your light. Every maker’s arrangement is different, and that variation is the pattern’s truest success.
If you found joy (or productive struggle) in this pattern, consider leaving a comment on the blog post or pinning the tutorial for your fiber community. Your documentation helps other makers discover the project and builds the archive we all draw from.
Happy stitching, always.
— Aurelia Thorne
Master Fiber Artist & Lead Pattern Curator, Nail It Home


