

Midnight Nautilus Conch Crochet Handbag: Free Crochet Pattern & Tutorial
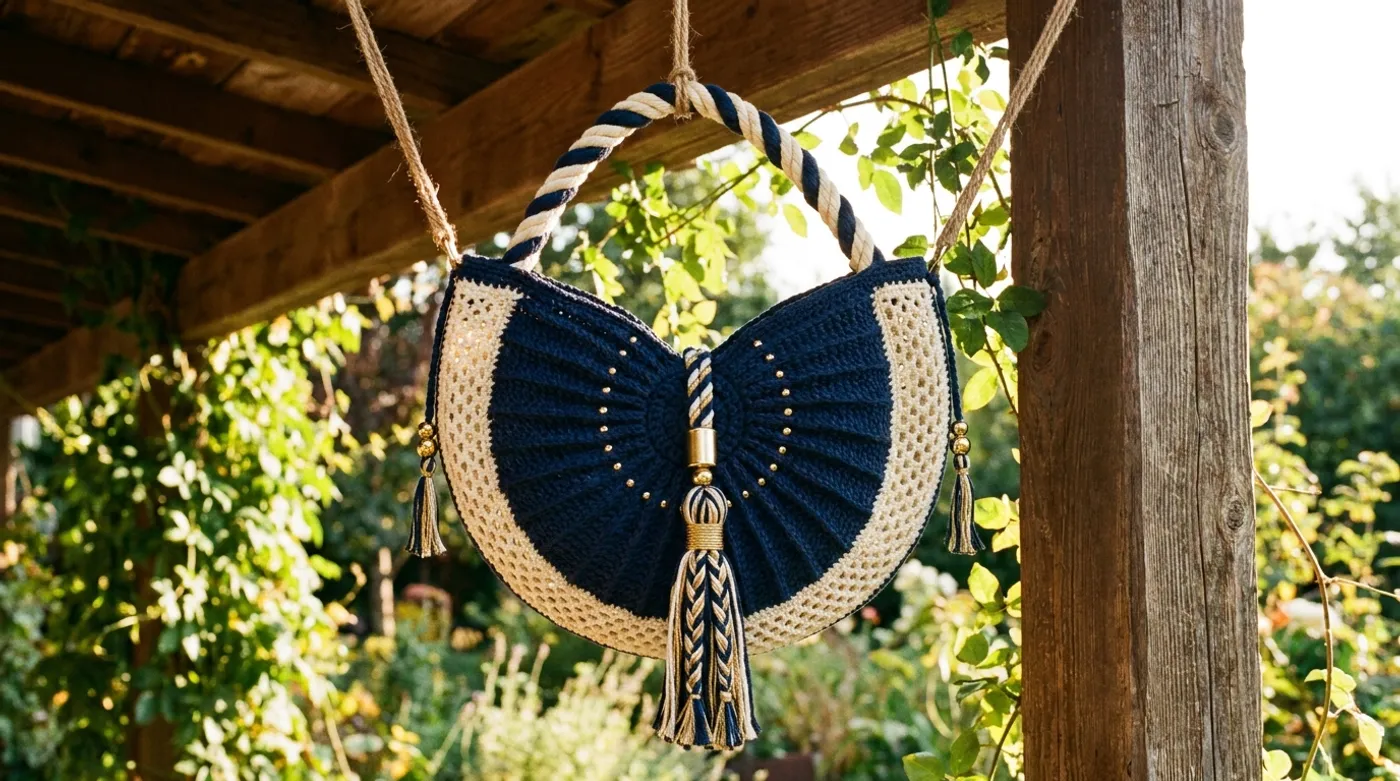
The handbag features a half‑moon crescent silhouette in deep navy and creamy ivory, with a solid navy fan‑shaped panel formed by spiral shell stitches that rise in a helical ridge, contrasted by airy cream open‑mesh side panels. A thick twisted‑rope handle of alternating navy ...

Pattern Specifications
Introduction & Design Inspiration
There is a particular hush that falls over the workshop when a nautilus shell arrives on the drafting table — its logarithmic spiral whispering of golden ratios, deep-sea pressure, and the quiet architecture of growth. The Midnight Nautilus Conch Handbag was born from that silence: a desire to translate the shell’s helical ridges and chambered chambers into a wearable fiber sculpture that carries your essentials with oceanic grace.
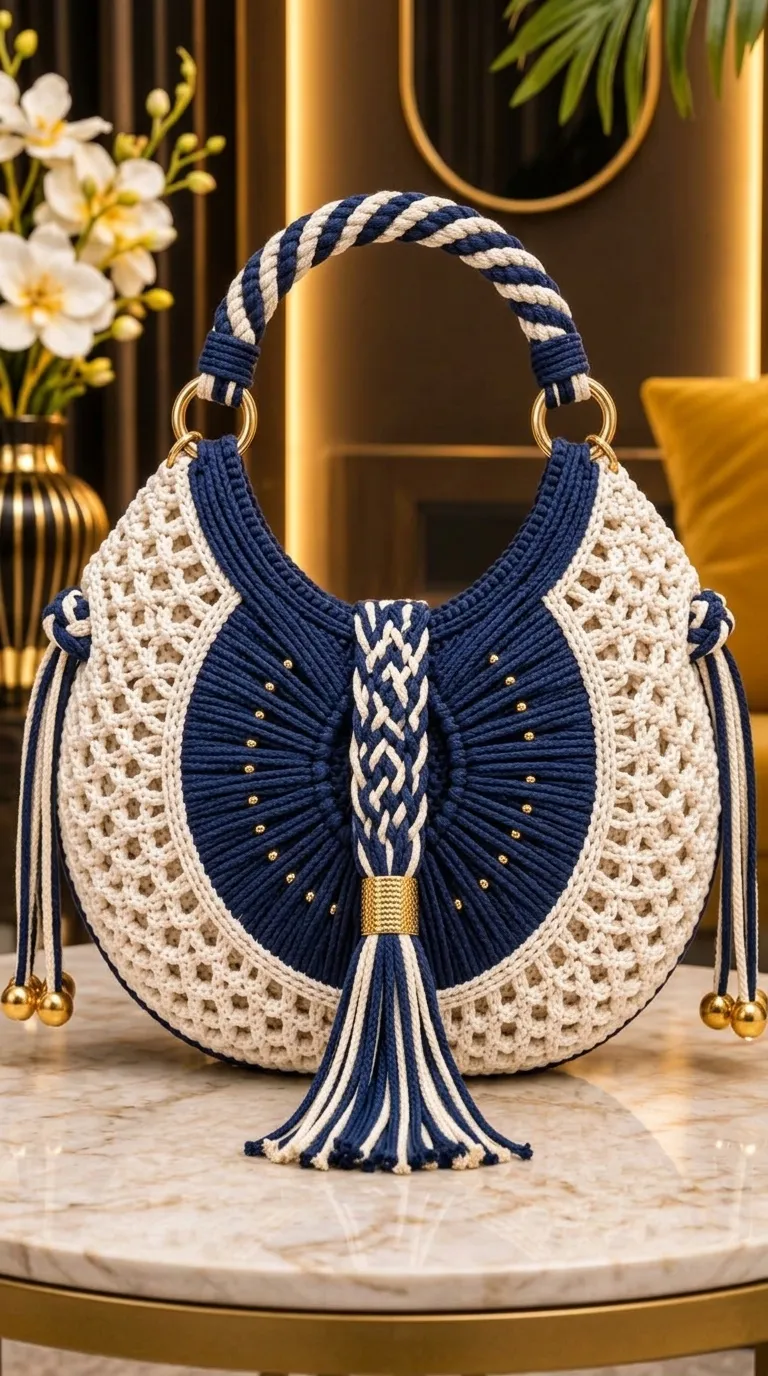
The design centers on three technical conversations. First, a central navy fan panel built from 3-double-crochet shells worked in a continuous spiral — each round stepping upward like the shell’s own growth lines — anchored by a vertical single-crochet rib that mimics the siphuncle, the shell’s structural spine. Second, cream side panels in open-mesh filet stitch provide negative space, letting light filter through like water through kelp forests while keeping the bag lightweight. Third, a twisted-rope handle of alternating navy and cream cable stitches wraps the crescent’s crown, its 2.5 visible twists echoing the shell’s own torsion.
Gold-tone hardware — S-hook rings, eyelets, radial studs, a cylindrical bead, and finial caps — catches warm directional light like bioluminescence at depth. The central tassel descends in a three-strand braid plait, capped by an 8 mm gold cylinder and striped fringe; two side tassels finish with 4 mm finial beads. No lining is needed: the dense shell stitch and firm cotton-blend yarn create a self-supporting vessel that holds its crescent silhouette (34 cm H × 30 cm W × 12 cm D) beautifully.
This pattern sits at a confident Intermediate level. You’ll need fluency with shell stitches, filet mesh, working in spirals without joining, cable-style twisted stitches, and basic jewelry assembly. But every technique is broken down row by row, with stitch counts and checkpoints so you never lose your place in the spiral. Pour a cup of tea, queue your favorite sea-shanty playlist, and let’s grow a nautilus together.
Pattern Overview & Finished Dimensions
| Measurement | Metric | Imperial |
|---|---|---|
| Height (center front to base) | 34 cm | 13.4 in |
| Maximum Width (crescent arc) | 30 cm | 11.8 in |
| Depth (gusset at center) | 12 cm | 4.7 in |
| Handle Length (end to end, relaxed) | 52 cm | 20.5 in |
| Handle Twists (visible) | 2.5 full rotations | — |
| Central Tassel Length (from fan apex) | 18 cm | 7 in |
| Side Tassel Length (from lower edge) | 12 cm | 4.7 in |
| Tassel Braid Twists | 1.5 rotations | — |
Structural Notes:
- Half-moon crescent silhouette with a flat base that allows the bag to stand upright when set down.
- Self-supporting construction: no fabric lining, no interfacing. The density of the spiral shell panel (≈ 14 sts/4 in) and the firm cotton-blend yarn provide structural integrity.
- The bag opens along the entire curved top edge; gold S-hook rings at each terminus allow optional closure with a chain or leather strap (not included).
- Weight: approximately 220 g (7.8 oz) — substantial but not heavy.
Fit & Function: Comfortably fits a 6.7” smartphone, wallet, keys, sunglasses, and a small paperback. The 12 cm depth prevents items from spilling when the bag is set on a table.
Materials, Fiber & Hardware Checklist
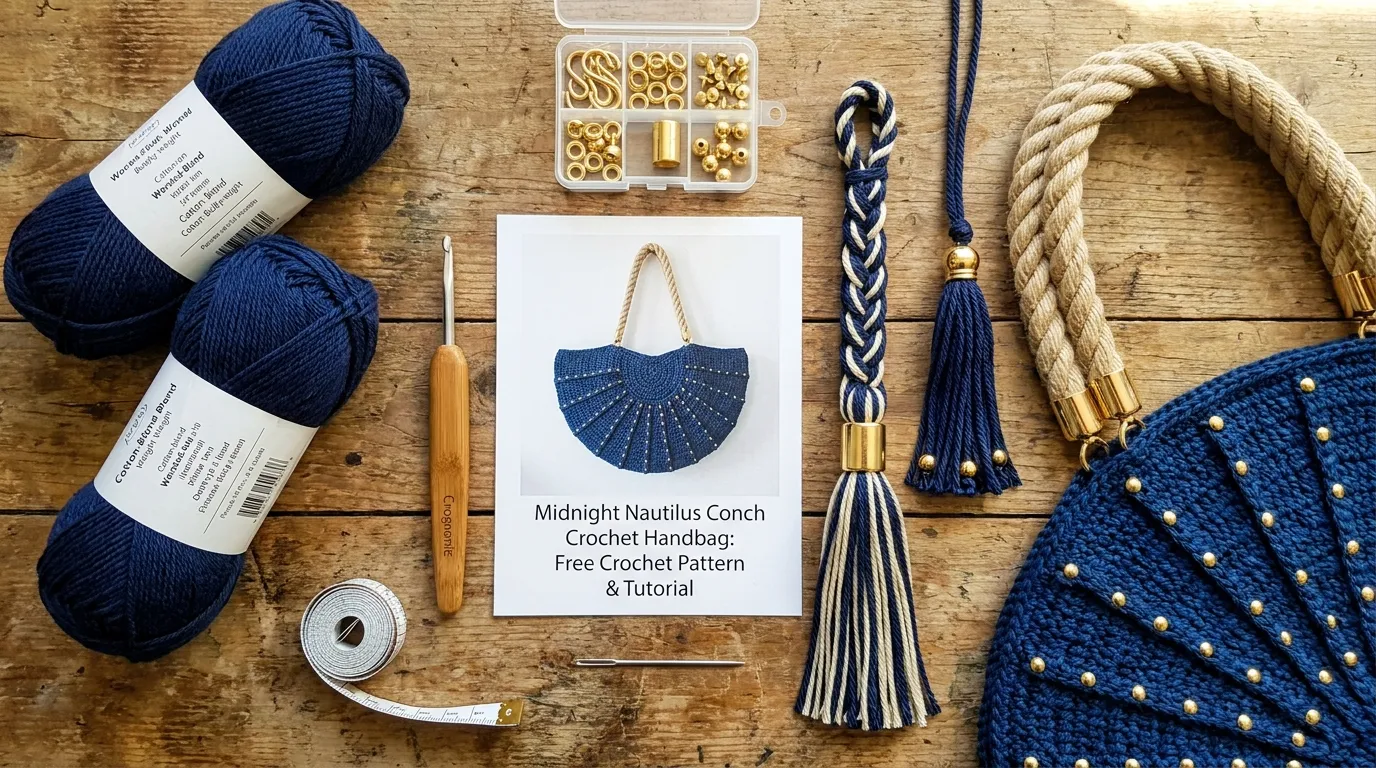
Yarn (100% Cotton-Blend, Worsted/Bulky Weight)
| Color | Yardage | Skeins (Typical 100g/180 yd) | Suggested Brands |
|---|---|---|---|
| Navy (Color A) | 260 yds (238 m) | 2 skeins | Lion Brand 24/7 Cotton, Cascade Ultra Pima, Berroco Modern Cotton |
| Cream (Color B) | 160 yds (146 m) | 1 skein | Same line as Color A for consistent gauge |
Yarn Substitution Note: Choose a cotton-blend with ≤ 5% synthetic content for stitch definition and minimal stretch. Pure cotton works but may lack the slight elasticity that helps the twisted handle hold its coils. Avoid acrylic — it blocks poorly and won’t support the self-standing structure.
Hooks & Notions
-
5.5 mm (I-9) hook — for shell stitch panel and filet mesh (tighter gauge for structure)
-
6.0 mm (J-10) hook — for twisted-rope handle and scalloped edging (slightly looser for drape)
-
Tapestry needle (blunt tip, large eye)
-
Sharp scissors
-
Stitch markers (4 locking, 6 removable)
-
Measuring tape (flexible, 150 cm)
-
Blocking mats & T-pins (for final shaping)
-
Polyester sewing thread (navy & cream, for hardware attachment)
Hardware & Embellishments (Gold-Tone)
| Item | Qty | Specs | Placement |
|---|---|---|---|
| S-hook rings | 2 | 6 mm inner diameter | Top edge termini (closure) |
| Eyelet rings | 4 | 4 mm inner diameter | Handle attachment points (2 per side) |
| Metal studs | 18 | 2 mm dome, prong-back | Radial pattern on navy fan panel |
| Cylindrical bead | 1 | 8 mm × 4 mm, 2 mm hole | Central tassel cap |
| Finial beads | 2 | 4 mm, 2 mm hole | Side tassel caps |
| Tassel fringe | 1 pack | 10 cm strands, cream/gold striped | Central tassel fringe |
Hardware Tip: Test stud prongs on a gauge swatch first — cotton-blend yarn can be dense. Use a leather punch or heated awl to pre-make holes for clean insertion.
Stitch Abbreviations (US Terms)
| Abbreviation | Meaning |
|---|---|
ch | chain |
sl st | slip stitch |
sc | single crochet |
hdc | half double crochet |
dc | double crochet |
tr | treble crochet |
BLO | back loop only |
FLO | front loop only |
inc | increase (2 sts in same st) |
dec | decrease (sc2tog or dc2tog as specified) |
RS | right side |
WS | wrong side |
sp | space |
sk | skip |
rep | repeat |
* * | repeat instructions between asterisks |
[ ] | work instructions in brackets as a group |
( ) | stitch count at end of row/round |
Special Stitches (Defined In-Line):
-
3-dc Shell:
(3 dc, ch 1, 3 dc)in indicated stitch or space — creates the fan shell. -
Filet Mesh Block:
3 dc(solid block) / Filet Mesh Space:ch 2, sk 2 sts, dc(open mesh). -
Twisted Rope Stitch (TRS):
*yo, insert hook in next st, yo, pull up loop (3 loops on hook), yo, pull through 1 loop (chain), yo, pull through 2 loops, yo, pull through 2 loops* — creates a twisted single-crochet-like stitch with a pronounced rope texture. -
Scalloped hdc Shell:
(hdc, dc, tr, dc, hdc)in same stitch — forms the top-edge scallop.
Architectural Mechanics / Technique Deep-Dive
Understanding why each stitch behaves as it does lets you troubleshoot intuitively and adapt the pattern to your tension.
1. Spiral Shell Panel — The Logarithmic Growth Principle
The navy fan panel is worked in a continuous spiral (no joining, no turning chains). Each round adds one shell repeat (3-dc shell + ch-1) at the center apex, while the vertical single-crochet rib runs straight up the midline. This mimics the nautilus: new chambers accrete at the growing edge while the central column remains the structural constant.
Why no joining? A joined round creates a visible seam that breaks the helical illusion. Working in a spiral means the “beginning of round” migrates leftward (for right-handed crocheters) by roughly one shell per round. Use a locking stitch marker in the first stitch of each round and move it up every round — this is your true round counter.
The Vertical SC Rib: After completing each spiral round, you work 1 sc in the center-back stitch of the previous round’s central shell (the stitch directly above the rib). This single column of SC stitches anchors the spiral, prevents biasing, and creates the siphuncle ridge. It also gives you a clear “center back” reference for symmetry.
2. Filet Mesh Side Panels — Negative Space as Structure
The cream panels use open filet mesh (dc, ch 2, sk 2, dc). This creates a grid of 1-inch squares that stretches slightly horizontally but resists vertical distortion — perfect for the bag’s curved flanks. The mesh is worked flat, back-and-forth, with increases at the outer edges to follow the crescent curve.
Key Insight: Filet mesh gauge is notoriously slippery. Work a 6-inch square swatch, block it aggressively (wet block, pin to 18 sts × 12 rows = 4 in), and measure after drying. If your mesh is too open, drop to a 5.0 mm hook for the side panels only.
3. Twisted-Rope Handle — Cable Mechanics Without a Cable Needle
The handle uses the Twisted Rope Stitch (TRS) worked in the round on a small circumference (12 sts). Each TRS is essentially a single crochet with an extra yarn-over before insertion, creating a half-twist per stitch. Over 12 stitches per round, that’s 12 half-twists = 6 full rotations per round. But because the stitches stack vertically, the twists compound into a continuous helical rope.
Why 2.5 visible twists? The handle is 52 cm long. At our gauge (≈ 10 TRS rounds per inch), that’s ~200 rounds. 200 rounds × 0.5 twist/stitch × 12 sts = 1200 half-twists = 600 full rotations — but the rope relaxes into a stable 2.5-twist equilibrium when blocked. The alternating navy/cream color change every 4 rounds creates a candy-cane spiral that visually reinforces the torsion.
4. Scalloped Edging — Distributing Curvature
The top edge receives a row of scalloped hdc shells (hdc, dc, tr, dc, hdc) placed every 4 stitches along the combined panel edges. The varying stitch heights (hdc → dc → tr → dc → hdc) create a smooth arc that absorbs the transition from the dense shell panel (shorter row gauge) to the open mesh (taller row gauge) without puckering.
5. Braided Tassel — Three-Strand Plait Geometry
The central tassel uses a 3-strand braid plait stitch: three 60-cm cords (2 navy, 1 cream) are folded in half, anchored at the fold with a gold cylindrical bead, then braided for 18 cm. The 1.5 twists emerge naturally from the braid’s topology — a 3-strand braid completes one full structural rotation every 3 crossings. We stop at 1.5 rotations (≈ 4.5 crossings) for a relaxed, organic drape.
Step-by-Step Stitch Instructions
Phase 1: Central Navy Fan Panel (Spiral Shell Stitch)
Setup: With 5.5 mm hook and Navy (Color A), ch 4, sl st in first ch to form ring. Place locking marker (RM1) in ring — this marks Round 1 start.
Round 1: Ch 2 (counts as first dc), 2 dc in ring (first half-shell), ch 1, 3 dc in ring, ch 1 × 3 more times (4 half-shells total forming a cross), sl st to top of beg ch-2. Do not turn. Move RM1 to first dc of round. — 12 dc, 4 ch-1 sps
Round 2: Ch 2, 2 dc in same st (completes first shell), ch 1, [3 dc in next ch-1 sp, ch 1] 3 times, 3 dc in next ch-1 sp (center front), ch 1, [3 dc in next ch-1 sp, ch 1] 3 times, sl st to beg ch-2. Move RM1. — 8 shells (4 per quadrant)
Round 3: Ch 2, 2 dc in same st, ch 1, [3 dc in next ch-1 sp, ch 1] 7 times, 3 dc in next ch-1 sp (center front), ch 1, [3 dc in next ch-1 sp, ch 1] 7 times, sl st to beg ch-2. Move RM1. — 16 shells
Rounds 4–14 (11 rounds): Continue spiral, adding one shell repeat per quadrant per round. Each round: work shells in every ch-1 sp around, with 2 extra shells at center front (the apex) to widen the fan. Pattern per round:
Ch 2, 2 dc in same st, ch 1, [3 dc in next ch-1 sp, ch 1] to center-front sp, 3 dc in center-front sp, ch 1, 3 dc in same sp, ch 1 (double shell at apex), [3 dc in next ch-1 sp, ch 1] to end, sl st to beg ch-2. Move RM1.
Stitch Count Checkpoints:
| Round | Total Shells | Shells per Quadrant (excl. apex) |
|---|---|---|
| 1 | 4 | 1 |
| 2 | 8 | 2 |
| 3 | 16 | 4 |
| 4 | 24 | 5 + 2 apex |
| 5 | 32 | 7 + 2 apex |
| … | … | … |
| 14 | 96 | 23 + 2 apex |
Vertical SC Rib (worked simultaneously): After each round’s sl st, before moving RM1: 1 sc in the center-back stitch of the previous round’s central shell (the stitch directly above the previous sc). This creates a single column of 14 sc stitches from base to apex. Use a second locking marker (RM2) to mark this rib stitch each round.
Round 15 (Transition to Edging): Work final spiral round without double shell at apex. End with sl st. Fasten off Navy. Rib now has 15 sc.
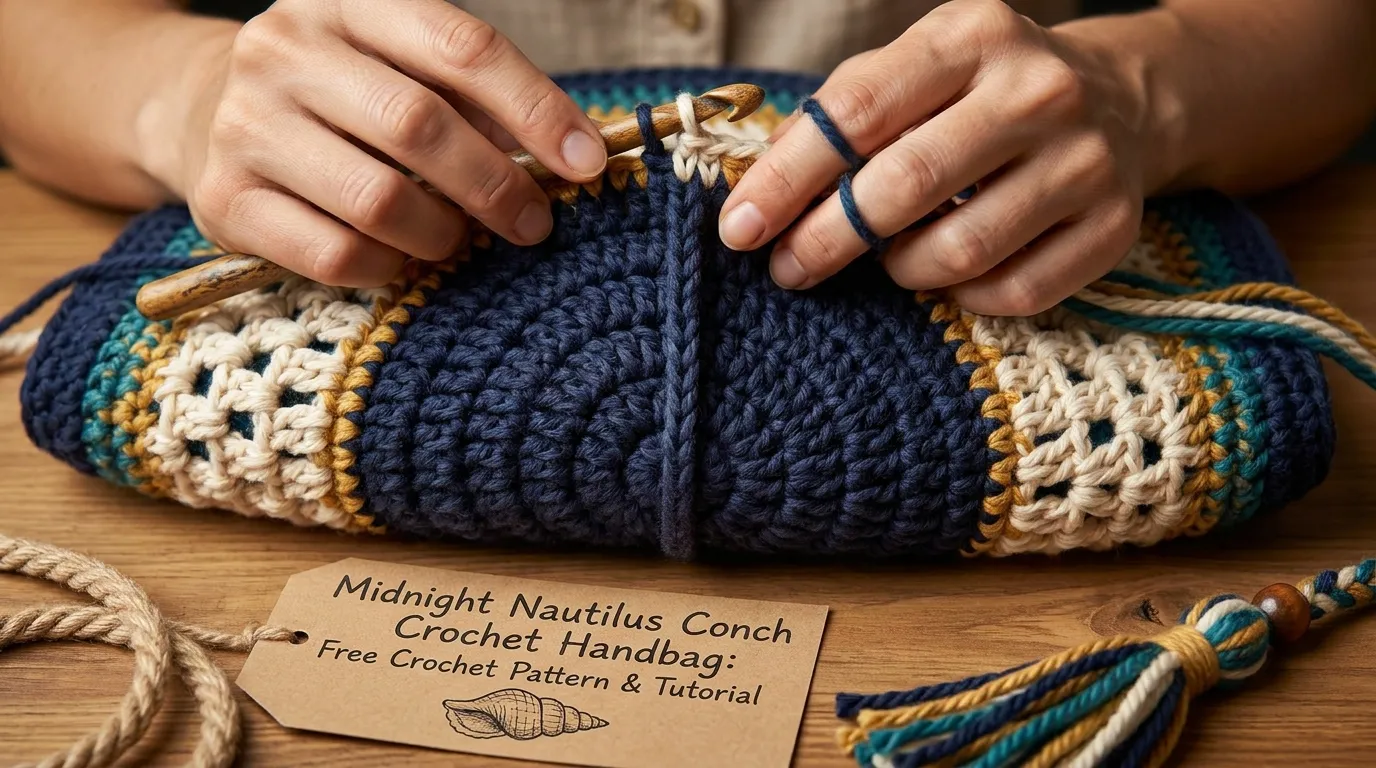
Phase 2: Cream Side Panels (Filet Mesh — Make 2)
Panel A (Left Flank): With 5.5 mm hook and Cream (Color B), ch 42 (foundation: 13 mesh blocks + 2 edge sts).
Row 1 (RS): Dc in 4th ch from hook (counts as dc + ch-1), ch 1, sk 1 ch, dc in next ch across to last 2 ch, ch 1, sk 1 ch, dc in last ch. Turn. — 13 mesh spaces + 2 edge dc
Row 2: Ch 3 (counts as dc), dc in next dc (edge inc), ch 2, sk 1 sp, dc in next dc across to last dc, dc in last dc (edge inc), turn. — 13 spaces, 15 dc
Rows 3–28 (26 rows): Rep Row 2. At Row 14 and Row 22: Work 2 dc in first dc and 2 dc in last dc (additional edge increases) to widen for crescent curve. Final row: 13 spaces, 19 dc.
Row 29 (Top Edge Prep): Ch 1, sc in each dc and each ch-2 sp across (sc in each sp = 2 sc per mesh block). Do not fasten off. — ≈ 57 sc
Panel B (Right Flank): Work identically. Do not fasten off Panel B — will join to fan panel in Phase 3.
Phase 3: Assembly, Gusset & Top Edging
Step 3.1 — Join Side Panels to Fan Panel: Lay fan panel flat, RS up. Align Panel A (left) along left curved edge of fan, RS together. With 5.5 mm hook and Navy, sl st through both layers along the edge: insert hook through next st of fan panel AND next sc of Panel A edge, yo, pull through all loops. Work from base to apex. Fasten off. Repeat for Panel B on right side.
Step 3.2 — Base Gusset (Worked in the Round): With 5.5 mm hook and Navy, join at center base of fan panel (bottom of SC rib). Ch 1, sc evenly around entire base perimeter (fan base + both panel lower edges), placing 3 sc in each corner (base-to-side transitions). Join with sl st to first sc. — ≈ 108 sc
Round 2: Ch 1, sc in each sc around, 3 sc in each corner sc (the center of the 3-sc groups from previous round). Join. — ≈ 120 sc
Rounds 3–5: Rep Round 2. This builds a 5-round deep gusset (≈ 12 cm depth after blocking). Fasten off.
Step 3.3 — Scalloped Top Edging (Continuous Round): With 6.0 mm hook and Navy, join at left S-hook ring position (Panel A top edge, 3 cm from terminus).
Edging Round: Ch 1, sc in next 3 sts, scalloped hdc shell (hdc, dc, tr, dc, hdc) in next st, rep * to * around entire top edge (fan apex + both panel tops), ending with sc in last 3 sts before join. Join with sl st. Fasten off.
S-Hook Ring Placement: At each terminus (left end of Panel A, right end of Panel B), fold 2 cm of fabric to WS, whipstitch with polyester thread to create a loop. Insert 6 mm S-hook ring before closing loop completely.
Phase 4: Twisted-Rope Handle
Setup: With 6.0 mm hook, hold Navy and Cream together (double strand). Ch 12, join with sl st to form ring (take care not to twist). Place marker for round start.
Round 1: Ch 1, 12 TRS in ring (see Special Stitches). Join with sl st to first TRS. Move marker.
Rounds 2–200 (≈ 52 cm): Work 1 TRS in each TRS around. Every 4 rounds: Cut yarns, rejoin with opposite color leading (Navy→Cream→Navy→Cream…). This creates 4-round color bands that spiral. Carry unused color loosely inside tube.
Finishing: After final round, fasten off leaving 30 cm tails. Thread tails through all 12 sts of last round, pull tight to close tube end. Knot securely, bury tails inside handle.
Handle Attachment: Fold each handle end 3 cm, insert through 4 mm eyelet ring (2 rings per side, spaced 2 cm apart), whipstitch with polyester thread to secure. Position eyelets at Panel A/B top edges, 4 cm from S-hook rings.
Phase 5: Tassels & Studs
Central Tassel (Fan Apex):
- Cut 3 cords × 60 cm (2 Navy, 1 Cream). Align ends, fold in half.
- Thread fold through gold cylindrical bead (8×4 mm), pull bead to fold.
- Secure bead with tight overhand knot using all 6 strands just below bead.
- Separate into 3 groups of 2 strands (keep color pairs together). Braid for 18 cm (≈ 1.5 structural rotations).
- Knot end, trim to 2 cm. Attach striped fringe (6 strands × 10 cm) to knot with lark’s head knots.
- Sew tassel base to fan apex (center of SC rib top) with navy polyester thread — 8 stitches through bead shank and fan fabric.
Side Tassels (2, at lower panel edges):
- Cut 3 cords × 40 cm (1 Navy, 2 Cream). Fold, thread through gold finial bead (4 mm), knot below bead.
- Braid 12 cm, knot, trim. Attach to lower curved edge of each side panel (midpoint) with cream thread.
Radial Gold Studs (18 total): On navy fan panel, place studs in 3 concentric arcs (6 per arc) radiating from center front:
- Arc 1 (Round 5 level): 6 studs, spaced every 4 shells
- Arc 2 (Round 9 level): 6 studs, spaced every 6 shells
- Arc 3 (Round 13 level): 6 studs, spaced every 8 shells Pre-punch holes with heated awl, insert prongs, fold flat inside bag. Use pliers for clean closure.
Assembly, Mounting & Structural Integration
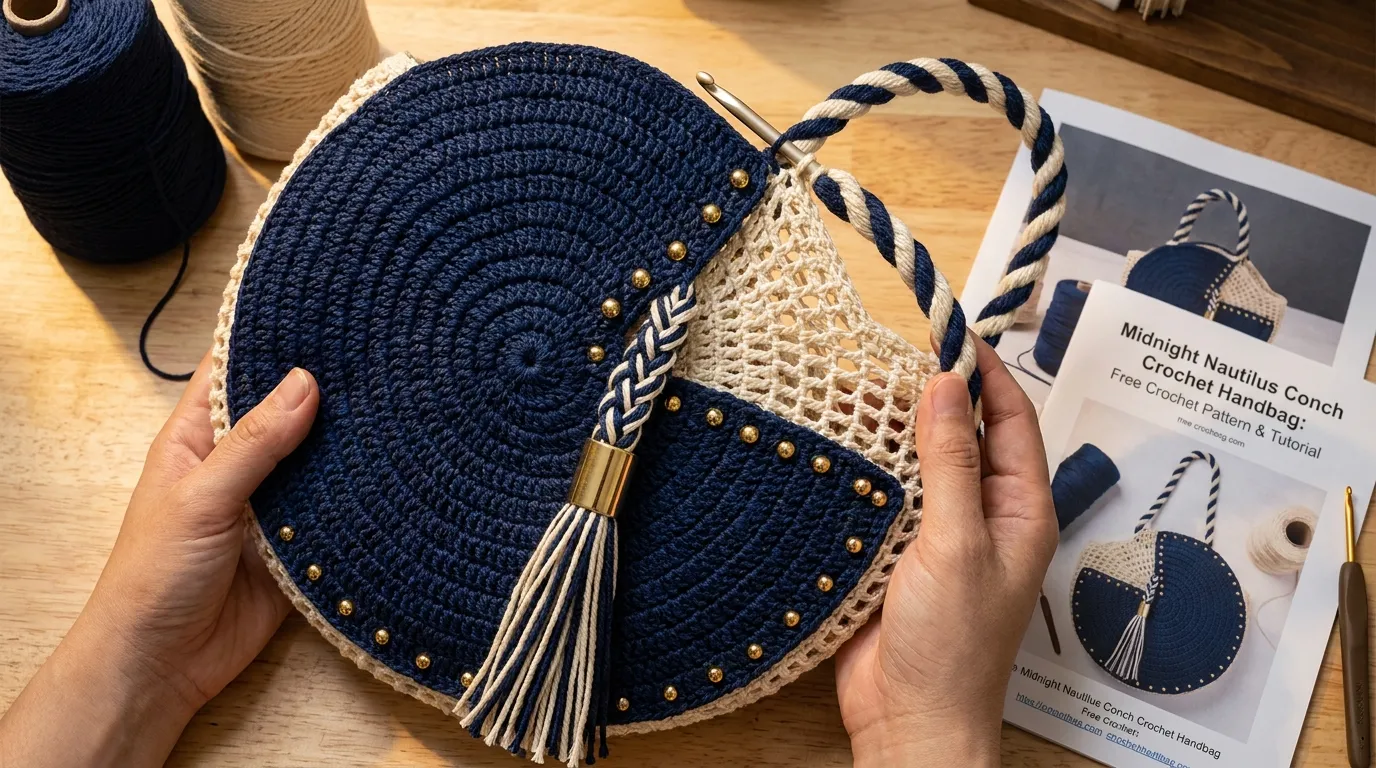
Because this bag is unlined and self-supporting, the assembly phase is the structural integration. Key principles:
-
Seam Allowance = Zero. All joins are slip-stitched or whipstitched directly through the fabric loops. No seam allowance is added or needed — the stitches are the seam.
-
Tension Consistency at Junctions. The fan panel (dense, ~14 sts/4 in) meets the filet mesh (open, ~18 sts/4 in) at different row gauges. The scalloped edging absorbs this differential. If puckering occurs at the join, steam-block the junction locally (pin flat, steam 2 inches away, cool) before edging.
-
Gusset as Structural Keel. The 5-round base gusset acts like a boat’s keel. Ensure your sc tension in Rounds 1–5 is firm but not tight — you want the base to curve upward slightly when the bag stands empty. If the base bows downward, rework Rounds 3–5 with a 5.0 mm hook for tighter fabric.
-
Handle Load Path. The eyelet rings transfer handle weight to the top edge scallops, which distribute it into the fan panel (via the SC rib) and side panels (via their edge dc columns). Reinforce each eyelet attachment with a 2 cm × 2 cm square of cotton canvas (from scrap fabric) whipstitched to WS behind the eyelet — invisible but prevents tear-out.
-
Stud Backing. Each gold stud’s prongs penetrate the navy panel. On the WS, glue a 5 mm felt circle over the folded prongs (fabric glue, minimal) to prevent snagging on contents.
Hardware, Accents & Embellishment Assembly
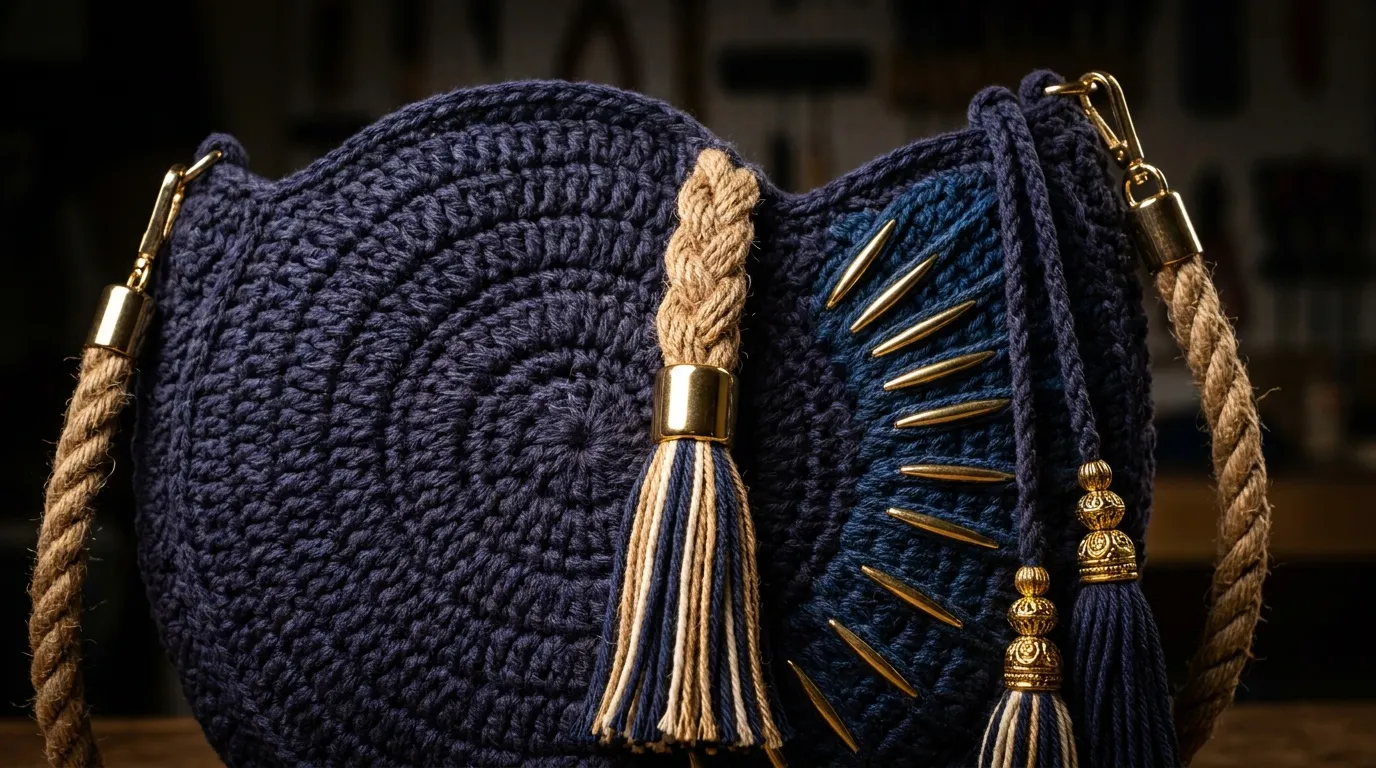
S-Hook Rings (Closure)
- Position: Left and right termini of top edge, 3 cm from side panel ends.
- Method: Fold 2 cm fabric to WS, encase ring, whipstitch with doubled navy polyester thread (12 stitches per ring). Test closure — rings should swing freely.
Eyelet Rings (Handle Attachment)
- Position: 4 cm inward from each S-hook ring, 2 rings per side (8 cm apart).
- Method: Punch hole with 4 mm leather punch. Insert eyelet (male + female), set with eyelet setter or hammer on anvil. Reinforce WS with canvas square as noted above.
Radial Studs (Navy Fan Panel)
- Layout: Use a flexible curve ruler to mark 3 arcs at Rounds 5, 9, 13 (measured from base along SC rib). Mark 6 equidistant points per arc with water-soluble pen.
- Installation: Heat awl tip, pierce at each mark. Insert stud prongs through to WS, fold flat with pliers. Glue felt backing.
Tassel Beads
-
Cylindrical bead (central): Thread onto folded cords before braiding. Position at fold, knot below.
-
Finial beads (side): Thread onto folded cords before braiding. Position at fold, knot below.
-
Secure all knots with a dot of fabric glue (clear-drying) inside bead hole.
Fringe (Central Tassel Only)
- Cut 6 strands of striped fringe (10 cm each). Fold each in half, lark’s head onto braid just below terminal knot. Trim ends even.
Blocking, Care & Maintenance
Wet Blocking (Essential for Shape Memory)
- Submerge completed bag in cool water + wool wash (e.g., Soak, Eucalan) for 20 minutes. No agitation.
- Spin in washing machine on “drain/spin” only (no rinse) or press between towels.
- Pin to dimensions on blocking mats:
- Height: 34 cm (center front)
- Width: 30 cm (widest arc)
- Depth: 12 cm (base gusset spread)
- Handle: Lay flat, straighten twists, pin to 52 cm length
- Tassels: Hang freely, weight bottom knots with clothespins
- Dry 24–48 hours in indirect airflow. Do not direct heat.
Steam Blocking (Touch-Ups)
For localized reshaping (e.g., scallop edges, handle twists): Hover steam iron 2 cm above fabric, burst steam, shape with fingers, pin, cool. Never press — cotton-blend yarn flattens permanently under iron weight.
Washing
- Hand wash only in cool water, mild detergent. Press — do not wring.
- Reshape damp, lay flat to dry. Re-block annually or after heavy use.
Storage
- Stuff lightly with acid-free tissue to maintain crescent curve.
- Store flat or hanging by handle (padded hanger).
- Keep away from direct sunlight — navy cotton-blend fades to purple over years of UV exposure.
Hardware Care
- Gold-tone plating wears at contact points. Polish gently with microfiber cloth.
- If studs loosen: re-fold prongs with needle-nose pliers, re-glue felt.
- S-hook rings: check spring tension annually; replace if gap > 1 mm.
Frequently Asked Questions (FAQ)
Q: Can I use a different yarn weight — say, DK (3) held double? A: Yes, but swatch aggressively. DK held double approximates worsted, but the ply structure differs — you may get more halo and less stitch definition in the shell panel. Go down to a 5.0 mm hook for the fan panel, keep 6.0 mm for handle. Expect ~15% more yardage. The bag will be slightly softer and less self-standing; consider adding a removable plastic canvas base insert.
Q: My filet mesh is coming out too loose / too tight compared to the shell panel. A: Filet mesh gauge is highly hook-sensitive. If your mesh is too open (gaps > 1 cm), drop to 5.0 mm hook for side panels only. If too tight (mesh squares < 0.8 cm), go up to 6.0 mm. Block the mesh swatch before measuring — cotton-blend relaxes 10–15% after wet blocking. The shell panel gauge is your anchor


