

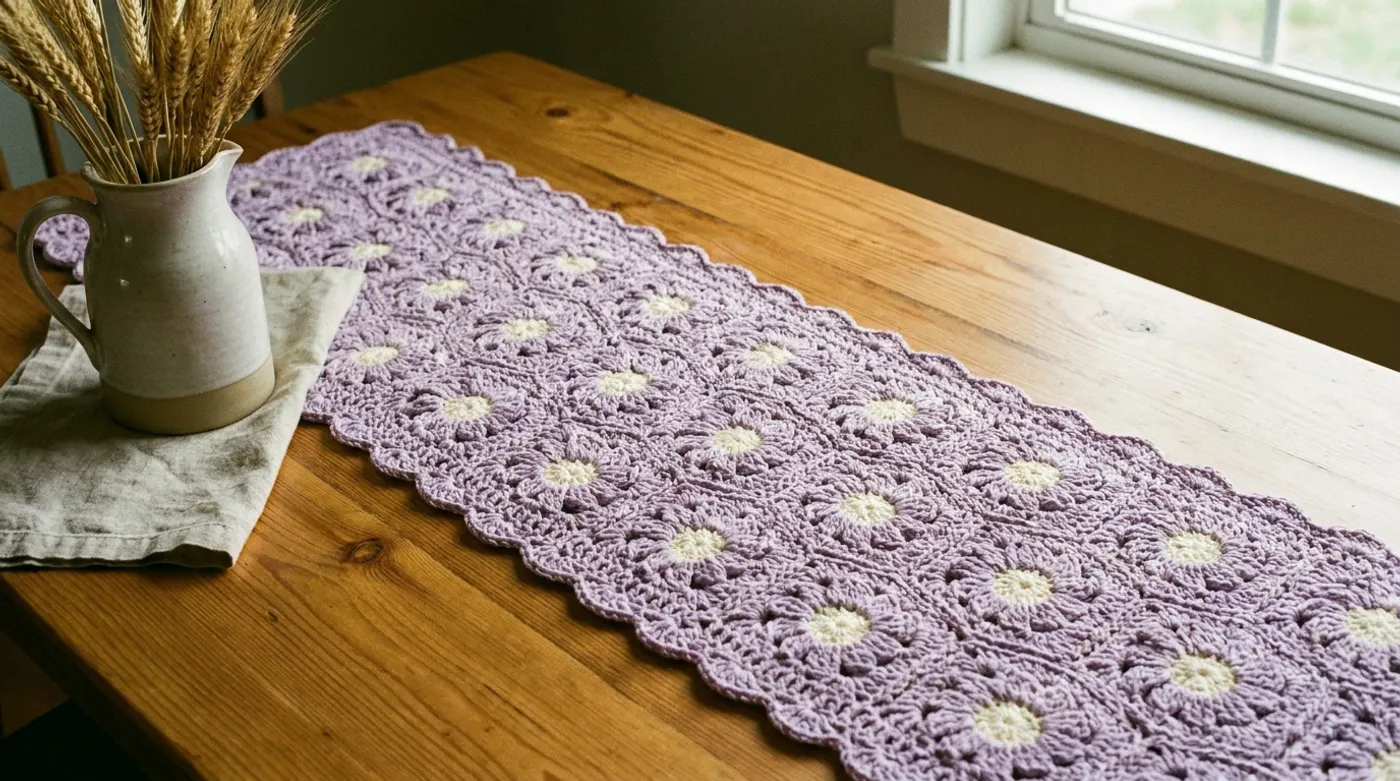
Lavender Daisy Blossom Tablerunner: Free Crochet Pattern & Tutorial
A rectangular, self‑supporting table runner made of medium‑weight cotton yarn, featuring two staggered rows of solid daisy motifs; each motif is a flat, 4‑5 in (10‑12 cm) diameter circle with a cream‑filled center and lavender petals, linked by tight single‑crochet bridge roun...

Pattern Specifications
Introduction & Design Inspiration
There is a particular quiet joy in dressing a table with something made entirely by hand. The Lavender Daisy Blossom Tablerunner was born from a desire to capture the fleeting beauty of a late-spring meadow — those moments when lavender and white daisies sway together in a gentle breeze — and translate that feeling into a textile that lives on your table year-round.
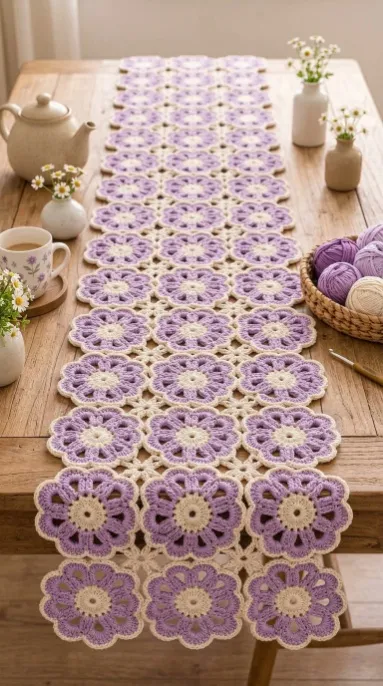
The design centers on a simple, satisfying rhythm: a solid cream center worked in a magic ring, a single round of lavender petals formed with half-double crochet shells, and a tight single-crochet bridge that locks each motif to its neighbors. Two parallel, staggered rows create a gentle helical flow — the motifs nestle into the gaps of the opposite row, giving the runner a subtle, organic movement without any complicated shaping.
Cotton worsted-weight yarn was chosen deliberately. Its matte finish absorbs light rather than reflecting it, which lets the stitch definition of each petal and bridge round speak for itself. The result is a runner that feels substantial under the fingertips, lies flat without blocking aggression, and withstands the daily life of a busy table — spills, heat, and all — while only growing softer with every wash.
Whether you are a newer crocheter looking for a first motif-joining project or an experienced maker wanting a meditative, portable make, this pattern offers clear structure with room for your own color story. Let’s begin.
Pattern Overview & Finished Dimensions
- Finished Width: 9 in (23 cm) at widest point (two staggered motif rows)
- Finished Length: 64 in (162 cm) — adjustable by adding or removing motif pairs
- Individual Motif Diameter: 4.5 in (11.5 cm)
- Motif Count: 14 motifs per row (28 total) for stated length
- Structure: Two parallel helical rows of flat circular motifs joined by single-crochet bridge rounds; finished with a scalloped shell-stitch border and slip-stitch edging
- Weight: Approximately 180 g (6.3 oz)
- Drape: Firm, self-supporting; lies flat without curling
- Reversible: Yes — both sides present the same texture
Fit & Adjustment Notes:
To shorten, work fewer motif pairs (each pair adds ~4.5 in / 11.5 cm). To widen, add a third staggered row (increases width to ~13.5 in / 34 cm). The shell border scales automatically with the final row count.
Materials, Fiber & Hardware Checklist
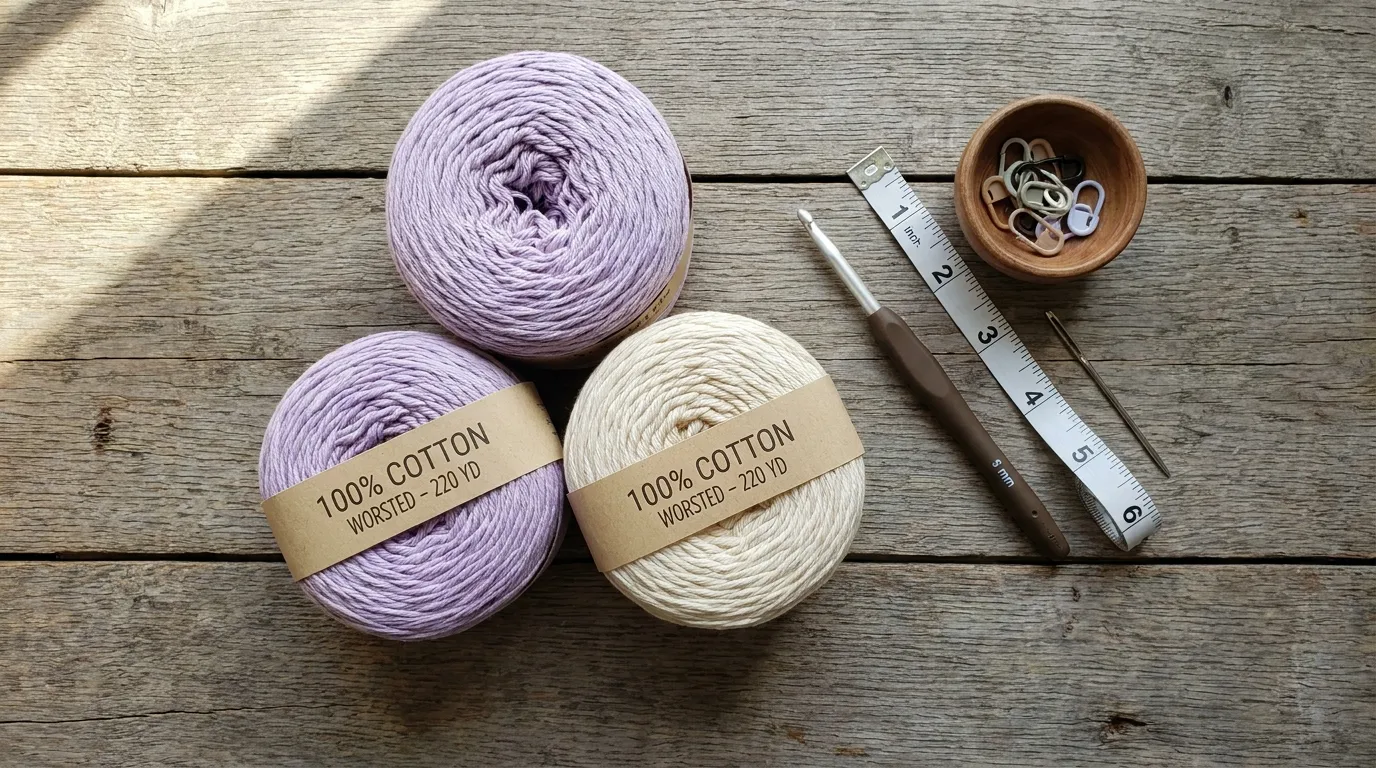
Yarn (100% cotton, worsted / 4 / medium):
- Color A (Lavender): 280 yds / 256 m (approx. 100 g / 3.5 oz) — e.g., Lily Sugar’n Cream “Lavender” or Lion Brand 24/7 Cotton “Lilac”
- Color B (Cream): 200 yds / 183 m (approx. 70 g / 2.5 oz) — e.g., Lily Sugar’n Cream “Ecru” or Lion Brand 24/7 Cotton “Natural”
Tools & Notions:
- 5.0 mm (US H-8) crochet hook — or size needed to obtain gauge
- Tapestry needle (blunt tip, large eye) for weaving ends
- Sharp scissors
- Measuring tape
- Stitch markers (2–3, optional, for marking bridge join points)
- Blocking mats and T-pins (for final blocking)
No lining, hardware, or additional accents required.
Stitch Abbreviations (US Terms)
| Abbreviation | Meaning |
|---|---|
| ch | chain |
| sl st | slip stitch |
| sc | single crochet |
| hdc | half double crochet |
| dc | double crochet |
| sp | space |
| st(s) | stitch(es) |
| rnd(s) | round(s) |
| rep | repeat |
| * … * | work instructions between asterisks the number of times indicated |
| ( … ) | work grouped stitches into the same stitch or space |
| [ … ] x N | repeat bracketed sequence N times |
| RS | right side |
| WS | wrong side |
| BLO | back loop only |
| FLO | front loop only |
| MR | magic ring (adjustable loop) |
Special Stitches:
- Shell (5-dc shell): (dc, ch 1, dc, ch 1, dc) in indicated stitch or space — creates a 3-dc fan with chain-1 separators.
- Petal Cluster: (hdc, dc, hdc) in indicated stitch — forms a single petal lobe.
- Bridge sc: Single crochet worked through both loops of the current motif’s edge stitch and the corresponding stitch of the adjacent motif (joining as you go).
Architectural Mechanics / Technique Deep-Dive
The runner’s architecture rests on three modular ideas that repeat across the entire piece:
-
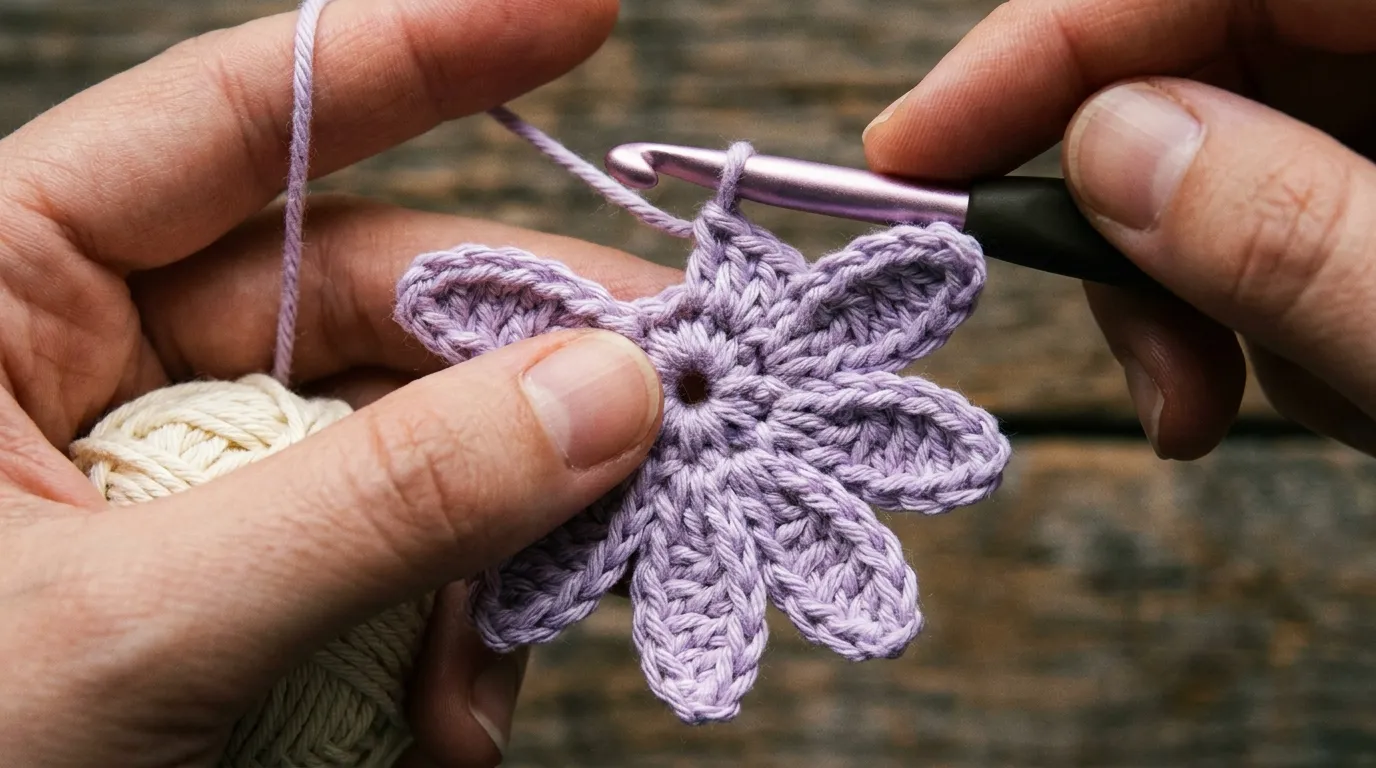
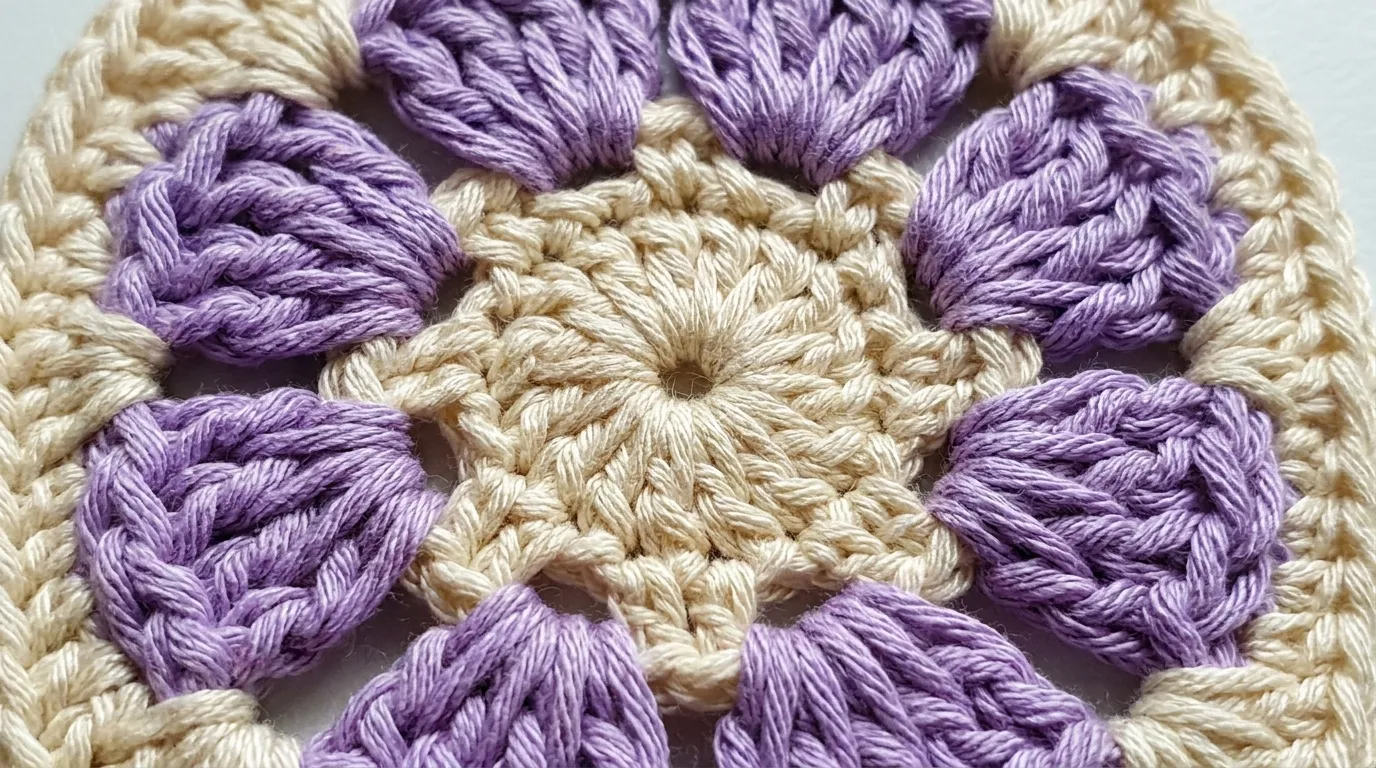
Motif Core (Rnds 1–2): A magic-ring start yields a perfectly centered, hole-free foundation. Round 1 establishes 12 sc — a multiple of 6 that divides cleanly into 6 petal clusters. Round 2 builds the petals: each petal cluster (hdc, dc, hdc) sits in a single sc of Round 1, and a ch-1 between clusters creates the negative space that defines each petal’s silhouette. The result is a flat, 4.5-inch circle with six distinct lobes.
-
Bridge Round (Rnd 3): This is the structural spine. Instead of a decorative edging, Round 3 is a continuous round of single crochet that simultaneously finishes the motif’s outer edge and joins it to its neighbors. When working the first motif of a row, you simply sc around. For every subsequent motif, you work “bridge sc” stitches into the corresponding stitches of the already-completed adjacent motif(s). This join-as-you-go method eliminates seaming later and creates a nearly invisible, flexible hinge between motifs.
-
Staggered Helical Rows: Row 1 motifs are placed center-to-center at 4.5-inch intervals. Row 2 motifs are offset by half that distance (2.25 in / 5.7 cm) so each Row 2 motif nestles into the “valley” between two Row 1 motifs. The bridge round of each Row 2 motif joins to two Row 1 motifs (one on each side) plus its Row 2 neighbors. This triangulated join network distributes tension evenly, prevents skewing, and gives the runner its subtle helical flow.
-
Shell Border: After all motifs are joined, a single continuous round of shell stitches travels the entire perimeter. The 5-dc shell (dc, ch 1, dc, ch 1, dc) places three dc groups into each “valley” between motifs, while a single sc anchors each shell at the motif’s outer bridge stitch. A final slip-stitch round tightens the edge and adds a clean, non-rolling finish.
Why cotton worsted? The fiber’s low elasticity means the bridge joins lock in place without stretching. The matte surface shows every stitch clearly — helpful for learning join-as-you-go — and the fabric softens beautifully through use without pilling.
Step-by-Step Stitch Instructions
Work all motifs with Color A (Lavender) for petals and Color B (Cream) for centers. Carry Color B only for Rnd 1; cut after Rnd 1 and join Color A for Rnds 2– 3. Weave ends as you go to minimize finishing.
Phase 1: Foundation / Center Motif (Make 28 Total — 14 per Row)
Rnd 1 (Center — Color B):
With Color B, make MR. Ch 1 (does not count as st). Work 12 sc into MR. Pull tail to close ring. Join with sl st to first sc. — 12 sc
Fasten off Color B. Weave in tail.
Rnd 2 (Petals — Color A):
Join Color A with sl st in any sc. Ch 2 (counts as first hdc). *Petal cluster in next sc (hdc, dc, hdc), ch 1, skip next sc; rep from * around. Join with sl st to top of beginning ch-2. — 6 petal clusters, 6 ch-1 sps
Do not fasten off.
Rnd 3 (Bridge Round — Color A):
For the very first motif of Row 1 only: Ch
- Sc in same st as join (base of ch-2). Sc in each of next 2 sts (dc, hdc of cluster). *Sc in ch-1 sp, sc in next 3 sts (hdc, dc, hdc of next cluster); rep from * around. Join with sl st to first sc. — 36 sc
Fasten off. Weave ends.
For all subsequent motifs (Row 1 motifs 2–14, and all Row 2 motifs):
Work Rnds 1–2 identically. On Rnd 3, join as you go:
Ch
- Sc in same st as join. Sc in next 2 sts. *Sc in ch-1 sp. Bridge join: Insert hook through ch-1 sp of current motif and corresponding ch-1 sp of adjacent completed motif (Row 1 neighbor for Row 1 motifs; Row 1 motifs on either side for Row 2 motifs), yarn over, pull through both thicknesses, yarn over, pull through 2 loops on hook (bridge sc made). Sc in next 3 sts of current motif; rep from * around. Join with sl st to first sc. — 36 sc (including bridge scs)
Fasten off. Weave ends.
Placement Guide:
- Row 1: Work 14 motifs in a straight line, joining each new motif to the previous one at the 6 ch-1 sps (every 6th sc of Rnd 3). Center-to-center spacing = 4.5 in.
- Row 2: Work 14 motifs, offset by 2.25 in. Join each new motif to two Row 1 motifs (the two it sits between) at their adjacent ch-1 sps, and to the previous Row 2 motif. This creates a triangulated grid.
Phase 2: Shell Border (Continuous Round Around Entire Perimeter)
With RS facing, join Color A with sl st at any outer bridge sc at a short end of the runner.
Border Rnd 1: Ch 1. *Sc in next bridge sc (anchor). Shell in next valley (the dip between two motifs): (dc, ch 1, dc, ch 1, dc) in the space between the two motifs’ outer edges. Rep from * around entire perimeter, working a shell in every valley and a sc anchor at every motif’s outer bridge stitch. At corners (short ends), work 2 shells in the same valley for a gentle turn. Join with sl st to first sc.
Border Rnd 2 (Edging): Ch
- Sl st in each st and ch-1 sp around, keeping tension even. Join with sl st to first sl st. Fasten off. Weave all ends.
Assembly, Mounting & Structural Integration
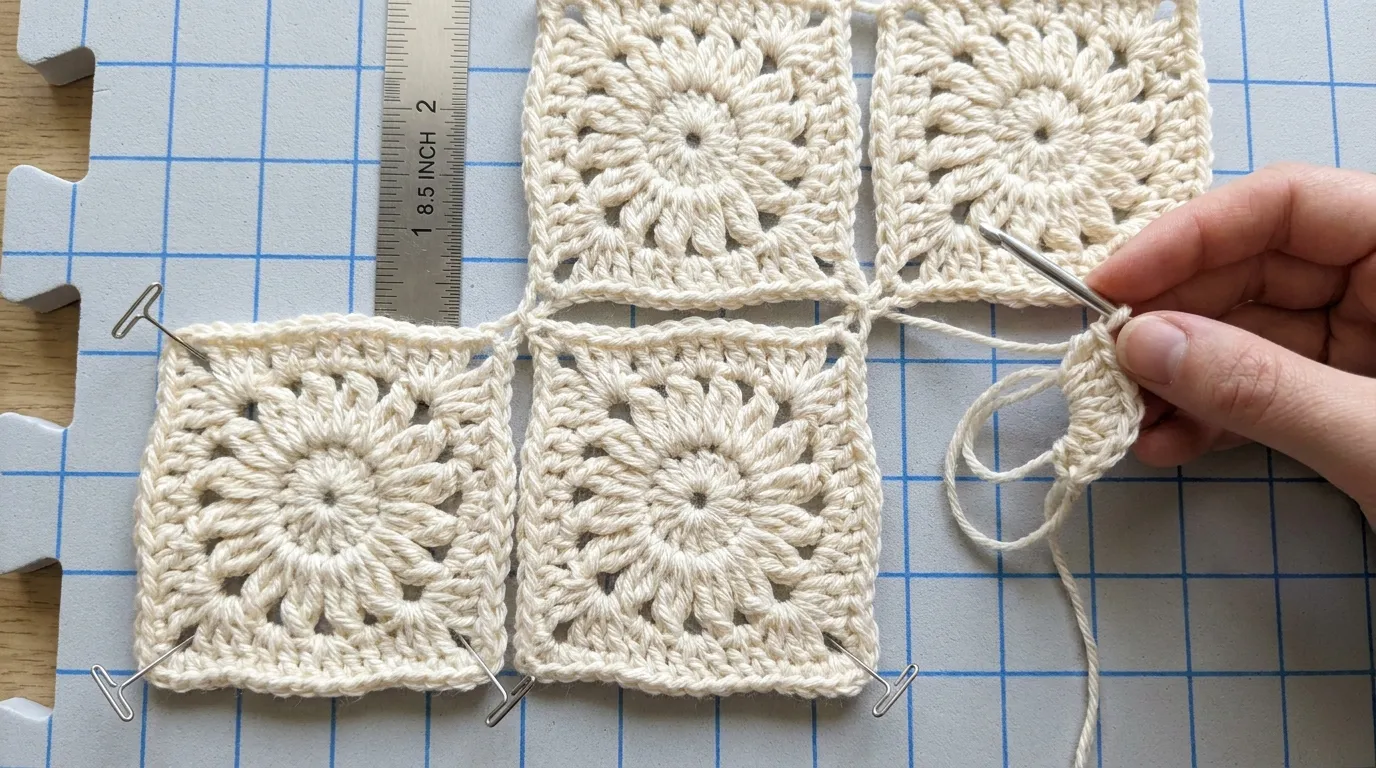
Because this runner uses join-as-you-go construction, no separate assembly step is required. The bridge rounds (Rnd 3 of each motif) create the structural integration in real time. However, a few finishing touches ensure professional results:
-
End Weaving: Use a tapestry needle to weave each tail along the path of the bridge round stitches for at least 2 in (5 cm), then trim. The dense sc fabric hides ends completely.
-
Blocking (Highly Recommended):
- Damp-block: Submerge finished runner in cool water with a drop of wool wash. Press out excess (do not wring).
- Lay flat on blocking mats. Pin to 9 in × 64 in (23 × 162 cm), ensuring motifs are circular, not oval.
- Pay special attention to the shell border — pin each shell point to open the scallops fully.
- Air dry completely (24–48 hours). Cotton retains blocked dimensions well.
-
Flatness Check: After blocking, the runner should lie perfectly flat with no cupping at motif centers. If any motif centers dome slightly, steam lightly from the WS and press flat while warm.
Hardware, Accents & Embellishment Assembly
This pattern includes no hardware, straps, or added embellishments by design. The beauty lives in the stitch architecture itself. However, if you wish to personalize:
- Tassels: Add 2-inch cotton tassels at each short-end corner (4 total). Use Color A or a contrasting sage green.
- Monogram: Surface-slip-stitch initials in a third color (e.g., sage or dusty rose) along one long edge after blocking.
- Beaded Picots: On Border Rnd 2, add a size 6/0 glass bead to every 4th sl st for subtle sparkle.
These are entirely optional — the runner is complete and beautiful as written.
Blocking, Care & Maintenance
Blocking (First Wash): Follow the damp-blocking instructions in Section 7. This sets the stitch geometry and opens the shell scallops permanently.
Routine Washing:
- Machine wash cold, gentle cycle, with like colors.
- Use mild detergent; avoid bleach and fabric softeners (they coat cotton fibers and reduce absorbency).
- Tumble dry low or lay flat to dry. Reshape while damp if needed.
- Iron on medium heat (cotton setting) with steam if desired — press from WS to preserve texture.
Storage:
- Roll (don’t fold) to avoid permanent creases at motif bridges.
- Store in a cotton bag or acid-free tissue; avoid plastic bins which can trap moisture.
- Lavender sachets in storage deter moths naturally.
Longevity Notes: Cotton worsted softens with each wash. The bridge joins may loosen microscopically over years — if a join ever gaps, simply whipstitch the two motifs together with matching thread from the WS. The modular construction makes repair invisible and easy.
Frequently Asked Questions (FAQ)
Q: Can I use DK (3) or Fingering (1) weight yarn instead?
A: Yes, but adjust hook size down (3.5–4.0 mm for DK, 2.5–3.0 mm for Fingering) and expect smaller motifs (~3 in / 7.5 cm for DK, ~2 in / 5 cm for Fingering). You’ll need more motifs for the same length. Yardage requirements decrease proportionally. Gauge swatch a single motif first.
Q: My motifs are cupping (bowling upward at the center). What went wrong?
A: Cupping usually means your tension on Rnd 2 petal clusters is too tight, or you have too many increases. Ensure you are working exactly 6 petal clusters into 12 sc (1 cluster per 2 sc, with a ch-1 skip between). Block firmly — cotton responds well to steam blocking. If cupping persists, try going up 0.5 mm hook size for Rnd 2 only.
Q: How do I join Row 2 motifs to two Row 1 motifs simultaneously?
A: At each ch-1 sp of the Row 2 motif’s Rnd 3, you’ll bridge to one Row 1 motif. Since Row 2 motifs sit in the valleys, each Row 2 motif has 6 ch-1 sps; 3 of those align with the left Row 1 motif, 3 with the right. Work bridge scs into the corresponding ch-1 sps of each Row 1 neighbor as you encounter them. Stitch markers on the Row 1 motifs’ ch-1 sps help enormously.
Q: Can I make this runner wider (3 rows) or longer (80+ in)?
A: Absolutely. For a third row, repeat Row 2’s logic: offset by another 2.25 in, joining to two Row 2 motifs. Width becomes ~13.5 in (34 cm). For length, simply add motif pairs (one Row 1 + one Row 2) — each pair adds ~4.5 in (11.5 cm). Border scales automatically. Yardage increases linearly: ~34 yds (31 m) Color A + ~24 yds (22 m) Color B per added motif pair.
Community Call-to-Action
You’ve stitched a meadow onto your table — now let it be seen. Share your finished Lavender Daisy Blossom Tablerunner on Instagram or Pinterest and tag @NailItHome with #NailItHomeCrochet and #LavenderDaisyRunner. We feature maker highlights in our monthly newsletter and love seeing your color variations (sage and ivory? dusty rose and oat?).
Questions, modifications, or just want to say hello? Drop a comment below or DM us — Aurelia reads every one.
Happy hooking,
Aurelia Thorne
Master Fiber Artist & Lead Pattern Curator, Nail It Home


