

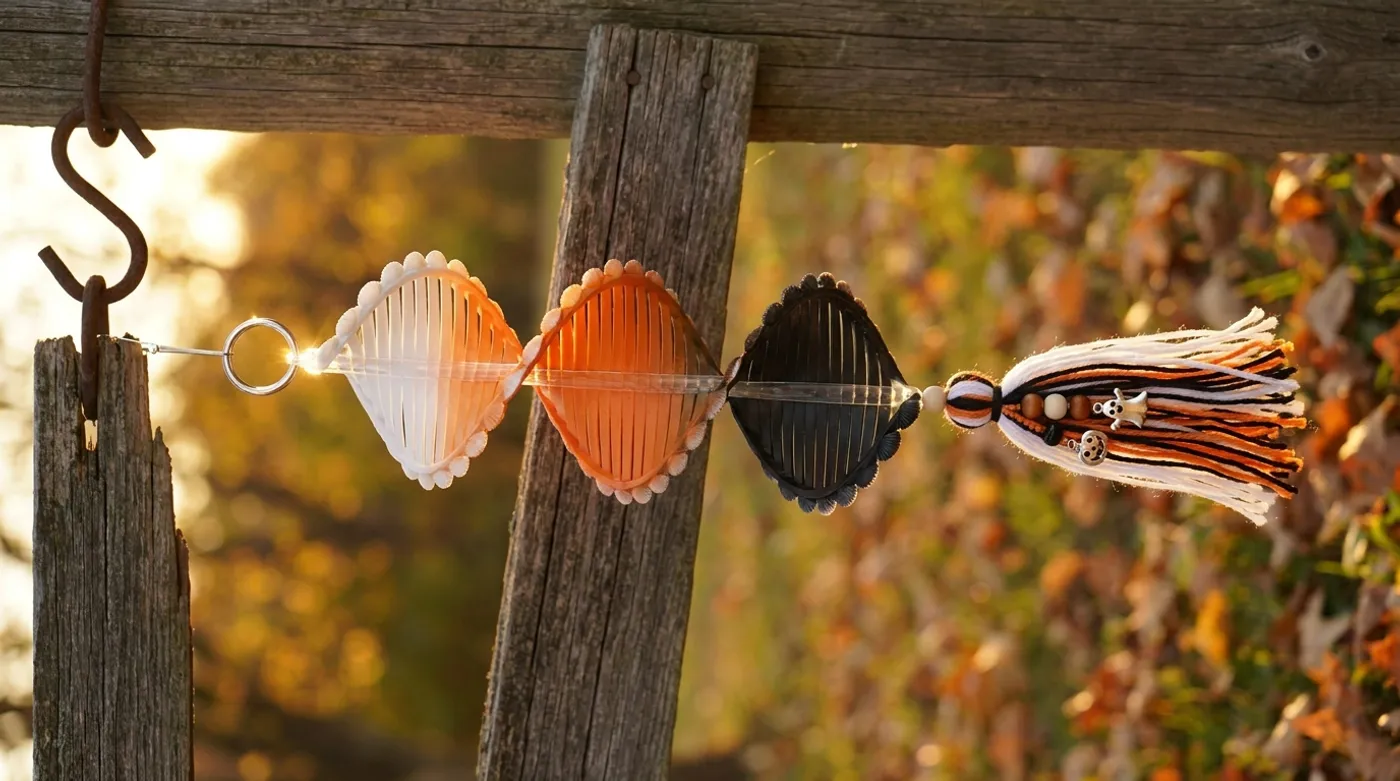
Halloween Spider & Candy Corn Spiral Wind Spinner: Free Crochet Pattern & Tutorial
Create a mesmerizing Halloween wind spinner featuring a spiral helix design with spider and candy corn motifs. This free pattern includes detailed instructions for the spiral body, scalloped edging, tassel fringe, and hardware assembly.

Pattern Specifications
1. Introduction & Design Inspiration
There is something quietly magical about watching a handmade object catch the autumn breeze and come alive. This Halloween Spider & Candy Corn Spiral Wind Spinner was born from a desire to capture that kinetic poetry — a piece that doesn’t just hang, but dances. The spiral helix geometry creates a continuous, fluid twist that catches light and shadow differently with every gust, while the internal colorwork motifs — tiny spiders in black against white, candy corn triangles in orange and white — reveal themselves like secrets as the spinner rotates.
The design draws inspiration from vintage paper whirligigs and the delicate geometry of spider silk glistening with morning dew. I chose a worsted-weight cotton blend for its crisp stitch definition and ability to hold the spiral’s structural memory without sagging. The scalloped shell edging adds a feminine, almost Victorian touch that softens the spooky motifs, while the wooden bead and silver charm accents introduce warm, organic texture against the smooth yarn.
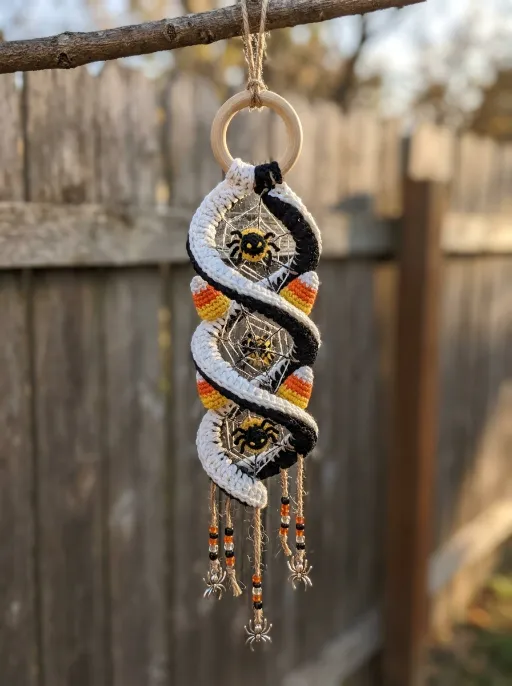
Whether you hang it from a porch beam, a shepherd’s hook in the garden, or even indoors near an open window, this spinner brings movement and mischief to the season. The pattern is written for confident beginners — if you can single crochet, half double crochet, and work in a continuous spiral, you have every skill needed. Let’s make something that spins.
2. Pattern Overview & Finished Dimensions
-
Finished Vertical Drop: 12 inches (30.5 cm) from hanging ring to bottom of tassel
-
Spiral Width (at widest point): 4 inches (10 cm)
-
Number of Helical Turns: 5 full rotations
-
Spiral Strip Width: 1.25 inches (3.2 cm) consistent throughout
-
Scalloped Edging Depth: 0.5 inches (1.3 cm) along both long edges
-
Tassel Fringe Length: 3 inches (7.6 cm) including wooden beads
-
Suspension Cord Length: 18 inches (45.7 cm) from S-hook to top of spiral
-
Total Weight: Approximately 1.2 oz (34 g)
Structural Notes: The spinner is worked as a single continuous strip in a widening spiral (helix) geometry, then stabilized with a clear plastic sheet insert sandwiched between the crochet fabric and a white fabric backing. This three-layer construction ensures the spiral holds its open helix shape indefinitely, even in sustained wind. The scalloped edging is worked directly onto the long edges after the spiral is complete. Hardware attaches at the top (S-hook, hanging ring, suspension cord) and bottom (tassel with wooden beads and silver charms).
3. Materials, Fiber & Hardware Checklist
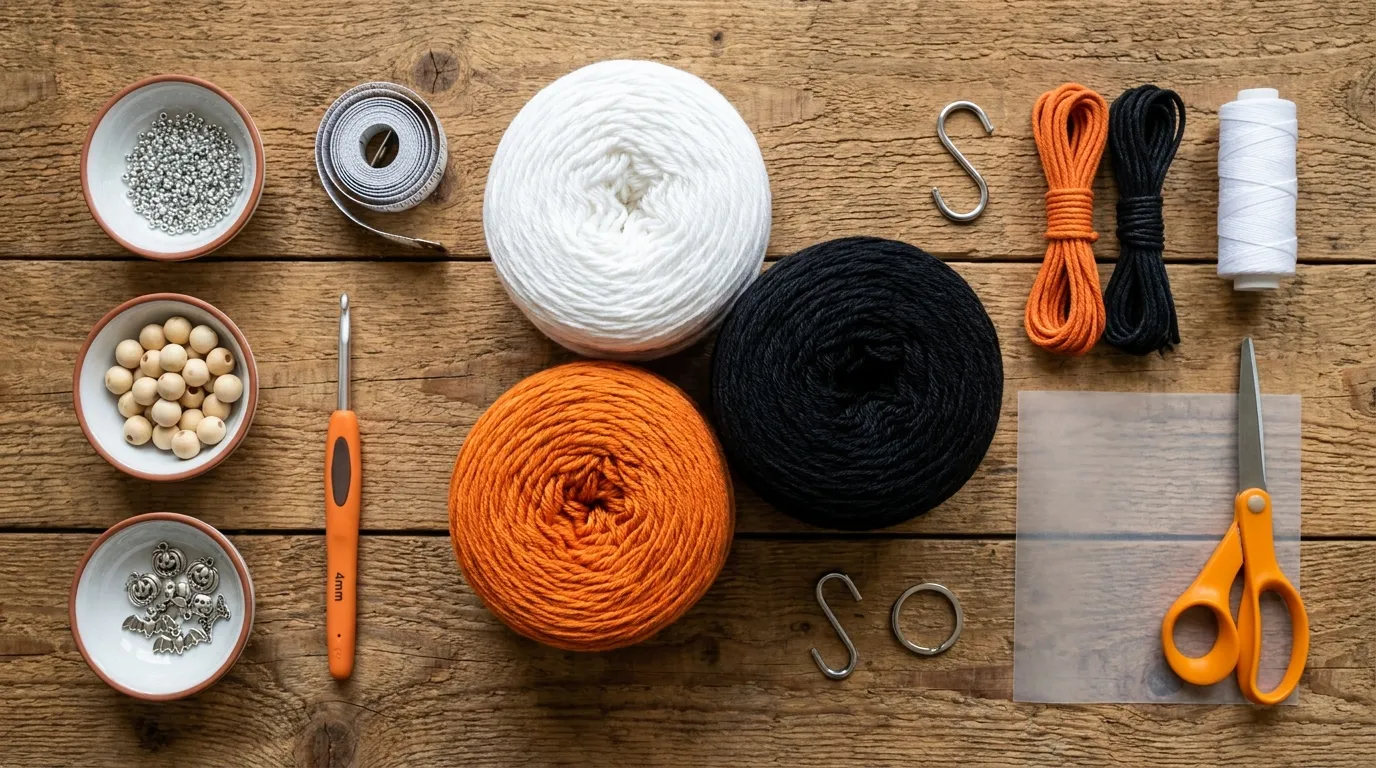
Yarn (Worsted / Medium / 4 Weight — Cotton Blend Recommended)
-
White: 120 yds (110 m) — Main spiral body & scalloped edging
-
Black: 100 yds (91 m) — Spider motifs, accent cords, tassel fringe
-
Orange: 60 yds (55 m) — Candy corn motifs, accent cords, tassel fringe
Tools & Notions
- 5.0 mm (H-8) crochet hook — or size needed to obtain gauge
- Tapestry needle (blunt tip, large eye)
- Sharp fabric scissors
- Stitch markers (2–3, locking style preferred)
- Measuring tape
- Fabric glue (permanent, washable — for securing plastic sheet edges)
Hardware & Stabilization
- Clear plastic sheet (0.5 mm / 20 mil thickness) — cut to 12” × 4.5” rectangle with rounded corners
- White cotton fabric backing — cut to 12.5” × 5” rectangle (allows 0.25” seam allowance)
- Metal S-hook (2 inches / 5 cm, silver or antique brass finish)
- Split key ring / hanging ring (1 inch / 2.5 cm inner diameter)
- Suspension cord (1.5 mm braided polyester, 18 inches / 45.7 cm) — white or black
- Wooden beads (8 mm diameter, natural finish) — 6 pieces
- Silver charm beads (6 mm, lobster clasp or jump ring attached) — 3 pieces (spider, moon, star motifs)
- Silver seed beads (size 6/0) — for tassel wrapping
Optional but Helpful
- Blocking mats and T-pins
- Rotary cutter and cutting mat (for plastic sheet and fabric)
- Small paintbrush (for applying fabric glue precisely)
4. Stitch Abbreviations (US Terms)
| Abbreviation | Meaning |
|---|---|
ch | chain |
sl st | slip stitch |
sc | single crochet |
hdc | half double crochet |
dc | double crochet |
inc | increase (2 stitches in same stitch) |
dec | decrease (single crochet 2 together) |
sc2tog | single crochet 2 together (same as dec) |
BLO | back loop only |
FLO | front loop only |
RS | right side |
WS | wrong side |
sp | space |
sk | skip |
rep | repeat |
* * | repeat instructions between asterisks |
[ ] | total stitch count for row/round |
5. Architectural Mechanics / Technique Deep-Dive
The Helix Spiral Geometry Unlike a flat rectangle that is later twisted, this spinner is crocheted as a helix from the very first stitch. We achieve this by working in a continuous spiral (no joining rounds, no turning chains) while gradually increasing the strip width for the first 3 rotations, maintaining constant width for rotation 4, then decreasing for rotation 5. This creates a natural, organic flare at the center — the “belly” of the spiral — that catches air most effectively.
Why Continuous Spiral (No Joining)? Joining each round with a slip stitch creates a visible seam that disrupts the smooth twist. By working continuously — placing the first stitch of each new round directly into the first stitch of the previous round — the fabric becomes a single unbroken coil. Use a locking stitch marker in the first stitch of each round to track your rounds accurately.
Stitch Architecture: SC + HDC Ridges The main spiral body alternates rounds of single crochet (worked in BLO) and half double crochet (worked in both loops). The BLO single crochet rounds create pronounced horizontal ridges that act like structural ribs, giving the spiral “memory” — it wants to return to its curved shape. The HDC rounds add height and drape between ridges. This ribbed texture is essential for the spinner to hold its helix under wind load.
Scalloped Shell Edging Mechanics
The edging is worked after the spiral is complete and stabilized. Each shell = (2 dc, ch 1, 2 dc) in a single stitch, separated by sk 2 sts, sc in next st. This creates a deep, rhythmic wave that follows the spiral’s curve. Working the edging last ensures the shells align perfectly with the final dimensions, including the plastic insert and fabric backing.
Three-Layer Stabilization Sandwich
- Crochet Spiral (outer) — decorative, structural ribs
- Clear Plastic Sheet (middle) — rigid but flexible; prevents collapsing in wind
- White Fabric Backing (inner) — clean finish, hides plastic, adds weight for momentum
The layers are basted together with white thread before the edging encloses the raw edges. This is not a lined bag — it’s a laminated kinetic sculpture.
6. Step-by-Step Stitch Instructions
Phase 1: Foundation & Spiral Initiation (Rounds 1–8)
Round 1 (White): Ch 4, join with sl st to form ring. Ch 1 (does not count as st), 8 sc in ring. Place marker in first sc. Do not join. [8 sc]
Round 2: Inc in next st 8 times. Move marker. [16 sc]
Round 3: Sc in next st, inc in next st 8 times. [24 sc]
Round 4: Sc in next 2 sts, inc in next st 8 times. [32 sc]
Round 5: Sc in next 3 sts, inc in next st 8 times. [40 sc]
Round 6: Sc in next 4 sts, inc in next st 8 times. [48 sc]
Round 7: Sc in next 5 sts, inc in next st 8 times. [56 sc]
Round 8: Sc in next 6 sts, inc in next st 8 times. [64 sc]
Note: Rounds 1–8 establish the center disk (approx. 2.5” diameter). From Round 9 onward, we transition to the helical strip — working back and forth in rows along a single long edge, not in the round.
Phase 2: Helical Strip Body (Rows 9–105)
Transition to Rows: At end of Round 8, do not continue in spiral. Instead, ch 1, turn. You will now work rows along the outer edge of the disk, building the spiral strip outward.
Row 9 (RS — White, BLO): Working in BLO only, sc in each st around outer edge of disk (64 sts), then continue sc evenly along the “seam” line for 12 sts to begin the strip. Turn. [76 sc]
Row 10 (WS — White, both loops): Hdc in each st across. Turn. [76 hdc]
Row 11 (RS — White, BLO): Sc in each st across in BLO. Turn. [76 sc]
Row 12 (WS — White, both loops): Hdc in each st across. Turn. [76 hdc]
Rows 13–28 (16 rows): Rep Rows 11–12 eight times. This completes Rotation 1 (approx. 2.5” of strip length).
Rows 29–44 (16 rows): Rep Rows 11–12 eight times. Rotation 2.
Rows 45–60 (16 rows): Rep Rows 11–12 eight times. Rotation 3.
Colorwork Integration (Spider & Candy Corn Motifs): Starting Row 33 (beginning of Rotation 2), introduce motifs on RS rows only (BLO sc rows). Use intarsia technique — carry unused color loosely behind work.
- Spider Motif (Black on White): Chart: 5 sts wide × 3 rows tall. Place centered every 18 sts along strip.
- Candy Corn Motif (Orange/White/Orange): Chart: 4 sts wide × 4 rows tall (triangle). Place centered every 22 sts, offset from spiders. Work motifs on Rows 33, 37, 41, 45, 49, 53, 57, 61, 65, 69, 73, 77, 81, 85, 89, 93, 97, 101.
Rows 61–76 (16 rows): Rep Rows 11–12 eight times. Rotation 4 (constant width — no increases/decreases).
Rows 77–92 (16 rows): Rep Rows 11–12 eight times. Rotation 5 — Begin Decrease.
On each RS row (BLO sc), work
decat both ends:sc2togat start,sc2togat end. This removes 2 sts per RS row. WS rows (hdc): work even, no decreases. After 8 RS rows (Rows 77, 79, 81, 83, 85, 87, 89, 91), strip narrows from 76 → 60 sts.
Rows 93–105 (13 rows): Continue decrease rhythm on RS rows until 44 sts remain. Final row (Row 105) is a WS hdc row. Fasten off white. Weave in ends.
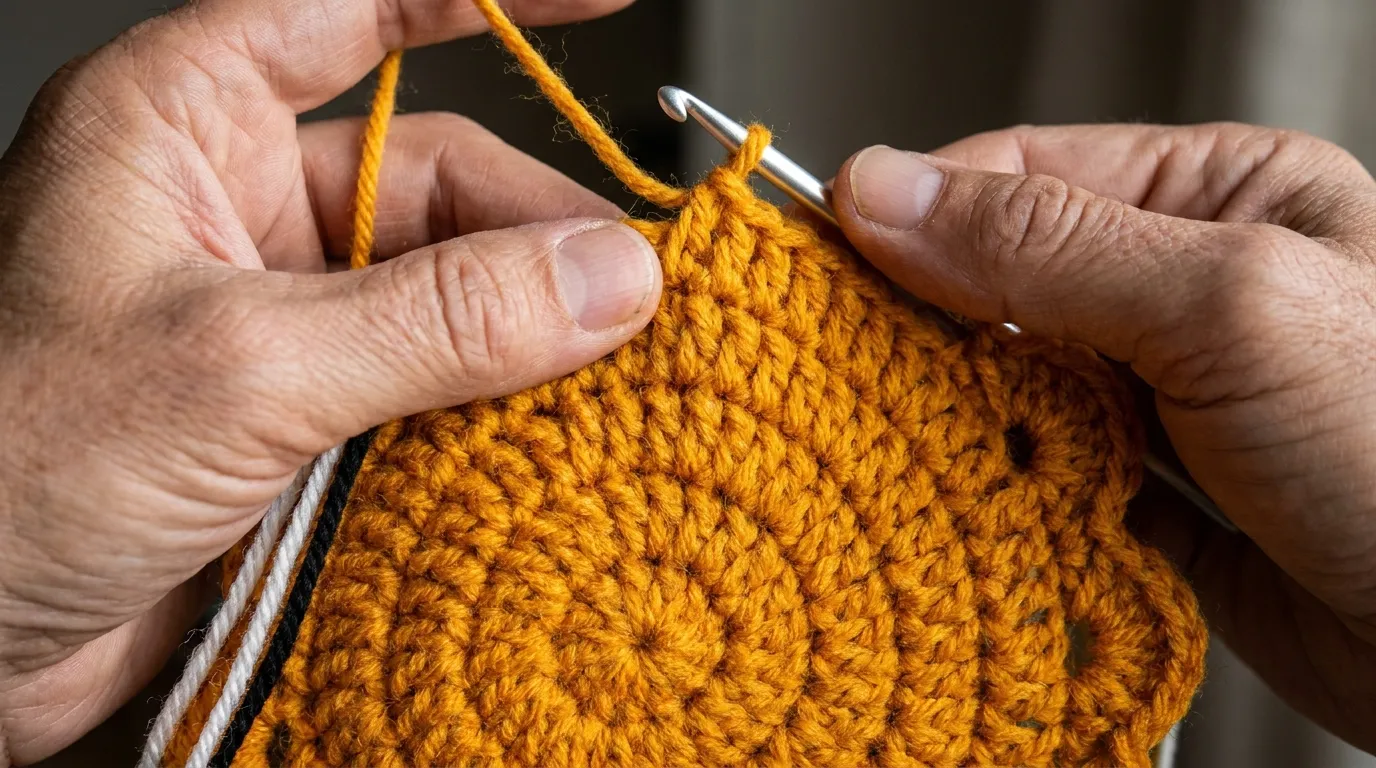
Phase 3: Scalloped Shell Edging (Both Long Edges)
Setup: With RS facing, join White yarn with sl st at top outer corner of spiral (start of Row 9). Ch 1.
Edging Row (worked along one long edge): *Sc in next st, sk 2 sts, (2 dc, ch 1, 2 dc) in next st [shell made], sk 2 sts; rep from * to end of edge, sc in last st. Fasten off.
Repeat on opposite long edge (bottom edge of spiral), joining at bottom outer corner. Ensure shells mirror — the ch-1 center of each shell should align visually across the spiral width.
Tip: Block the spiral flat before edging (see Section 9) so edges are even and shells sit uniformly.
7. Assembly, Mounting & Structural Integration
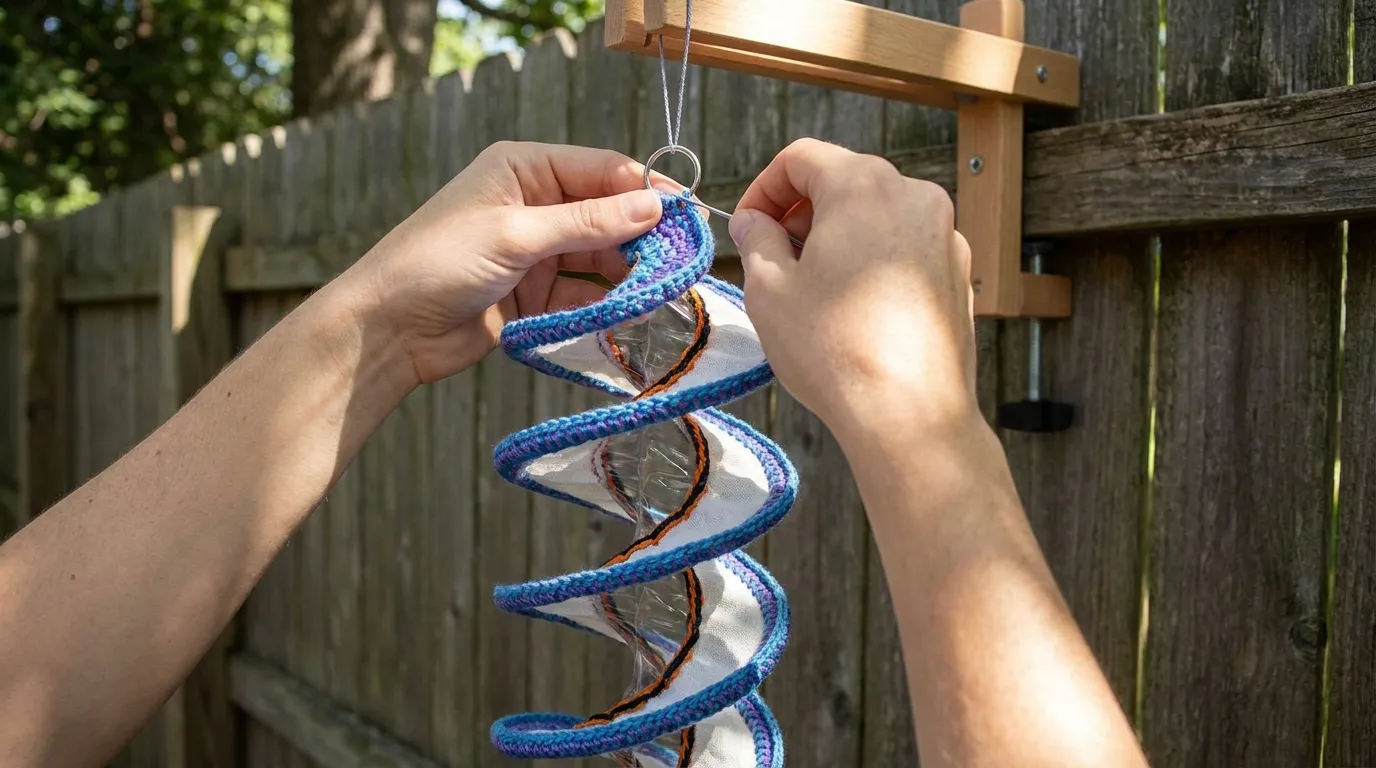
Step 1: Cut Stabilizer & Backing
- Trace the finished spiral (including edging) onto paper. Add 0.25” seam allowance all around.
- Cut clear plastic sheet to this template (no seam allowance — plastic sits inside).
- Cut white fabric backing to template + 0.25” seam allowance.
Step 2: Baste the Sandwich
- Lay fabric backing WS up.
- Center plastic sheet on top.
- Lay crochet spiral RS up on top of plastic.
- Pin all three layers together at 2” intervals along both long edges and top/bottom.
- Using white thread and sharp needle, baste with long running stitch (0.5” stitches) 0.125” from raw edges. Remove pins.
Step 3: Enclose Raw Edges with Edging The scalloped edging (Section 6, Phase 3) is worked through all three layers — your hook catches crochet fabric, plastic, and fabric backing simultaneously. This permanently seals the sandwich. If edging was worked before assembly (per instructions), carefully unpick the last round of edging, insert layers, then re-work edging through all layers.
Step 4: Top Suspension Assembly
- At top center of spiral (center of Round 1 disk), use tapestry needle and white thread to create a reinforced loop: stitch through all layers in a 0.5” circle, 6–8 times.
- Open split key ring / hanging ring. Thread through reinforced loop. Close ring.
- Attach S-hook to hanging ring.
- Tie suspension cord (18”) to S-hook with a secure lark’s head knot. Trim ends, melt with lighter to prevent fraying.
Step 5: Bottom Tassel Assembly
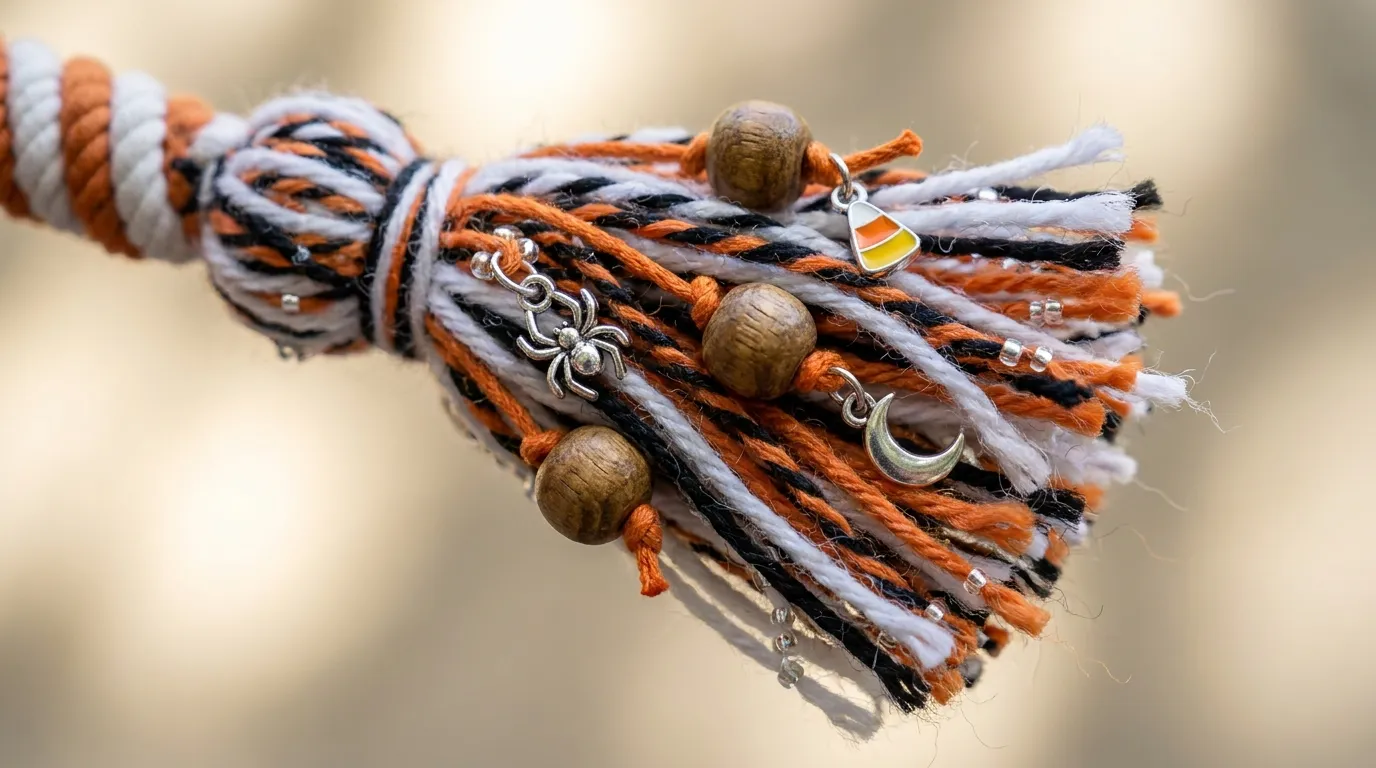
- Cut 12 strands each of White, Black, Orange yarn — 18” long (24 strands total).
- Fold bundle in half. Use 12” strand of White to wrap tightly 0.5” below fold (forms tassel head). Secure with knot, bury ends inside tassel.
- Thread wooden beads (6) onto individual fringe strands (2 strands per bead), push to tassel head. Knot below each bead.
- Attach silver charms to 3 remaining strand pairs using jump rings.
- Add silver seed beads to remaining fringe tips for weight and sparkle.
- Sew tassel head securely to bottom center of spiral (through all layers) with heavy white thread.
8. Hardware, Accents & Embellishment Assembly
Accent Cords (Optional Decorative Detail) Cut 2 lengths each of Black and Orange accent cord (1.5 mm braided) to 14”. Fold each in half. Lark’s head knot onto the spiral’s outer edge at Rotation 2 and Rotation 4 (one cord per rotation, alternating colors). Trim ends evenly at 3”. These add subtle color flashes when spinning.
Charm Placement The three silver charms (spider, moon, star) hang from the tassel fringe at staggered lengths:
- Spider charm: 1” below tassel head
- Moon charm: 1.75” below tassel head
- Star charm: 2.5” below tassel head
Final Hardware Check
- S-hook opens/closes smoothly
- Hanging ring rotates freely
- Suspension cord knot is tight and sealed
- Tassel is firmly sewn (test with firm tug)
- All beads are secure on strands
- No loose yarn ends visible
9. Blocking, Care & Maintenance
Blocking (Essential for Spiral Memory)
- Submerge finished spinner (without hardware — remove S-hook, ring, cord, tassel) in cool water with wool wash. Soak 15 minutes.
- Gently press water out (do not wring). Roll in towel, press firmly.
- Lay flat on blocking mats. Pin spiral into open helix shape: use T-pins every 1” along both edges, gently coaxing the 5 turns into even spacing. The center should be widest (4”), ends tapered.
- Mist with water if needed. Air dry completely (24–48 hours).
- Remove pins. Re-attach hardware and tassel.
Washing
- Spot clean only with cool water and mild detergent.
- Do not machine wash — plastic sheet and fabric backing may separate.
- If deep cleaning needed: hand wash in cool water, press flat between towels, re-block to restore helix geometry.
Storage
- Store flat or hanging — never folded (creases the plastic sheet).
- Keep in breathable cotton bag away from direct sunlight (prevents yarn fading and plastic yellowing).
- If storing long-term, remove tassel to prevent fringe tangling.
Seasonal Refresh Before each Halloween season: inspect plastic sheet for cracks, check all hardware connections, re-block if spiral has relaxed. A light steam press (hover iron 2” above, never touch) can revive ridge definition.
10. Frequently Asked Questions (FAQ)
Q: Can I use acrylic yarn instead of cotton blend? A: Yes, but with caveats. Acrylic lacks the crisp stitch memory of cotton, so the spiral may relax over time and lose its tight helix. If using acrylic, block aggressively with steam (hover method) and consider a slightly heavier plastic stabilizer (1 mm / 40 mil). The scalloped edging may also be less defined.
Q: My spiral won’t lay flat — the edges curl inward. What went wrong? A: This usually means your BLO sc tension is tighter than your HDC tension, causing the ridges to pull. Solution: go up one hook size (5.5 mm / I-9) for BLO sc rows only, or consciously relax your grip on RS rows. Blocking (Section 9) will correct minor curling.
Q: How do I adjust the finished length? A: Each full rotation = 16 rows (8 RS + 8 WS) ≈ 2.5” of vertical drop. To shorten: work fewer rotations (e.g., 4 rotations = ~10” drop). To lengthen: add rotations in pairs (maintain decrease symmetry). Adjust plastic sheet and fabric backing length accordingly.
Q: The plastic sheet shows through the white fabric backing. Can I prevent this? A: Use a heavier white fabric (quilting cotton or muslin, not voile). Alternatively, cut a second layer of white fabric and baste both to the plastic before adding the crochet layer. A tiny dab of fabric glue at the plastic sheet corners (between fabric layers) prevents shifting.
11. Community Call-to-Action
You’ve spun something wonderful — a kinetic sculpture that catches the October wind and turns it into shadow-play. I’d love to see your spinner in motion! Share a photo or short video on Instagram or Pinterest tagged @NailItHome and #NailItHomeHalloween — bonus points for golden-hour light filtering through the scallops.
If you modified the colorway (midnight purple and bone? blood orange and charcoal?), swapped the charms, or scaled it up for a garden statement piece, tell us in the comments below. Every maker’s interpretation teaches the rest of us something new.
Happy haunting, and happy hooking.
— Aurelia


