

Gliding Origami Style Swan With Frost Tipped Wings: Free Crochet Pattern & Tutorial
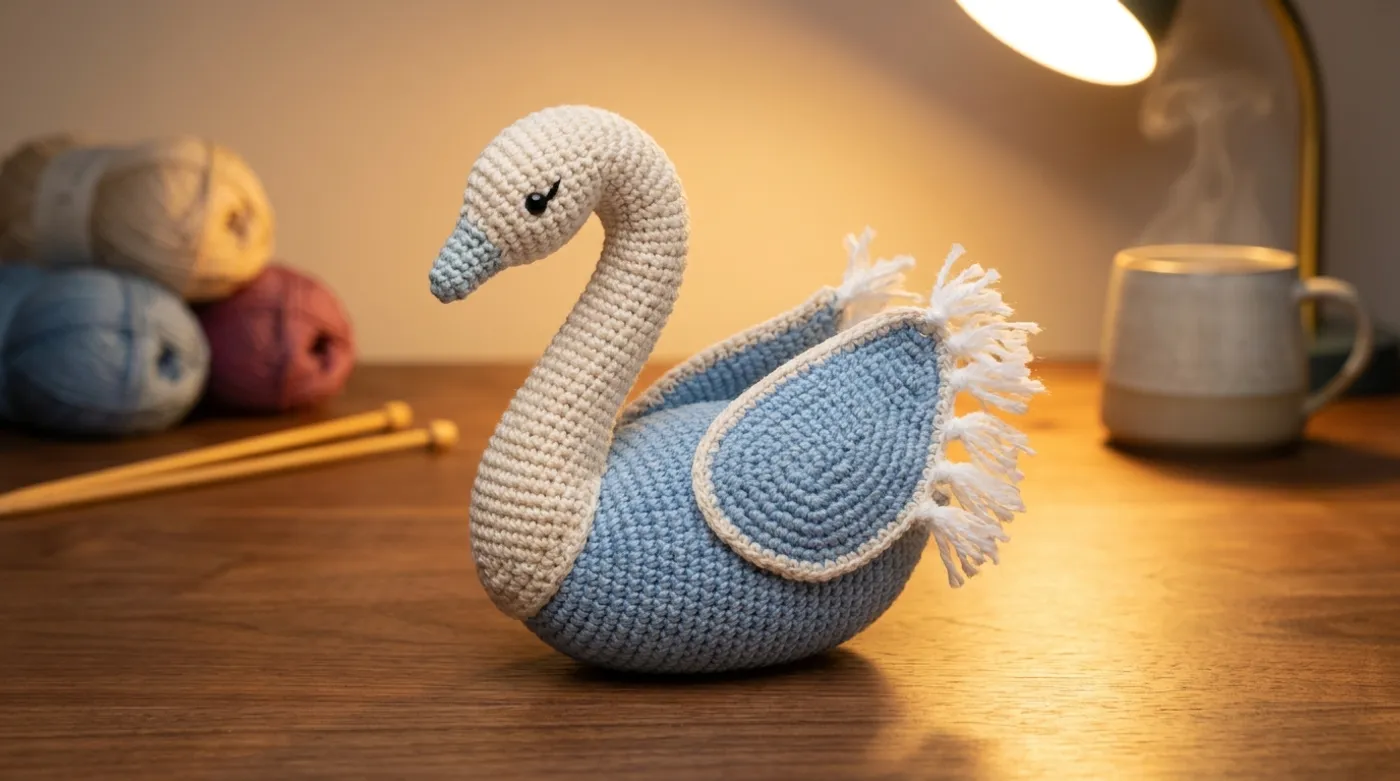
Create an elegant hand-held amigurumi swan with powder blue body, cream arched neck, origami-folded wings, and delicate frost-tipped fringe. Free pattern with step-by-step tutorial.

Pattern Specifications
1. Introduction & Design Inspiration
There is a quiet magic in watching a swan glide across still water — the effortless curve of its neck, the layered architecture of its folded wings, the way light catches the frost at its wingtips on a winter morning. This pattern was born from that moment of suspended grace, translated into yarn through the dual languages of amigurumi and origami.
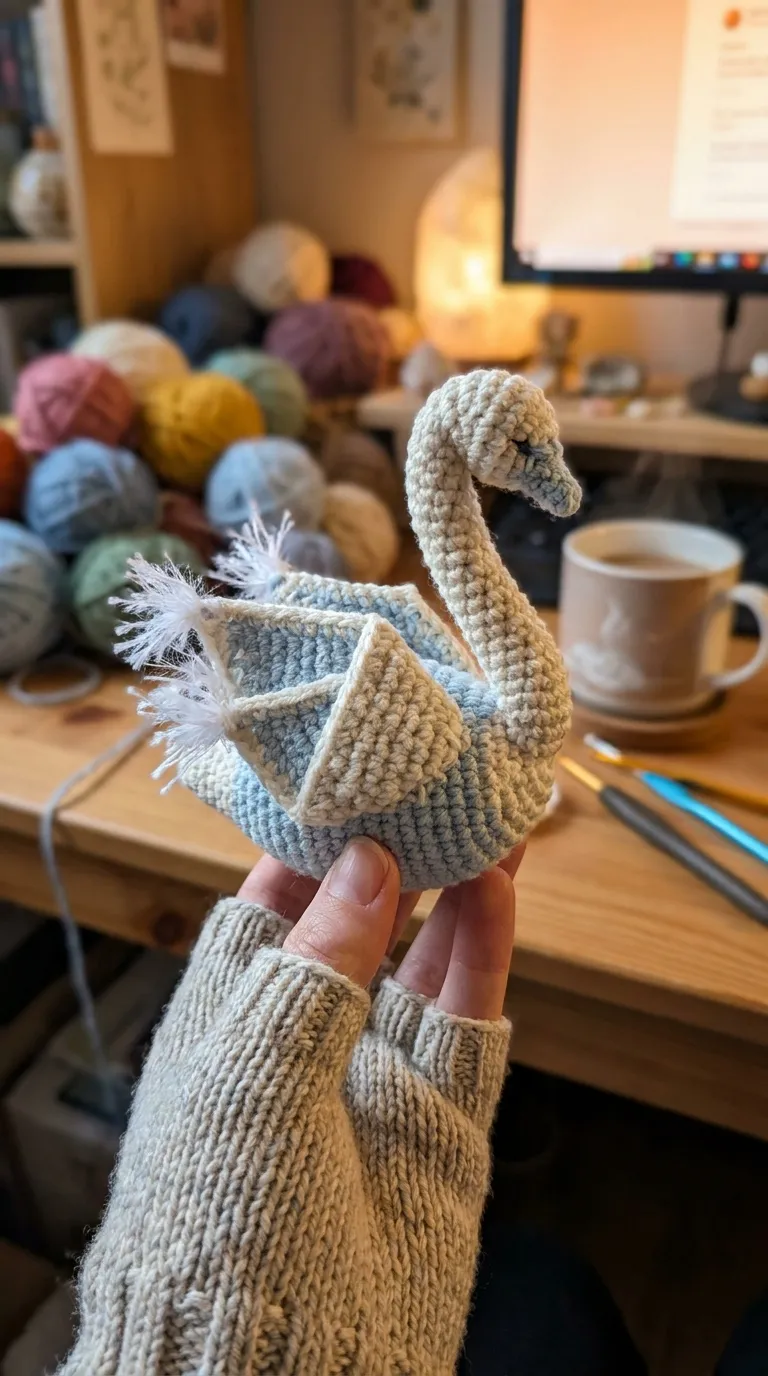
The body and neck are worked in continuous spiral single crochet, creating a seamless, solid form that holds its S-curve without wires or armature. The wings break from the third dimension entirely — they are flat panels, crocheted in rows with a crisp cream border, then folded like paper into layered origami planes that rest atop the back. Tiny white fluffy yarn tassels at the rear wing edges catch the light like frost feathers. A single black embroidered eye and a pale blue-grey beak tip complete the portrait.
This swan fits in the palm of your hand — approximately 12–15 cm tall and 10–12 cm wide — making it a perfect desk companion, shelf guardian, or gift for someone who appreciates the intersection of geometry and softness. The pattern is written for worsted or DK weight yarn with a 3.5–4.0 mm hook to achieve the tight fabric that amigurumi demands. No prior amigurumi experience is required; only patience with increases, decreases, and the meditative rhythm of spiral rounds.
2. Pattern Overview & Finished Dimensions
-
Finished Height: 12–15 cm (4.75–6 inches) from base to crown of head
-
Finished Width: 10–12 cm (4–4.75 inches) at widest point of body
-
Neck Length: ~7 cm (2.75 inches) from body join to base of beak
-
Wing Span (folded): ~9 cm (3.5 inches) across layered wings
-
Construction Type: Solid 3D amigurumi body/neck/head worked in continuous spiral; flat origami wing panels worked in rows, folded, and sewn in place
-
Stuffing: Polyester fiberfill, firmly packed
-
Skill Level: Easy — requires comfort with sc, inc, dec, working in spiral rounds, and basic flat panel crochet
-
Seaming: Minimal — wings attached with whipstitch; beak sewn to head; tassels tied on
The swan is self-supporting when stuffed firmly. The arched neck holds its curve through strategic stuffing density and the natural tension of the stitch architecture — no wire, no plastic canvas, no internal structure beyond fiberfill.
3. Materials, Fiber & Hardware Checklist
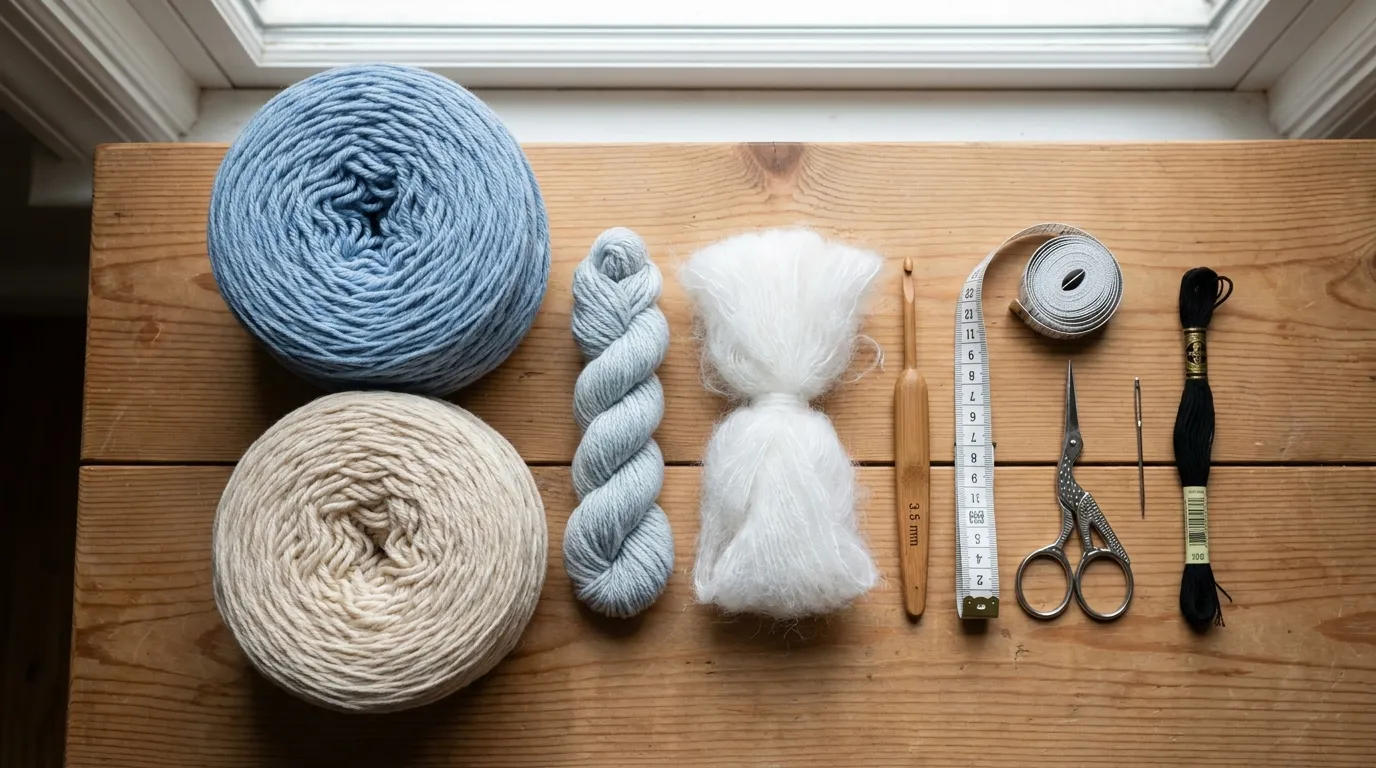
Yarn (all worsted/DK weight, matte acrylic or acrylic-blend recommended):
-
Color A — Powder/Frost Blue: ~100 yds (91 m) — body, wing interiors
-
Color B — Warm Cream/Off-White: ~60 yds (55 m) — neck, head, wing borders, beak base
-
Color C — Pale Blue-Grey: ~15 yds (14 m) — beak tip
-
Color D — White Fluffy/Airy Yarn: ~5 yds (5 m) — frost-tipped fringe tassels (brushed mohair, eyelash, or loosely spun novelty yarn works beautifully)
Tools & Notions:
- Crochet hook: 3.5 mm (E-4) for worsted, or 4.0 mm (G-6) for DK — choose the size that gives you a tight, stiff fabric with no gaps when stretched
- Tapestry needle (blunt tip, large eye)
- Sharp embroidery scissors
- Stitch markers (2–3, locking preferred)
- Polyester fiberfill — approx 30–40 g (1–1.5 oz)
- Black embroidery floss or perle cotton — single strand for eye
- Straight pins (for positioning wings before sewing)
Optional but Helpful:
- Row counter or pencil/paper for tracking spiral rounds
- Stuffing tool (chopstick, hemostat, or dedicated stuffing fork)
- Blocking mat and pins (for wing panels before folding)
4. Stitch Abbreviations (US Terms)
| Abbreviation | Meaning |
|---|---|
| ch | chain |
| sl st | slip stitch |
| sc | single crochet |
| hdc | half double crochet |
| inc | increase (2 sc in same stitch) |
| dec | invisible decrease (insert hook in front loop of next stitch, front loop of following stitch, yarn over, pull through both loops, yarn over, pull through both loops on hook) |
| BLO | back loop only |
| FLO | front loop only |
| RS | right side |
| WS | wrong side |
| st(s) | stitch(es) |
| rnd(s) | round(s) |
| row(s) | row(s) |
| […] x N | repeat bracketed sequence N times |
| (X sts) | stitch count at end of round/row |
Special Notes:
-
Continuous Spiral: Do not join rounds with sl st and do not turn. Use a stitch marker in the first stitch of each round, moving it up as you go.
-
Invisible Decrease: Used throughout for clean shaping. Standard dec (sc2tog) creates a visible bump; invisible dec keeps the surface smooth.
-
Wing Panels: Worked flat in rows with turning chains. Ch 1 at start of row does not count as a stitch unless noted.
5. Architectural Mechanics / Technique Deep-Dive
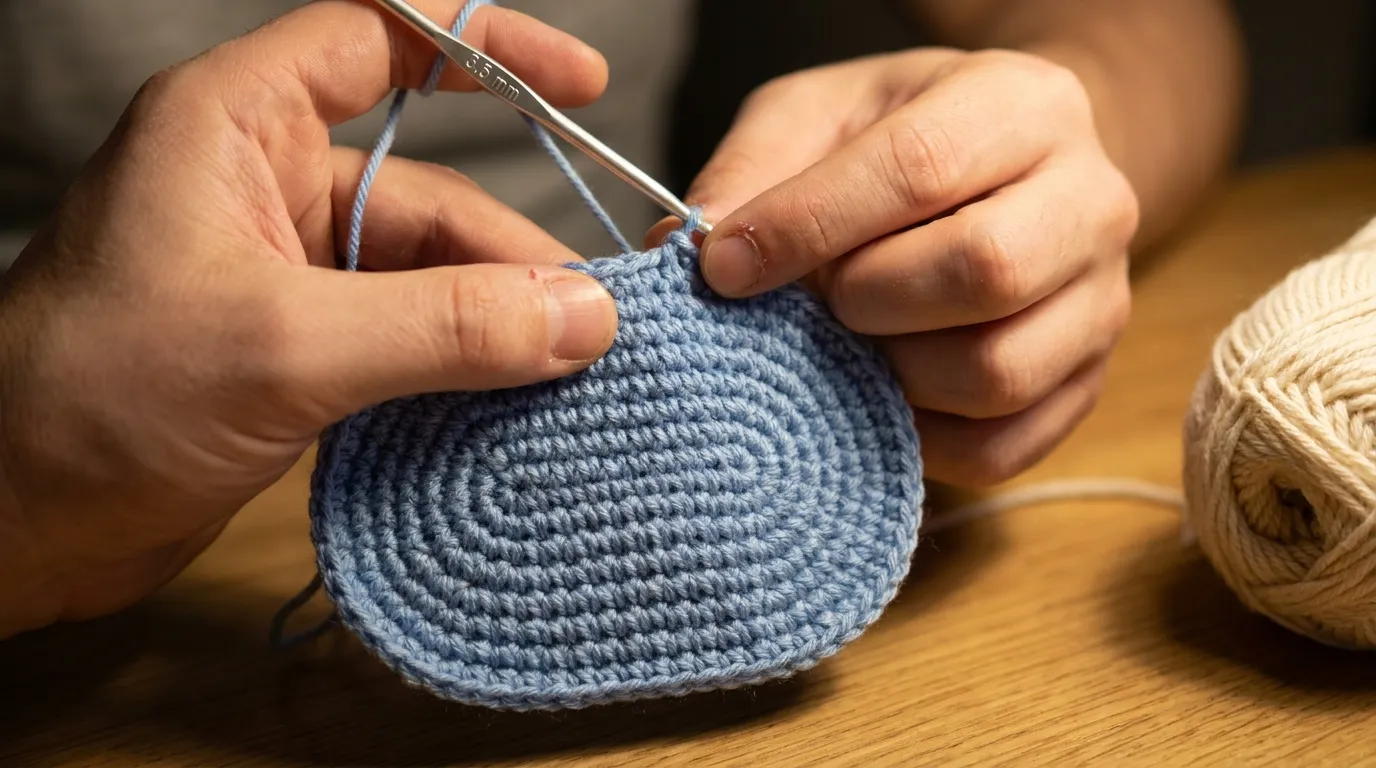
Why Continuous Spiral for the Body? Amigurumi worked in joined rounds creates a visible seam line where each round ends. Continuous spiral eliminates that seam entirely, giving the swan’s body and neck a perfectly smooth, organic surface — essential for a creature defined by curves. The trade-off is that you must track your round count with a marker; the reward is a form that looks grown, not constructed.
The S-Curve Neck: Strategic Stuffing Over Structure The neck’s elegant arch is not created by short rows or wire. It emerges from two factors: (1) the gradual taper from body-width to head-width through consistent decrease rounds, and (2) stuffing density. Pack the lower neck firmly; stuff the upper neck and head more lightly. When you bend the neck into its S-curve during final shaping, the firmer lower section resists compression while the lighter upper section yields, locking the curve in place. This is fiber sculpture — the stuffing is the armature.
Origami Wings: Flat Panels, Folded Volume The wings are not crocheted in 3D. They are rectangular-ish panels worked in rows: a powder blue interior (sc and hdc for subtle texture) framed by a cream single crochet border with a slip stitch picot edge. Once blocked flat, each panel is folded into a soft Z-pleat — two mountain folds, one valley — creating three layered planes that mimic folded paper. The folds are not sewn shut; they are held by the tension of the whipstitch attaching the wing to the body and by the natural memory of the blocked fabric. This is why blocking the panels before folding matters: it trains the yarn to hold the crease.
Frost-Tipped Fringe: Tassels, Not Fringe The “frost tips” are not cut fringe. They are tiny tassels (3–4 strands each, ~1.5 cm long) tied into the rear edge of the top wing layer. Tassels move independently, catching light and air like real feather barbs. Cut fringe would lie flat; tassels dance.
6. Step-by-Step Stitch Instructions
Phase 1: Body (Color A — Powder Blue)
Worked in continuous spiral. Place marker in first stitch of each round.
Rnd 1: 6 sc in magic ring (6 sts) Rnd 2: [inc] x 6 (12 sts) Rnd 3: [sc, inc] x 6 (18 sts) Rnd 4: [sc 2, inc] x 6 (24 sts) Rnd 5: [sc 3, inc] x 6 (30 sts) Rnd 6: [sc 4, inc] x 6 (36 sts) Rnd 7: [sc 5, inc] x 6 (42 sts) Rnd 8: [sc 6, inc] x 6 (48 sts) Rnd 9: [sc 7, inc] x 6 (54 sts) Rnd 10: [sc 8, inc] x 6 (60 sts)
Rnds 11–18: Sc in each st around (60 sts) — 8 rounds straight. This establishes the oval body width.
Rnd 19: [sc 8, dec] x 6 (54 sts) Rnd 20: [sc 7, dec] x 6 (48 sts) Rnd 21: [sc 6, dec] x 6 (42 sts) Rnd 22: [sc 5, dec] x 6 (36 sts) Rnd 23: [sc 4, dec] x 6 (30 sts) Rnd 24: [sc 3, dec] x 6 (24 sts)
Pause here. Stuff the body firmly, massaging into an oval shape — slightly longer than wide. The stuffing should feel dense, like a firm stress ball. Continue to neck without fastening off.
Phase 2: Neck & Head (Color B — Warm Cream)
Continue in continuous spiral from body. The transition round is worked in Color B.
Rnd 25 (transition): Join Color B with sc in next st, sc in each st around (24 sts). Carry Color A inside work for 2–3 stitches to secure, then trim.
Rnd 26: [sc 2, dec] x 6 (18 sts) Rnd 27: Sc in each st around (18 sts) Rnd 28: [sc 1, dec] x 6 (12 sts) Rnds 29–34: Sc in each st around (12 sts) — 6 rounds straight. This is the neck column.
Rnd 35: [inc] x 12 (24 sts) — begin head expansion Rnd 36: [sc, inc] x 12 (36 sts) Rnd 37: [sc 2, inc] x 12 (48 sts) Rnds 38–41: Sc in each st around (48 sts) — 4 rounds straight. Head width established.
Rnd 42: [sc 2, dec] x 12 (36 sts) Rnd 43: [sc 1, dec] x 12 (24 sts) Rnd 44: [dec] x 12 (12 sts)
Stuff head firmly but not as densely as body. Shape into a smooth oval. Continue:
Rnd 45: [dec] x 6 (6 sts) Fasten off leaving 20 cm tail. Thread tail through tapestry needle, weave through front loops of final 6 stitches, pull tight to close. Bury tail inside head.
Phase 3: Beak (Color C — Pale Blue-Grey)
Worked flat in rows, then folded and sewn.
Row 1: Ch 6, sc in 2nd ch from hook and each ch across (5 sts), turn Row 2: Ch 1, sc in each st across (5 sts), turn Row 3: Ch 1, dec, sc, dec (3 sts), turn Row 4: Ch 1, dec, sc (2 sts), turn Row 5: Ch 1, dec (1 st) Fasten off leaving 15 cm tail for sewing.
Fold beak in half lengthwise (RS together) so Row 1 meets Row 5. Whipstitch the two long edges together, creating a 3D cone. Turn RS out. Sew beak to front of head, centered, with the pointed tip angled slightly downward. The base of the beak should sit at the junction of Rnds 34–35 of the head.
Phase 4: Wings — Make 2 (Color A interior, Color B border)
Worked flat in rows. Block before folding.
Interior Panel (Color A): Row 1: Ch 18, sc in 2nd ch from hook and each ch across (17 sts), turn Row 2: Ch 1, sc in each st across (17 sts), turn Row 3: Ch 1, hdc in each st across (17 sts), turn Row 4: Ch 1, sc in each st across (17 sts), turn Row 5: Ch 1, hdc in each st across (17 sts), turn Row 6: Ch 1, sc in each st across (17 sts), turn Row 7: Ch 1, hdc in each st across (17 sts), turn Row 8: Ch 1, sc in each st across (17 sts) Fasten off. Do not turn.
Border (Color B) — worked evenly around entire panel perimeter: Join Color B with sl st in any corner. Ch 1, sc evenly around all four sides (approx 17 sts per long edge, 7 sts per short edge, 3 sc in each corner), sl st to first sc. Fasten off.
Picot Edge (Color B): Join Color B with sl st in any border stitch. [Ch 3, sl st in 3rd ch from hook (picot made), sl st in next border st, sl st in next border st] around entire perimeter. Fasten off and weave in ends.
Block both panels: Pin to blocking mat, mist lightly with water, let dry completely. This sets the stitches and trains the fabric to hold folds.
Folding the Wings (Origami Step): Lay panel flat, RS up (picot edge facing you). The panel is wider than it is tall.
- Valley Fold 1: Bring left edge toward center, folding at ~1/3 width. Crease firmly with fingers.
- Mountain Fold: Bring the new left edge (the fold you just made) back toward left, creating a Z-pleat. The panel now has three layers: back layer (original left third), middle layer (center third, folded under), front layer (right third, folded over).
- Valley Fold 2: At the right edge, fold the remaining third under toward center, tucking under the front layer.
You should now have a compact folded wing ~5 cm wide with three visible layered planes. Pin folds in place temporarily. Repeat for second wing.
Phase 5: Frost-Tipped Tassels (Color D — White Fluffy Yarn)
Make 6–8 tassels per wing (12–16 total).
Cut 4 strands of Color D, each ~8 cm long. Fold bundle in half. Insert crochet hook through the rear edge of the top wing layer (the front-most folded plane), catch the folded midpoint of the strands, pull a loop through, then pull the cut ends through the loop and tighten. Trim ends evenly to ~1.5 cm. Space tassels evenly along the rear edge of the top layer, approx 1 cm apart.
7. Assembly, Mounting & Structural Integration
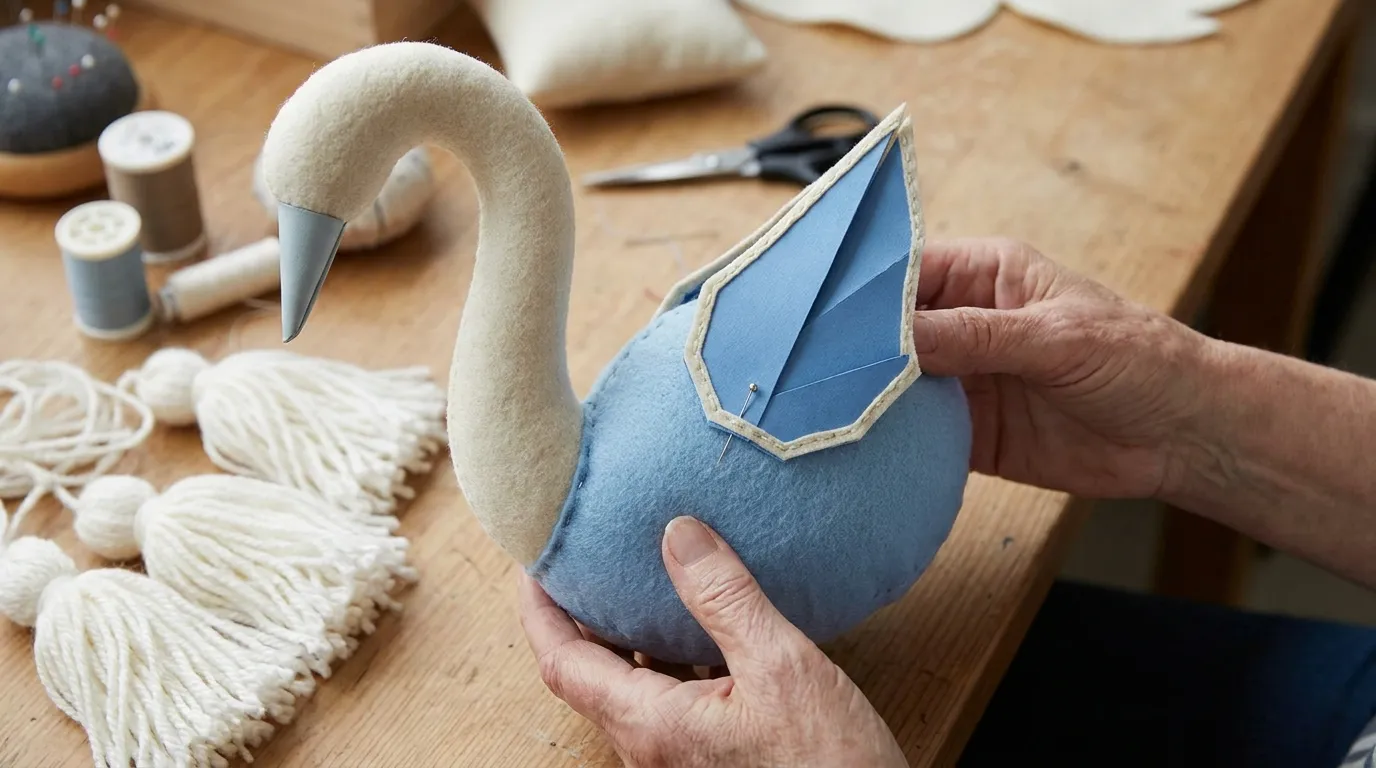
Attaching Wings: Position wings on either side of the body, layered over the back, with the folded edges facing upward and slightly forward. The top layer of each wing should angle gracefully toward the tail. Pin in place.
Using Color B and tapestry needle, whipstitch the back layer only of each wing to the body. Stitch through the body fabric and the bottom layer of the wing fold, catching only the back layer so the front two layers remain free and dimensional. Work 8–10 stitches per wing along the folded edge. Remove pins.
Eye Embroidery: Using a single strand of black embroidery floss and a sharp embroidery needle, embroider one small French knot (wrap 2x) or a tiny satin stitch eye on each side of the head, positioned at the level of Rnd 38–39, approximately 3 stitches back from the beak base. Keep eyes symmetrical — use pins to mark placement first.
Final Shaping: With the wings attached and eye embroidered, gently bend the neck into an S-curve. Use your thumbs to press the curve into the stuffing: one thumb at the base of the neck (pushing forward), one at the mid-neck (pushing back), one at the head-neck junction (pushing forward). The firm lower neck and lighter upper neck will hold this shape. Adjust until the silhouette feels balanced and alive.
8. Hardware, Accents & Embellishment Assembly
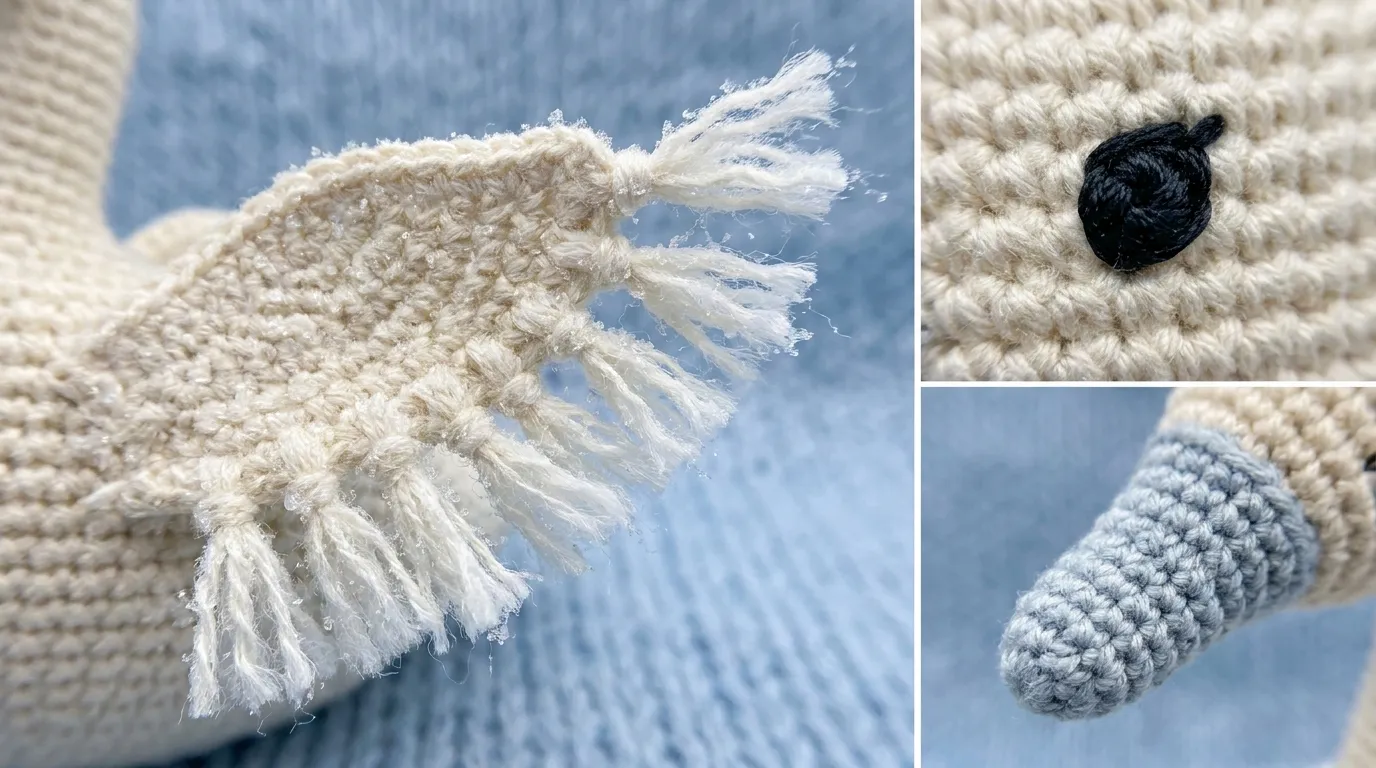
This piece requires no hardware — no D-rings, no chains, no clasps. The accents are entirely fiber-based:
-
Beak Tip: The pale blue-grey tip (Color C) is integral to the folded beak cone. No separate application needed.
-
Eye: Single-strand black embroidery floss, French knot or satin stitch. No beads, no safety eyes.
-
Frost Tassels: White fluffy yarn (Color D) tied into the rear edge of the top wing layer as described in Phase 5. These are the only “fringe” element.
-
Wing Borders: The cream single crochet + picot slip stitch border (Color B) frames each wing panel and defines the origami folds visually.
No additional embellishments. The swan’s elegance lives in restraint.
9. Blocking, Care & Maintenance
Blocking (Wings Only): Block wing panels before folding (see Phase 4). Pin to dimensions: 17 sts wide x 7 rows tall (approx 9 x 5 cm). Light mist blocking is sufficient for acrylic/acrylic-blend — do not steam, as heat can melt or flatten the fibers permanently. Let dry 24 hours.
Washing: Spot clean only. Dampen a soft cloth with cool water and mild wool wash; gently dab soiled areas. Do not submerge — the dense stuffing retains water and may mildew. If full washing is unavoidable: hand wash in cool water with gentle detergent, press (do not wring) in towels to remove excess water, reshape while damp, and air dry 48+ hours, rotating periodically.
Storage: Store in a breathable cotton bag or open box. Avoid plastic bags (traps humidity). Keep away from direct sunlight to prevent color fading. The swan holds its shape indefinitely if not crushed.
Refreshing the Frost Tassels: If tassels become matted, gently separate strands with fingers or a fine-tooth comb. A cool hair dryer on low/cool setting can restore fluffiness.
10. Frequently Asked Questions (FAQ)
Q: Can I use cotton yarn instead of acrylic? A: Yes, but with caveats. Cotton has less elasticity and “memory” than acrylic, so the neck may not hold its S-curve as firmly without a wire insert. The wing panels will block beautifully but may not hold folded creases as crisply. If using cotton, consider adding a 20-gauge floral wire inside the neck (insert before stuffing head) and starch-blocking the wings.
Q: My swan’s neck flops over. What did I do wrong? A: Two likely causes: (1) Stuffing density — the lower neck must be very firm, almost hard, while the upper neck is medium. Re-stuff through the head opening if needed (use a chopstick to push fiberfill down). (2) Hook size too large — if your fabric has visible gaps, the structure lacks rigidity. Go down a hook size and re-crochet the neck/head section.
Q: Can I make this larger or smaller? A: Absolutely. For a larger swan (20 cm tall), use bulky (5) yarn and a 5.5 mm hook; add 2–3 increase rounds to body (Rnds 11–12 at 66–72 sts), 4–5 more neck rounds, and 2 more head expansion rounds. For a tiny swan (8 cm), use fingering (1) yarn and a 2.25 mm hook; stop body increases at Rnd 8 (48 sts), shorten neck by 2 rounds, reduce head expansion by 1 round. Scale wing panels proportionally.
Q: The wing folds won’t stay. Help? A: Three fixes: (1) Ensure panels are fully dry after blocking — damp yarn won’t hold a crease. (2) Use a tighter hook for the border (3.5 mm instead of 4.0 mm) so the picot edge has more tension. (3) Add a single hidden stitch: after whipstitching wing to body, take one tiny stitch through the valley fold (middle layer to back layer) at the center of the wing, using Color B. This tacks the fold invisibly.
11. Community Call-to-Action
Your swan is complete — a small sculpture of quiet motion, folded geometry, and soft frost. Whether it perches on your desk, guards a bookshelf, or travels in a pocket as a talisman of grace, it carries the hours you spent shaping stitch into spirit.
We would love to see your flock. Share your finished swan on Instagram with @NailItHome and #NailItHomeSwan — tag us in your process shots, your “first stitch” and “last tassel” moments, the morning light catching the frost tips. On Pinterest, pin your project photo to your “Crochet Amigurumi” or “Handmade Home” boards and link back to this pattern.
Questions? Stuck on a decrease round? Want to show off your colorway variation (a midnight navy body with silver frost tips? a blush pink swan for a nursery?). Drop a comment below or DM us — Aurelia reads every one.
Happy hooking. May your tension be even, your stuffing firm, and your swans ever gliding.
— Aurelia Thorne, Master Fiber Artist & Lead Pattern Curator, Nail It Home


