

Friendly Dragon Amigurumi With Earthy Moss Green Scales: Free Crochet Pattern & Tutorial
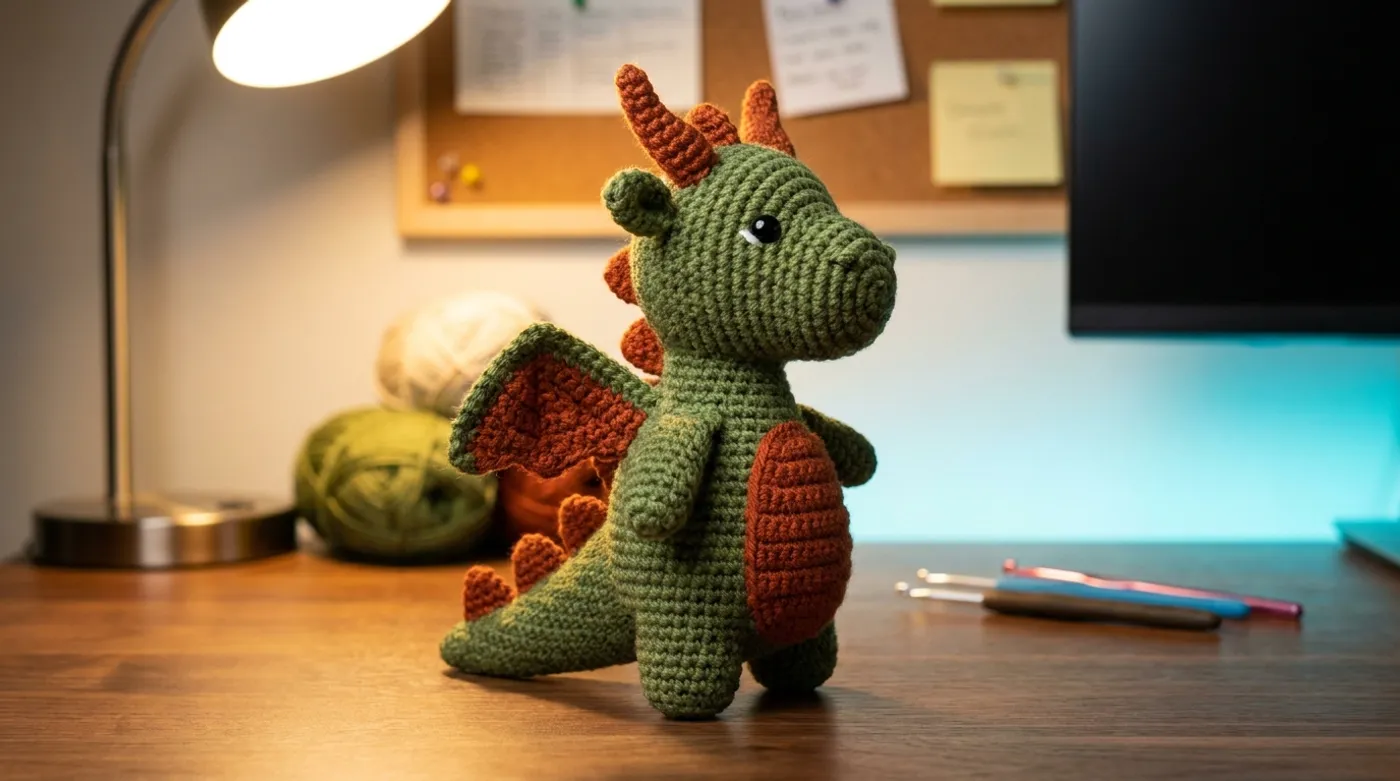
A compact, friendly dragon amigurumi stands upright, about 4.5 inches tall with a 2‑inch wide mid‑body, built from a continuous single‑crochet spiral in medium‑weight yarn. Its body is moss‑green, accented by burnt‑orange belly, wing interior and dorsal spikes, while short cre...

Pattern Specifications
Introduction & Design Inspiration
There is a particular quiet magic in watching a creature emerge from a single strand of yarn—loop by loop, round by round—until a personality stares back at you. This friendly dragon began as a sketch in my notebook during a long winter evening: a compact guardian with moss-green scales, a warm burnt-orange belly like glowing embers, and tiny cream horns that catch the light. I wanted something that could perch on a desk corner, ride a bookshelf, or tuck into a pocket for courage on difficult days.
The design leans into the meditative rhythm of continuous spiral crochet. No joining, no turning chains—just a steady helix that grows organically from nose to tail tip. Color changes carve out the belly and wing interiors, while 3-sc cluster stitches erupt along the spine as playful dorsal spikes. The horns are simple tapered tubes, and a single white stitch catches the light in the dragon’s eye, giving it a spark of life.
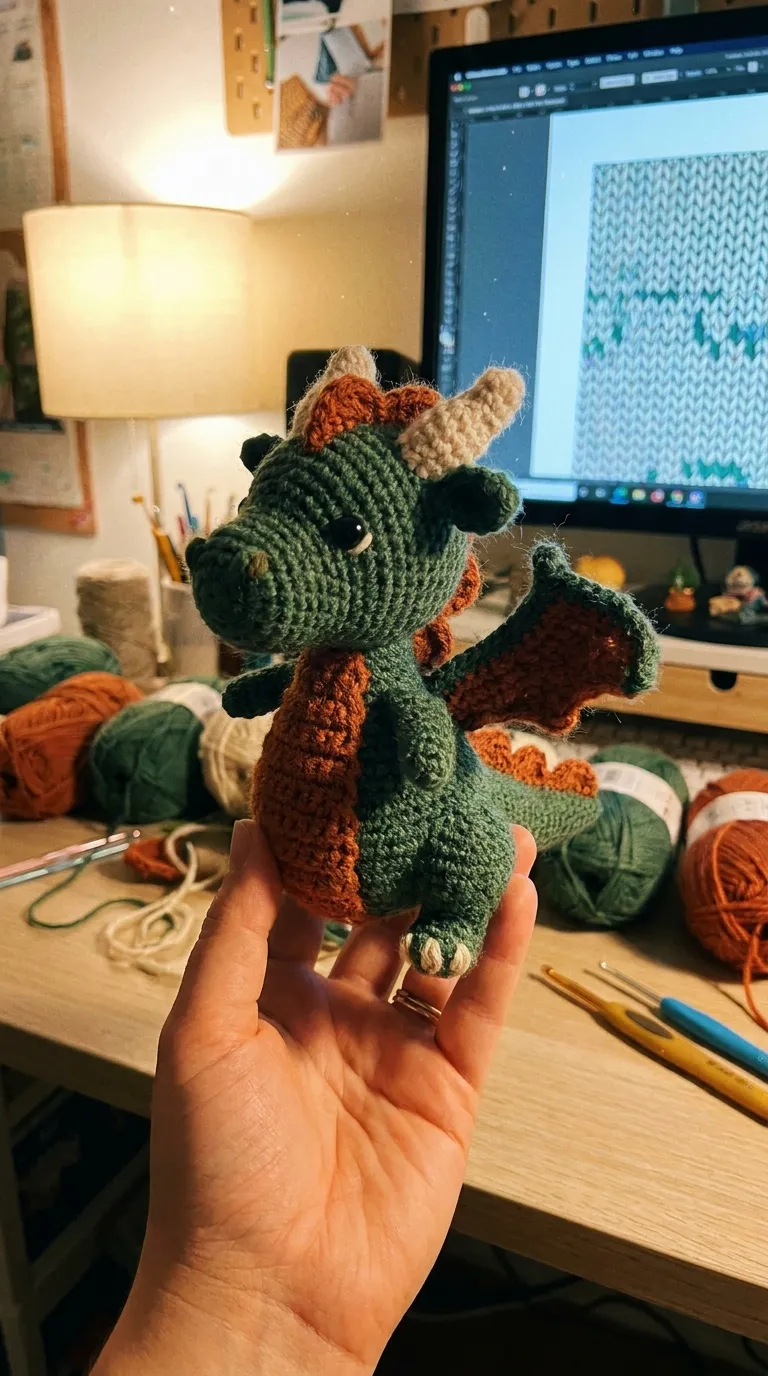
Whether this is your first amigurumi or your fiftieth, the pattern walks you through every increase, decrease, and color transition with stitch-by-stitch clarity. Gather your yarn, find a comfortable chair, and let’s bring a little dragon into the world.
Pattern Overview & Finished Dimensions
-
Height (horn tip to tail end): 4.5–5 inches (11.5–12.5 cm)
-
Body diameter at widest point: 2 inches (5 cm)
-
Helical rounds from head to tail: 6–7 full spiral rotations
-
Construction: Single-piece continuous spiral (helix) worked in single crochet; no seaming required
-
Colorwork: Three yarn colors (moss green, burnt orange, cream) with minimal ends to weave
-
Stuffing: Polyester fiberfill, firmly packed for structure
-
Eyes: 6 mm black safety eye or embroidered French knot + white highlight stitch
-
Skill notes: Suitable for confident beginners; requires comfort with magic ring, invisible decreases, and mid-round color changes
Materials, Fiber & Hardware Checklist
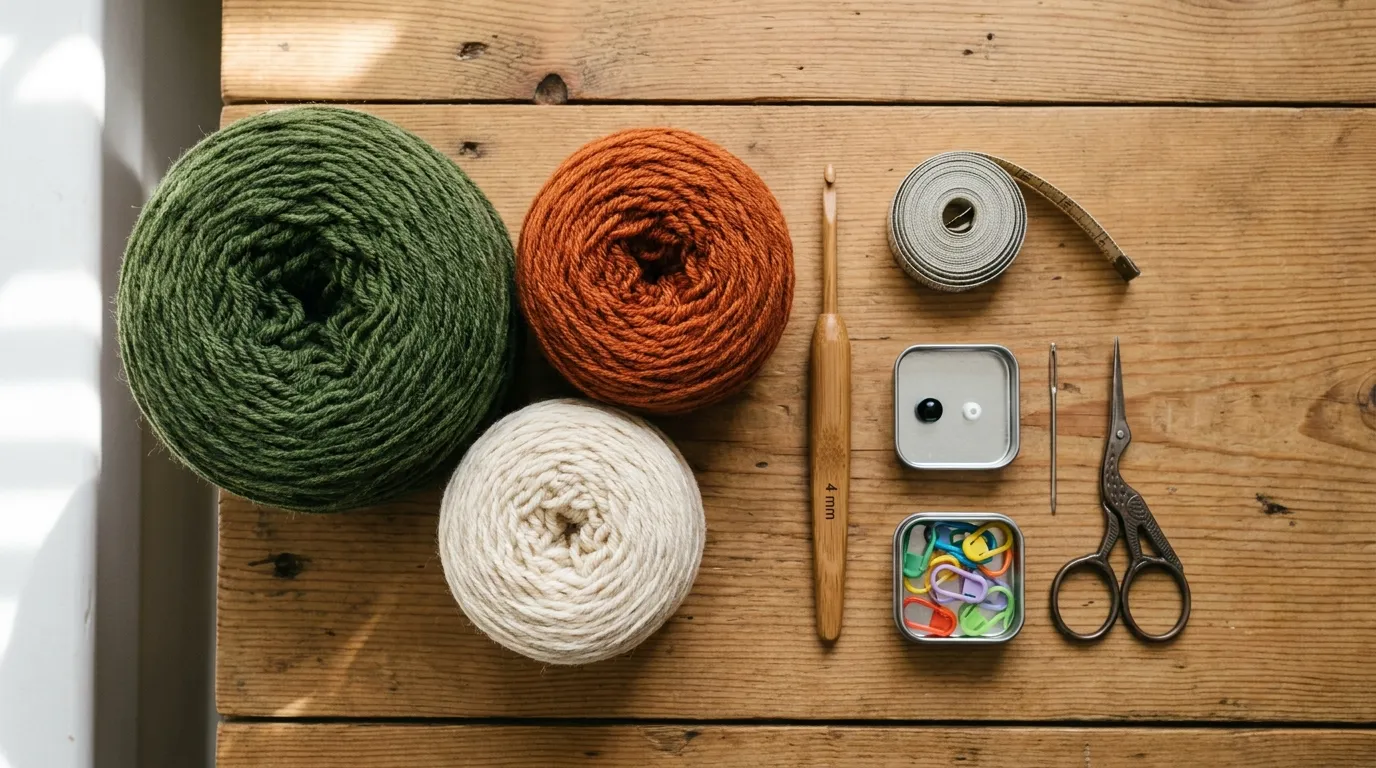
Yarn (all worsted / medium weight, category 4):
-
Moss Green (Main Color / MC): ~55 yds / 50 m — e.g., Lion Brand Vanna’s Choice “Fern” or Red Heart Super Saver “Dark Sage”
-
Burnt Orange (Contrast Color A / CC-A): ~15 yds / 14 m — e.g., Lion Brand Vanna’s Choice “Terracotta” or Red Heart Super Saver “Pumpkin”
-
Cream (Contrast Color B / CC-B): ~10 yds / 9 m — e.g., Lion Brand Vanna’s Choice “Beige” or Red Heart Super Saver “Off White”
-
White & Black (Eyes): Scraps — white embroidery floss or yarn for highlight; 6 mm black safety eye or black embroidery floss for pupil
Tools & Notions:
- 3.5 mm (US E-4) crochet hook — or size needed to achieve tight, dense fabric
- Polyester fiberfill stuffing (~1 oz / 28 g)
- 6 mm black safety eye with washer (or embroider eye)
- Tapestry needle (blunt tip, large eye)
- Stitch marker (locking style preferred)
- Sharp scissors
- Optional: 4 mm black bead for eye if not using safety eye
No hardware, lining, or stabilizer required.
Stitch Abbreviations (US Terms)
| Abbreviation | Meaning |
|---|---|
| ch | chain |
| sl st | slip stitch |
| sc | single crochet |
| inc | increase (2 sc in same stitch) |
| dec | invisible decrease (insert hook in FLO of next 2 sts, yarn over, pull through both loops, yarn over, pull through 2 loops) |
| sc3tog | 3-sc cluster (insert hook in next st, yo, pull up loop) × 3, yo, pull through all 4 loops on hook |
| BLO | back loop only |
| FLO | front loop only |
| RS | right side (outside of work) |
| WS | wrong side (inside of work) |
| st(s) | stitch(es) |
| rnd(s) | round(s) |
| MC | main color (moss green) |
| CC-A | contrast color A (burnt orange) |
| CC-B | contrast color B (cream) |
| [ ] × N | repeat instructions in brackets N times |
Special Techniques:
-
Magic Ring (Adjustable Loop): Wrap yarn around fingers, insert hook, pull up loop, ch 1, work stitches into ring, pull tail to close.
-
Invisible Decrease: Worked in front loops only for a nearly seamless decrease—essential for amigurumi shaping.
-
Continuous Spiral: Do not join rounds with sl st; do not ch 1 at start of rounds. Use a stitch marker in the first stitch of each round to track progress.
-
Mid-Round Color Change: Complete the last stitch of the old color until 2 loops remain on hook, drop old color, pick up new color, yo and pull through both loops with new color. Carry unused color loosely along inside of work.
Architectural Mechanics / Technique Deep-Dive
This dragon is a study in helical topology. Unlike flat crochet that progresses in rows, amigurumi worked in a continuous spiral creates a seamless tube that can be shaped in three dimensions through strategic increases and decreases. Think of it as 3D printing with yarn: each round is a cross-sectional slice, and the stitch count of that slice determines the circumference at that height.
Increases (inc) expand the cross-section—used at the crown of the head, the belly bulge, and the base of the tail. Decreases (dec) contract it—tapering the snout, narrowing the neck, shaping the limbs, and closing the tail tip. The rhythm of increase/decrease pairs creates the dragon’s silhouette: a gentle swell for the head, a constriction for the neck, a generous roundness for the body, and a long, graceful taper to the tail.
Color changes are architectural as well as decorative. The burnt-orange belly (CC-A) is not merely surface appliqué—it is worked into the spiral as a vertical panel, replacing MC stitches for a defined section of each round. This creates a clean, integrated color boundary without seaming. The wing interiors use the same technique on a smaller scale.
Dorsal spikes introduce texture through the 3-sc cluster (sc3tog). Unlike a standard decrease that reduces stitch count, this cluster maintains the stitch count while adding a raised, triangular nub on the surface. Worked every few rounds along the spine, they form a ridged crest that catches light and defines the dragon’s silhouette.
Horns are miniature tapered tubes: a tiny magic ring of 4 sc, worked in rounds with a single decrease at the tip to close. They are sewn onto the head after stuffing, positioned symmetrically.
Eyes anchor the expression. A 6 mm safety eye placed between rounds 8–9 (counting from nose) with a single white embroidery stitch for highlight gives the dragon a gentle, curious gaze. If you prefer embroidery, a French knot in black thread with a white straight stitch achieves the same effect.
Step-by-Step Stitch Instructions
Work in continuous spiral unless noted. Move stitch marker up each round. Stuff firmly as you go, especially the head and body. Carry unused colors along inside of work; do not cut until instructed.
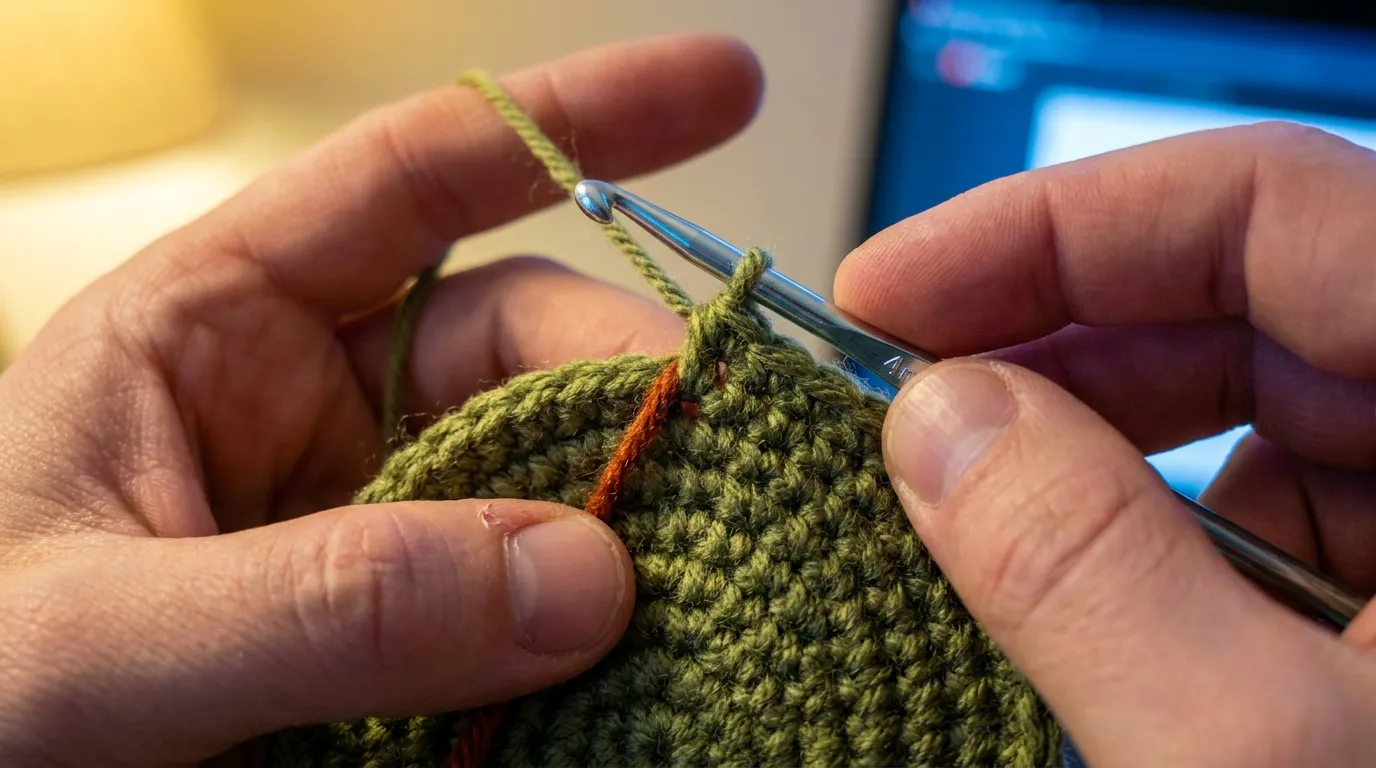
Phase 1: Head & Snout (MC throughout)
Rnd 1: Magic ring, 6 sc into ring. (6 sts) Rnd 2: [inc] × 6. (12 sts) Rnd 3: [sc, inc] × 6. (18 sts) Rnd 4: [2 sc, inc] × 6. (24 sts) Rnd 5: [3 sc, inc] × 6. (30 sts) Rnd 6–8: Sc in each st around. (30 sts, 3 rounds) Rnd 9: [3 sc, dec] × 6. (24 sts) Rnd 10: [2 sc, dec] × 6. (18 sts) Rnd 11: [sc, dec] × 6. (12 sts) — Begin stuffing snout firmly. Rnd 12: [dec] × 6. (6 sts) — Finish stuffing head. Fasten off MC, leaving long tail for closing. Pull tail through remaining 6 sts, cinch closed, weave in.
Phase 2: Body with Belly Panel & Dorsal Spikes (MC + CC-A)
Attach MC to any stitch at base of head (where Rnd 12 closed). The belly panel runs along the center front; dorsal spikes run along the center back. Use stitch marker to mark center-back stitch for spike placement.
Rnd 13 (Body foundation): Sc in each st around head base (12 sts), then continue in spiral: [inc] × 12. (24 sts) Rnd 14: [sc, inc] × 12. (36 sts) Rnd 15: [2 sc, inc] × 12. (48 sts) Rnd 16: [3 sc, inc] × 12. (60 sts) Rnd 17–19: Sc in each st around. (60 sts, 3 rounds)
Begin belly panel (CC-A) and dorsal spikes (MC) on Rnd 20. The belly panel occupies 12 stitches at center front. The dorsal spike is worked in the single center-back stitch.
Rnd 20: Work in MC until 6 sts before center-front marker. Switch to CC-A, sc in next 12 sts (belly panel), switch to MC, sc to center-back stitch, sc3tog in center-back stitch (dorsal spike #1), sc in remaining sts to end of round. (60 sts)
Rnd 21–22: Repeat Rnd 20 pattern (belly panel in CC-A, dorsal spike in MC at center-back on Rnd 21 only). (60 sts)
Rnd 23: Sc in each st around (MC for non-belly, CC-A for belly 12 sts). No spike this round. (60 sts)
Rnd 24: Repeat Rnd 20 pattern with dorsal spike #2 at center-back. (60 sts)
Rnd 25–26: Repeat Rnd 23 (no spike). (60 sts)
Rnd 27: Repeat Rnd 20 pattern with dorsal spike #3 at center-back. (60 sts)
Rnd 28–29: Sc in each st around (maintain belly panel). (60 sts, 2 rounds)
Begin body taper.
Rnd 30: [8 sc, dec] × 6. (54 sts) — Belly panel continues in CC-A over its 12 sts; adjust dec placement to avoid belly stitches. Rnd 31: Sc in each st around. (54 sts) Rnd 32: [7 sc, dec] × 6. (48 sts) Rnd 33: Sc in each st around. (48 sts) Rnd 34: [6 sc, dec] × 6. (42 sts) Rnd 35: Sc in each st around. (42 sts) Rnd 36: [5 sc, dec] × 6. (36 sts) Rnd 37: Sc in each st around. (36 sts) Rnd 38: [4 sc, dec] × 6. (30 sts) Rnd 39: Sc in each st around. (30 sts) Rnd 40: [3 sc, dec] × 6. (24 sts) Rnd 41: Sc in each st around. (24 sts) — Stuff body firmly now. Rnd 42: [2 sc, dec] × 6. (18 sts) Rnd 43: [sc, dec] × 6. (12 sts) Rnd 44: [dec] × 6. (6 sts)
Do not fasten off. Continue directly to tail.
Phase 3: Tail (MC + CC-A for tip)
Rnd 45–50: Sc in each st around. (6 sts, 6 rounds) — Tail tube. Rnd 51: Switch to CC-A (burnt orange). Sc in each st around. (6 sts) Rnd 52: [inc] × 6. (12 sts) Rnd 53: Sc in each st around. (12 sts) Rnd 54: [dec] × 6. (6 sts) Rnd 55: [dec] × 3. (3 sts) Fasten off CC-A, leaving tail. Thread tail through remaining 3 sts, pull tight, weave in securely.
Phase 4: Wings (Make 2, MC with CC-A interior)
Worked flat in rows, then edged in the round.
Row 1 (RS): Ch 8, sc in 2nd ch from hook and each ch across. (7 sts) Row 2: Ch 1, turn. Inc in first st, sc in next 5 sts, inc in last st. (9 sts) Row 3: Ch 1, turn. Sc in each st across. (9 sts) Row 4: Ch 1, turn. Inc in first st, sc in next 7 sts, inc in last st. (11 sts) Row 5: Ch 1, turn. Sc in each st across. (11 sts) Row 6: Ch 1, turn. Dec, sc in next 7 sts, dec. (9 sts) Row 7: Ch 1, turn. Dec, sc in next 5 sts, dec. (7 sts) Row 8: Ch 1, turn. Dec, sc in next 3 sts, dec. (5 sts) Fasten off, leaving long tail for sewing.
Edging: With RS facing, join MC at wing tip. Work 1 round of sc evenly around entire wing perimeter, working 3 sc in each corner stitch at tip and base. When reaching the straight edge (Row 1 foundation), work sc in each ch. At the base (where wing attaches to body), leave a gap of ~4 sts unworked for sewing. Fasten off.
Wing interior: With CC-A, surface crochet (sl st) a simple vein line from base to tip, or embroider a lazy daisy stitch for decoration.
Phase 5: Horns (Make 2, CC-B)
Rnd 1: Magic ring, 4 sc into ring. (4 sts) Rnd 2–5: Sc in each st around. (4 sts, 4 rounds) Rnd 6: [dec] × 2. (2 sts) Rnd 7: Sc in each st around. (2 sts) Fasten off, leaving long tail. Stuff horn lightly. Sew closed at tip.
Phase 6: Eyes & Facial Details
Safety Eye Method: Insert 6 mm safety eye between Rnd 8 and 9 of head (counting from nose tip), spaced 6 sts apart. Secure washer inside before stuffing head fully. Embroider a single white stitch (or tiny white bead) at 10 o’clock position on each eye for highlight.
Embroidered Eye Method: Using black embroidery floss (6 strands), work a French knot (wrap 3×) at each eye position. Add a single white straight stitch for highlight.
Nose Highlight: With CC-B (cream), embroider a small “V” or two horizontal straight stitches at the tip of the snout for a subtle nose highlight.
Assembly, Mounting & Structural Integration
-
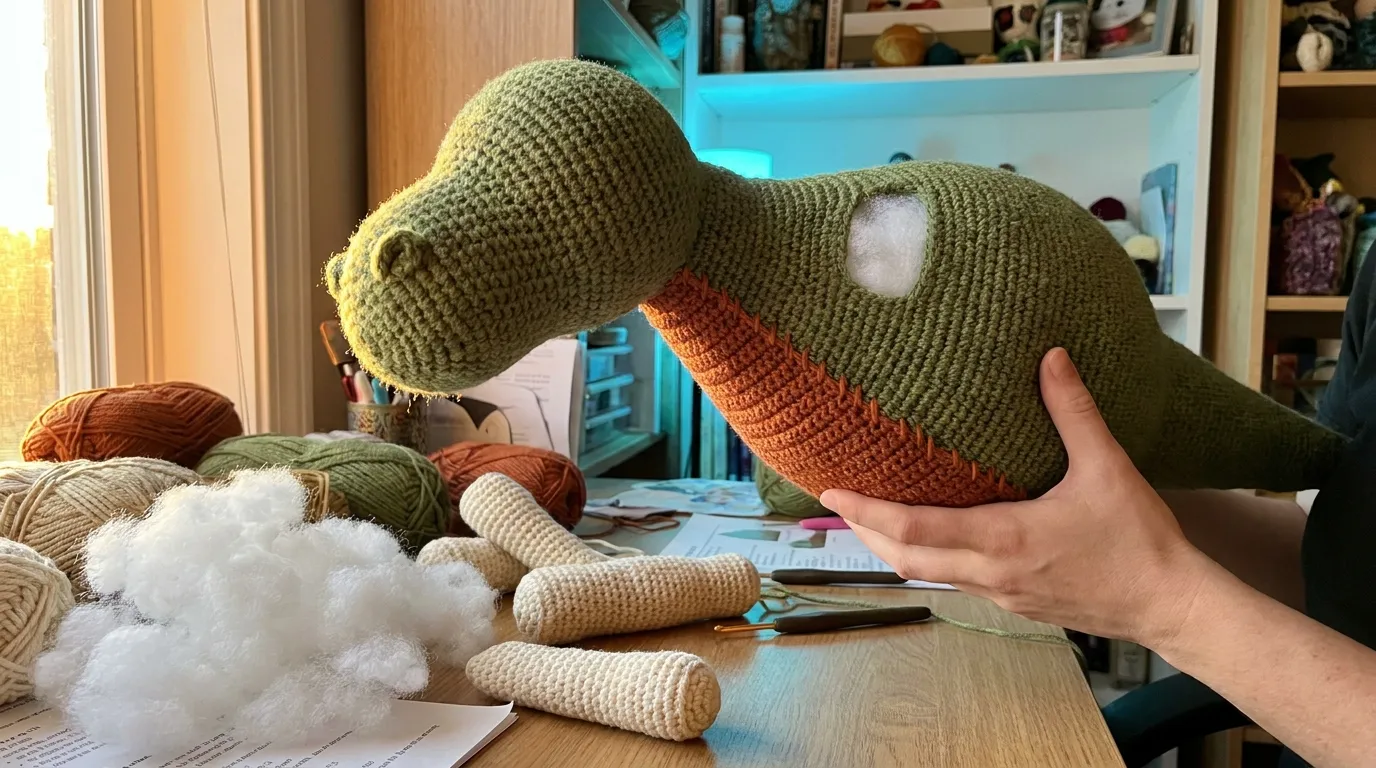
Wings: Position wings on sides of body at Rnd 22–24 (just behind the widest point). The unworked gap at the wing base aligns with the body. Using the wing’s long tail and tapestry needle, whipstitch the wing base to the body through both loops of body stitches. Secure firmly, weave in end.
-
Horns: Position horns on top of head at Rnd 4–5 (counting from nose), spaced 4 sts apart. Using CC-B tails, sew each horn securely through the head stuffing. Weave in ends.
-
Tail Tip: The burnt-orange tail tip is already integrated. Ensure stuffing extends into the tail for a gentle curve.
-
Final Shaping: Gently manipulate stuffing to smooth any lumps. The dragon should stand upright with a slight backward lean; the tail acts as a kickstand. Adjust stuffing in the tail base if needed for balance.
-
Weave All Ends: Use tapestry needle to weave every yarn tail through the interior stuffing, exiting at a different point, then trim flush. No ends should be visible.
Hardware, Accents & Embellishment Assembly
This dragon requires no hardware (no chains, clasps, D-rings, or buttons). The accents are integral to the crochet:
-
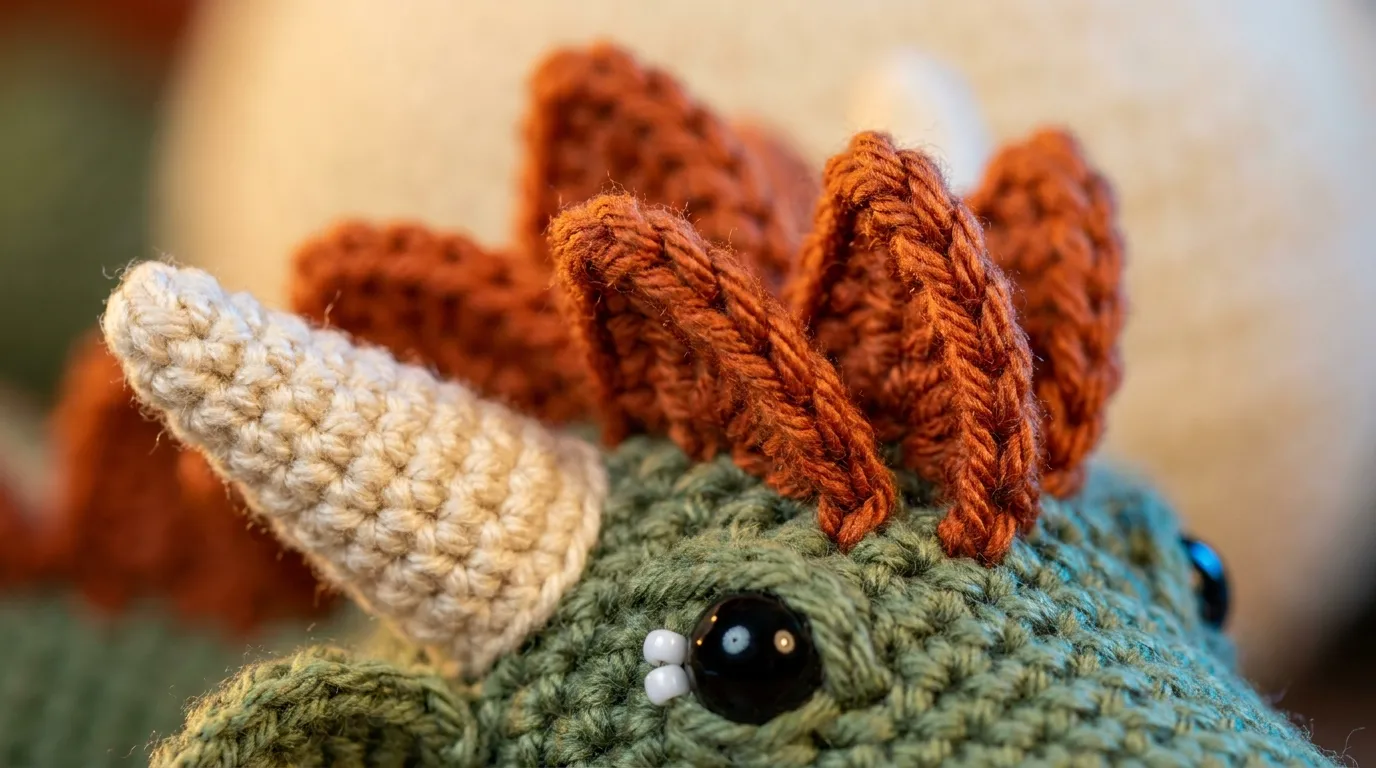
Dorsal Spikes: Three 3-sc clusters (Rnds 20, 24, 27) form a ridged crest. They are structural, not applied.
-
Belly Panel: Burnt orange vertical panel (12 sts wide) runs from Rnd 20 to Rnd 41, integrated into the spiral.
-
Wing Interiors: Optional CC-A surface crochet or embroidery adds subtle contrast.
-
Horns: Cream tapered tubes, sewn on after stuffing.
-
Eye Highlight: Single white stitch or bead—this tiny detail transforms the expression from “object” to “character.”
If you wish to add a wearable loop (for a bag charm or ornament), chain 15 in MC at the center-back of the head (between horns), sl st back to base, and fasten off. Sew securely.
Blocking, Care & Maintenance
Blocking: Amigurumi does not require traditional wet blocking. Instead, steam shape gently: hold a steam iron 1–2 inches above the piece (never touch the yarn), allowing steam to relax the stitches. Shape the head, smooth the belly panel, and define the dorsal spikes with your fingers while warm. Let cool completely before handling.
Washing: Spot-clean only with cool water and mild wool wash. Do not submerge—stuffing retains water and may mildew. If full washing is unavoidable, hand-wash in cool water, press gently in a towel (do not wring), reshape, and air dry 24–48 hours, rotating periodically.
Storage: Store in a cotton bag or acid-free tissue box away from direct sunlight (prevents fading) and humidity. Avoid plastic bags long-term. If displaying on a shelf, rotate occasionally to prevent flat spots in stuffing.
Repairs: A loose stitch can be re-tensioned with a tapestry needle. If a dorsal spike flattens, re-steam and pinch into shape. Safety eyes are permanent; if one pops, replace with embroidery.
Frequently Asked Questions (FAQ)
Q: Can I use DK (weight 3) or bulky (weight 5) yarn instead of worsted?
A: Yes, but adjust hook size and expect size changes. DK with a 2.75 mm hook yields a ~3.5-inch dragon; bulky with a 5.5 mm hook yields ~6.5 inches. Yardage will scale accordingly. Maintain tight tension regardless of weight.
Q: My invisible decreases look loose/gappy. How do I fix this?
A: Ensure you’re working only in the front loops of the two stitches, and pull the first yarn-over snug before completing the stitch. Practice on a swatch: 12 sc, then [dec] × 6. The resulting 6 sts should be nearly invisible. Tension consistency is key—keep your working yarn taut but not strangling the hook.
Q: How do I keep the carried yarn (CC-A) from showing through the MC stitches?
A: Carry CC-A loosely along the inside (WS) of the work, catching it every 3–4 stitches by working an MC stitch over the carried strand. Do not pull tight. If it still peeks, use a slightly smaller hook for the MC sections, or work the belly panel in tapestry crochet style (carrying both colors every stitch) for the cleanest edge.
Q: The dragon won’t stand up—it tips forward/backward.
A: Adjust stuffing distribution. Remove a little from the head/snout if tipping forward; add more to the tail base if tipping backward. The tail is the kickstand—ensure it’s firmly stuffed and curved slightly downward. A few stitches tacking the tail base to the body (through the stuffing) can anchor the pose.
Community Call-to-Action
Your dragon is now awake, perched, and ready for adventure. Whether it guards your stitch markers, watches over a stack of library books, or rides in your project bag as a talisman, I’d love to see the personality your tension and color choices gave it.
Share your make: Post a photo on Instagram or Pinterest and tag @NailItHome with #NailItHomeDragon. Tell us your dragon’s name, the yarn you chose, and the spot it claimed in your home.
Found a clever modification? A new spike pattern? A different eye style? Drop it in the comments on the blog post—our community learns from every maker’s hands.
Happy hooking, and may your stitches stay even and your stuffing never lump.
— Aurelia Thorne, Master Fiber Artist & Lead Pattern Curator, Nail It Home


