

Fresh Citrus Orchard Table Runner: Free Crochet Pattern & Tutorial
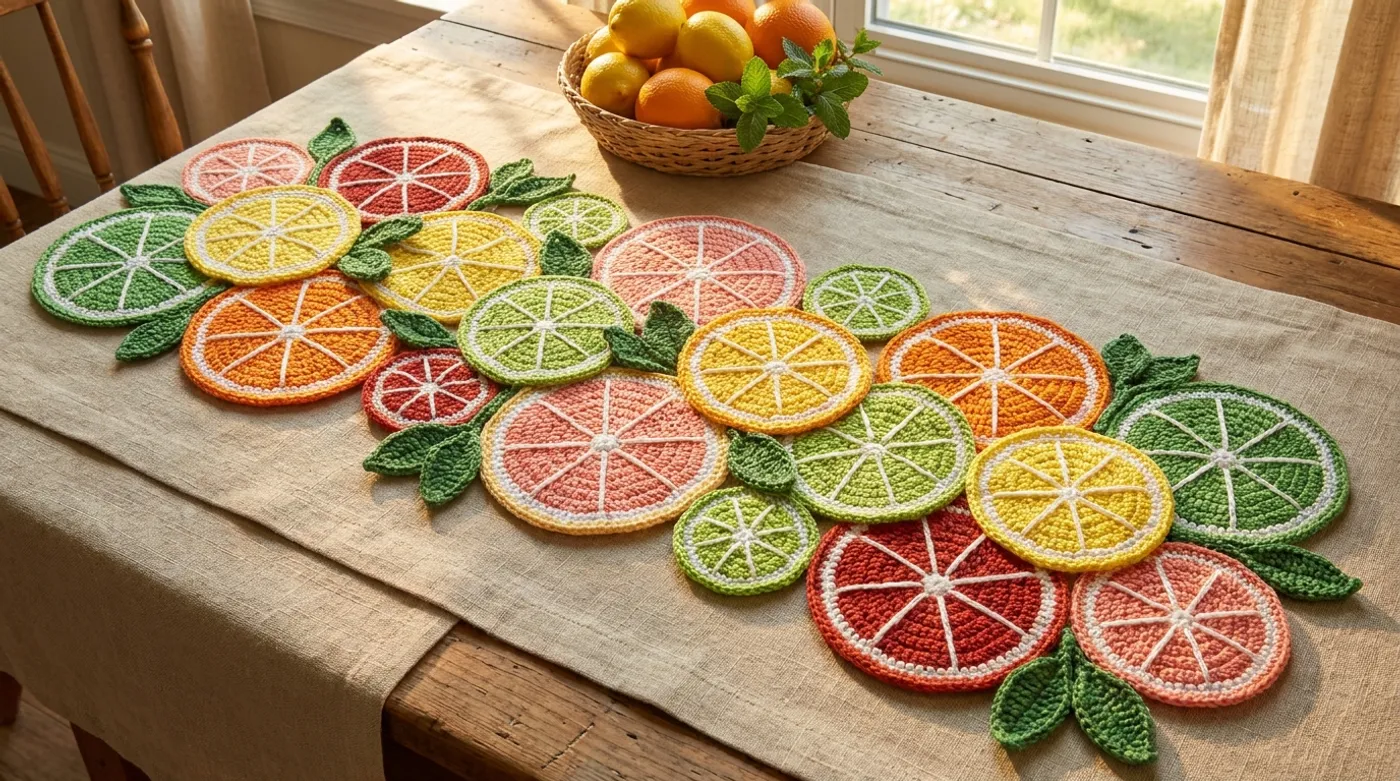
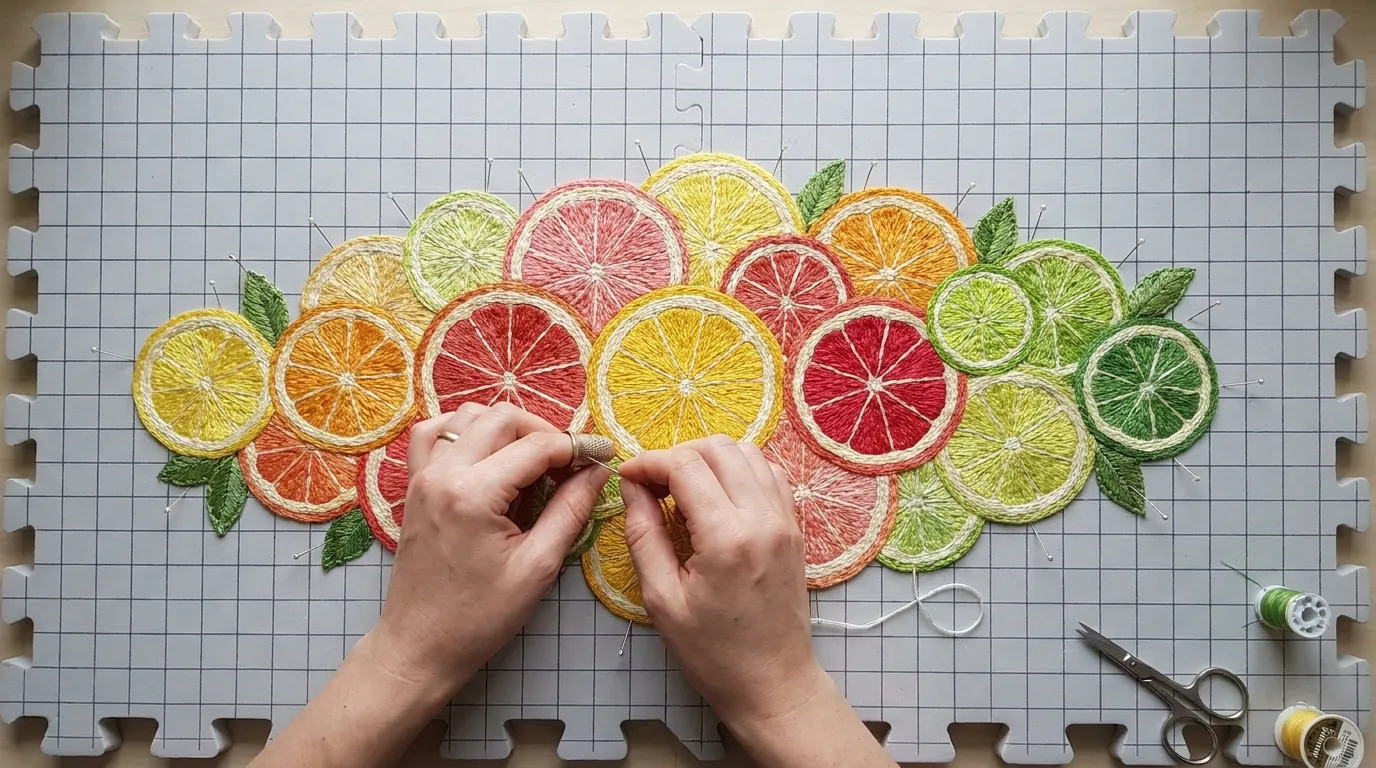
Create a vibrant citrus orchard table runner with overlapping crochet fruit slices in lemon yellow, orange, grapefruit pink, blood red, lime green, and leaf green. Features white radial spokes, rind borders, and textured green leaves.

Pattern Specifications
1. Introduction & Design Inspiration
There is a particular joy in capturing the fleeting perfection of a citrus slice — the way light catches each translucent segment, the clean geometry of radial spokes, the bright pop of rind against jewel-toned flesh. This table runner was born from a morning at the farmers market, where pyramids of Meyer lemons, blood oranges, and Key limes glowed like edible stained glass. I wanted to translate that ephemeral beauty into something lasting for the table, a piece that carries summer’s brightness through every season.
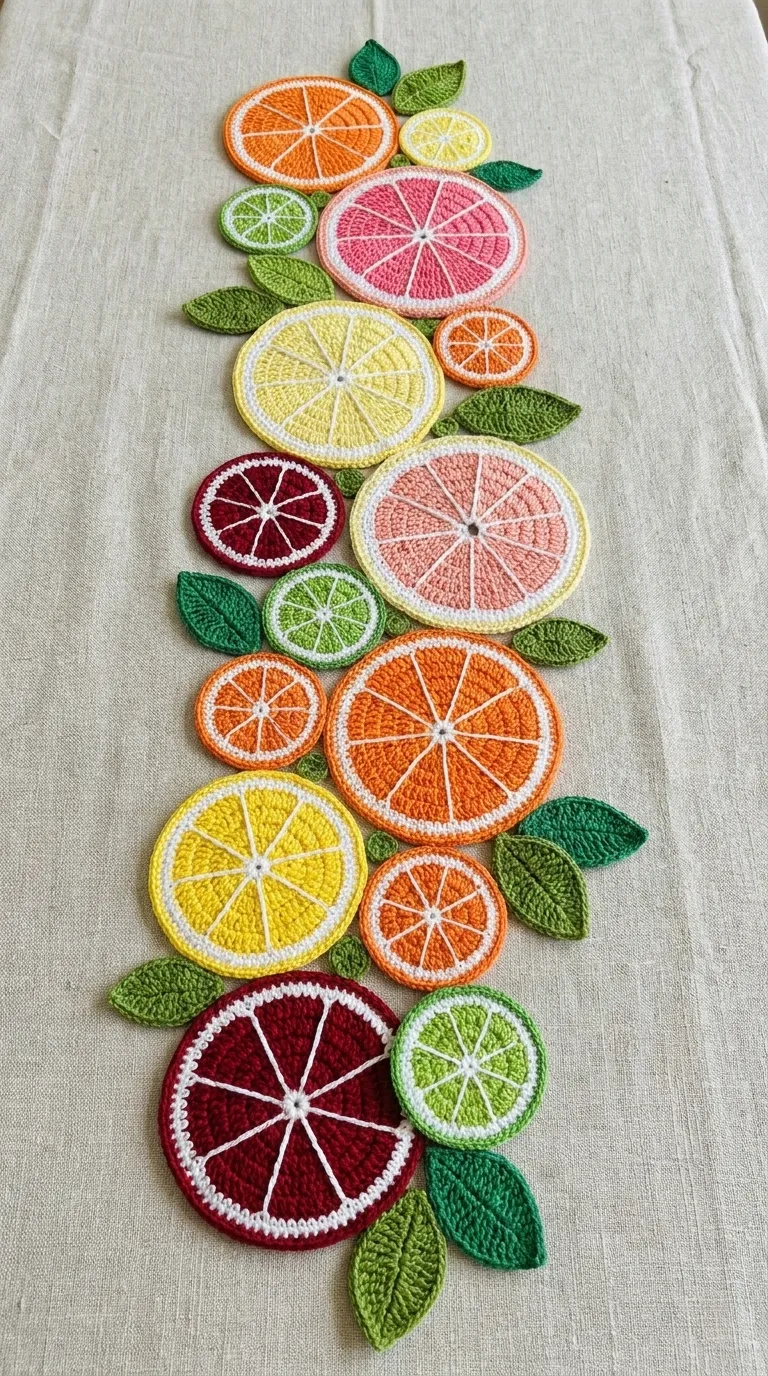
The design constructs an elongated, asymmetrical runner from overlapping circular motifs — each a complete citrus slice worked in concentric double-crochet rounds. Eight surface-stitched white spokes divide every slice into perfect segments, while a single-crochet rind border frames each circle in crisp contrast. Textured green leaves, worked in chained veins and slip-stitched edges, nestle into the curved gaps between motifs, completing the organic rhythm. The result is a runner approximately 48 inches long by 14 inches at its widest point, composed of nine fruit slices ranging from 3 to 7 inches in diameter, plus five leaf accents.
Whether you are new to motif work or a seasoned maker looking for a refreshing project, this pattern walks you through every stitch with precision. You will master circular increases, surface crochet for clean radial lines, and a clever join-as-you-go method that eliminates seaming. Let us begin.
2. Pattern Overview & Finished Dimensions
-
Finished Length: 48 inches (122 cm)
-
Finished Width (widest point): 14 inches (35.5 cm)
-
Motif Count: 9 citrus slices (3 small at 3 in / 7.5 cm, 3 medium at 5 in / 12.5 cm, 3 large at 7 in / 17.5 cm) + 5 leaf accents
-
Construction: Individual circular motifs worked separately, then joined in an overlapping asymmetrical arrangement using slip-stitch join-as-you-go on the final round of each motif
-
Structure: Flat, non-reversible (right side displays segment spokes and rind detail)
-
Drape: Firm but flexible — suitable for tabletop use without curling
-
Care: Machine washable cold, lay flat to dry (see Section 9 for full blocking and care instructions)
The runner’s asymmetry is intentional: motifs overlap at varying offsets, creating a natural, windfall-fruit arrangement. You may follow the suggested layout diagram or arrange your slices freely — each runner will be uniquely yours.
3. Materials, Fiber & Hardware Checklist
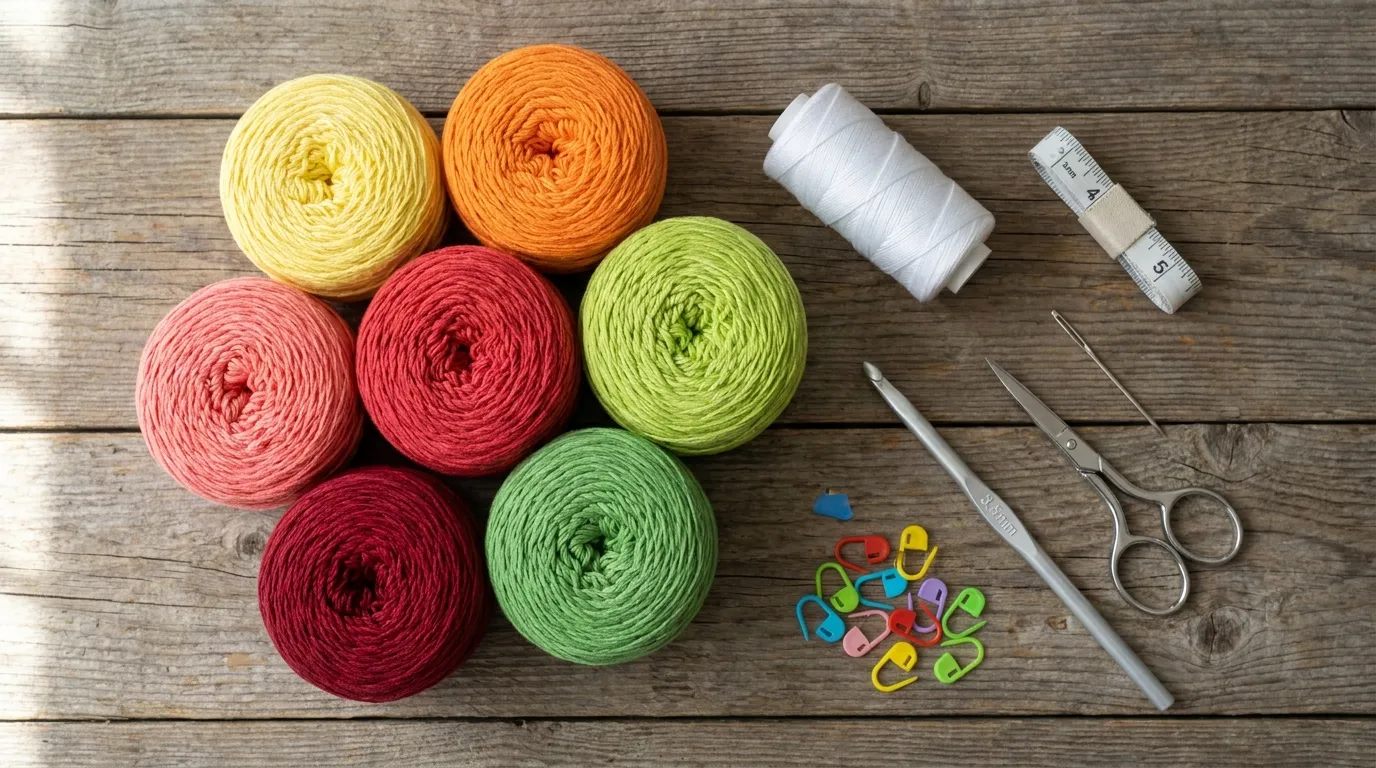
Yarn — Matte DK-weight cotton (approx. 240 yds / 220 m per 100g skein):
- Lemon Yellow — 70 yds (64 m) / ~30g
- Valencia Orange — 70 yds (64 m) / ~30g
- Grapefruit Pink — 70 yds (64 m) / ~30g
- Blood Red — 70 yds (64 m) / ~30g
- Lime Green — 70 yds (64 m) / ~30g
- Leaf Green — 40 yds (36.5 m) / ~17g
- Bright White (cotton thread, size 10 or fine sport weight) — 30 yds (27 m) / ~13g
Tools & Notions:
- 3.5 mm (E-4) crochet hook — or size needed to obtain gauge
- 2.75 mm (C-2) crochet hook — for white thread spokes and leaf veins (optional; you may use 3.5 mm throughout with tighter tension)
- Tapestry needle (blunt tip, large eye)
- Sharp scissors
- Blocking mats and T-pins
- Measuring tape
- Stitch markers (6–8, locking style recommended)
Yarn Substitution Notes: Choose a matte, non-mercerized DK cotton with good stitch definition. Avoid shiny mercerized cottons — they obscure the spoke detail. A wool-cotton blend works but will block differently. For a heavier runner, substitute worsted weight and a 4.5 mm hook; expect dimensions to increase by roughly 25 percent.
4. Stitch Abbreviations (US Terms)
| Abbreviation | Meaning |
|---|---|
| ch | chain |
| sl st | slip stitch |
| sc | single crochet |
| hdc | half double crochet |
| dc | double crochet |
| tr | treble crochet |
| inc | increase (2 stitches in same stitch) |
| dec | decrease (sc2tog or dc2tog as specified) |
| RS | right side |
| WS | wrong side |
| st(s) | stitch(es) |
| rnd(s) | round(s) |
| sp(s) | space(s) |
| BLO | back loop only |
| FLO | front loop only |
| sc-sp | single crochet in space |
| surface sl st | surface slip stitch (worked on RS of fabric) |
Special Techniques:
-
Magic Ring (MR): Adjustable loop start for tight center.
-
Standing DC: Join new yarn with a slip knot on hook, yarn over, insert into indicated stitch, complete as normal dc — eliminates joining chain.
-
Invisible Join: Cut yarn, pull through last stitch, thread needle, insert under both loops of first stitch of round, then back into center of last stitch — creates seamless round transition.
-
Join-As-You-Go (JAYG): On final rnd of a motif, replace designated ch-sp with sl st into corresponding ch-sp of adjacent motif.
5. Architectural Mechanics / Technique Deep-Dive
This runner relies on three core architectural principles: concentric circular geometry, surface embroidery for structure, and modular join-as-you-go assembly.
Concentric Circular Geometry: Each citrus slice begins at the center and expands outward in dc rounds with eight evenly spaced increases per round (two dc, ch 1, two dc in each increase point). This creates an octagonal circle that blocks into a smooth round. The stitch count grows by 16 dc per round (8 increase points × 2 extra dc each). Small slices stop at Rnd 4 (approx. 3 in), medium at Rnd 7 (approx. 5 in), large at Rnd 10 (approx. 7 in). The ch-1 at each increase point forms the “pith channels” — the white membrane lines visible in real citrus.
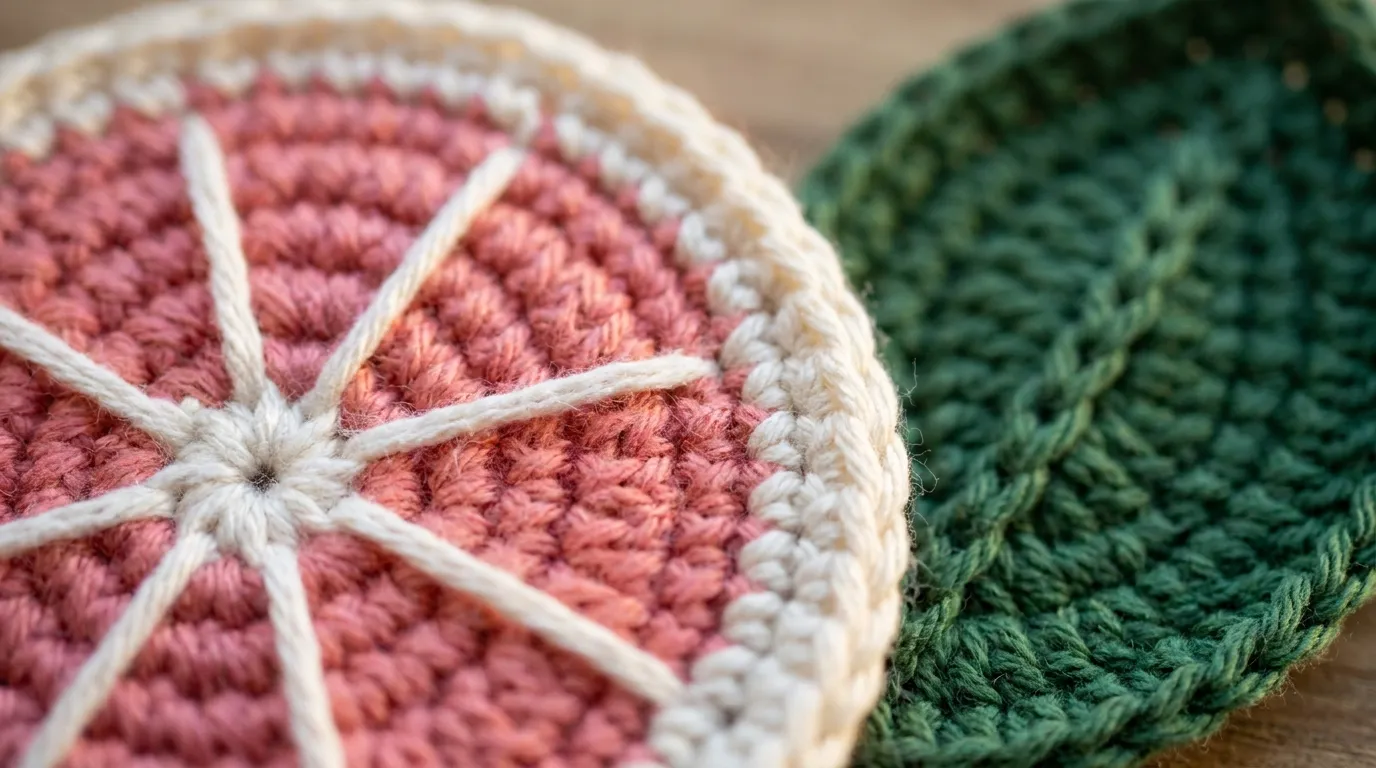
Surface-Stitched Radial Spokes: After the slice is complete and blocked, eight white spokes are added using surface slip stitches. Working on the RS, you insert the hook from front to back at the center, pull up a loop of white thread, then surface sl st outward along each pith channel to the rind border. This technique sits on top of the fabric without distorting the dc rounds, giving crisp, raised segment lines that mimic fruit membranes. It also reinforces the slice structure.
Rind Border: A final round of sc in the fruit color, worked into every stitch and ch-1 sp of the last dc round, creates a firm, slightly rolled edge — the “rind.” This round is also where JAYG connections happen: when joining a new slice to an existing one, you replace the ch-1 at overlap points with a sl st into the neighbor’s rind border.
Leaf Architecture: Leaves are worked flat in rows from a central chained vein. The vein is a foundation chain; stitches are worked down one side (sc, hdc, dc, tr for shaping), then up the other side in mirror. A final sc border unifies the edge. Leaves are attached by sewing or by working the final border sc directly into rind border gaps (JAYG-style).
Why This Works: Concentric dc rounds give volume and opacity (no stuffing needed). Surface spokes avoid the bulk and alignment issues of working spokes in-the-round. JAYG assembly means zero seaming — the runner emerges as a single fabric. The matte cotton absorbs light beautifully, making the color transitions glow.
6. Step-by-Step Stitch Instructions
Phase 1: Citrus Slice Motifs — Foundation & Expansion
All slices begin identically. Work in continuous rounds (no joining ch) unless noted. Use stitch marker to mark first st of each rnd. Move marker up each rnd.
Rnd 1 (Center): With fruit color (e.g., Lemon Yellow), MR, ch 2 (counts as first dc), 15 dc into ring. Pull ring tight. Do not join. [16 dc]
Rnd 2 (First Increase Ring): 2 dc in next st, ch 1, 2 dc in next st — repeat from * to * around. [32 dc, 8 ch-1 sps]
Note: The 8 ch-1 sps are your pith channels / future spoke paths.
Rnd 3: Dc in each st to ch-1 sp, (2 dc, ch 1, 2 dc) in ch-1 sp — repeat around. [48 dc, 8 ch-1 sps]
Rnd 4: Dc in each st to ch-1 sp, (2 dc, ch 1, 2 dc) in ch-1 sp — repeat around. [64 dc, 8 ch-1 sps]
→ Small Slice (3 in) stops here. Proceed to Rind Border (Rnd 5).
Rnd 5: Dc in each st to ch-1 sp, (2 dc, ch 1, 2 dc) in ch-1 sp — repeat around. [80 dc, 8 ch-1 sps]
Rnd 6: Dc in each st to ch-1 sp, (2 dc, ch 1, 2 dc) in ch-1 sp — repeat around. [96 dc, 8 ch-1 sps]
Rnd 7: Dc in each st to ch-1 sp, (2 dc, ch 1, 2 dc) in ch-1 sp — repeat around. [112 dc, 8 ch-1 sps]
→ Medium Slice (5 in) stops here. Proceed to Rind Border (Rnd 8).
Rnd 8: Dc in each st to ch-1 sp, (2 dc, ch 1, 2 dc) in ch-1 sp — repeat around. [128 dc, 8 ch-1 sps]
Rnd 9: Dc in each st to ch-1 sp, (2 dc, ch 1, 2 dc) in ch-1 sp — repeat around. [144 dc, 8 ch-1 sps]
Rnd 10: Dc in each st to ch-1 sp, (2 dc, ch 1, 2 dc) in ch-1 sp — repeat around. [160 dc, 8 ch-1 sps]
→ Large Slice (7 in) stops here. Proceed to Rind Border (Rnd 11).
Rind Border (Final Round for All Sizes):
Switch to 3.5 mm hook if using smaller hook for spokes. With same fruit color, sc in each dc and ch-1 sp around. At each ch-1 sp: (sc, ch 1, sc) — this maintains the 8 pith channels through the border. Join with invisible join. Fasten off.
Stitch counts: Small [72 sc + 8 ch-1], Medium [120 sc + 8 ch-1], Large [168 sc + 8 ch-1].
Make 9 slices total:
- 3 Small: 1 Lemon Yellow, 1 Lime Green, 1 Grapefruit Pink
- 3 Medium: 1 Valencia Orange, 1 Blood Red, 1 Lemon Yellow
- 3 Large: 1 Grapefruit Pink, 1 Valencia Orange, 1 Blood Red
Block all slices lightly before adding spokes (see Section 9).
Phase 2: Surface-Stitched Radial Spokes
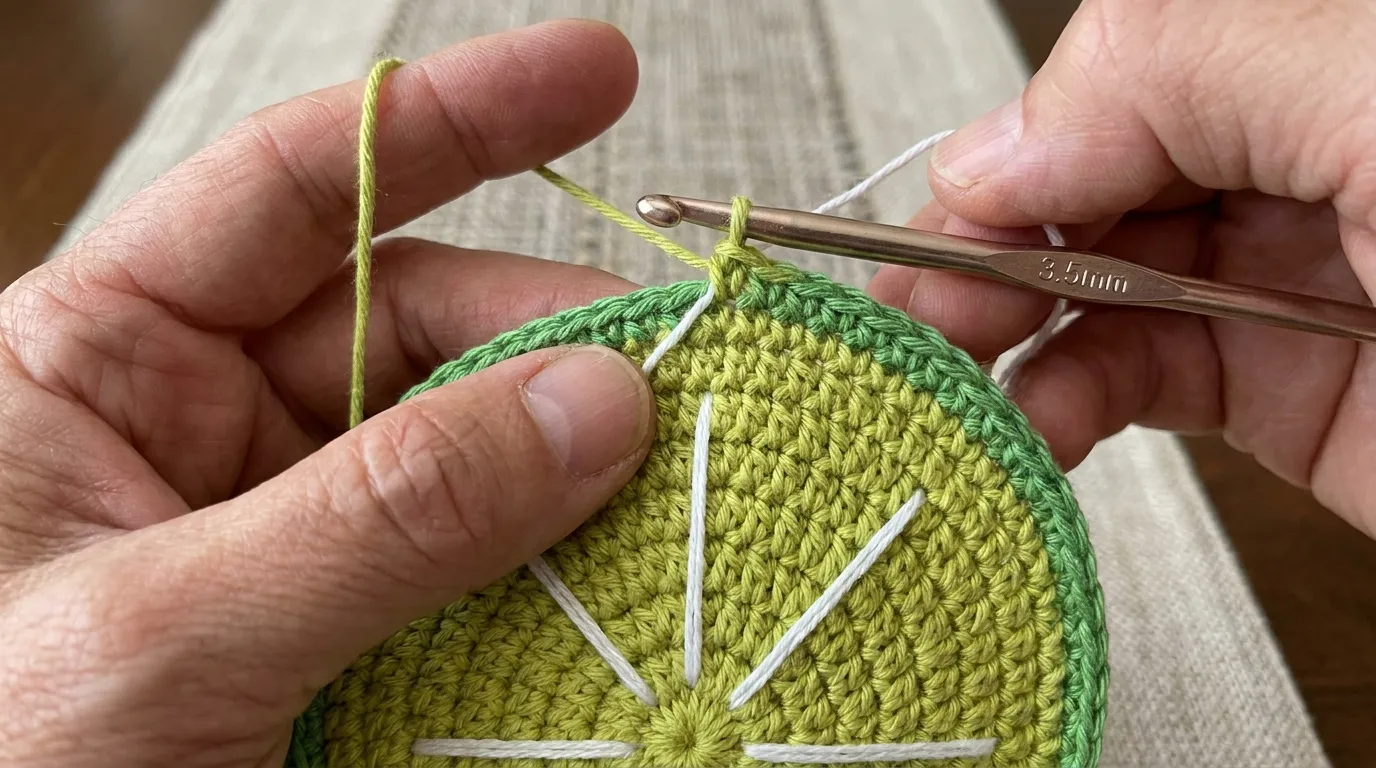
Work on RS of blocked slice. Use Bright White thread and 2.75 mm hook (or 3.5 mm with tight tension).
- Thread white onto hook. Insert hook from RS to WS at exact center of slice (center of MR). Pull up a loop (approx. 6 in tail remains on WS).
- Surface sl st outward along a pith channel: Insert hook into next dc (or ch-1 sp) along the channel line, yarn over on WS, pull loop through to RS and through loop on hook. Continue in a straight line toward the rind border, following the ch-1 column.
- When you reach the rind border ch-1 sp, work one final surface sl st into that sp. Cut thread, leaving 6 in tail. Pull tail through last loop to secure.
- Repeat for all 8 channels. Weave in all 16 tails (8 centers, 8 rind ends) on WS using tapestry needle.
Tip: Work spokes before joining slices — flat access is easier. If you prefer, add spokes after assembly; just ensure slices are pinned in final arrangement first.
Phase 3: Leaf Motifs
With Leaf Green and 3.5 mm hook.
Leaf Foundation: Ch 18.
Row 1 (RS): Sc in 2nd ch from hook, hdc in next, dc in next 2, tr in next 3, dc in next 2, hdc in next, sc in next, sl st in last ch. Do not turn. Rotate to work down opposite side of foundation chain.
Row 1 (continued, other side): Sl st in same last ch (now first of other side), sc in next, hdc in next, dc in next 2, tr in next 3, dc in next 2, hdc in next, sc in next. Ch 1, turn. [34 sts + 2 sl st at tip]
Row 2 (Border): Sc evenly around entire leaf edge, working (sc, ch 1, sc) in tip st, and 2 sc in each side st at the base curve. Join with sl st to first sc. Fasten off, leaving 12 in tail for attachment.
Make 5 leaves. Block lightly.
Phase 4: Assembly — Join-As-You-Go Layout
Arrange slices on blocking mats per diagram (or your design). Overlap edges by 1–1.5 inches. Pin in place.
Joining Method: You will work the Rind Border round on each slice in sequence, joining to already-completed neighbors as you go. Start with a central Large slice (e.g., Blood Red). Work its Rind Border completely (no joins). Fasten off.
For each subsequent slice: Work Rind Border normally until you reach a ch-1 sp that overlaps a neighbor’s rind border. At that sp: instead of (sc, ch 1, sc), work sc, sl st into neighbor’s corresponding rind border ch-1 sp, sc. Continue around. Where multiple overlaps occur, repeat at each overlap point. This creates a flexible, lace-like join that allows slight movement but holds the arrangement.
Suggested Join Order (center outward):
- Large Blood Red (center) — no joins
- Large Valencia Orange — joins to Blood Red at 2 overlap points
- Large Grapefruit Pink — joins to both at 3 points
- Medium Lemon Yellow — joins to Large slices at 2 points
- Medium Blood Red — joins at 2 points
- Medium Valencia Orange — joins at 2 points
- Small Lime Green — joins at 1 point
- Small Grapefruit Pink — joins at 1 point
- Small Lemon Yellow — joins at 1 point
Attach Leaves: Using 12 in tails, sew leaves into the curved gaps along the outer edges of the runner (3 on one long side, 2 on the other). Whipstitch leaf base to rind borders of adjacent slices. Weave in ends.
7. Assembly, Mounting & Structural Integration
This runner requires no mounting hardware, lining, or structural reinforcement — the joined motifs are the structure. However, a few finishing steps ensure longevity and polish:
End Weaving: Weave all tails (slice fasten-offs, spoke threads, leaf attachments) thoroughly on WS. Use a tapestry needle and follow stitch paths for at least 2 inches. Trim close.
Gap Inspection: Check all JAYG joins. If any overlap feels loose, add a discreet whipstitch on WS between the two rind borders at the join point.
Flattening: After all joins, pin the entire runner to blocking mats (see Section 9) and steam-block. This sets the joins and ensures the runner lies perfectly flat on the table.
Optional Backing: For heavy-use tables, you may hand-sew a piece of cotton lawn or linen backing to the WS using a running stitch around the outer perimeter only. This is not required — the DK cotton is dense enough for daily use.
8. Hardware, Accents & Embellishment Assembly
No hardware is used in this design. The only accents are the crocheted leaves, which are attached in Phase 4. If you wish to add a subtle shimmer, consider working the final rind border round with a strand of fine metallic thread held together with the fruit color — gold for orange/yellow slices, silver for pink/red, copper for blood red. Test on a swatch first.
9. Blocking, Care & Maintenance
Blocking (Essential for Spoke Clarity & Join Setting):
- Pin each slice individually to blocking mats before adding spokes. Use T-pins at each of the 8 pith channels to maintain radial symmetry. Lightly mist with water. Let dry completely.
- After spokes are added and slices are joined, pin the full runner to mats. Steam-block (hover iron 1 inch above fabric, burst steam) or wet-block (submerge in cool water, roll in towel, pin out). Ensure all joins lie flat and spokes are straight. Dry 24 hours.
Washing: Machine wash cold, gentle cycle, in a mesh lingerie bag. Use mild detergent (no bleach, no fabric softener).
Drying: Lay flat on a towel, reshape to original dimensions. Do not wring. Do not tumble dry.
Ironing: If needed, steam iron on low (cotton setting) with a pressing cloth. Do not press directly on spokes.
Storage: Roll loosely (do not fold) in acid-free tissue. Store flat in a cotton bag. Avoid plastic — cotton needs to breathe.
10. Frequently Asked Questions (FAQ)
Q: Can I use worsted weight yarn instead of DK?
A: Yes. Use a 4.5 mm (7 US) hook. Expect motifs to be roughly 25 percent larger (small ~3.75 in, medium ~6.25 in, large ~8.75 in) and the runner to reach ~60 inches long. Yardage increases by ~40 percent. The thicker yarn yields a cozier, more rustic look — lovely for autumn tables.
Q: My slices are cupping (curling up at the edges). How do I fix this?
A: Cupping usually means your tension is too tight on the increase rounds, or you need more increases. First, block aggressively — steam and pin flat. If cupping persists, add one extra increase per pith channel on the final dc round (work 3 dc, ch 1, 3 dc in each ch-1 sp instead of 2 dc, ch 1, 2 dc). This adds 8 dc to the circumference and flattens the circle.
Q: The surface slip stitch spokes look uneven / wobbly.
A: Surface sl st tension is tricky. Practice on a swatch first. Keep the working thread on the WS loose — do not pull tight after each stitch. Use a smaller hook (2.75 mm) for the thread. Work slowly, inserting the hook exactly in the center of each dc along the channel. If a spoke goes astray, frog it (surface sl st unravels easily) and redo. Blocking after spokes helps straighten minor wobbles.
Q: Can I make this runner longer or shorter?
A: Absolutely. The modular design scales linearly. Add more slices in the same size progression (small–medium–large–medium–small) to extend. For a shorter runner, use 5 slices (large–medium–small–medium–large) for ~28 inches. Adjust leaf count to match gap count.
Q: How do I keep the white spokes from yellowing over time?
A: Use a high-quality mercerized cotton thread (e.g., DMC Cordonnet Special or Anchor) for the white — it resists yellowing better than standard cotton. Wash with a color-safe oxygen brightener occasionally. Avoid direct sunlight exposure when stored.
11. Community Call-to-Action
Your citrus orchard is ready to grace the table — whether it holds a summer brunch spread, a stack of cookbooks, or simply catches the afternoon light. Each slice holds the memory of the stitches that built it; each leaf, the care of your hands.
I would love to see your finished runner. Share it on Instagram with #NailItHomeCitrus and tag @NailItHome — your color choices, your layout, your leaves. Pin the pattern on Pinterest for your next maker gathering. And if you have questions, modifications, or a story about the table this runner will dress, leave a comment below. This community grows brighter with every make.
Happy stitching,
Aurelia Thorne
Master Fiber Artist & Lead Pattern Curator, Nail It Home


