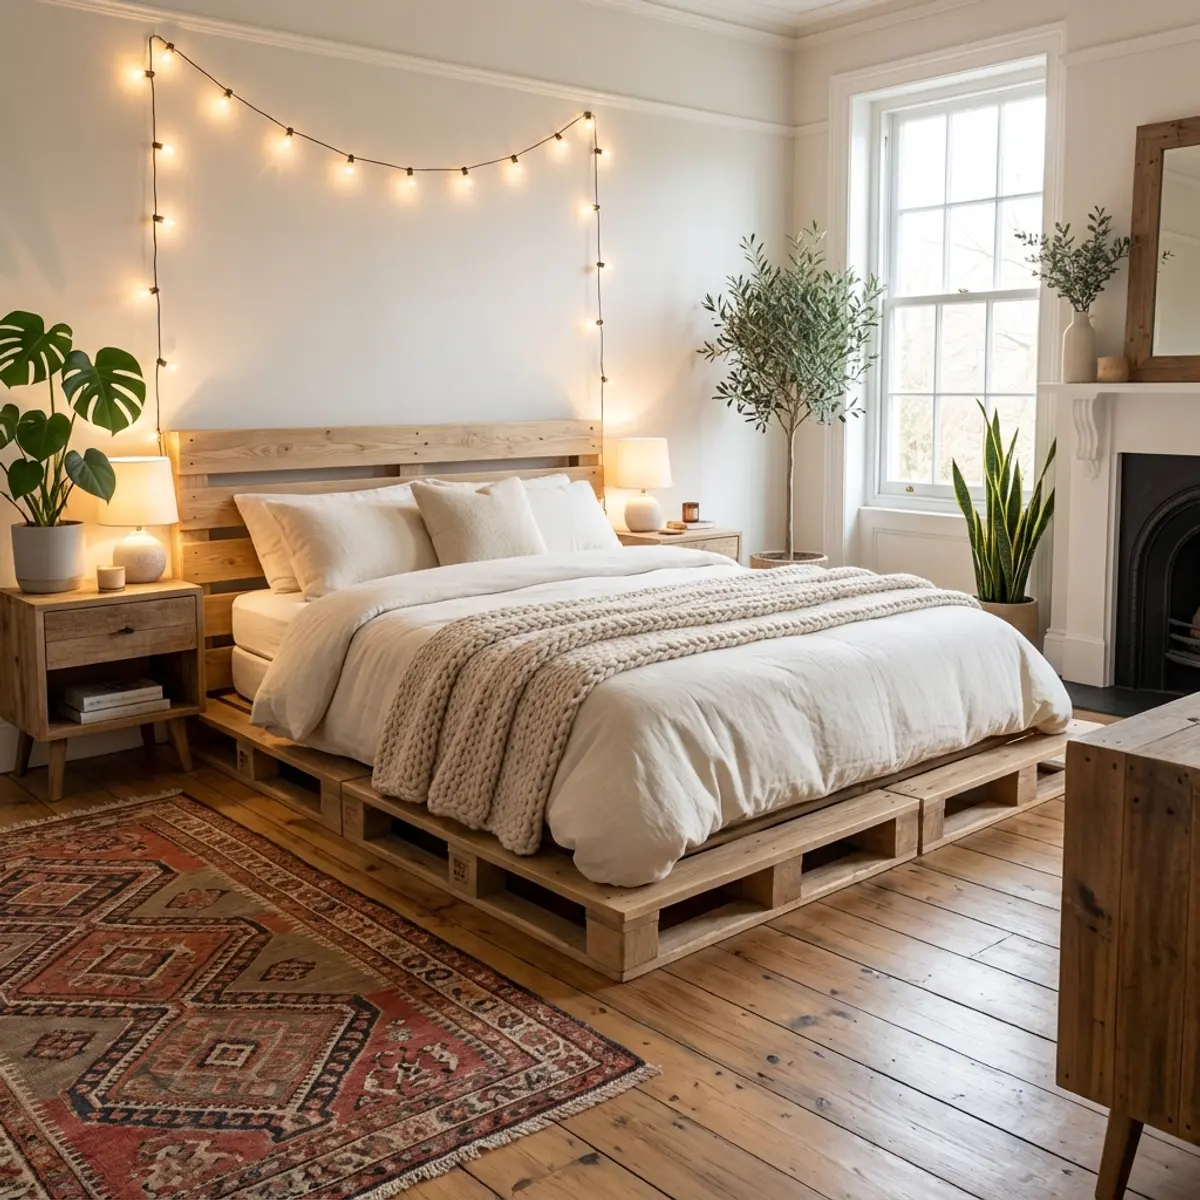
How to Build a Budget-Friendly Pallet Bed: A Complete Guide
Nail It Home Editorial
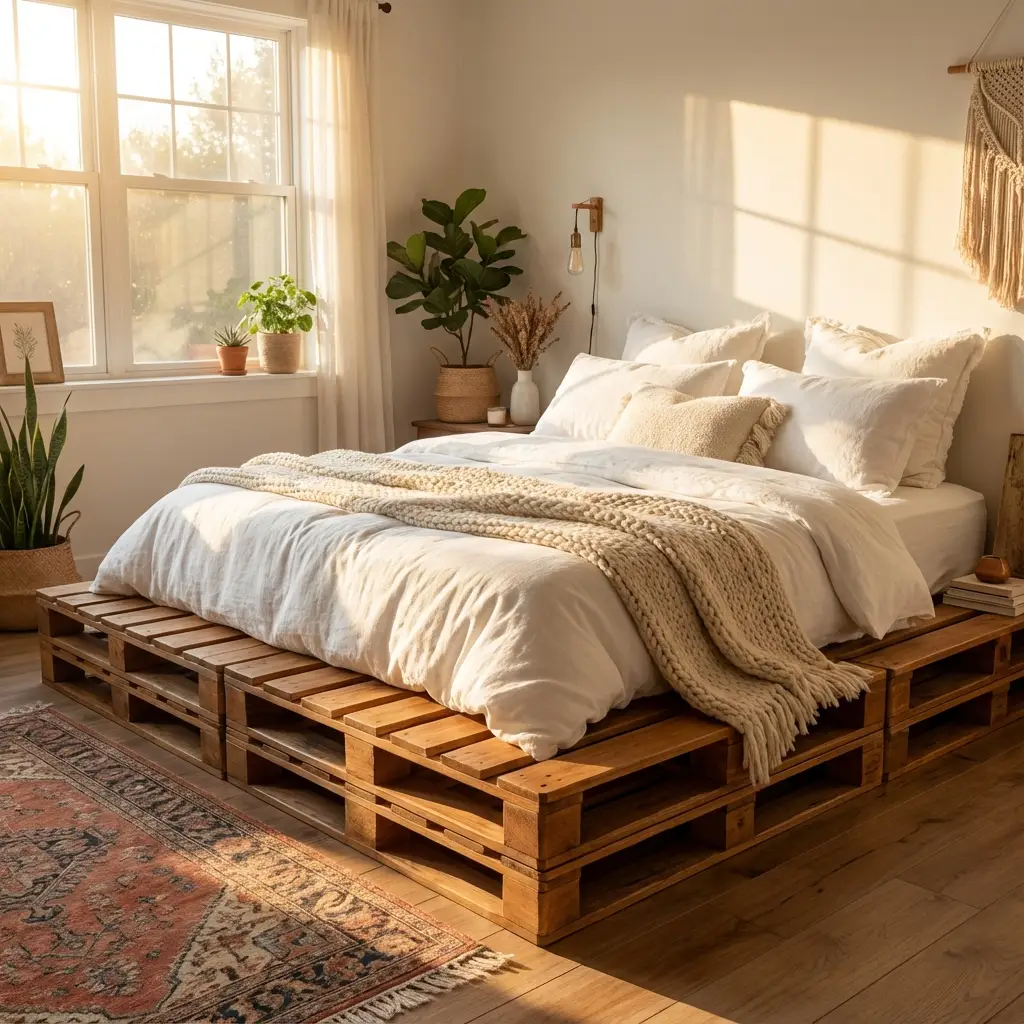
Are you looking for a stylish bed frame that won’t break the bank? A pallet bed is a fantastic solution that combines rustic charm, modern aesthetics, and unbeatable affordability. Whether you’re furnishing a first apartment, updating a guest room, or just love the look of upcycled furniture, this project is for you.
Why Choose a Pallet Bed?
Pallet beds have taken the DIY world by storm, and for good reason:
- Budget-Friendly: Sourcing pallets can often be free or very cheap, making this one of the most affordable furniture projects.
- Eco-Friendly: Upcycling wood keeps it out of landfills and gives it a new life.
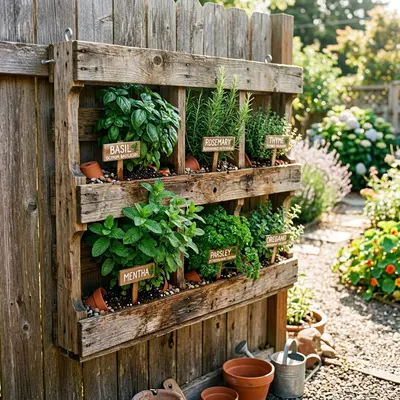
- Customizable: You can paint, stain, or arrange the pallets to fit any mattress size and room style.
- Unique Aesthetic: The raw, industrial look adds character and warmth to any space.
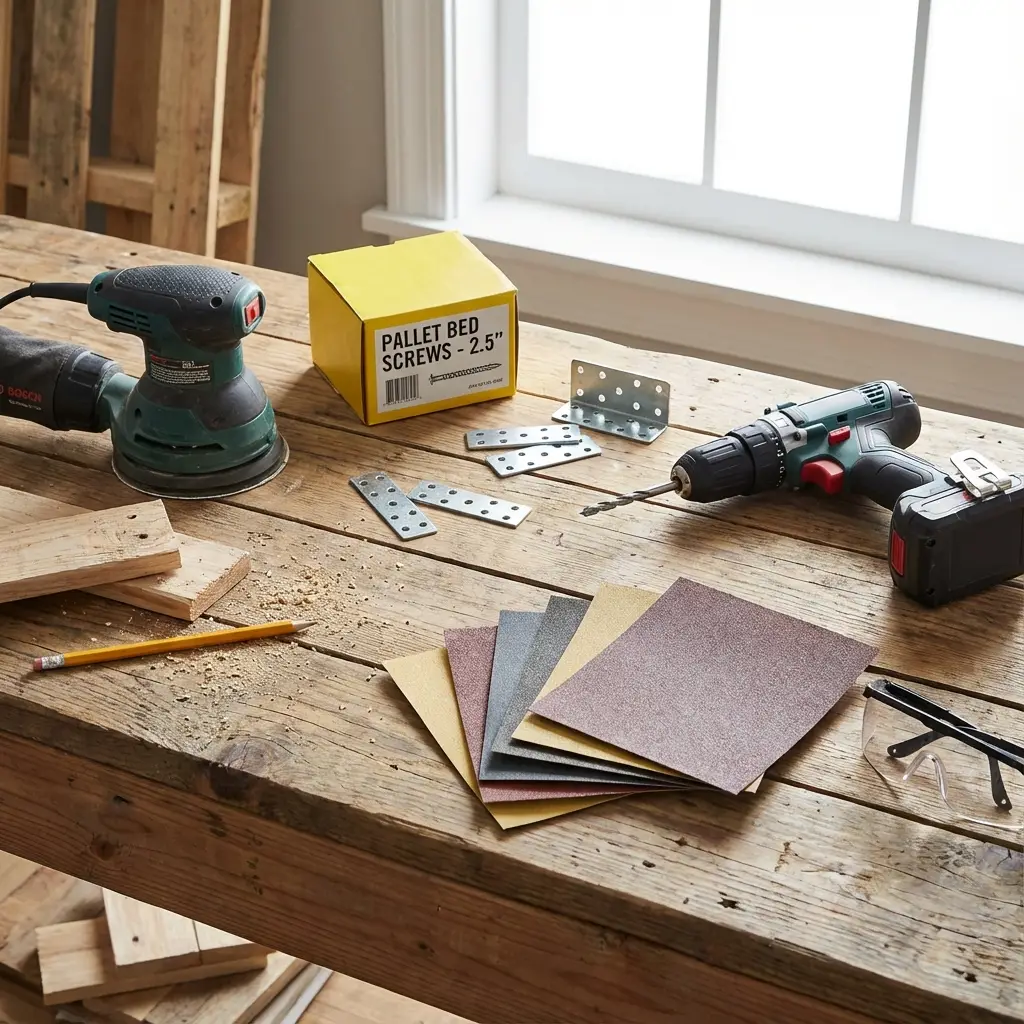
Materials and Tools Needed
Before you start hunting for pallets, gather these essentials to ensure a smooth build.
Materials List:
- 4-8 Wood Pallets: (Depending on your mattress size and desired height) - Look for “HT” (Heat Treated) stamps for safety.
- Sandpaper: (80, 120, and 220 grit)
- Wood Screws: (2-3 inches long)
- Flat Mending Plates: (Metal brackets to connect pallets)
- Wood Stain or Paint: (Optional)
- Clear Polyurethane: (Water-based recommended for bedrooms)
- Felt Pads: (To protect your floor)
Tools Required:
- Orbital Sander: (A lifesaver for this project!)
- Drill/Driver
- Crowbar/Pry Bar: (If you need to adjust or disassemble any boards)
- Saw: (Circular saw or hand saw if resizing is needed)
- Measuring Tape
- Safety Gear: (Dust mask, safety glasses, gloves)
Estimated Cost: $20-$50 (Mostly for hardware and finish, assuming free or cheap pallets)
Step-by-Step Instructions
Step 1: Source Safe Pallets
This is the most critical step. Not all pallets are safe for indoor use.
- Look for the IPPC stamp.
- Find the “HT” Code: This stands for Heat Treated. Avoid “MB” (Methyl Bromide), which is a toxic chemical.
- Check for Cleanliness: Avoid pallets with spills, stains (especially oil), or bad odors.
- Inspect Structure: choose pallets that are sturdy without too many cracked or loose boards.
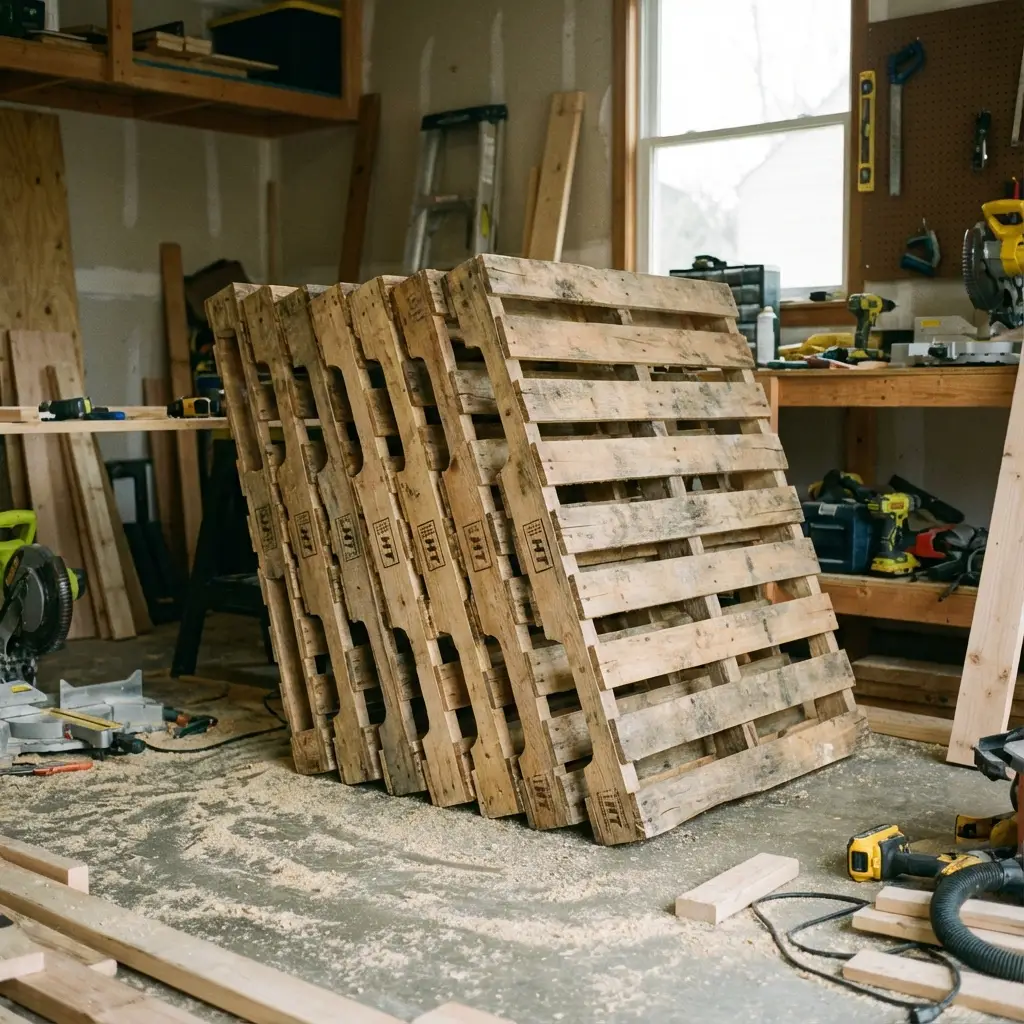
Tip: Ask local hardware stores, garden centers, or small businesses if they have pallets to give away.
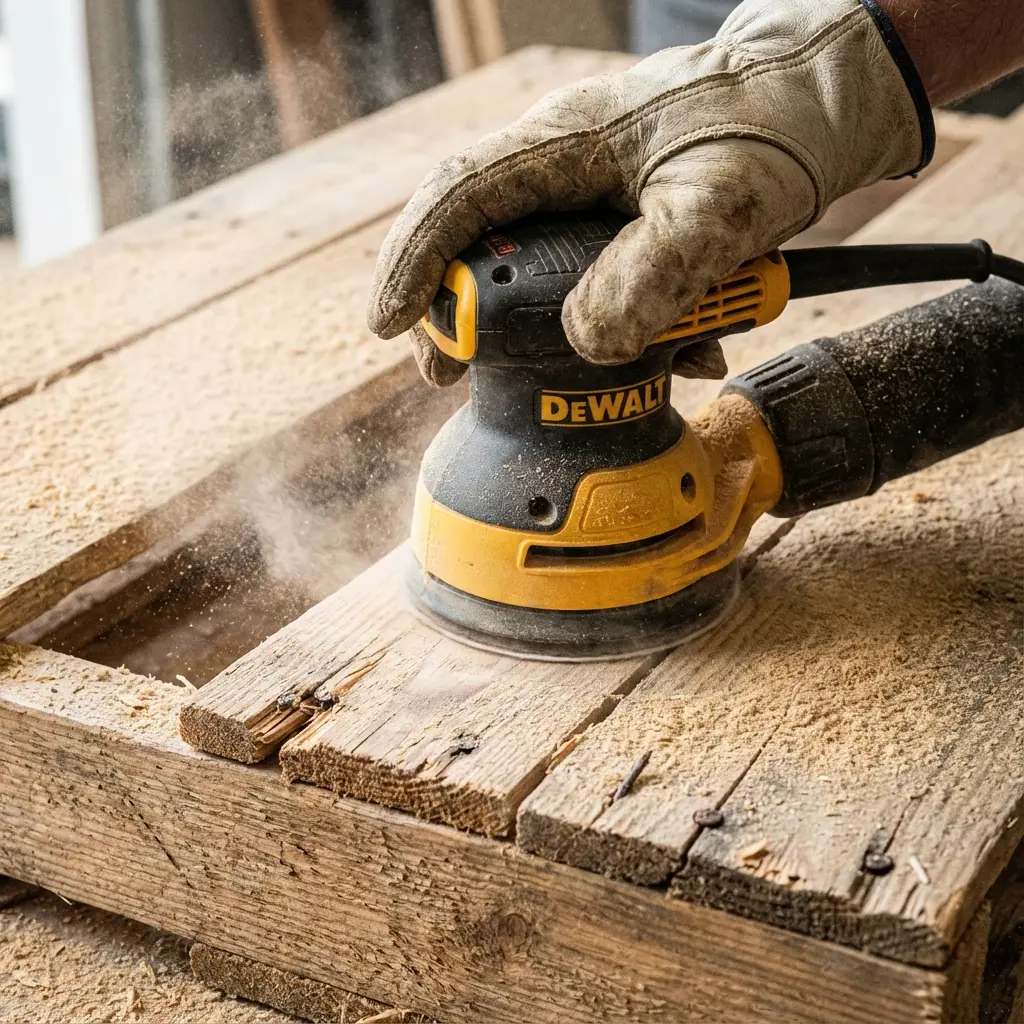
Step 2: Prep and Sand
Pallet wood is rough. To save your mattress from snags and your toes from splinters, thorough sanding is mandatory.
- Clean: Scrub the pallets with soapy water and a stiff brush if they are dirty. Let them dry completely (this might take a day or two in the sun).
- Inspect: Remove any protruding nails or staples. Hammer them in or pull them out.
- Sand: Start with 80-grit sandpaper to remove rough spots and splinters. Work your way up to 120-grit, and finish with 220-grit for a smooth touch, especially on the outer edges and corners.
Step 3: Layout and Configuration
Measure your mattress and decide on your layout.
- Queen Size: typically requires a layout of roughly 60” x 80”. You might need to arrange 4 standard (48” x 40”) pallets in a T-shape or cut them to fit.
- King Size: will need more width.
- Overhang: Some people like the pallets to extend beyond the mattress to create a platform or built-in “nightstand” ledge.
Arrange your pallets on the floor to visualize the final bed. If they are too long or wide, mark them for cutting.
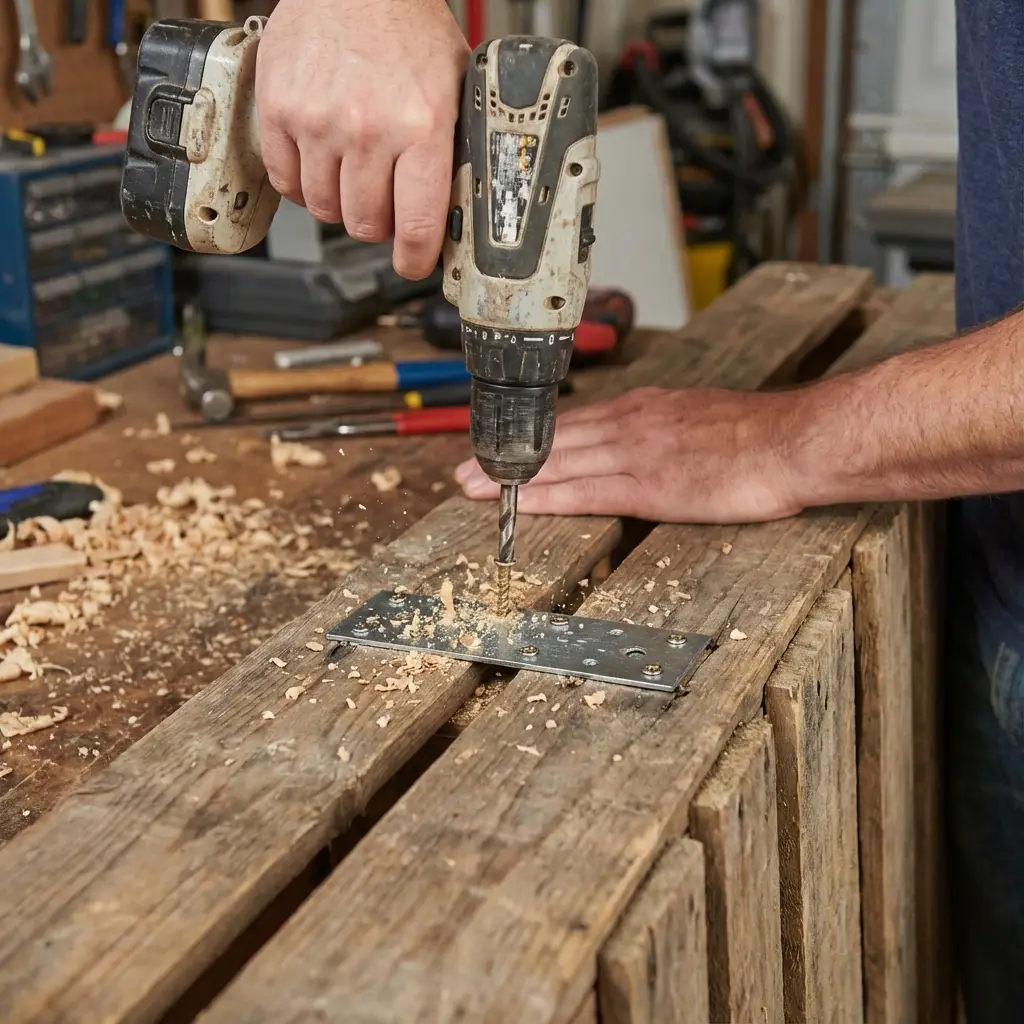
Step 4: Assemble the Frame
Once you are happy with the layout:
- Connect Pallets: Use flat mending plates and screws to join the pallets together securely. This prevents them from sliding apart.
- Stacking (Optional): If you want a higher bed, stack a second layer of pallets on top of the first. Screw the top layer to the bottom layer securely.
- Floor Protection: Stick felt pads to the bottom corners of the bottom pallets to prevent scratching your floor.
Step 5: Seal and Finish
Lock in the look and protect the wood.
- Clean Dust: Wipe away all sanding dust with a tack cloth or damp rag.
- Stain (Optional): Apply wood stain if you want a specific color (walnut, grey, etc.).
- Seal: Apply 1-2 coats of clear polyurethane. Satin or matte finish looks best for a rustic vibe. This seals the wood, prevents splinters, and makes it easier to clean.
Step 6: Final touches
Once the finish is dry (wait at least 24 hours just to be safe from fumes):
- Move the frame into position.
- Place your mattress on top.
- Style with cozy bedding, throw pillows, and maybe some fairy lights for that dreamy look.
Maintenance Tips
- Vacuum Underneath: The gaps in pallets can collect dust. Use a vacuum crevice tool to clean between the boards.
- Check Screws: Occasionally check if the connecting plates are tight.
- Rotate Mattress: As with any bed frame, rotate your mattress regularly for even wear.
Conclusion
Building a pallet bed is a rewarding project that transforms your bedroom with minimal investment. It’s customizable, sturdy, and undeniably cool. Plus, you get the bragging rights of sleeping on a bed you built yourself!
Ready to get started? Grab your sander and go hunt for some pallets!