

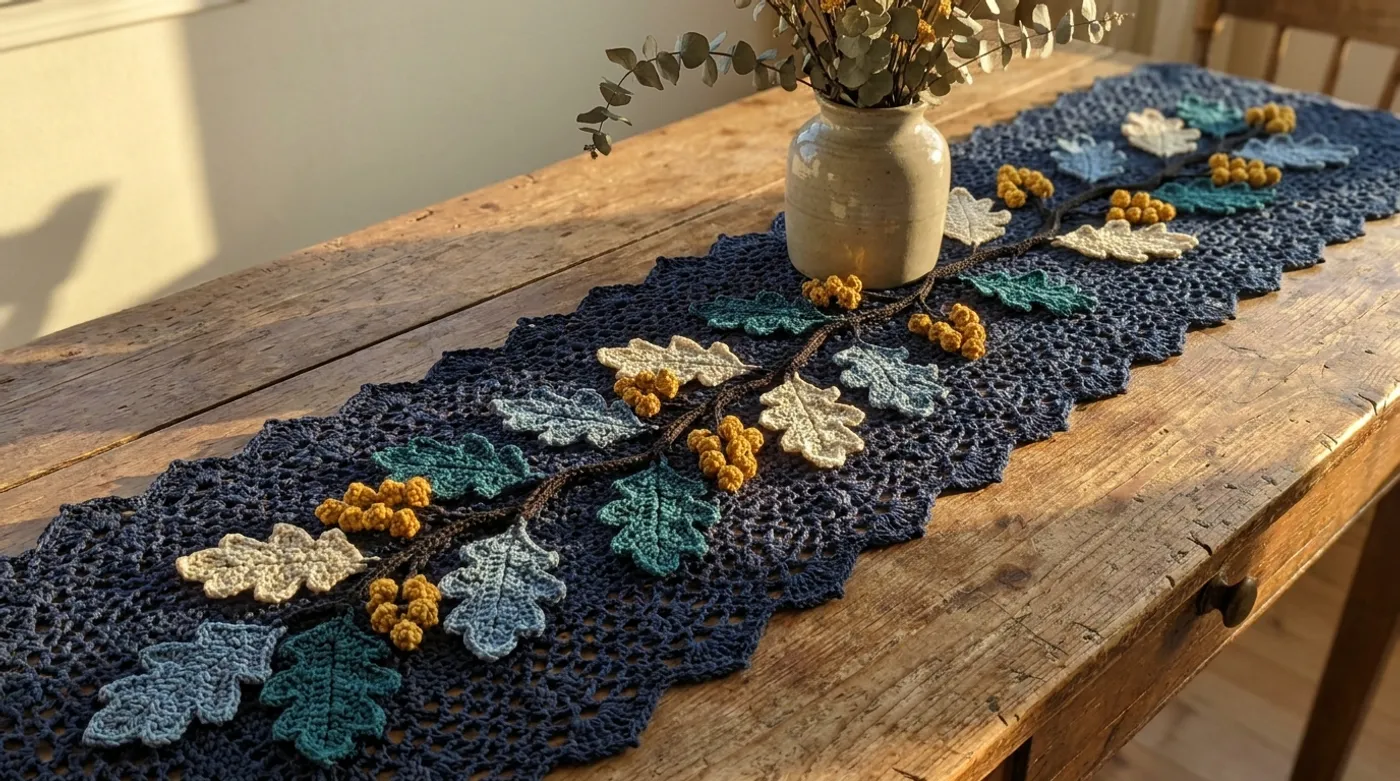
Botanical Oak Leaf & Berry Crochet Tablerunner: Free Crochet Pattern & Tutorial
Create an heirloom-quality botanical table runner featuring a navy openwork lace base, scalloped shell edging, raised 3D oak leaves in cream, dusty blue, and teal, plus mustard-yellow berry clusters. Free pattern with detailed tutorials.

Pattern Specifications
1. Introduction & Design Inspiration
There is a particular hush that settles over a dining table when autumn light slants through the windows — golden, deliberate, outlining the veins of a fallen oak leaf in a way that feels almost intentional. This runner was born from that moment: the desire to capture the quiet architecture of the forest floor and translate it into stitch, to make something that holds the memory of a woodland walk long after the season has turned.
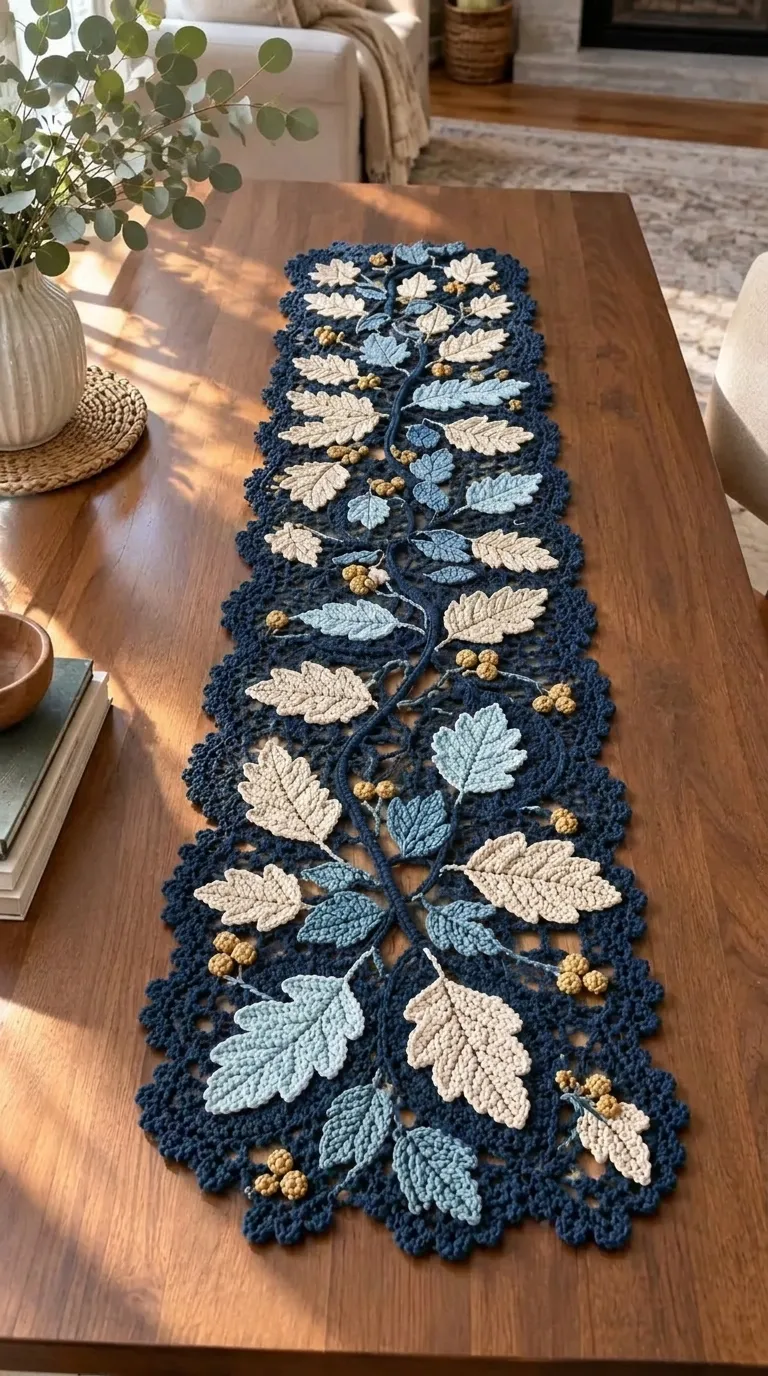
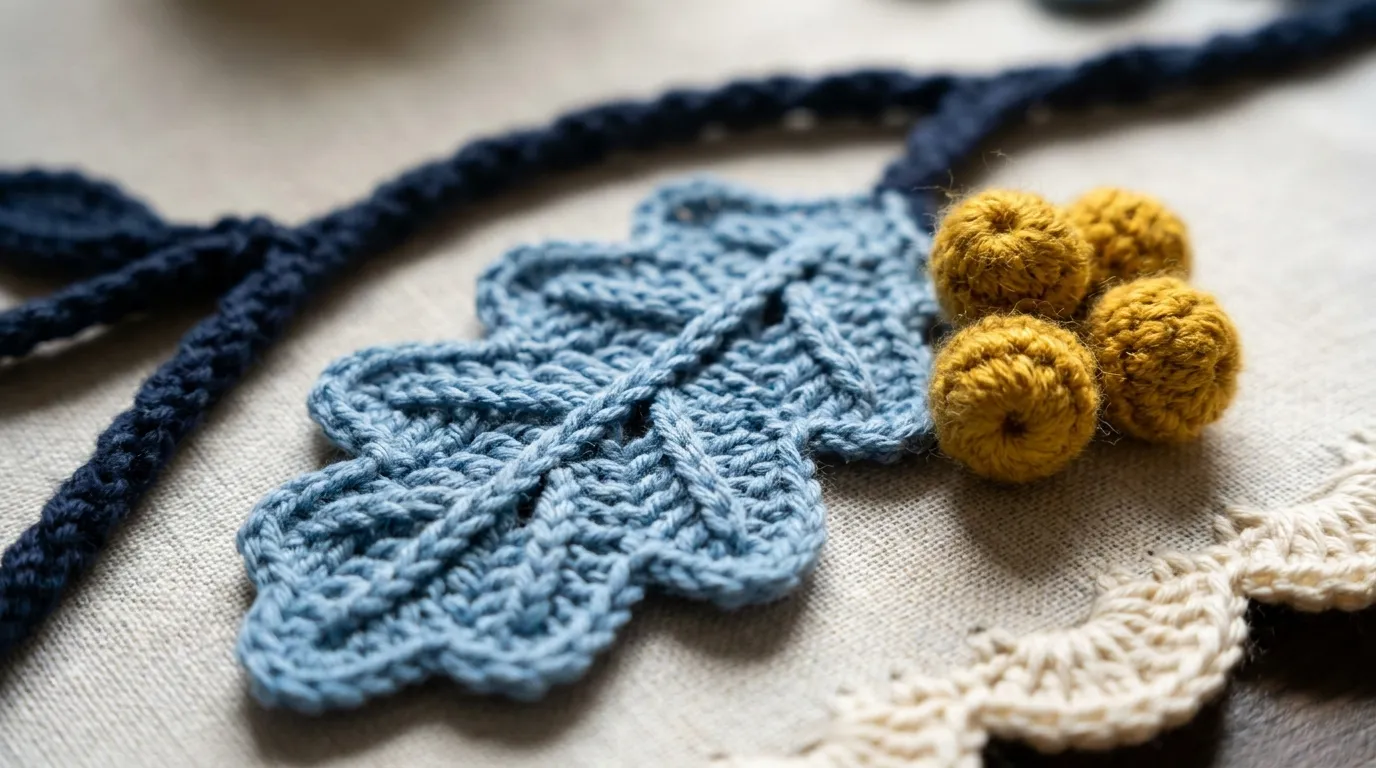
The design centers on contrast: a deep navy openwork lace field that reads like twilight canopy, against which cream, dusty sky blue, and teal oak leaves unfurl in dimensional relief. A wandering vine — worked in surface slip stitch with a dark navy cord — stitches the composition together, bearing clusters of mustard-yellow popcorn berries that catch the light like tiny lanterns. The scalloped shell border frames the whole with a rhythmic, tidal edge, echoing the lobed margins of the leaves themselves.
This is not a quick weekend make. It is a project that asks for patience and rewards it with texture you can trace with your fingertips: the raised front-post veins of each leaf, the taut roundness of each berry, the crisp geometry of the lace ground. When finished, it stretches approximately 15 × 54 inches — long enough for a generous farmhouse table, narrow enough for a console or sideboard. It is heirloom work, meant to be folded into linen closets and brought out for generations of autumn gatherings.
2. Pattern Overview & Finished Dimensions
-
Finished Dimensions: 15 inches (38 cm) wide × 54 inches (137 cm) long, including scalloped edging
-
Shape: Elongated rectangle with scalloped shell borders on all four sides
-
Structure: Three-layer construction — (1) navy openwork lace base panel, (2) appliquéd 3D oak leaves and berry clusters, (3) surface-crocheted central vine
-
Skill Level: Intermediate — requires comfort with front-post stitches, popcorn stitches, surface crochet, appliqué placement, and reading lace charts or detailed written lace instructions
-
Gauge Notes: Gauge is not critical for the appliqué elements, but the lace base should match the stated gauge to achieve the correct finished dimensions. Block the base panel before appliquéing leaves.
-
Yarn Substitution Guidance: Use mercerized cotton in sport/DK weight for stitch definition and sheen. Avoid fuzzy or haloed yarns — they obscure the lace architecture and leaf veins. A tight twist is essential for the berry popcorns to hold their sphere shape.
3. Materials, Fiber & Hardware Checklist
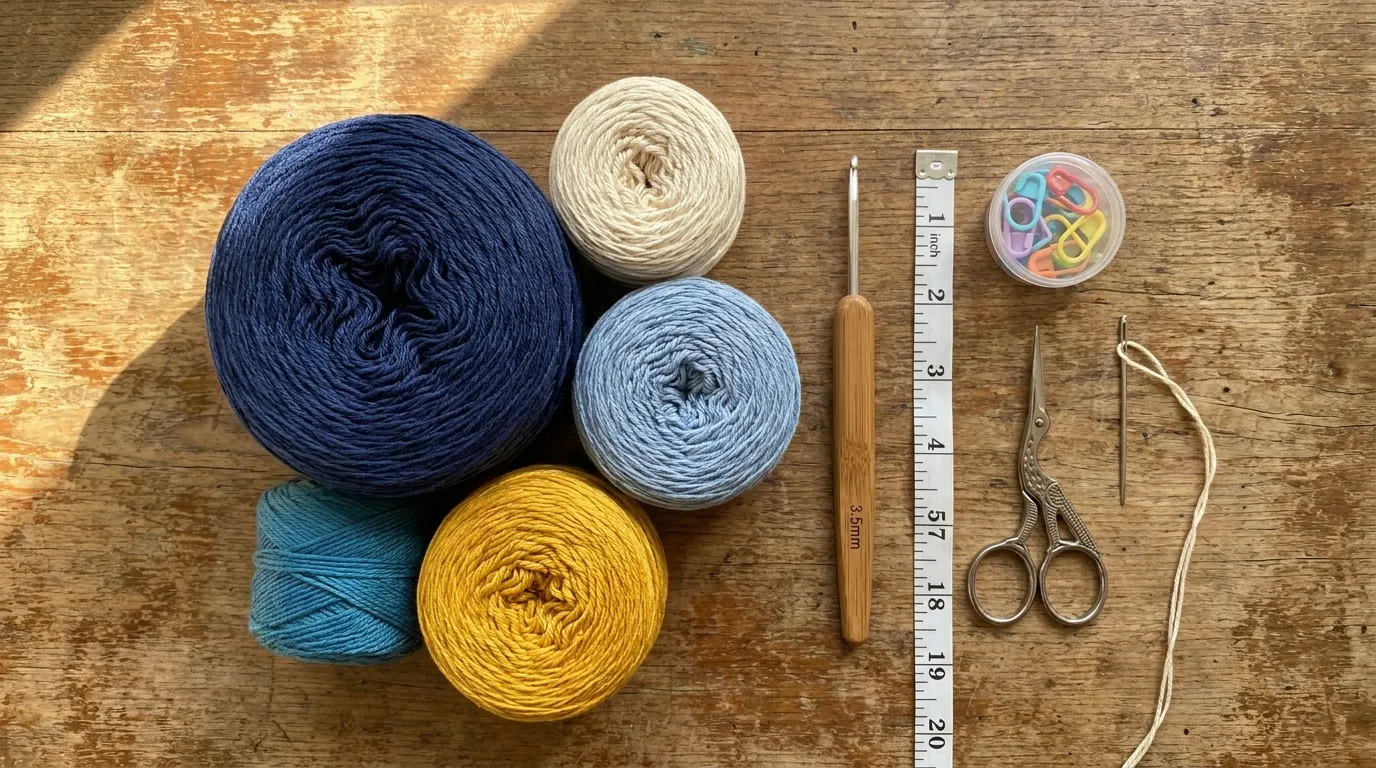
Yarn (all mercerized cotton, sport/DK weight):
-
Color A — Deep Navy: 550 yds / 500 m (lace base panel + surface vine cord)
-
Color B — Cream / Ecru: 180 yds / 165 m (oak leaves, approx. 12 large + 6 small)
-
Color C — Light Dusty Blue: 150 yds / 137 m (oak leaves, approx. 8 medium)
-
Color D — Teal Blue: 150 yds / 137 m (oak leaves, approx. 8 medium)
-
Color E — Mustard Yellow: 80 yds / 73 m (3D berry clusters, approx. 35–40 berries)
-
Color F — Dark Navy (surface cord): 40 yds / 37 m (central vine — can be same as Color A if using a separate ball for cord management)
Tools & Notions:
-
Crochet hook 3.5 mm (E-4) — for lace base, leaves, berries
-
Crochet hook 4.0 mm (G-6) — for scalloped shell edging (slightly larger hook gives a softer, more drapey shell)
-
Tapestry needles (sharp-tipped for appliqué, blunt for weaving ends)
-
Blocking mats and T-pins (minimum 24 × 60 inch blocking surface)
-
Rust-proof blocking wires (optional but recommended for straight scallop edges)
-
Stitch markers (locking type, 10+)
-
Small scissors
-
Measuring tape
-
Optional: Fine cotton sewing thread in navy for reinforcing berry attachments
Yarn Notes: The yardage above includes generous allowance for the 3D leaves (each large leaf uses ~12 yds), berry clusters (each berry ~1.5 yds), and the surface vine (~30 yds). If you work tightly, purchase an extra 10% in Colors B–E.
4. Stitch Abbreviations (US Terms)
| Abbreviation | Stitch Name |
|---|---|
| ch | chain |
| sl st | slip stitch |
| sc | single crochet |
| hdc | half double crochet |
| dc | double crochet |
| tr | treble crochet |
| dtr | double treble crochet |
| fpdc | front post double crochet |
| fpdc2tog | front post double crochet 2 together (decrease) |
| fpdc3tog | front post double crochet 3 together (decrease) |
| popcorn (pc) | 5 dc in same st, remove hook from loop, insert hook in first dc of group, pull loop through, ch 1 to close |
| BLO | back loop only |
| FLO | front loop only |
| RS | right side |
| WS | wrong side |
| sp | space |
| sk | skip |
| rep | repeat |
| * * | repeat instructions between asterisks |
| [ ] | stitch count at end of row/round |
5. Architectural Mechanics / Technique Deep-Dive
This runner employs three distinct stitch architectures that function independently before being unified in assembly. Understanding the why behind each will make the execution more intuitive.
1. The Openwork Lace Base (Filet-Inspired Mesh with Shell Fans) The navy ground is a modified filet mesh: alternating dc and ch-2 spaces create an open grid, but every 8th row introduces a row of shell fans (5 dc in ch-2 sp) that undulate across the width. This serves two purposes — it adds structural stability to prevent the long panel from biasing, and it creates a subtle horizontal rhythm that echoes the lobed leaf margins. The 4.0 mm hook for the final edging row allows the shells to bloom outward without curling.
2. The 3D Oak Leaves (Raised Front-Post Vein Architecture) Each leaf is worked in rows from the base upward, but the magic lives in the front-post double crochet veins. By working fpdc around the posts of the previous row’s stitches, you create raised ridges that sit on top of the leaf fabric, mimicking the vascular structure of a real oak leaf. The leaf shaping uses strategic fpdc2tog and fpdc3tog decreases at the lobe tips to create the characteristic deep sinuses. The leaves are worked in three sizes (Large: 5.5”, Medium: 4”, Small: 2.75”) and three colors for visual depth.
3. The Popcorn Berry Clusters (Amigurumi Spheres on a Stem) Each berry is a miniature amigurumi sphere: a magic ring start, 6 sc, increase to 12, work even, then decrease to close — but the final round is replaced by a 5-dc popcorn worked into the center of the closing round. This creates a taut, highlighted dome that catches light. Berries are worked in clusters of 3–5 on a short crocheted stem (ch-8, sl st back down), then the entire cluster is sewn to the vine. The mustard yellow against navy creates a simultaneous contrast that vibrates visually.
4. Surface Crochet Vine (The Structural Spine) The dark navy vine is applied after the base is blocked and leaves are positioned. Using surface slip stitch (insert hook through fabric from RS, yarn over on WS, pull loop through to RS), you “draw” the vine freehand. This technique allows organic, asymmetrical curves impossible with pre-planned stitch placement. The cord is carried on the WS and tacked every 2–3 inches with sewing thread for security.
6. Step-by-Step Stitch Instructions
Phase 1: Navy Openwork Lace Base Panel
Foundation Row (RS): With 3.5 mm hook and Color A, ch 163. (This yields 80 ch-2 spaces + 1 edge dc on each side = 15” wide at gauge.) Row 1 (RS): Dc in 4th ch from hook (counts as dc + ch-2 sp), ch 2, sk 2 ch, dc in next ch; rep from * to last ch, dc in last ch. Turn. [81 dc, 80 ch-2 sps] Row 2 (WS): Ch 3 (counts as dc), dc in first dc, ch 2, sk ch-2 sp, dc in next dc; rep from * across, ending with dc in top of turning ch. Turn. [81 dc, 80 ch-2 sps] Rows 3–7: Rep Row 2 five more times. (6 rows of plain mesh completed.)
Row 8 (Shell Fan Row - RS): Ch 3 (counts as dc), ch 2, sk ch-2 sp, dc in next dc; rep from * to 3rd ch-2 sp from left edge, **work 5 dc in this ch-2 sp (shell fan made), ch 2, sk ch-2 sp, dc in next dc; rep from * to next 8th ch-2 sp, rep from **; continue pattern across row, ending with dc in turning ch. Turn. → Shell fans occur every 8th ch-2 sp across the row (10 fans total per shell row).
Rows 9–15: Rep Row 2 seven times (plain mesh). Row 16: Rep Row 8 (shell fan row). Continue Pattern: Work 7 rows plain mesh, 1 shell fan row. Repeat this 8-row block 6 times total (Rows 1–48), then work Rows 49–54 as plain mesh (6 rows). Final Row (Row 55 - RS): Ch 1, sc in each dc and each ch-2 sp across (sc in each ch of the ch-2 sps). Fasten off. [321 sc]
Block Base Panel: Wet-block to 15 × 54 inches. Pin scallop points (see Edging below) after edging is worked.
Phase 2: Scalloped Shell Edging (All Four Sides)
With 4.0 mm hook and Color A, RS facing.
Long Sides (Top & Bottom): Join yarn at corner. Ch 1, sc in next sc, [sk 2 sc, 5 dc in next sc (shell), sk 2 sc, sc in next sc] rep across to corner. At corner: 3 sc in corner st. Rep from * on opposite long side. Join with sl st to first sc.
Short Sides (Ends): Working into row ends: Ch 1, sc in next row end, [sk 1 row end, 5 dc in next row end, sk 1 row end, sc in next row end] rep across to corner. At corner: 3 sc in corner. Rep on opposite short side. Join, fasten off.
→ Shell count: ~26 shells per long side, ~7 shells per short side. Adjust skips slightly if your row gauge differs — the goal is even spacing.
Phase 3: 3D Oak Leaves (Make 26 Total)
Leaf Anatomy: Each leaf has a central stem (worked first), two primary lobes, and 3–4 secondary lobes per side. Veins are fpdc worked on RS rows only.
Large Leaf (Make 6: 3 Cream, 2 Dusty Blue, 1 Teal) — ~5.5” long Stem & Base: Ch 10. Row 1: Sc in 2nd ch from hook and each ch across. Turn. [9 sc] Row 2 (RS): Ch 1, 2 sc in first sc, sc in next 7 sc, 2 sc in last sc. Turn. [11 sc] Row 3: Ch 1, 2 sc in first, sc in next 9, 2 sc in last. Turn. [13 sc] Row 4 (First Vein Row - RS): Ch 1, sc in first 2 sc, fpdc around next sc (center vein), sc in next 9 sc, fpdc around next sc, sc in last 2 sc. Turn. [13 sc + 2 fpdc] Row 5 (WS): Ch 1, sc in each sc across (sk fpdc). Turn. [13 sc] Row 6 (RS - Lobe Shaping Begins): Ch 1, sc in first 3 sc, fpdc around next sc, ch 3, sk 3 sc (forms sinus), sc in next 3 sc, fpdc around next sc, ch 3, sk 3 sc, sc in last 3 sc. Turn. [6 sc + 2 fpdc + 2 ch-3 sps] Row 7: Ch 1, sc in each sc, in ch-3 sp: (sc, hdc, dc, hdc, sc) — forms lobe tip. Turn. Rows 8–12: Continue lobe shaping with fpdc veins on RS rows, decreasing at lobe tips via fpdc2tog/fpdc3tog. Work 2 lobes per side. Final row: sc around entire leaf edge, working 3 sc in each lobe tip. Fasten off, leave 18” tail for appliqué.
Medium Leaf (Make 8: 3 Cream, 3 Dusty Blue, 2 Teal) — ~4” long Same structure, start with ch 8, 4 plain mesh rows before vein row, 1 lobe per side.
Small Leaf (Make 12: 6 Cream, 3 Dusty Blue, 3 Teal) — ~2.75” long Ch 6, 2 plain rows, vein row, 1 small lobe per side (ch-2 sinus). Work in rounds after Row 4 for speed: join to work in spiral, fpdc veins on every other round.
Leaf Assembly Note: Block all leaves lightly (steam only) before appliqué. Arrange on blocked base panel following the vine path (see Phase 5). Pin in place.
Phase 4: Mustard Yellow Berry Clusters (Make 8 Clusters of 3–5 Berries Each)
Single Berry (Make 35–40): With 3.5 mm hook and Color E. Rnd 1: Magic ring, 6 sc in ring. [6] Rnd 2: Inc in each st around. [12] Rnd 3: Sc, inc × 6. [18] Rnds 4–6: Sc in each st around. [18] Rnd 7: Sc, dec × 6. [12] Rnd 8: Dec × 6. [6] — do not close. Popcorn Top: Insert hook in center of Rnd 8 (through the 6 sts), yarn over, pull up loop, ch 1, work 5 dc into same center point, remove hook, insert into first dc, pull loop through, ch 1 to close popcorn. Fasten off, leave 8” tail.
Berry Stem (Make 8): Ch 12. Sl st in 2nd ch from hook and each ch back to start. Fasten off, leave 12” tail.
Cluster Assembly: Thread berry tails onto tapestry needle. Sew 3–5 berries onto stem at ½” intervals, clustering at top. Secure stems to vine during Phase 5.
Phase 5: Surface Crochet Vine & Final Assembly
Positioning: On blocked base panel (RS up), use locking stitch markers to map the vine path: a gentle S-curve from bottom left to top right, crossing the center at ~27”. Place leaf markers along vine at irregular intervals (3–5” apart), alternating colors and sizes. Place berry cluster markers at vine junctions.
Surface Vine: With Color F (dark navy) and 3.5 mm hook, insert hook through fabric at vine start (bottom left, 2” from edge). Pull up loop. Insert hook ⅜” ahead along marked path, pull up loop, sl st through loop on hook — this is surface sl st. Continue following markers. At each leaf marker, work 2–3 surface sl st around leaf stem base to anchor. At berry markers, work surface sl st around stem base. Fasten off on WS, weave ends.
Appliqué Leaves: Using matching color tails, whipstitch each leaf to base panel through the sc border of the leaf and the mesh of the base. Stitch at stem base, lobe tips, and 2–3 points along veins. Knot securely on WS.
Attach Berry Clusters: Sew cluster stems to vine at marked points using mustard yellow thread, then reinforce with navy sewing thread through base panel.
7. Assembly, Mounting & Structural Integration
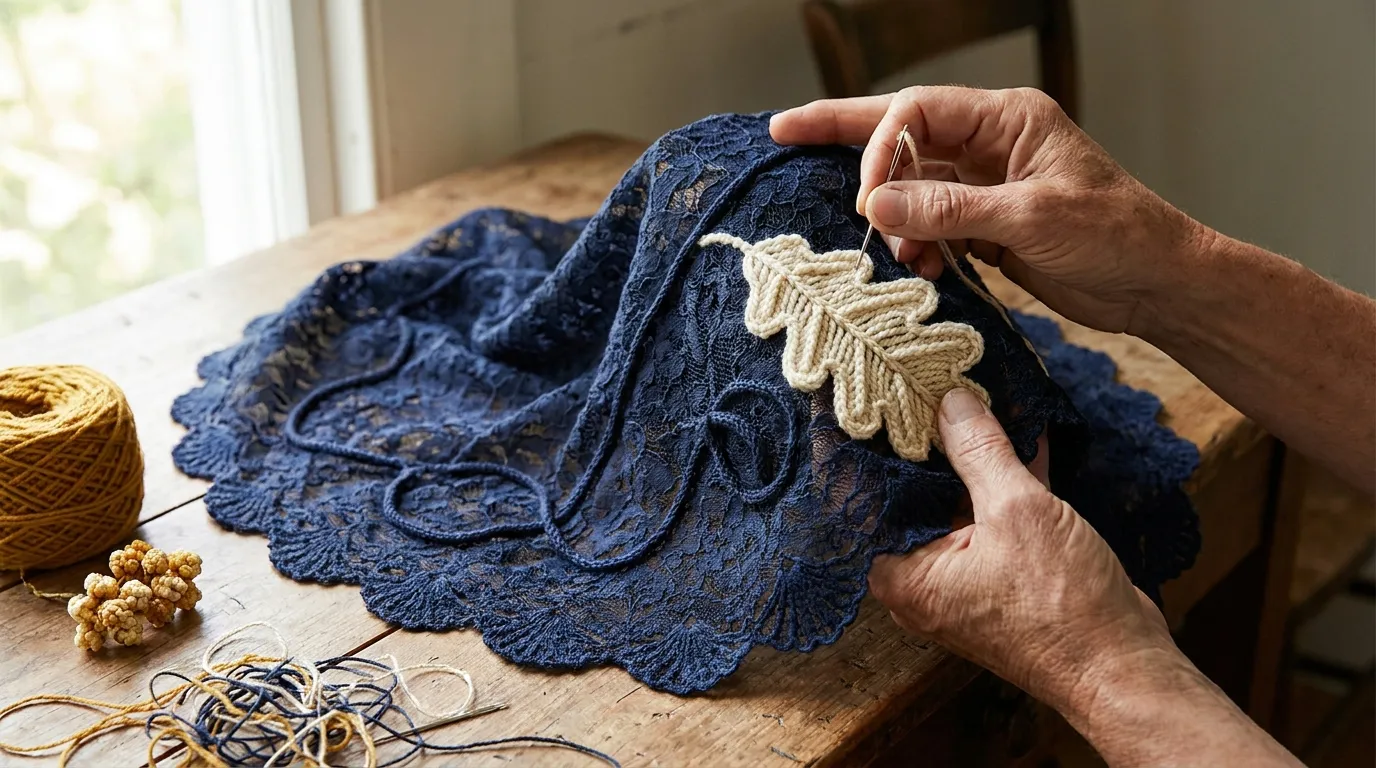
This piece requires no lining, mounting hardware, or structural reinforcement beyond the blocking and secure appliqué. The integrity comes from:
- Base Panel Density: The filet mesh at sport/DK gauge creates a stable, non-stretchy fabric that holds its rectangular shape.
- Edging as Frame: The scalloped shell border acts as a structural hem, distributing tension evenly across the perimeter.
- Appliqué Distribution: Leaves and berries are placed symmetrically along the vine but asymmetrically across the width, balancing visual weight without concentrating stress.
- Surface Vine Tacking: The vine is not merely decorative — it is tacked to the base every 2–3 inches with fine navy sewing thread (invisible on RS), preventing the surface crochet from snagging or lifting during use.
Final Press: After all elements are attached, steam-block the entire runner once more (hover iron 1” above fabric, do not press directly on 3D elements). This relaxes any tension from appliqué stitching and unifies the drape.
8. Hardware, Accents & Embellishment Assembly
No hardware (D-rings, clasps, chains) is used in this design. The embellishments are integral to the stitch architecture:
-
Popcorn Berries: The 5-dc popcorn top creates a self-contained highlight that requires no bead or sequin. The tight mercerized cotton holds the sphere without stuffing.
-
Leaf Veins: The fpdc veins are the embellishment — no embroidery or surface stitching needed beyond the structural vine.
-
Vine Cord: The dark navy surface cord is the drawn line. If you prefer a slightly thicker vine, hold two strands of Color A together for the surface crochet.
Optional Embellishment: For a subtle shimmer in evening light, work the final round of 3–4 berries per cluster with a strand of fine gold metallic thread held double with the mustard yellow. This catches candlelight beautifully at holiday tables.
9. Blocking, Care & Maintenance
Blocking (Critical — Do Not Skip):
- Submerge base panel in cool water with wool wash (e.g., Soak or Eucalan) for 15 minutes. Do not agitate.
- Spin in pillowcase in washing machine (delicate) or press between towels — do not wring.
- Pin to blocking mats at 15 × 54 inches. Use blocking wires through scallop edges for straight lines. Pin each shell point individually.
- Steam heavily (hover, don’t touch). Let dry 24 hours.
- Block leaves individually: pin flat, steam, dry 2 hours.
- Assemble (Phases 4–5), then final steam block entire runner.
Washing:
- Hand wash only in cool water with pH-neutral detergent.
- Press water out — never wring.
- Lay flat on towels, reshape to 15 × 54”, pin scallops if needed.
- Air dry flat. Do not hang wet — the weight will distort the lace.
Storage:
- Roll (don’t fold) around acid-free tissue paper.
- Store in cotton pillowcase or muslin bag — not plastic.
- Cedar blocks or lavender sachets deter moths without oils transferring to cotton.
Ironing: If needed, steam only on wrong side. Never press directly on popcorn berries or fpdc veins — they will flatten permanently.
10. Frequently Asked Questions (FAQ)
Q: Can I use worsted weight yarn and a larger hook to make this faster? A: Not recommended. The lace architecture, leaf veins, and popcorn berries all rely on the stitch definition and drape of sport/DK mercerized cotton. Worsted weight will make the base panel stiff and heavy, the leaves bulky rather than delicate, and the berries too large for the vine scale. The finished runner would exceed 20” wide and lose its elegant proportions.
Q: My popcorn berries are collapsing / not holding a round shape. What am I doing wrong? A: Three likely causes: (1) Yarn too soft — must be mercerized, tightly plied cotton. (2) Hook too large — use 3.5 mm for berries even if you use 4.0 mm for edging. (3) Not enough tension on the popcorn close — when you pull the loop through the first dc to close the popcorn, pull firmly before the closing ch 1. The popcorn should feel taut, not squishy.
Q: How do I keep the surface vine from puckering the base fabric? A: Work the surface sl st with a loose tension — the loop on the hook should be generous. Insert the hook straight through (not at an angle) to avoid distorting the mesh. Tack the vine on the WS with sewing thread every 2–3 inches as you go; this anchors it without pulling the RS fabric. If puckering occurs, gently steam the area from the WS after tacking.
Q: Can I make this narrower/shorter for a coffee table? A: Yes. Reduce foundation chain in multiples of 8 + 3 (for the mesh repeat) — e.g., ch 107 for ~10” width. Reduce length by working fewer 8-row mesh/shell blocks (each block = ~6.75”). Keep the same edging, leaf count, and vine density. Recalculate yardage: ~70% for a 10 × 36” runner.
11. Community Call-to-Action
You’ve crocheted a forest floor into your dining table — now let it be seen. Share your finished Botanical Oak Leaf & Berry Tablerunner on Instagram with @NailItHome and #NailItHomeBotanical so we can celebrate your stitchwork alongside makers worldwide. Tag your yarn choices, your color substitutions, the table it graces — every detail tells the story of your hands.
Pin the pattern to your “Heirloom Crochet” board on Pinterest. Leave a note in the comments below: which leaf color became your favorite to make? Did the popcorn berries surprise you? Your notes become the marginalia that guide the next maker.
Happy stitching, always.
— Aurelia Thorne, Master Fiber Artist & Lead Pattern Curator, Nail It Home


