

Boho Mandala Granny Square Tablerunner: Free Crochet Pattern & Tutorial
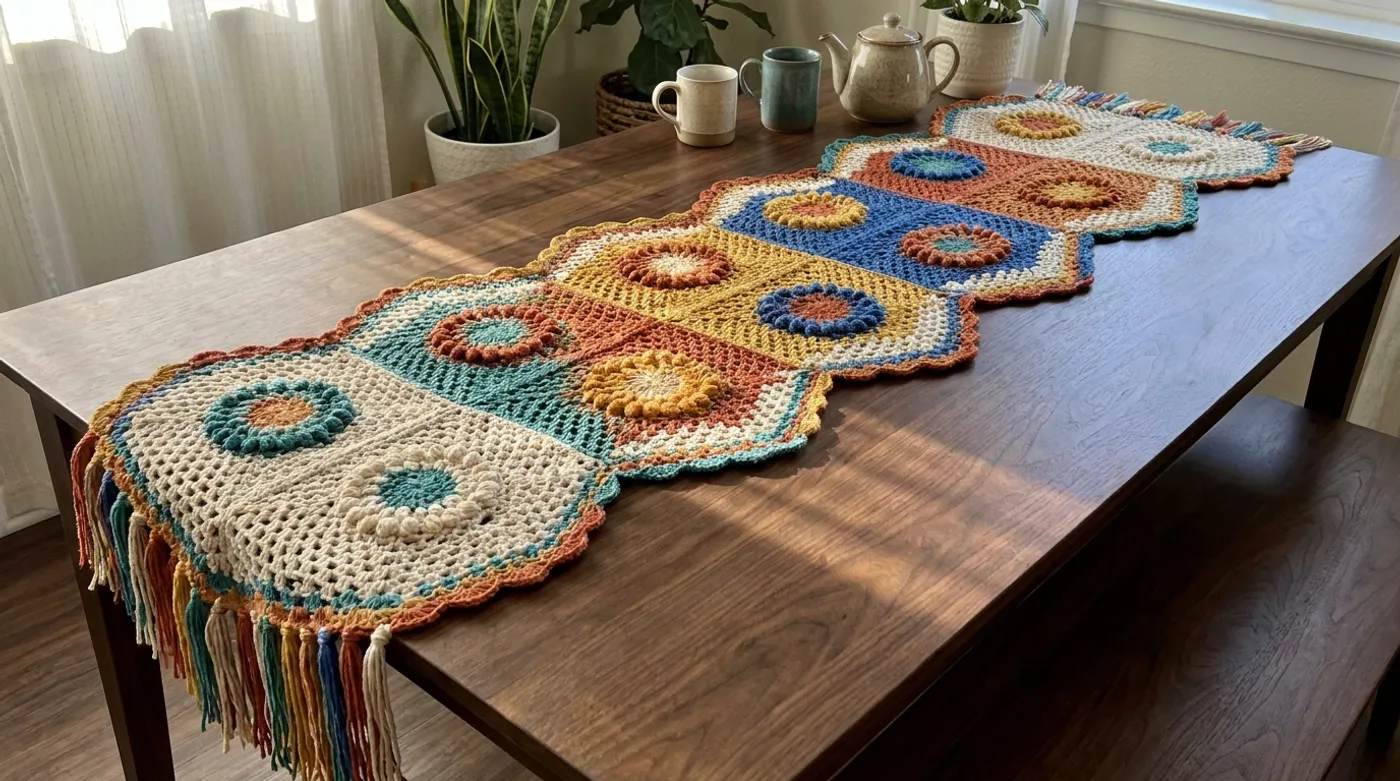
The Boho Mandala Granny Square Tablerunner is a 70‑inch long, 12‑13‑inch wide zig‑zag chevron runner composed of 12‑inch squares joined diagonally. Each square contains a solid, raised mandala centre built from concentric popcorn‑cluster rings in a six‑step rainbow gradient (c...

Pattern Specifications
Introduction & Design Inspiration
There is a particular kind of magic that happens when geometry meets color in fiber form. The Boho Mandala Granny Square Tablerunner was born from a desire to capture the free-spirited energy of a Moroccan souk at golden hour — where every textile tells a story through texture and hue — and translate it into a piece that feels both ancestral and entirely at home on a modern dining table.
Each of the twelve 12-inch squares in this runner holds a secret: a solid, raised mandala center built from six concentric rings of popcorn clusters, each ring a different shade in a curated rainbow gradient that moves from cream through teal, burnt orange, golden yellow, royal blue, and deep terracotta. These mandalas are not merely decorative; they are structural anchors, giving the runner a luxurious 3D topography that catches light differently from every angle. The open-mesh double crochet background provides airy negative space, allowing the mandalas to breathe and the colors to sing without visual heaviness.
The squares are joined on the diagonal using invisible slip-stitch seams, creating a dynamic zig-zag chevron rhythm that draws the eye along the full 70-inch length. A scalloped shell edging in matching gradient colors frames the perimeter, and multicolored fringe tassels — each strand pulling from the mandala palette — cascade from the final round of each end square, adding movement and tactile delight.
This pattern is written for the intermediate crocheter who is comfortable with popcorn stitches, working in the round, and joining motifs. If you have ever wanted to master the art of dimensional stitch texture while creating a genuine heirloom piece for your home, this project is your invitation. Let us begin.
Pattern Overview & Finished Dimensions
- Finished Length: 70 inches (178 cm)
- Finished Width: 12.5 inches (32 cm) at widest point (center squares)
- Individual Square Dimensions: 12 inches × 12 inches (30.5 cm × 30.5 cm) after blocking
- Number of Squares: 12 (arranged in diagonal chevron formation)
- Mandala Center Diameter: 4.5 inches (11.5 cm)
- Fringe Length: 4 inches (10 cm)
- Construction Method: 12 individual squares worked in the round, joined diagonally with slip stitch, edged and fringed as final steps
- Yarn Weight: Worsted / Medium (4) — 100% acrylic recommended for stitch definition and washability
- Hook Size: 5.0 mm (US H-8) — adjust up/down 0.5 mm to meet gauge
- Gauge: 13 dc × 7 rows = 4 inches (10 cm) in double crochet, measured flat after blocking
- Skill Level: Intermediate (requires popcorn stitch, working in rounds, invisible joining, shell edging)
- Estimated Time: 18–22 hours
- Estimated Cost: $35–55 depending on yarn brand
Fit & Structure Notes: The runner is self-supporting with no backing or lining required. The acrylic yarn provides enough body for the piece to lay flat after blocking. The diagonal join creates natural bias stretch — block firmly to dimensions before joining to prevent distortion.
Materials, Fiber & Hardware Checklist
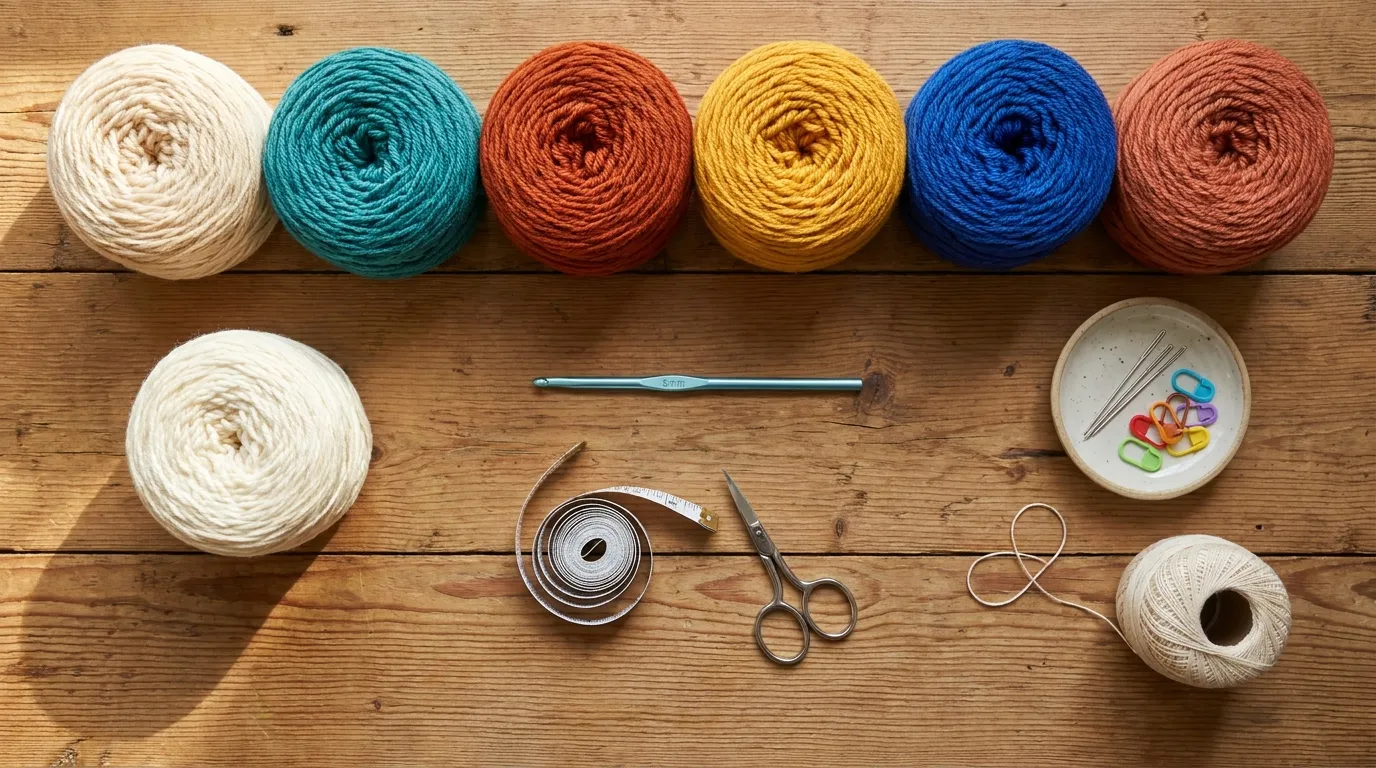
Yarn — Mandala Centers (6 colors, 190 yds / 174 m each):
- Color A: Cream (e.g., Lion Brand Vanna’s Choice #170 White)
- Color B: Teal (e.g., Lion Brand Vanna’s Choice #173 Aqua)
- Color C: Burnt Orange (e.g., Lion Brand Vanna’s Choice #158 Terracotta)
- Color D: Golden Yellow (e.g., Lion Brand Vanna’s Choice #152 Gold)
- Color E: Royal Blue (e.g., Lion Brand Vanna’s Choice #174 Navy)
- Color F: Terracotta (e.g., Lion Brand Vanna’s Choice #157 Brick)
Yarn — Background, Joining & Edging:
- Color A (Cream): Additional 100 yds / 91 m for square backgrounds, diagonal joining, and shell edging base rounds
Thread — Scalloped Edging Detail:
- White cotton thread (size 10 crochet thread, ~50 yds / 46 m) for final picot/shell round
Tools & Notions:
- 5.0 mm (US H-8) crochet hook — aluminum or bamboo
- 3.5 mm (US E-4) steel crochet hook for cotton thread edging
- Tapestry needle (blunt tip, large eye)
- Sharp embroidery scissors
- Measuring tape (60 inch / 150 cm)
- Blocking mats and T-pins (minimum 12-inch square coverage)
- 12 locking stitch markers (for marking mandala ring transitions)
- Cardboard fringe template (4 inches / 10 cm wide)
Yarn Substitution Guidance: Choose a worsted-weight acrylic with good stitch definition and minimal halo. Avoid single-ply or loosely spun yarns — they will not hold the popcorn texture. Cotton worsted works but yields a heavier, stiffer drape. Superwash wool blends are acceptable but require careful blocking.
Stitch Abbreviations (US Terms)
| Abbreviation | Stitch Name |
|---|---|
| ch | chain |
| sl st | slip stitch |
| sc | single crochet |
| hdc | half double crochet |
| dc | double crochet |
| tr | treble crochet |
| pc | popcorn stitch (5 dc in same st, drop loop, insert hook in first dc, pull dropped loop through, ch 1 to close) |
| sh | shell (5 dc in same st/sp) |
| picot | ch 3, sl st in 3rd ch from hook |
| BLO | back loop only |
| FLO | front loop only |
| sp(s) | space(s) |
| st(s) | stitch(es) |
| rnd(s) | round(s) |
| rep | repeat |
| RS | right side |
| WS | wrong side |
| [ ] | work instructions inside brackets the number of times indicated |
| ( ) | stitch group worked in same stitch/space |
Special Stitch Definitions:
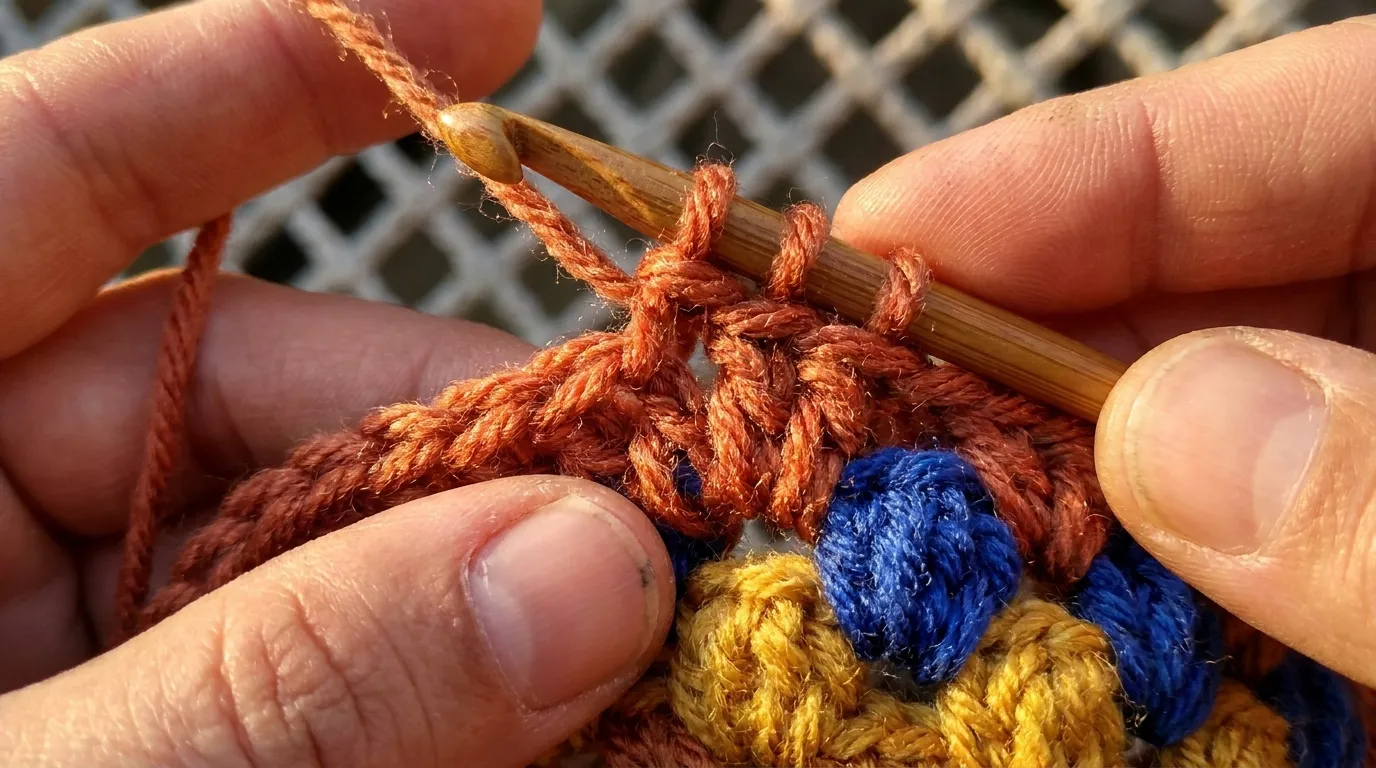
Popcorn Stitch (pc): Yarn over, insert hook in indicated stitch, yarn over, pull up loop, yarn over, pull through 2 loops — repeat from * to * 4 more times in same stitch (6 loops on hook). Drop working loop from hook. Insert hook from front to back through first dc of the group. Pick up dropped loop and pull through first dc. Chain 1 to secure. Popcorn pushes to RS automatically.
Standing Double Crochet (standing dc): Begin with slip knot on hook. Yarn over, insert hook in indicated stitch/space, yarn over, pull up loop, (yarn over, pull through 2 loops) twice. Used to start a round without a visible joining chain.
Invisible Join (for round endings): Cut yarn leaving 6-inch tail. Pull tail through last stitch. Thread tapestry needle. Insert needle under both loops of first stitch of round (not the joining chain), pull through. Insert needle down through back loop only of last stitch worked. Pull snug — mimics a stitch perfectly.
Architectural Mechanics / Technique Deep-Dive
Understanding the why behind each structural choice will make your crochet more intuitive and your finished piece more polished.
The Mandala Center — Concentric Popcorn Geometry:
Each mandala begins with a magic ring of 12 dc. From there, six rings of popcorn stitches expand outward. The popcorn stitch is essentially a 5-dc cluster compressed into a single stitch footprint, creating a raised “bump” that protrudes ~¼ inch from the fabric surface. By placing popcorns in every stitch of Round 2, then every other stitch in Round 3, then every third stitch in Round 4, and so on, we create a controlled radial expansion that keeps the mandala flat while building height. The six color changes (one per ring) create the gradient narrative. Critical: always work the popcorn’s closing ch-1 — it maintains stitch count for the next round and prevents puckering.
The Open-Mesh Background — Filet-Inspired Airiness:
Rounds 8–14 of each square transition from the dense mandala to an open dc/ch-1 mesh (dc, ch 1, skip 1, dc). This filet-style grid serves three purposes: (1) it reduces yarn consumption and weight, (2) it creates visual lightness that makes the mandala appear to float, and (3) it provides consistent anchor points for the diagonal join. The mesh gauge (13 dc per 4 inches) matches the solid fabric gauge, ensuring squares remain square.
Diagonal Chevron Join — Bias Geometry:
Joining squares corner-to-corner on the diagonal rotates each square 45° relative to the runner’s long axis. This transforms the square’s straight edges into zig-zag chevrons. The invisible slip-stitch seam is worked through the back loops only of corresponding edge stitches, creating a nearly flat, flexible join that disappears into the fabric. Because the join is on the bias, the runner has natural give — block aggressively to final dimensions before joining.
Scalloped Shell Edging — Curvature Control:
The edging uses three rounds: a base round of sc evenly spaced, a shell round (5 dc in every 3rd sc), and a cotton-thread picot-shell round (shell + picot at shell peak). The shell depth (5 dc) and spacing (every 3rd sc) are calibrated so that exactly 42 shells fit the 70-inch perimeter, with the corner shells falling precisely at the chevron points. The cotton thread adds crispness and allows tighter picots than yarn would permit.
Fringe Tassels — Integrated Color Story:
Each tassel uses 6 strands (one per mandala color) cut to 8 inches, folded in half, and attached via lark’s head knot through the final edging round’s stitches. This pulls the entire palette to the ends, unifying the design.
Step-by-Step Stitch Instructions
Phase 1: Mandala Center Square (Make 12)
Color Sequence per Square:
Each square uses a different starting color for Round 1, then follows the fixed gradient sequence (A→B→C→D→E→F) for Rounds 2–7. This distributes the six mandala colors across the 12 squares so the runner reads as a continuous color flow. Assign as follows:
| Square # | Round 1 Color | Rounds 2–7 Colors |
|---|---|---|
| 1, 7 | A (Cream) | B, C, D, E, F, A |
| 2, 8 | B (Teal) | C, D, E, F, A, B |
| 3, 9 | C (Burnt Orange) | D, E, F, A, B, C |
| 4, 10 | D (Golden Yellow) | E, F, A, B, C, D |
| 5, 11 | E (Royal Blue) | F, A, B, C, D, E |
| 6, 12 | F (Terracotta) | A, B, C, D, E, F |
Round 1 (Mandala Center — Color per table above):
Magic ring. Ch 3 (counts as dc). 11 dc in ring. Sl st to top of beg ch-3. — 12 dc. Pull ring tight.
Round 2 (Color B for Sq 1/7, Color C for Sq 2/8, etc. — next color in gradient):
Standing dc in any dc. Pc in next dc 11 times. Invisible join. — 12 pc.
Note: Each pc replaces a dc. The ch-1 closing each pc counts as the “stitch” for next round placement.
Round 3 (Next gradient color):
Standing dc in ch-1 sp of any pc. Ch 1, pc in ch-1 sp of next pc 11 times. Ch 1. Invisible join to standing dc. — 12 pc, 12 ch-1 sps.
Round 4 (Next gradient color):
Standing dc in any ch-1 sp. Ch 1, dc in next ch-1 sp, ch 1, pc in next ch-1 sp 11 times. Ch 1, dc in last ch-1 sp, ch 1. Invisible join. — 12 pc, 12 dc, 24 ch-1 sps.
Round 5 (Next gradient color):
Standing dc in any ch-1 sp. Ch 1, dc in next 2 ch-1 sps, ch 1, pc in next ch-1 sp 11 times. Ch 1, dc in last 2 ch-1 sps, ch 1. Invisible join. — 12 pc, 24 dc, 36 ch-1 sps.
Round 6 (Next gradient color):
Standing dc in any ch-1 sp. Ch 1, dc in next 3 ch-1 sps, ch 1, pc in next ch-1 sp 11 times. Ch 1, dc in last 3 ch-1 sps, ch 1. Invisible join. — 12 pc, 36 dc, 48 ch-1 sps.
Round 7 (Final gradient color — completes mandala at ~4.5” diameter):
Standing dc in any ch-1 sp. Ch 1, dc in next 4 ch-1 sps, ch 1, pc in next ch-1 sp 11 times. Ch 1, dc in last 4 ch-1 sps, ch 1. Invisible join. — 12 pc, 48 dc, 60 ch-1 sps.
Fasten off mandala color. Weave in ends.
Round 8 (Color A — Cream background begins):
Join Color A with standing dc in any ch-1 sp. Ch 1, dc in each ch-1 sp and dc around to next pc ch-1 sp, ch 1, (dc, ch 1, dc) in pc ch-1 sp 11 times. Ch 1, dc in remaining ch-1 sps/dcs to beg, ch 1. Invisible join. — Corner established: (dc, ch 1, dc) in each pc sp = 4 corners. Side stitch count: 14 dc per side between corners.
Rounds 9–14 (Color A — Open Mesh Expansion to 12”):
Each round: Standing dc in any corner ch-1 sp. Ch 1, dc in next ch-1 sp across to next corner ch-1 sp, (dc, ch 1, dc) in corner ch-1 sp — repeat from * 3 more times. Ch 1. Invisible join.
- Round 9: 16 dc per side
- Round 10: 18 dc per side
- Round 11: 20 dc per side
- Round 12: 22 dc per side
- Round 13: 24 dc per side
- Round 14: 26 dc per side (square measures 12” after blocking)
Round 15 (Color A — Solid Edge Prep for Joining):
Standing sc in any corner ch-1 sp. Sc in each dc and ch-1 sp across to next corner, 3 sc in corner ch-1 sp — repeat 3 times. Sc in remaining sts to beg. Sl st to first sc. — 104 sc per side (including 3-sc corners), 416 sc total.
Fasten off. Block each square to 12” × 12” before joining.
Phase 2: Diagonal Chevron Join
Layout: Arrange 12 blocked squares in diagonal chevron order: Square 1 (top left), Square 2 (right of 1, touching at corners), Square 3 (right of 2), continuing to Square 6. Row 2: Square 7 below Square 1 (touching at corners), Square 8 below Square 2, etc., to Square 12. The chevron points alternate up/down.
Join Method — Invisible Slip Stitch Seam (BLO):
Hold two adjacent squares RS together, corners aligned. With Color A and tapestry needle (or hook), work slip stitches through back loops only of corresponding edge sc stitches from corner to corner. At the chevron point (where 4 squares meet), join all 4 corners together with a single sl st cluster. Work systematically: join all vertical seams first (Sq 1–7, 2–8, 3–9, 4–10, 5–11, 6–12), then diagonal seams (Sq 1–2, 2–3, 3–4, 4–5, 5–6; then 7–8, 8–9, 9–10, 10–11, 11–12). The BLO seam creates a subtle ridge on WS only; RS remains flat.
Join Tension Check: After each seam, lay piece flat. The join should have zero puckering and match the square’s natural stretch. If tight, redo with looser tension.
Phase 3: Scalloped Shell Edging & Fringe
Edging Round 1 — Base Single Crochet (Color A, 5.0 mm hook):
Join Color A with standing sc in any corner sc of outer perimeter. Sc in each sc around, working 3 sc in each corner sc (chevron points and outer corners) — join with sl st to first sc. — Approx. 420 sc total. Do not turn.
Edging Round 2 — Shell Round (Color A):
Ch 3 (counts as dc). Skip 2 sc, 5 dc in next sc (shell), skip 2 sc, sc in next sc — repeat around. At each chevron point/outer corner: skip 2 sc, 5 dc in center sc of 3-sc corner, skip 2 sc, sc in next sc. Join with sl st to 3rd ch of beg ch-3. — 42 shells total (10 per long side, 1 per chevron point × 10 points, 1 per end corner × 2).
Edging Round 3 — Picot Shell Round (Cotton thread, 3.5 mm steel hook):
Join thread with standing sc in first sc of Round 2 (between shells). Ch 3, sl st in 3rd ch from hook (picot), 5 dc in next sc (shell peak), ch 3, sl st in 3rd ch from hook (picot), sc in next sc (between shells) — repeat around. At corners/chevron points: work picot, shell in center dc of 5-dc shell, picot. Join with invisible join. Fasten off thread.
Fringe Tassels (All 6 mandala colors):
Cut 6 strands × 8 inches per tassel (one strand per color). For each end square (Square 1 and Square 12), attach 21 tassels evenly spaced across the short end (one tassel per 2 sc of Edging Round 1). To attach: fold 6-strand bundle in half. Insert hook from RS to WS through designated sc, pull fold through, pull tails through fold, tighten. Trim ends even at 4 inches. Steam fringe lightly to relax fibers.
Assembly, Mounting & Structural Integration
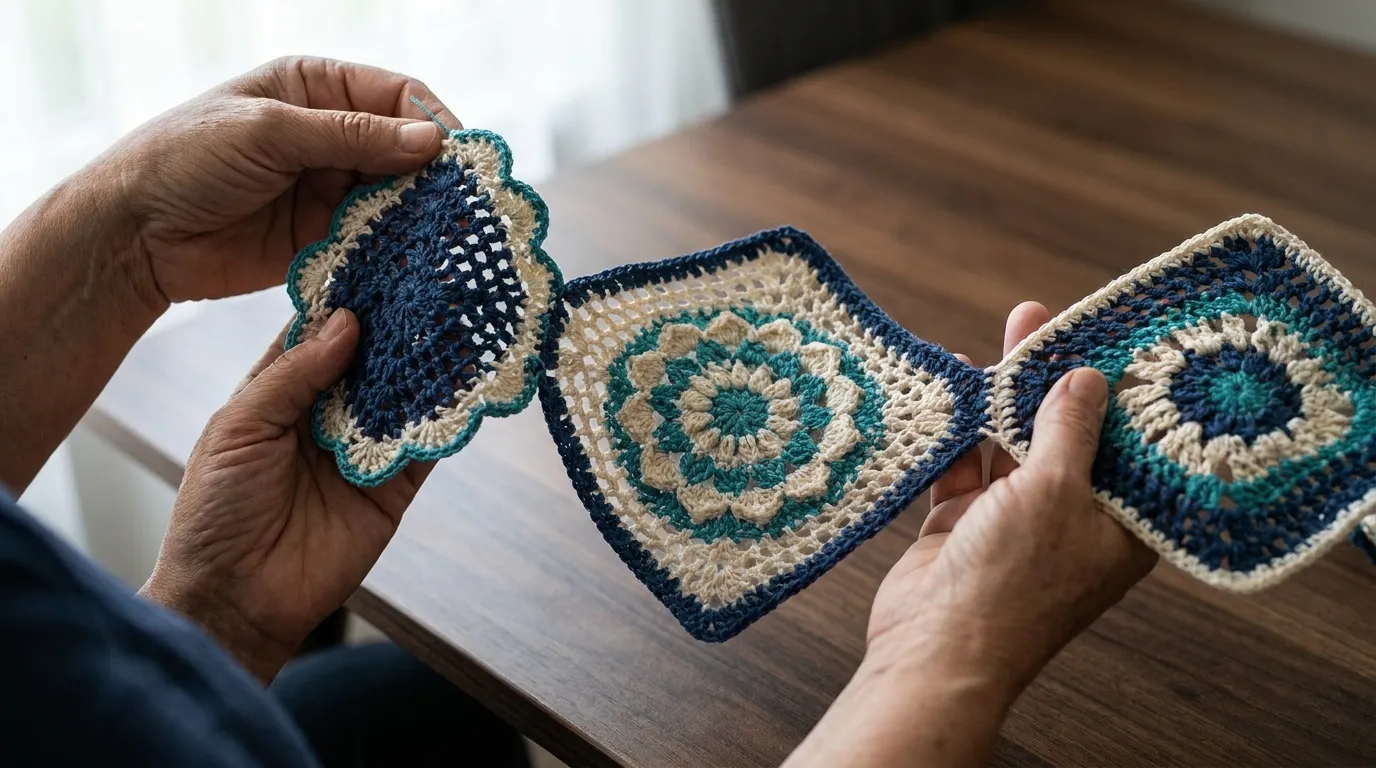
This tablerunner requires no lining, mounting hardware, or structural integration beyond the crochet fabric itself. The acrylic yarn’s memory, combined with thorough blocking, provides sufficient body for the piece to lay flat on any table surface. The diagonal chevron join creates a unified fabric that resists curling at the edges.
Final Blocking Protocol (Critical for Chevron Geometry):
- Pin runner to blocking mats at full 70” × 12.5” dimensions. Place pins every 2 inches along all edges, ensuring chevron points are sharp and straight.
- Mist heavily with cool water until uniformly damp (not soaking).
- Allow to dry completely (24–36 hours in moderate humidity).
- Remove pins. The runner will hold its dimensions through use and washing.
Storage: Roll (do not fold) around acid-free tissue paper tube. Store flat or hanging to prevent permanent creases at chevron points.
Hardware, Accents & Embellishment Assembly
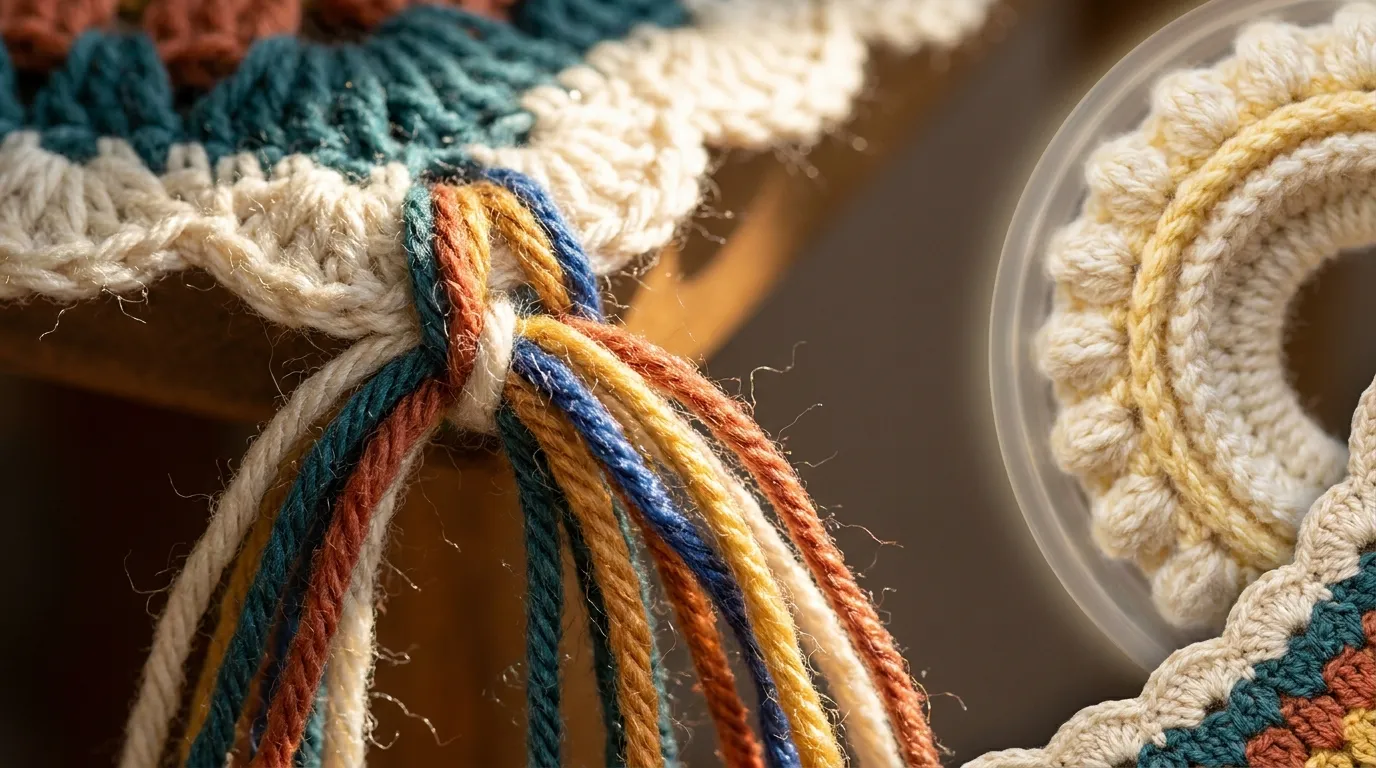
The only “hardware” in this piece is the fringe tassel assembly, detailed in Phase 3. No D-rings, clasps, chains, charms, or beads are used — the design’s integrity relies entirely on stitch architecture and color. The mandala centers are solid raised popcorn clusters with no external accents. This purity of form is intentional: the texture is the embellishment.
If you wish to personalize, consider:
- Adding a single row of surface crochet in metallic gold thread along the chevron seams
- Sewing tiny mother-of-pearl buttons at each chevron point (4-hole, ⅜ inch)
- Incorporating a subtle seed-bead picot in Edging Round 3 (add 3 beads to each ch-3 picot)
These are optional and not included in yardage/time estimates.
Blocking, Care & Maintenance
Blocking (First Time & After Washing):
- Use blocking mats with grid lines. Pin to 70” × 12.5”.
- Mist with cool water + 1 tsp wool wash per spray bottle.
- Dry flat, undisturbed, 24+ hours.
- Re-block annually or after washing to maintain chevron crispness.
Washing:
- Machine wash cold, gentle cycle, in mesh lingerie bag.
- Mild detergent (no bleach, no fabric softener — softener coats acrylic and reduces stitch definition).
- Spin low. Remove immediately.
Drying:
- Lay flat on towel, roll to remove excess water.
- Re-pin to blocking dimensions. Air dry.
- Do not tumble dry — heat can melt acrylic fibers and destroy popcorn texture.
Ironing/Steaming:
- Steam only, hover 2 inches above fabric. Never press — popcorns will flatten permanently.
- Fringe: steam lightly while hanging to remove kinks.
Long-Term Care:
- Rotate runner 180° seasonally for even wear/fade.
- Vacuum gently with upholstery attachment (no beater bar) between washes.
- Store rolled, not folded, in cotton pillowcase (not plastic — acrylic needs to breathe).
Frequently Asked Questions (FAQ)
Q: Can I use DK or fingering weight yarn instead of worsted?
A: Not recommended for this specific pattern. The popcorn stitch architecture relies on worsted weight’s diameter to create the 3D mandala height. DK yarn will produce a flatter, smaller mandala (~3” diameter) and the square will not reach 12” without adding 2–3 extra mesh rounds, which throws off the join geometry. If you must substitute, use DK with a 4.0 mm hook, work 16 mesh rounds instead of 7, and expect a ~55” runner — then adjust edging shell count accordingly.
Q: My popcorn stitches are leaning to one side / not popping forward.
A: Two fixes: (1) Ensure you are dropping the loop after completing the 5th dc, inserting hook front-to-back through the first dc’s top loops, then pulling the dropped loop through. If you insert back-to-front, the popcorn pushes to WS. (2) The closing ch-1 must be snug but not tight — it locks the popcorn’s orientation. Practice 10 popcorns in a swatch before starting Round 2.
Q: The diagonal join is puckering / the runner won’t lay flat.
A: This is almost always a tension issue in the slip-stitch seam. The BLO seam must have the exact same elasticity as the fabric. Test: work a 2-inch seam swatch on two blocked square edges. Lay flat. If it draws up, your slip stitches are too tight. Use a hook one size larger (5.5 mm) only for the join, or consciously loosen your grip. Also verify squares are blocked to identical 12” × 12” before joining — even ¼ inch discrepancy compounds across 12 squares.
Q: How do I calculate yardage if I want to make a longer/shorter runner?
A: Each square consumes ~85 yds (mandala colors) + ~8 yds (cream background) = ~93 yds/square. Each additional square adds ~93 yds total yarn. Edging scales linearly: ~10 yds cream per 10 inches of perimeter + ~5 yds cotton thread per 10 inches. Fringe: 6 strands × 8” × 2 ends = 96 strands × 8” = 64 ft = ~21 yds per end. For a 10-square runner (58”): ~930 yds total. For 14-square (82”): ~1,300 yds.
Q: Can I join the squares as I go (JAYG) instead of seaming after?
A: Technically yes — join the final round (Round 15 sc) of each new square to the previous square’s Round 15 using sl st BLO in place of the 3-sc corners. However, JAYG on the diagonal bias is extremely difficult to tension correctly and makes layout adjustments impossible. I strongly recommend the post-blocking seam method for this geometry. The invisible BLO seam is virtually undetectable and far more controllable.
Community Call-to-Action
You have just crocheted a piece of functional fiber art that carries six colors, twelve mandalas, forty-two shells, and forty-two tassels — each stitch a small meditation on geometry and hue. I would be honored to see your finished runner gracing your table, your sideboard, or gifted to someone who understands that handmade is a language of love.
Share your make:
📸 Post photos on Instagram with #NailItHomeBohoMandala and tag @NailItHome
📌 Pin your project on Pinterest with the pattern link
💬 Leave a comment below — tell me which mandala color spoke to you most, or how the chevron join felt in your hands
Your variations — colorway swaps, size modifications, fringe experiments — inspire the next pattern. This community grows because makers like you show up with hooks in hand and imagination in heart.
Until the next stitch,
Aurelia Thorne
Master Fiber Artist & Lead Pattern Curator, Nail It Home
Pattern © 2026 Nail It Home. Free for personal use. Do not reproduce, translate, or sell this pattern. Finished items may be sold in small quantities (≤25/year) with credit: “Pattern by Aurelia Thorne @ NailItHome.net”.


