

Blue And Cream Daisy Medallion Table Runner: Free Crochet Pattern & Tutorial
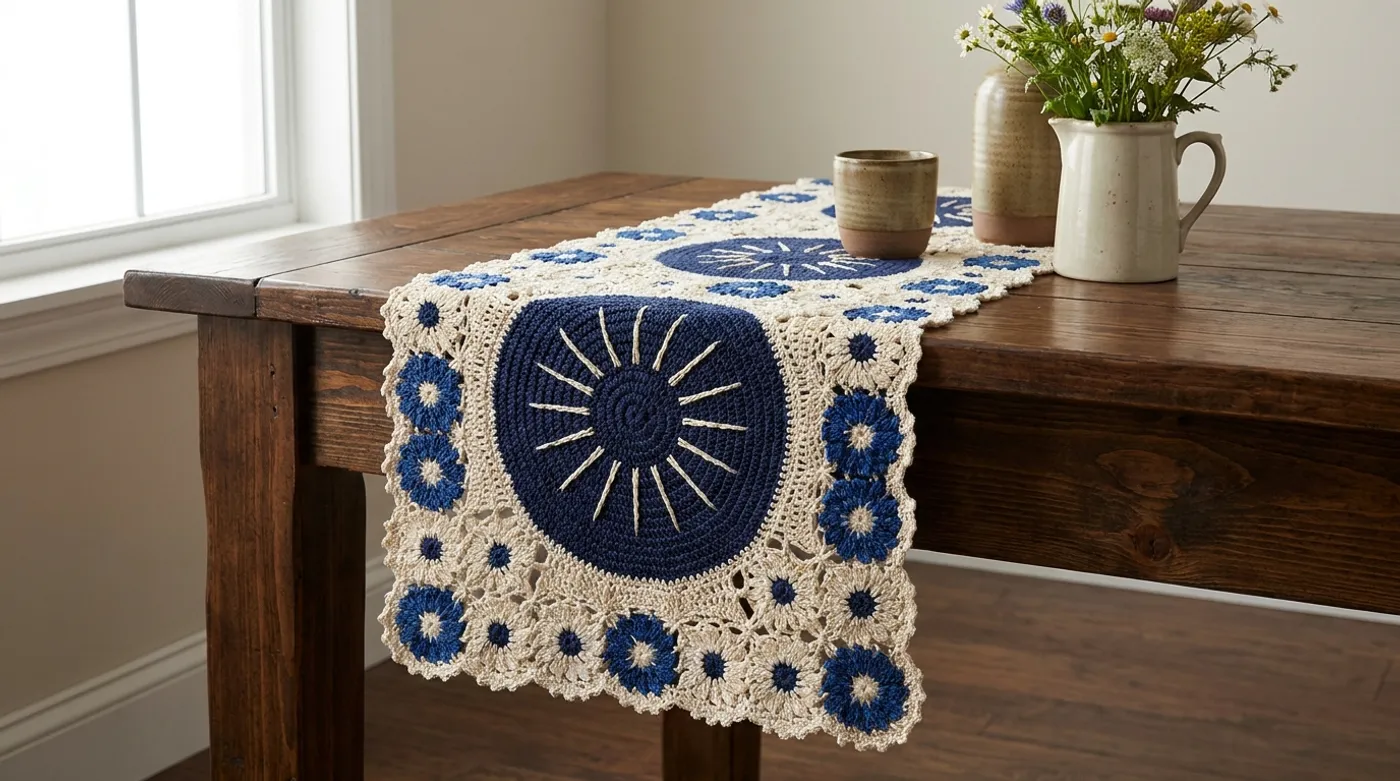
Create a stunning heirloom table runner featuring a central navy medallion with embroidered radial spokes surrounded by interconnected cream-and-blue daisy motifs. Free pattern with step-by-step tutorial.

Pattern Specifications
1. Introduction & Design Inspiration
There is a particular quiet magic in a handmade table runner — the way it anchors a gathering, softens the grain of an old farmhouse table, and catches the morning light in its stitches. This Blue and Cream Daisy Medallion Table Runner was born from a desire to merge two beloved traditions: the grand, concentric geometry of vintage doily medallions and the cheerful, repeating rhythm of floral granny squares.
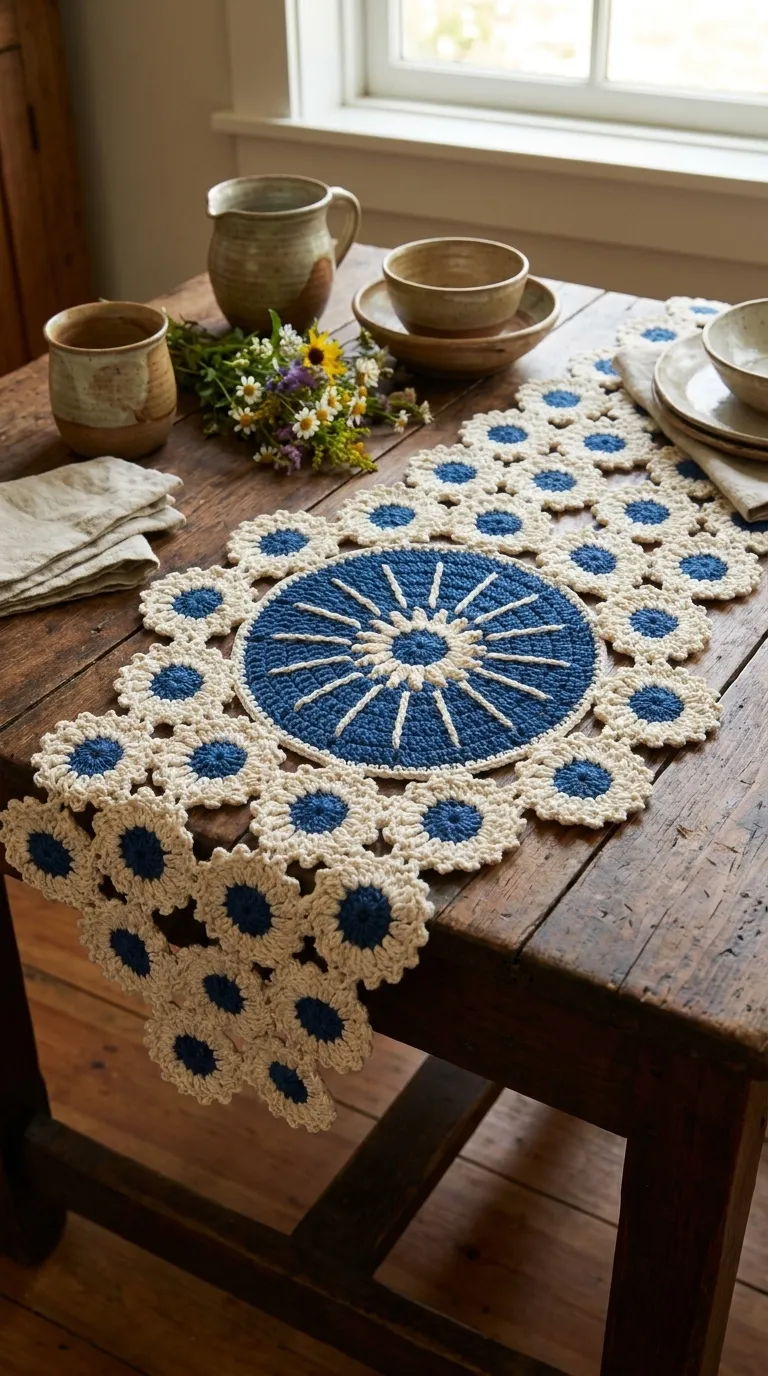
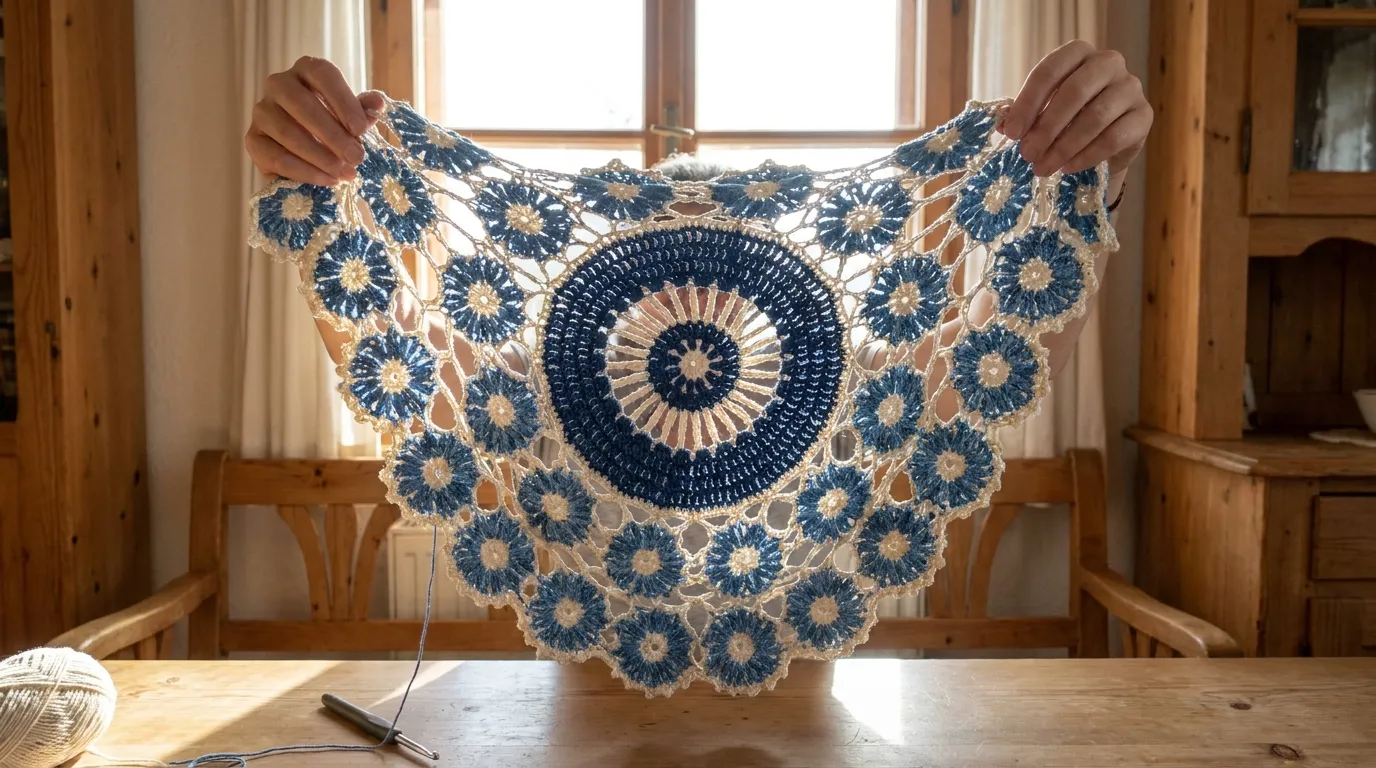
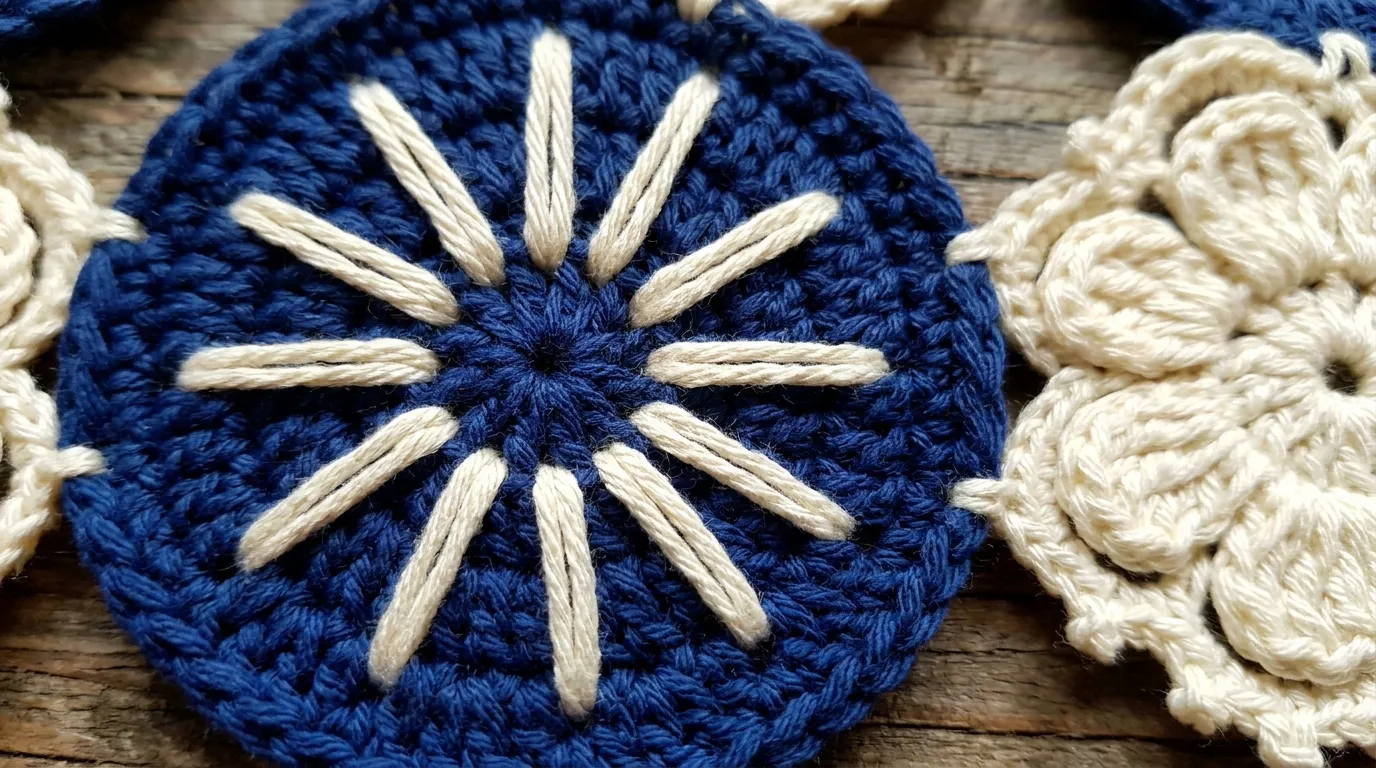
The design centers on a commanding navy blue medallion, worked in concentric rounds of double crochet that bloom outward like ripples on a still pond. Its crown jewel is a burst of off-white surface crochet — radial spokes stitched after the fact, catching the light like sunbeams through a window. Surrounding this centerpiece, a lattice of smaller daisy motifs joins seamlessly as you go, each one a miniature echo of the center: cream petals framed by a navy heart, edged in delicate picots that flutter at the runner’s perimeter.
Worked in 100% mercerized cotton DK, the fabric possesses a beautiful matte luster and substantial drape. It does not merely lie flat; it breathes, settling into the table’s contours with the weight and grace of a textile meant to be used, washed, and loved for generations. Whether dressing a holiday feast or a solitary morning coffee, this runner brings a cottagecore soul to any surface it graces.
2. Pattern Overview & Finished Dimensions
-
Finished Dimensions: 14 inches (35.5 cm) wide × 50 inches (127 cm) long, including picot border
-
Central Medallion Diameter: 10 inches (25.5 cm) after Round 12
-
Daisy Motif Diameter: 3.5 inches (9 cm) each, joined on four sides
-
Motif Layout: 1 central medallion + 12 daisy motifs (3 motifs wide × 4 motifs long, with center replacing middle motif of first row)
-
Drape: Moderate — fabric relaxes 5–8% after blocking; allow for slight vertical hang over table edges
-
Construction Method: Central medallion worked in rounds from center out; daisy motifs worked individually and joined as you go (JAYG) on final round; surface embroidery added last
-
Skill Level: Intermediate — requires comfort with working in rounds, surface crochet, join-as-you-go technique, and consistent tension across multiple motifs
-
Notions: Tapestry needle, blocking mats, T-pins, steam iron or garment steamer
3. Materials, Fiber & Hardware Checklist
Yarn — Primary (Dark Royal Blue)
-
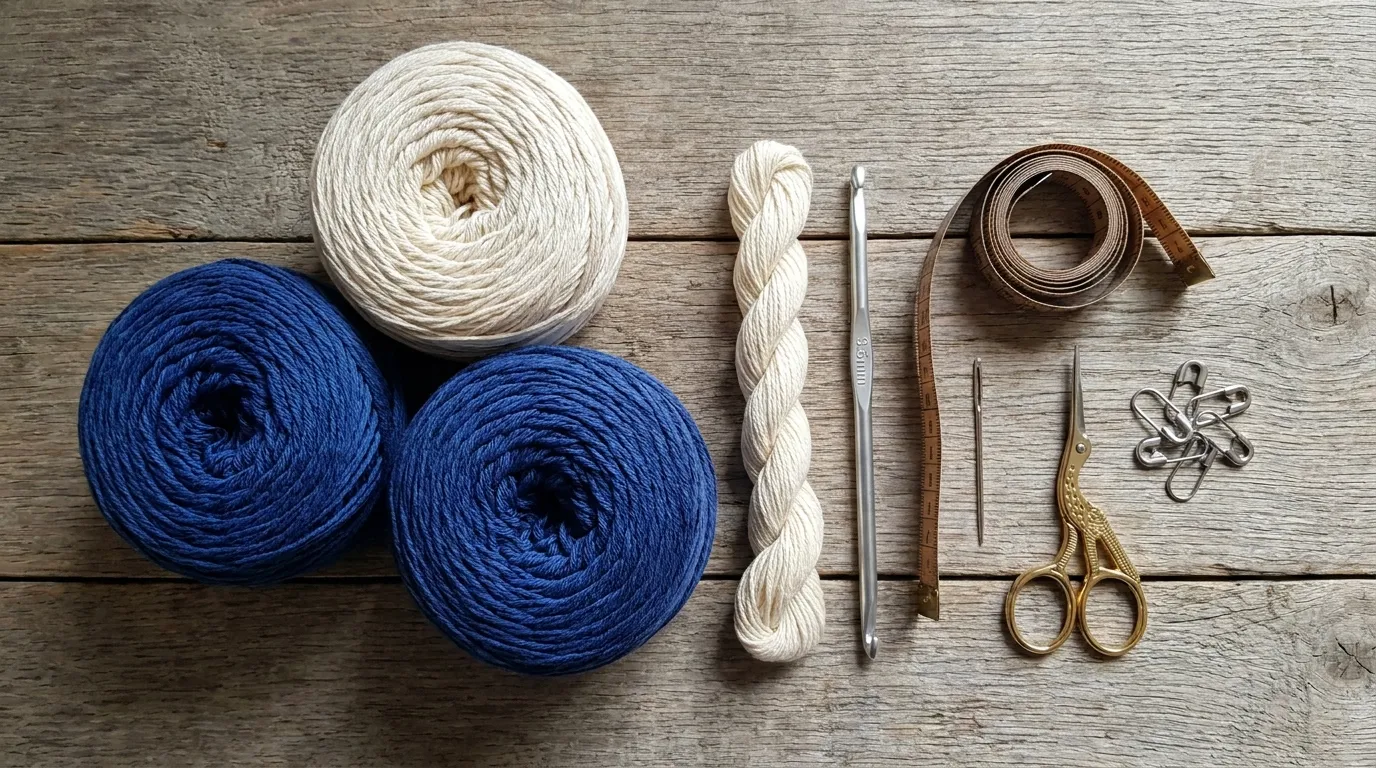
Fiber: 100% mercerized cotton, DK weight (3)
-
Yardage: 380 yds (347 m) / approx. 100 g
-
Suggested: Cascade Ultra Pima in “Navy” or equivalent matte-finish DK cotton
-
Colorway: Deep, saturated navy with minimal sheen
Yarn — Secondary (Off-White Cream)
-
Fiber: 100% mercerized cotton, DK weight (3)
-
Yardage: 240 yds (219 m) / approx. 65 g
-
Suggested: Same line as primary for consistent gauge and hand
-
Colorway: Warm off-white / cream (not optic white)
Yarn — Embroidery (Off-White Cream)
-
Fiber: 100% cotton embroidery floss or fine perle cotton (size 8 or 12)
-
Yardage: 25 yds (23 m) — single skein sufficient
-
Use: Surface crochet radial spokes on central medallion
Tools & Notions
- Crochet hook: 3.5 mm (US E-4) — adjust up or down to meet gauge
- Tapestry needle (blunt tip, large eye) for weaving ends and joining motifs
- Sharp embroidery needle for surface crochet
- Blocking mats and T-pins (minimum 24 × 24 inches coverage)
- Steam iron or garment steamer
- Measuring tape
- Stitch markers (4–6, locking style recommended)
4. Stitch Abbreviations (US Terms)
| Abbreviation | Stitch Name |
|---|---|
| ch | chain |
| sl st | slip stitch |
| sc | single crochet |
| hdc | half double crochet |
| dc | double crochet |
| tr | treble crochet |
| BLO | back loop only |
| FLO | front loop only |
| inc | increase (2 stitches in same stitch) |
| dec | decrease (stitches worked together) |
| sp | space |
| sk | skip |
| RS | right side |
| WS | wrong side |
| picot | ch 3, sl st in 3rd ch from hook |
| shell | (2 dc, ch 2, 2 dc) in indicated stitch or space |
| JAYG | join-as-you-go |
| sc-slp | surface crochet slip stitch (insert hook through fabric from RS, yarn over on WS, pull loop through to RS, sl st) |
5. Architectural Mechanics / Technique Deep-Dive
This runner’s architecture relies on three distinct but harmonious stitch systems. Understanding their mechanics will make the pattern flow intuitively.
Concentric Double Crochet Circles (Central Medallion) The medallion begins with a magic ring and expands through 12 rounds of dc increases. The increase formula follows a classic flat-circle geometry: each round adds 12 stitches (the multiple of the starting stitch count), distributed evenly. Rounds 1–6 establish the core; Rounds 7–12 transition to the joining framework by introducing ch-2 corner spaces at four cardinal points. These corners become the anchor points for the first ring of daisy motifs. Working in BLO on Rounds 10–12 creates a subtle ridge that visually separates the medallion from the motif field.
Shell-Stitch Daisy Motifs with Picot Edging Each daisy motif is a self-contained circle-to-square transformation. Rounds 1–3 form a floral hexagon: a navy center (Round 1), cream petals as shell clusters (Round 2), and a navy framing round (Round 3). Round 4 squares the circle with (shell, ch 2) corners and dc edges. The final round (Round 5) is the JAYG round — worked in cream, it replaces the standard picot edging with strategic sl st joins to neighboring motifs. The picot (ch 3, sl st) appears only on free edges (outer perimeter of runner), creating a scalloped border that catches light beautifully.
Surface Crochet Radial Spokes The medallion’s signature sunburst is not worked in the round — it is embroidered after the medallion is complete and blocked. Using a sharp embroidery needle and cotton floss, you work sc-slp stitches from the center outward along 12 evenly spaced radii. This technique sits on the fabric surface without distorting the underlying dc rounds. The spokes are worked in a single continuous thread where possible, minimizing ends. The matte cotton floss against the matte DK yarn creates a tonal texture play that reads as both subtle and striking.
6. Step-by-Step Stitch Instructions
Phase 1: Central Navy Medallion
Round 1 (RS): With navy, magic ring, ch 3 (counts as dc), 11 dc in ring, sl st to top of beg ch-3. (12 dc)
Round 2: Ch 3, dc in same st, 2 dc in each st around, sl st to top of beg ch-3. (24 dc)
Round 3: Ch 3, dc in same st, dc in next st, 2 dc in next st; rep from * around, sl st to top of beg ch-3. (36 dc)
Round 4: Ch 3, dc in same st, dc in next 2 sts, 2 dc in next st; rep from * around, sl st to top of beg ch-3. (48 dc)
Round 5: Ch 3, dc in same st, dc in next 3 sts, 2 dc in next st; rep from * around, sl st to top of beg ch-3. (60 dc)
Round 6: Ch 3, dc in same st, dc in next 4 sts, 2 dc in next st; rep from * around, sl st to top of beg ch-3. (72 dc)
Round 7: Ch 3, dc in same st, dc in next 5 sts, 2 dc in next st; rep from * around, sl st to top of beg ch-3. (84 dc)
Round 8: Ch 3, dc in same st, dc in next 6 sts, 2 dc in next st; rep from * around, sl st to top of beg ch-3. (96 dc)
Round 9: Ch 3, dc in same st, dc in next 7 sts, 2 dc in next st; rep from * around, sl st to top of beg ch-3. (108 dc)
Round 10 (Transition to Joining Framework — BLO): Ch 3, dc in same st (working in BLO), dc in next 8 sts, 2 dc in next st; rep from * around, sl st to top of beg ch-3. (120 dc)
Round 11 (BLO): Ch 3, dc in same st (BLO), dc in next 9 sts, 2 dc in next st; rep from * around, sl st to top of beg ch-3. (132 dc)
Round 12 (Corner Establishment — BLO): Ch 3, dc in same st (BLO), dc in next 10 sts, (2 dc, ch 2, 2 dc) in next st (corner made), dc in next 10 sts, 2 dc in next st; rep from * twice more, dc in next 10 sts, (2 dc, ch 2, 2 dc) in next st, dc in next 10 sts, sl st to top of beg ch-3. (144 dc + 4 ch-2 corners)
Fasten off navy. Block medallion to 10 inches diameter before proceeding.
Phase 2: Daisy Motifs (Make 12)
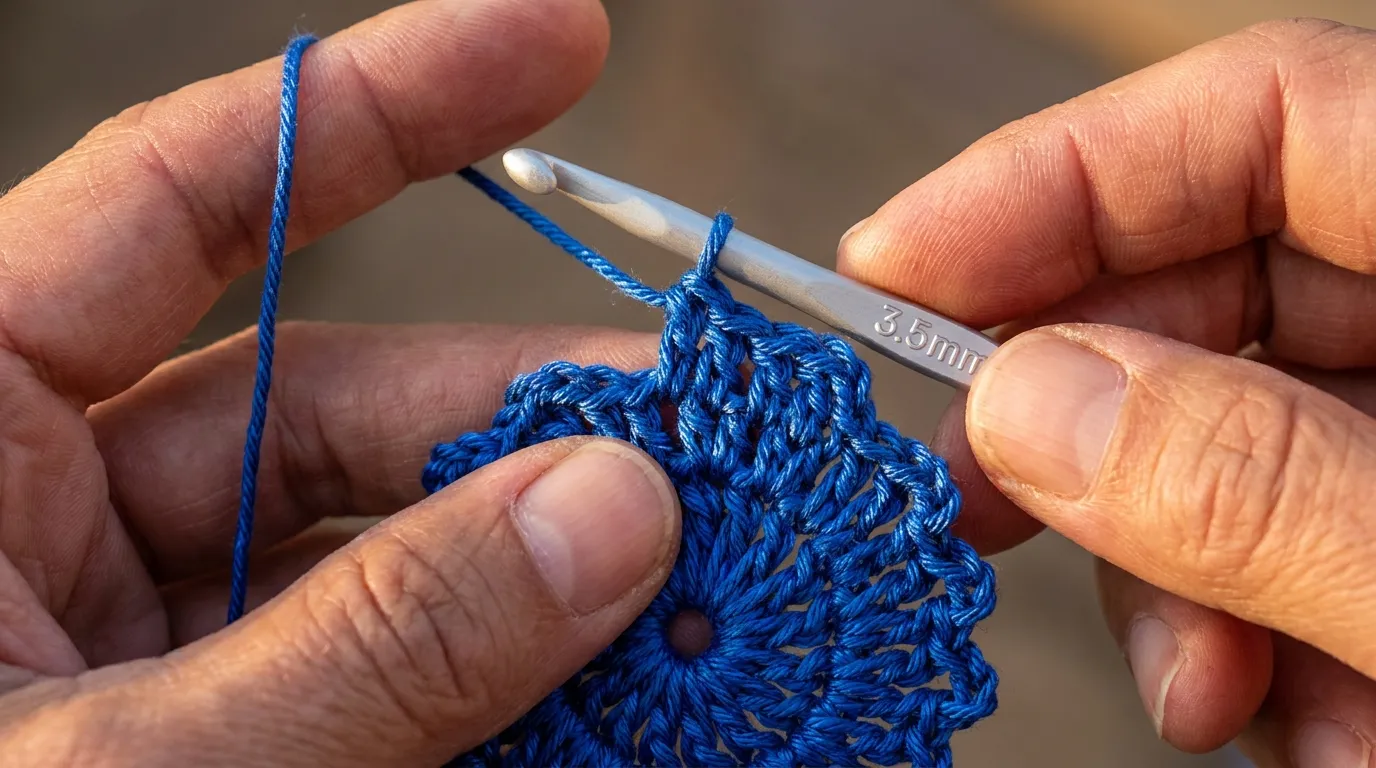
Round 1 (Navy Center): With navy, magic ring, ch 3 (counts as dc), 11 dc in ring, sl st to top of beg ch-3. (12 dc) Fasten off navy.
Round 2 (Cream Petals): Join cream with sl st in any dc, ch 3 (counts as dc), dc in same st, ch 2, sk 1 st, shell in next st, ch 2; rep from * around, ending with sk 1 st, sl st to top of beg ch-3. (6 shells, 6 ch-2 sps)
Round 3 (Navy Frame): Join navy with sl st in any ch-2 sp, ch 3 (counts as dc), 3 dc in same sp, ch 1, sc in next ch-2 sp, ch 1, shell in next ch-2 sp; rep from * around, ending ch 1, sc in beg ch-2 sp, ch 1, sl st to top of beg ch-3. (6 shells, 6 sc, ch-1 sps) Fasten off navy.
Round 4 (Squaring — Cream): Join cream with sl st in any sc, ch 3 (counts as dc), 2 dc in same sc, ch 2, sk next shell, dc in next sc, ch 2, shell in next sc, ch 2; rep from * around, ending sk next shell, sl st to top of beg ch-3. (4 shells, 4 dc, 4 ch-2 corners, ch-2 edge sps)
Round 5 (JAYG Edging — Cream): This round joins motifs to medallion and to each other. Work as follows for each motif based on its position:
-
First Motif (attached to medallion): Ch 1, sc in same sc, ch 2, sk next dc, sc in next shell center (ch-2 sp), ch 2, sk next dc, sc in next sc, ch 2, sk next shell, sc in next sc (corner) — at each corner: work (sc, ch 1, sl st to corresponding medallion ch-2 corner, ch 1, sc) in same sc, then continue around. On final side, work picots (ch 3, sl st in 3rd ch from hook) on free edges only.
-
Subsequent Motifs (JAYG to previous motifs): Work Round 5 identically, but replace ch-2 at join points with: ch 1, sl st to corresponding ch-2 sp of adjacent motif, ch 1. Join on two sides for interior motifs, three sides for edge motifs (one free edge gets picots), four sides for corner motifs (two free edges get picots).
Placement Map: Attach first ring of 4 motifs to medallion corners (North, East, South, West). Attach second ring of 8 motifs to fill the 3×4 grid. Total: 12 motifs.
Phase 3: Surface Embroidery — Radial Spokes
Thread embroidery needle with off-white floss (2 strands). On blocked medallion (RS facing), locate exact center (magic ring start). Insert needle from WS to RS at center. Work sc-slp outward along a straight line to Round 12 edge: insert hook through fabric at next dc post, pull loop through, sl st. Continue radially for 12 spokes spaced every 30 degrees (use stitch markers to mark radii at Rounds 4, 8, and 12). Fasten off on WS. Weave all ends.
7. Assembly, Mounting & Structural Integration
This runner requires no seaming — the JAYG method creates a continuous fabric. However, after all motifs are joined, the piece benefits from a thorough blocking to unify tension and open the picot border.
Blocking Protocol:
- Submerge finished runner in cool water with wool wash (suitable for cotton). Soak 15 minutes.
- Gently press out water (do not wring). Roll in towel to remove excess moisture.
- Lay flat on blocking mats. Pin to measurements: 14 × 50 inches, ensuring picot edges lie flat and motifs are square.
- Steam heavily — hover iron 1 inch above fabric, saturate with steam. Do not press directly.
- Allow to dry completely (24–36 hours) before unpinning.
8. Hardware, Accents & Embellishment Assembly
This design uses no hardware, clasps, or attached embellishments beyond the surface embroidery. The beauty resides in the stitch architecture itself. If desired, tiny mother-of-pearl buttons could be sewn at each motif center (13 total), but the pattern as written stands complete without them.
9. Blocking, Care & Maintenance
Washing: Hand wash in cool water with pH-neutral detergent. Press gently — never wring. Rinse thoroughly.
Drying: Lay flat on towel, reshape to dimensions, air dry. Avoid direct sunlight to prevent navy fading.
Blocking Maintenance: Re-block annually or after washing to restore picot crispness and motif alignment.
Storage: Roll (do not fold) around acid-free tissue tube. Store in cotton bag, not plastic.
Stain Treatment: Spot-treat immediately with cool water and mild soap. For stubborn stains, consult textile conservator — mercerized cotton releases dyes differently than standard cotton.
10. Frequently Asked Questions (FAQ)
Q: Can I use worsted weight yarn instead of DK?
A: Yes, but the runner will scale up significantly (approx. 18 × 64 inches). Use a 4.5 mm hook and expect to use 50% more yardage. The drape will be heavier and less delicate. Gauge swatching is essential.
Q: My medallion ruffles or cups — how do I fix it?
A: Ruffling = too many increases (tension too loose). Cupping = too few increases (tension too tight). Adjust hook size by 0.5 mm. If only slight, aggressive steam blocking often corrects minor distortion. Ensure you are not accidentally adding stitches at the join.
Q: How do I keep the JAYG joins invisible and even?
A: Work the joining sl st loosely — it should match the height of a ch-2 space. Use a hook one size larger (4.0 mm) for the join round only if your tension runs tight. Pin motifs in place before joining to verify alignment.
Q: Can I make this runner longer or shorter?
A: Absolutely. The grid is modular. Add or remove motif rows in multiples of 3 (width) or 4 (length). Each additional motif row adds approx. 3.5 inches. Adjust yardage proportionally (approx. 30 yds navy + 20 yds cream per motif).
11. Community Call-to-Action
You have stitched a piece of heirloom textile art — a runner that will witness countless meals, conversations, and quiet mornings. I would be honored to see your finished make. Share it on Instagram with #NailItHomeDaisyRunner and tag @NailItHome — your interpretation of color, tension, and styling inspires our entire community. Pin the pattern on Pinterest for your next cottagecore tablescape project. And if this pattern brought you joy, consider leaving a note in the comments below — your feedback shapes what we design next.
Happy stitching,
Aurelia Thorne
Master Fiber Artist & Lead Pattern Curator, Nail It Home


