

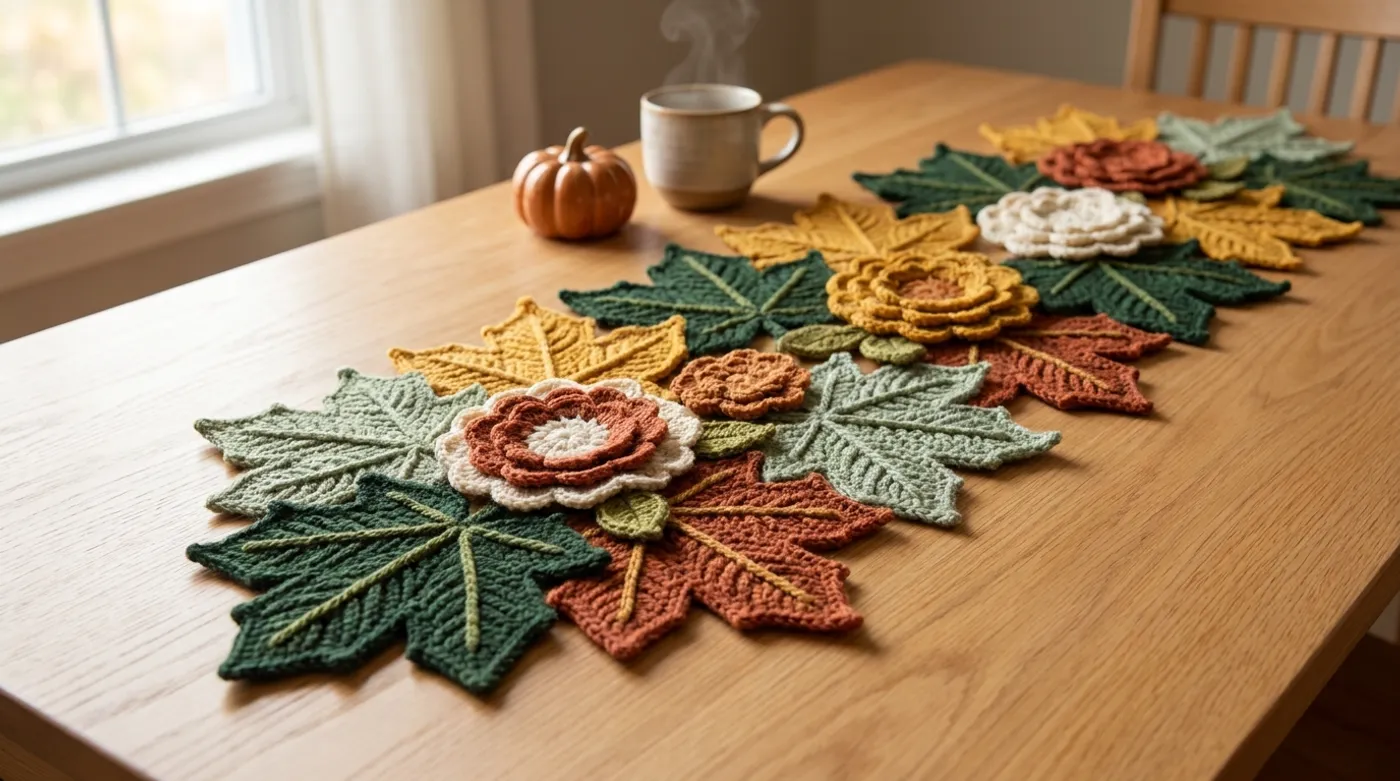
Autumn Maple Leaf & Rosette Mosaic Table Runner: Free Pattern & Tutorial
Transform your dining space with this heirloom mosaic table runner, showcasing sculptural five-lobed maple leaves, tiered 3D scalloped rosettes, and rich autumn foliage.

Pattern Specifications
There is a quiet magic in early autumn when the canopy transforms into an undulating mosaic of ember tones—amber ochre, deep forest canopy, smoldering terracotta, and dusty sage. Bringing that vibrant organic tapestry indoors requires more than just autumn colors; it calls for tactile dimension, sculptural forms, and heirloom-level craft. The Autumn Maple Leaf & Rosette Mosaic Table Runner was designed as an homage to the forest floor at peak foliage.
Instead of a conventional, rigid rectangular table runner with straight edges, this piece celebrates organic asymmetry. Dozens of individually crocheted five-lobed Canadian sugar maple leaves are arranged in an interlocking botanical mosaic. Rising from the leaf canopy are multi-tiered, three-dimensional circular rosettes with scalloped shell petals, accented by delicate olive leaflets. Draped down the center of an oak dining table, it instantly becomes the centerpiece of harvest dinners, Thanksgiving gatherings, or quiet morning coffee rituals.
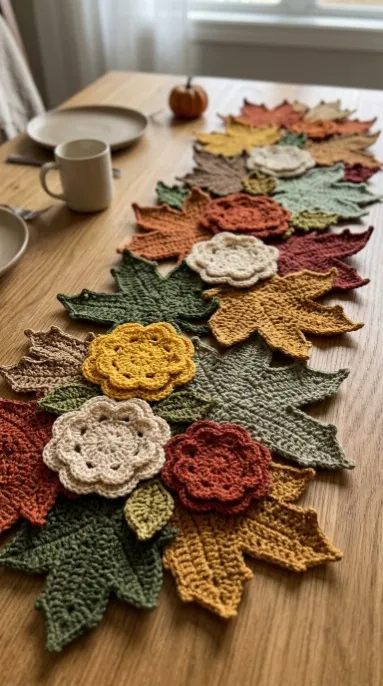
Because this design is built on modular motifs, you can customize its footprint effortlessly—crochet a compact console accent, a dramatic trailing centerpiece for an 8-seater holiday banquet, or a set of matching leaf-and-rosette trivets. Below, you will find our comprehensive guide covering fiber selection, the mechanics of five-point leaf geometry, tiered rosette construction, blocking techniques, and seamless mosaic assembly.
Pattern Overview & Finished Dimensions
- Design Style: Freeform interlocking botanical mosaic table runner (modular motif assembly).
- Finished Width: Approx. 14 to 16 inches (35 to 40 cm) at the widest leaf points.
- Finished Length: Approx. 54 inches (137 cm) as written for a 4-to-6-person dining table (easily lengthened or shortened in 6-inch increments).
- Motif Dimensions:
- Large Five-Lobed Maple Leaf: Approx. 6.5 in wide x 6.5 in tall (16.5 cm x 16.5 cm).
- Medium Accent Leaf: Approx. 5 in wide x 5 in tall (12.7 cm x 12.7 cm).
- Layered 3D Rosette: Approx. 3.75 in diameter (9.5 cm).
- Botanical Leaflet: Approx. 2.5 in long x 1.25 in wide (6.4 cm x 3.2 cm).
- Total Motif Count for 54-inch Runner:
- 18 Large Maple Leaves (6 Forest Green, 5 Golden Mustard, 4 Terracotta Rust, 3 Sage Green).
- 8 Medium Accent Leaves (3 Taupe/Sand, 3 Wine Burgundy, 2 Forest Green).
- 7 Layered 3D Rosettes (3 Cream/Ecru, 2 Terracotta Rust, 2 Golden Mustard).
- 10 Botanical Leaflets (Olive Moss Green).
Materials & Haberdashery Checklist
The choice of yarn is vital for a project of this nature. Table runners must endure warm serving dishes, occasional spills, and frequent handling while maintaining razor-sharp stitch definition. We strongly recommend a smooth, combed or mercerized 100% worsted weight cotton. Cotton provides structural heft, zero pilling, and responds beautifully to wet blocking.
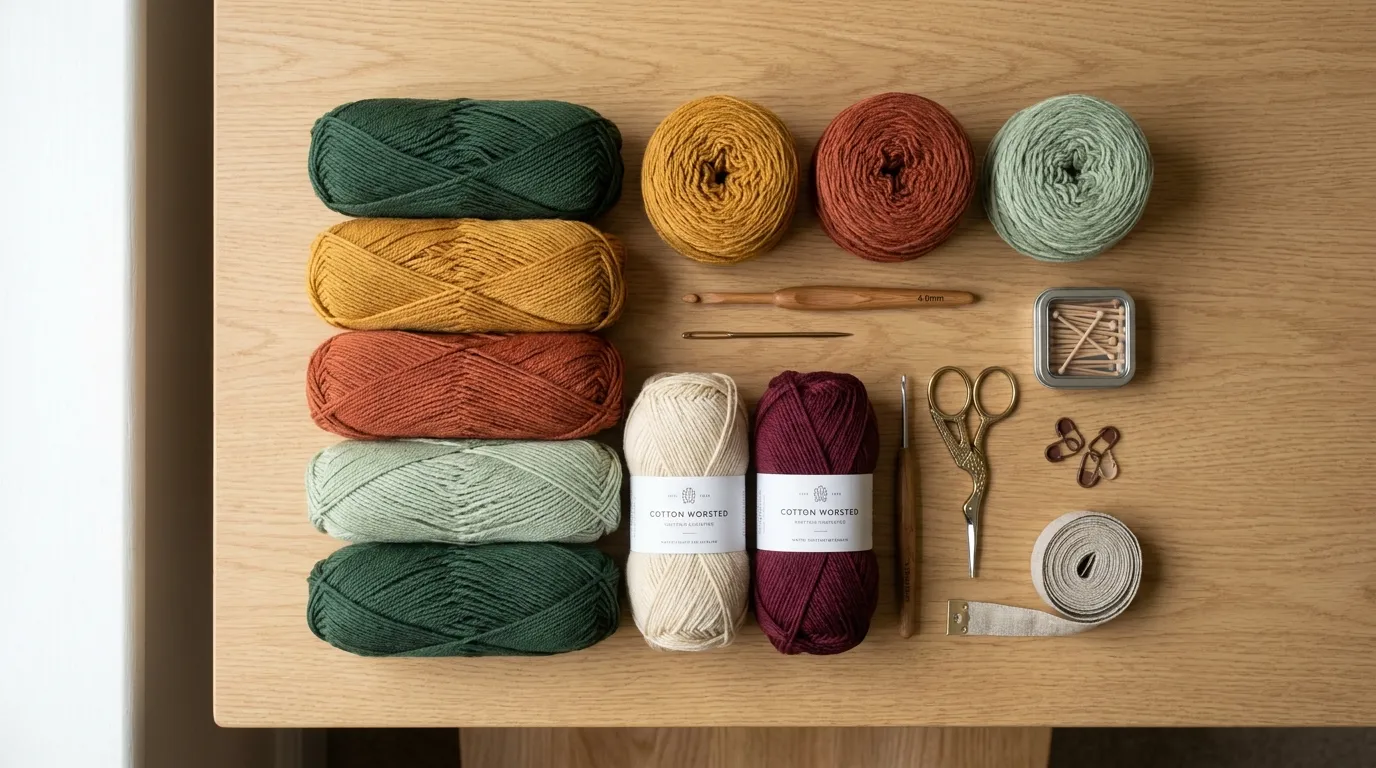
Yarn Requirements (Worsted Weight / Medium Category 4):
- Color A (Deep Forest Green): Approx. 280 yards (256 m) — 2 skeins (100g each).
- Color B (Golden Mustard Ochre): Approx. 240 yards (219 m) — 2 skeins (100g each).
- Color C (Terracotta Rust): Approx. 220 yards (201 m) — 2 skeins (100g each).
- Color D (Soft Sage Green): Approx. 180 yards (165 m) — 1 skein (100g).
- Color E (Warm Cream / Ecru): Approx. 80 yards (73 m) — 1 skein (50g).
- Color F (Deep Burgundy Wine & Olive): Approx. 50 yards (46 m) total for accent leaflets and small contrast points.
Tools & Notions:
- Crochet Hook: 4.0 mm (US G-6) inline wooden or ergonomic aluminum hook. (A slightly smaller hook than standard for worsted cotton yields firm, dense fabric that resists sagging).
- Tapestry Needle: Size 14–16 bent-tip blunt tapestry needle for weaving ends and invisible joining.
- Scissors: Sharp vintage embroidery or craft shears.
- Blocking Equipment: Interlocking foam blocking mats (minimum 4 squares) and at least 60 rust-proof stainless steel T-pins or wooden blocking pegs.
- Measuring Tape: Flexible linen or fiberglass tape measure.
- Locking Stitch Markers: At least 12 to 15 markers for temporary layout pinning.
Stitch Abbreviations (US Terms)
- ch: chain
- sl st: slip stitch
- sc: single crochet
- hdc: half double crochet
- dc: double crochet
- tr: treble (triple) crochet
- dtr: double treble crochet (yarn over 3 times)
- picot: ch 3, sl st in the third ch from hook (creates sharp leaf serrations and petal points)
- BLO: back loop only
- FLO: front loop only
- inc: increase (work 2 sts into the same stitch or loop)
- dec: decrease (work 2 sts together)
- MR: magic ring / adjustable loop
- RS / WS: Right Side / Wrong Side
- [ ] / * *: repeat enclosed sequence as instructed
Architectural Mechanics: Understanding the Mosaic Flow & Leaf Geometry
Creating an organic, flowing mosaic without gaps requires understanding two architectural concepts: graduated lobe vectoring and planar relief stratification.
1. Graduated Lobe Vectoring (The Maple Leaf)
A real maple leaf does not radiate symmetrically in a circle. It features a dominant vertical center lobe flanked by two wide lateral lobes, followed by two smaller basal wings. In crochet, we achieve this natural silhouette by working in concentric rounds around an oval core, then fanning out into short-row segments with graduated stitch heights (sc $\rightarrow$ hdc $\rightarrow$ dc $\rightarrow$ tr $\rightarrow$ dtr $\rightarrow$ picot $\rightarrow$ descending down). The sharp picot tips at the apex of each lobe give the motif its authentic Canadian maple leaf silhouette.
2. Planar Relief Stratification (The 3D Rosette)
To avoid the table runner looking like a flat paper cut-out, we introduce vertical tactile relief. By working the central floral rosettes in tiered loop construction—working the base circular disk in double crochet, then turning back to work scalloped petals into the leftover Front Loops (FLO) of inner rounds while building the next foundation tier in the Back Loops (BLO)—the petals naturally lift and curl forward. When placed on the runner, these rosettes act as dimensional studs that anchor the overlapping leaf canvas.
Step-by-Step Stitch Pattern
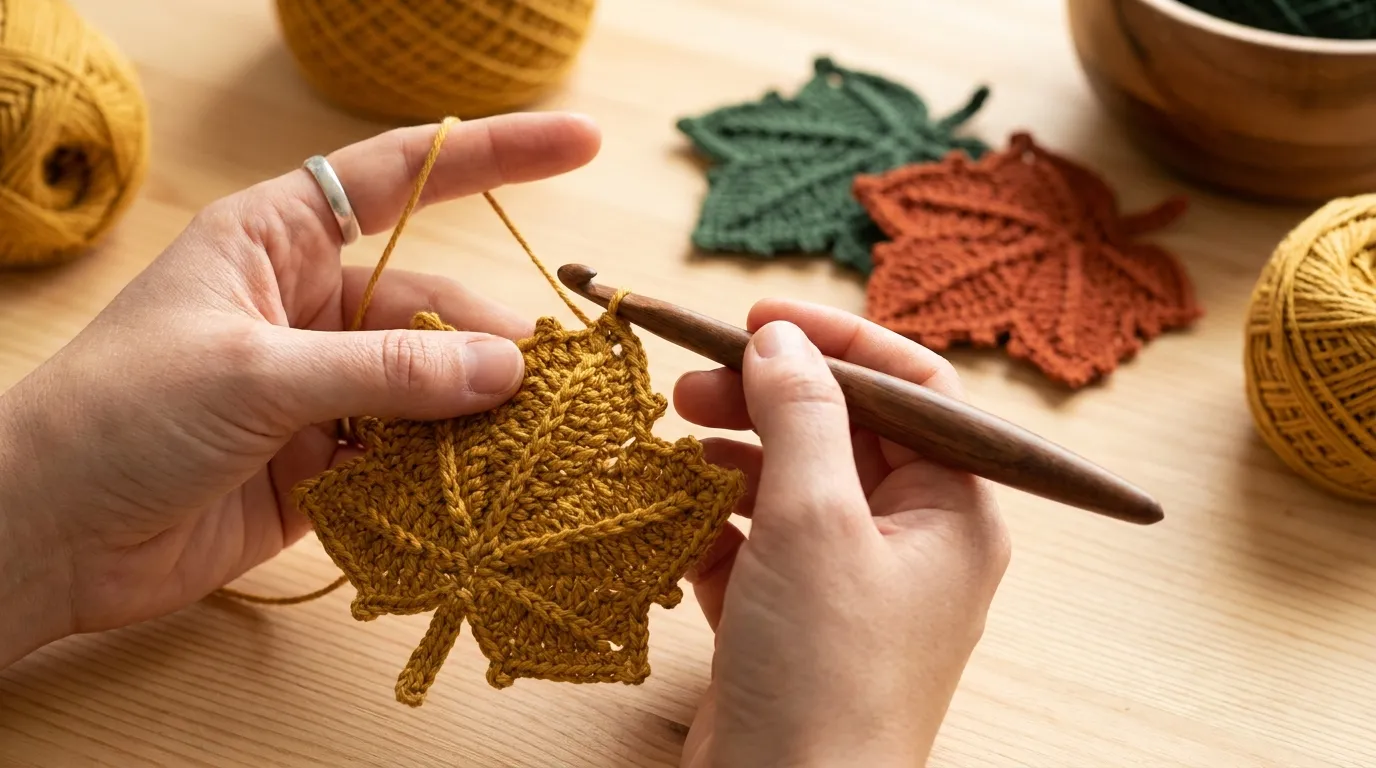
Motif 1: The Large Five-Lobed Maple Leaf
(Make 18 total: 6 Forest Green, 5 Mustard, 4 Terracotta, 3 Sage)
Central Core & Foundation:
- Foundation: Make a Magic Ring (MR).
- Round 1 (RS): Ch 3 (counts as first dc), work 14 dc into the magic ring. Sl st to top of beg ch-3 to join. Do not turn. (15 dc)
- Round 2: Ch 2 (counts as hdc), hdc in same st, 2 hdc in each of the next 11 sts; leave remaining 3 sts unworked (this gap forms the leaf stem notch). Turn. (24 hdc)
Lobe 1 (Left Lower Basal Lobe):
- Row 1: Ch 1, sc in first 4 sts. Turn. (4 sc)
- Row 2: Ch 1, sc in first st, hdc in next st, 2 dc in next st, dc in last st. Turn. (5 sts)
- Row 3 (Shaping & Picot): Ch 1, sc in first st, dc in next st, [dc, tr, picot, tr] all in next st, dc in next st, sl st in last st. Fasten off or sl st down edge back to Round 2 base.
Lobe 2 (Left Lateral Lobe):
- Join yarn with sl st in next open st along Round 2 base rim.
- Row 1: Ch 1, sc in same st, hdc in next st, dc in next 4 sts. Turn. (6 sts)
- Row 2: Ch 2, dc in first 2 sts, 2 tr in next st, tr in next 2 sts, dc in last st. Turn. (7 sts)
- Row 3 (Picot Apex): Ch 1, sc in first st, hdc in next st, dc in next st, [tr, dtr, picot, dtr, tr] in center st, dc in next st, hdc in next st, sl st in last st. Fasten off.
Lobe 3 (Center Apex Lobe — Tallest):
- Join yarn with sl st in next open st along Round 2 base.
- Row 1: Ch 1, sc in same st, dc in next 5 sts, sc in next st. Turn. (7 sts)
- Row 2: Ch 3 (counts as dc), dc in next st, 2 tr in next st, tr in next st, 2 tr in next st, dc in next 2 sts. Turn. (9 sts)
- Row 3 (Grand Picot Peak): Ch 1, sc in next 2 sts, hdc in next st, dc in next st, [tr, 2 dtr, ch 4 picot, 2 dtr, tr] in center apex st, dc in next st, hdc in next st, sc in next st, sl st in last st. Fasten off.
Lobe 4 (Right Lateral Lobe):
- Work mirror image of Lobe 2 across the next 6 sts of Round 2 base.
Lobe 5 (Right Lower Basal Lobe):
- Work mirror image of Lobe 1 across the final 4 sts of Round 2 base.
Leaf Stem & Perimeter Veining:
- Join yarn with sl st at the center bottom notch between Lobe 1 and Lobe 5.
- Stem: Ch 10, sl st in 2nd ch from hook and in each remaining 8 ch back to leaf base.
- Perimeter Slip Stitch Ribbing (Optional for extra firmness): Surface slip stitch from the stem upward along the center vein of Lobe 3, then sl st along the outer perimeter contours. Fasten off, leaving a 12-inch tail for assembly.
Motif 2: Layered 3D Scalloped Rosette
(Make 7 total: 3 Cream, 2 Terracotta Rust, 2 Golden Mustard)
The rosette is constructed in three tiers, utilizing the front and back loops of previous rounds to create self-supporting concentric petals that sit raised above the leaf canopy.
Tier 1 (Center Heart Disk):
- Round 1 (RS): Using chosen rosette color, MR, ch 2 (counts as hdc), 9 hdc in ring. Sl st to beg ch-2. (10 hdc)
- Round 2: Ch 1, 2 sc in each st around in BLO. Sl st to first sc. (20 sc)
Tier 2 (Inner Scalloped Petals):
- Turn piece slightly to face the unworked Front Loops (FLO) of Round 1:
- Petal Round 1 (FLO): [Sl st into next unworked front loop, ch 1, work (hdc, 2 dc, hdc) in same loop, sl st in next loop] 5 times. (5 inner curved petals). Fasten off inner petal round or push petals forward.
Tier 3 (Middle Foundation & Petal Flare):
- Return to the back loops of Round 2:
- Round 3: Ch 2, [1 dc in BLO of next st, 2 dc in BLO of following st] around. Sl st to join. (30 dc)
- Petal Round 2 (Outer Scallop Rim): [Skip 1 st, 5 dc in next st (shell created), skip 1 st, sl st in next st] around. You will have 7 to 8 sweeping shell petals that form a delicate scalloped edge around the dimensional center.
- Fasten off, leaving an 18-inch yarn tail for attaching to the runner.
Motif 3: Botanical Accent Leaflet
(Make 10 total: Olive Moss Green / Taupe)
- Foundation: Ch 11.
- Round 1: Sl st in 2nd ch from hook, sc in next ch, hdc in next ch, dc in next 3 ch, hdc in next ch, sc in next ch, [sc, ch 2, sl st in 2nd ch from hook (tiny tip picot), sc] in the final end chain.
- Opposite Side of Chain: Working along the bottom loops of the foundation chain: sc in next ch, hdc in next ch, dc in next 3 ch, hdc in next ch, sc in next ch, sl st into base.
- Stem Tail: Ch 4, sl st in 2nd ch from hook and next 2 ch. Sl st to leaf base. Fasten off with 8-inch tail.
Assembly, Layout Mapping & Invisible Joinery
Once all individual motifs are crocheted, the real artistry begins. Joining a mosaic runner requires a methodical approach to ensure the piece lays completely flat on your table without buckling or twisting.
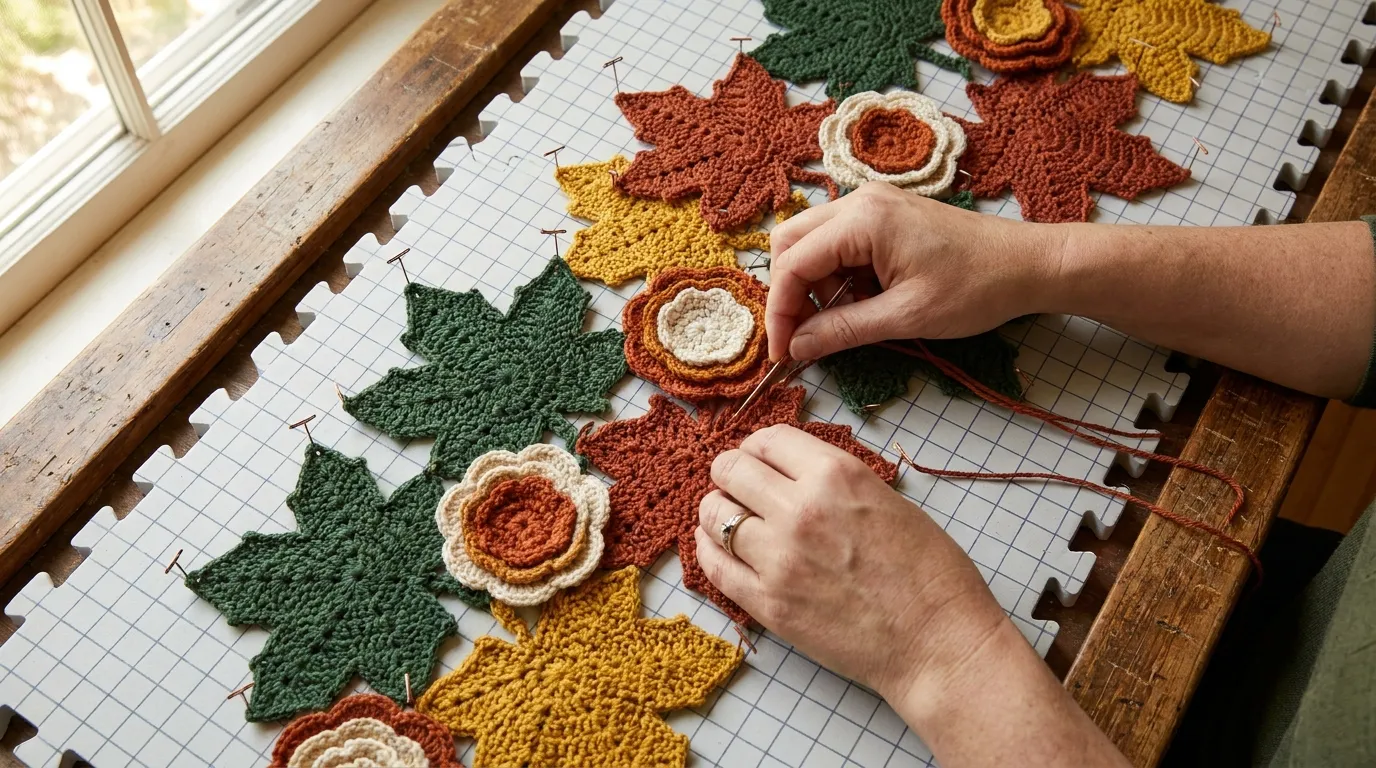
Step 1: Layout Mapping on Blocking Mats
- Clear a long workspace and assemble your interlocking foam blocking mats. If you don’t have a 54-inch continuous board, work in 24-inch sections.
- Establish your Center Spine Line using the printed grid lines on the foam mat.
- Lay down the largest maple leaves first, pointing stems inward toward the center and letting the pointed lobes fan outward to form the scalloped perimeter.
- Color Distribution Rule: Avoid clustering identical colors together. Alternate Forest Green, Golden Mustard, Terracotta, and Sage so the eye travels smoothly down the length of the table.
- Intersperse the medium leaves to fill the triangular negative spaces between large lobes.
- Position the 3D Scalloped Rosettes at key intersection junctions—especially where three or four leaf edges meet. The rosettes act as decorative visual anchors and conceal multi-motif seams.
- Tuck the small olive leaflets beneath the rosette petals, pointing their tips outward for an organic botanical flourish.
- Secure every motif to the foam mat with rust-proof T-pins through the lobes and centers.
Step 2: Invisible Wrong-Side Joinery
- Once you are satisfied with the composition, thread your bent-tip tapestry needle with an 18-inch length of matching yarn (or a neutral taupe thread).
- Starting from one end, flip small overlapping segments carefully onto their Wrong Side (WS).
- Where leaves overlap by 1/2 inch to 1 inch, work a whipstitch or mattress stitch catching only the interior wrong-side loops of both fabrics.
- Tension Tip: Keep your join stitches firm but elastic. Overly tight joining will cause the runner to cup and puck up on the dining table; overly loose stitches will cause the motifs to pull apart when lifted.
- Secure the rosettes: Sew through the solid circular base disk of the rosette down into the overlapping leaves beneath. Keep the outer scalloped petals free so they hover organically above the leaves.
- Weave all joining tails securely back and forth through the dense double-crochet leaf bodies. Trim clean.
Structural Wet Blocking & Dimensional Finishing
Cotton yarn has exceptional memory when properly blocked. Taking time to block your runner transforms a lumpy, curled collection of motifs into a sleek, magazine-worthy heirloom piece.
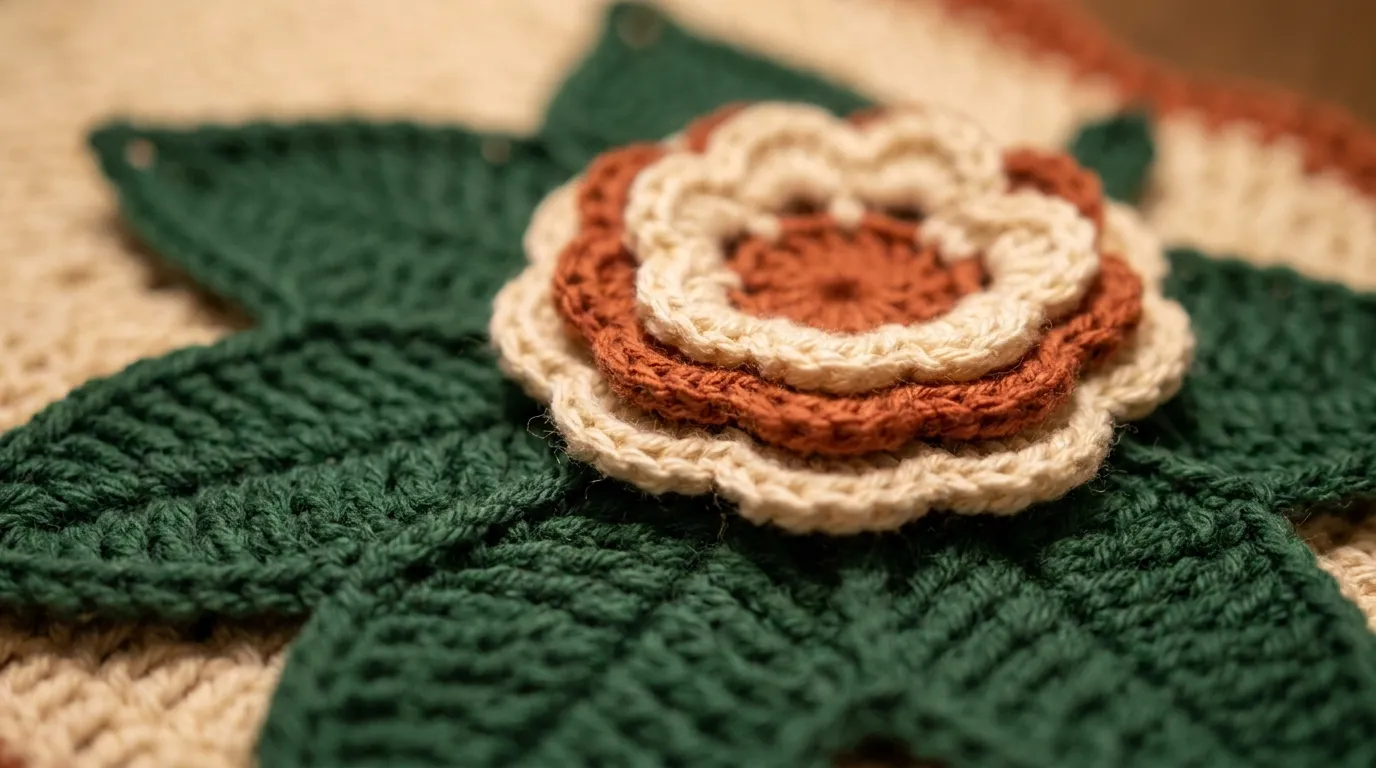
The Two-Stage Blocking Technique:
Stage 1: Individual Leaf Pinning (Pre-Assembly or Post-Assembly)
- Fill a clean basin with lukewarm water and add a few drops of no-rinse delicate wool/fiber wash.
- Submerge the runner (or individual motifs) and gently press so the water fully penetrates the cotton fibers. Soak for 15 minutes.
- Drain the water and gently roll the runner in a thick bath towel like a jelly roll. Press down firmly to absorb excess moisture. Never wring or twist crocheted motifs.
- Lay the damp runner flat on your gridded blocking boards.
- Place a T-pin through each of the picot tips on every leaf lobe, gently pulling outward to accentuate the crisp Canadian maple points.
- Pin along the center leaf stems to keep the runner straight.
- Allow to air-dry completely (typically 24 to 36 hours in a well-ventilated room).
Stage 2: Dimensional Steam Finishing for Rosettes
- Once dry, remove the T-pins.
- If any rosette petals have flattened during drying, cup your fingers around the petals to lift them upward.
- Hold a garment steamer or steam iron 3 to 4 inches above the rosettes (never press iron directly against the yarn). Let the gentle steam relax the cotton, then shape the petals with your fingertips into a soft, blooming curve. Let cool.
Care, Cleaning & Seasonal Table Setting Styling Guide
Care Instructions:
- Routine Maintenance: For crumbs and light dust, simply lift and shake the runner gently outdoors, or use a handheld upholstery brush.
- Washing: When spills happen, hand wash in cold water with mild liquid detergent. Lay flat on a clean dry towel to air-dry. Re-pin picot tips if needed.
- Heat Resistance: Because this piece is made from 100% natural cotton, it naturally resists moderate heat and can safely support warm serving bowls and teapots. However, avoid placing sizzling cast-iron skillets directly off the stovetop onto delicate rosette petals.
Dining Table Styling Ideas:
- Rustic Harvest Feast: Center the runner on a raw timber or light oak table. Pair with matte ceramic stoneware, antique horn-handled cutlery, and miniature white and orange heirloom pumpkins clustered around the leaves.
- Thanksgiving Elegance: Layer the runner over a wide hemstitched ivory linen cloth. Arrange brass tapered candleholders along the runner’s edges and intersperse dried cinnamon sticks and eucalyptus sprigs.
- Intimate Morning Coffee: Fold the runner to a shorter footprint or drape it diagonally across a circular breakfast nook table, paired with handcrafted ceramic mugs and a bowl of fresh orchard apples.
Frequently Asked Questions
Can I use acrylic yarn instead of cotton for this runner?
While acrylic yarn is budget-friendly, we strongly advise against it for a structured table runner. Acrylic does not hold crisp wet blocking well, tends to stretch and buckle under warm dishes, and lacks the structural heft that keeps the leaf points lying flat against the wood. Combed or mercerized worsted cotton is the gold standard for home decor runners.
How do I adjust the runner length for my specific dining table?
To adjust the length, add or subtract motifs in clusters of 3 (two large maple leaves and one rosette/leaflet pair). Each cluster adds approximately 5.5 to 6 inches (14 to 15 cm) to the overall length. For an 8-foot (2.4 m) table, increase the motif count by approximately 8 to 10 additional large leaves.
My maple leaf lobes are curling at the tips. How do I fix this?
Curling is natural as you crochet due to stitch tension. Wet blocking with stainless steel T-pins pulled through the picot loops will permanently relax and flatten the cotton fibers. If curling persists, drop down half a hook size (from 4.0 mm to 3.5 mm) or ensure your turning chains are worked loosely.
Can I machine wash the completed runner?
We recommend gentle hand washing only. The intricate overlapping points and 3D floral rosettes can snag on machine agitators or distort under high-speed spin cycles.
Did you make the Autumn Maple Leaf & Rosette Mosaic Table Runner? We would love to see your color variations and festive table styling! Tag your creations on Instagram or Pinterest at @NailItHome.


