

Autumn Harvest Rosette Tablerunner: Free Crochet Pattern & Tutorial
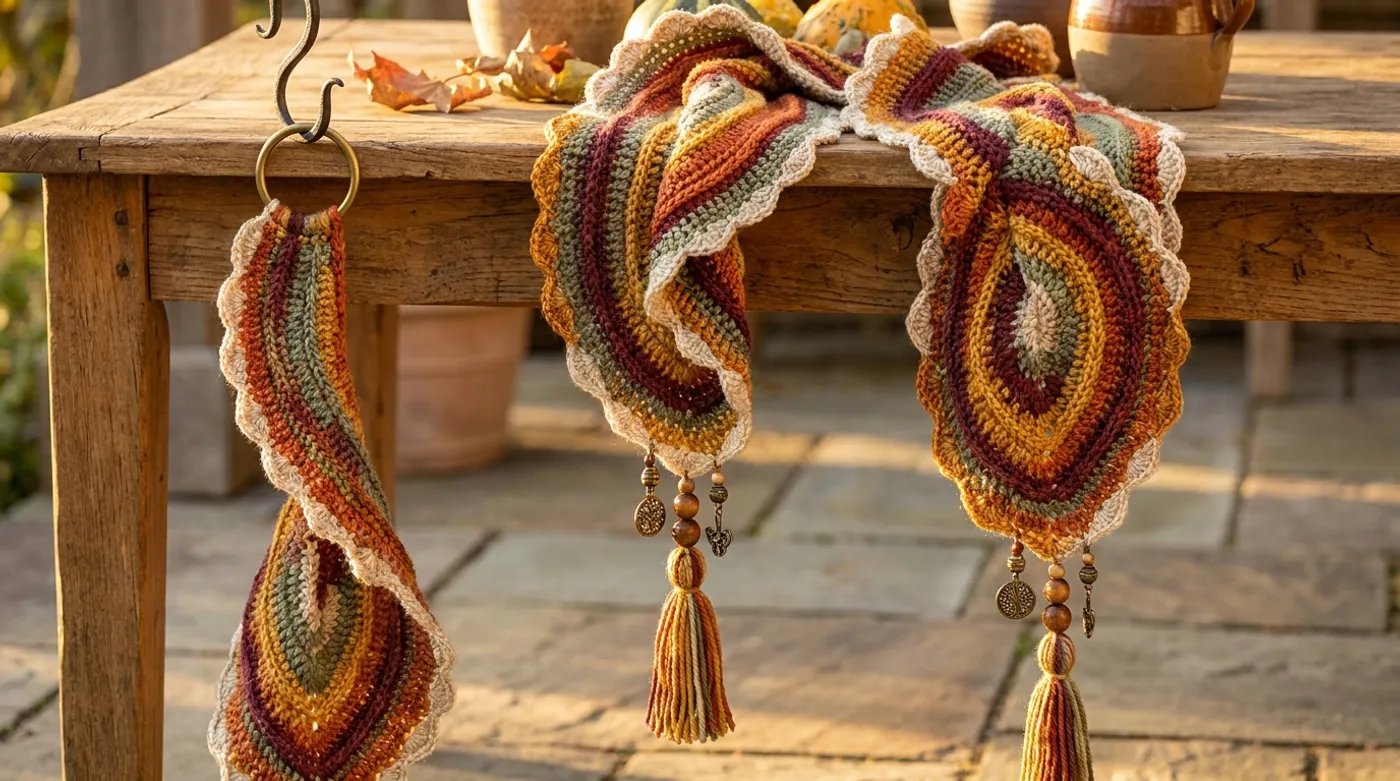
Create a stunning autumnal table runner featuring spiral rosette motifs, helical geometry, and delicate tassel fringe. This free crochet pattern includes step-by-step instructions for the signature spiral twirl technique, scalloped edging, and wooden bead accents.

Pattern Specifications
1. Introduction & Design Inspiration
There is a particular hush that settles over the workshop when autumn light slants through the windows — golden, deliberate, outlining every stitch in a way that feels almost intentional. This tablerunner was born in that light. I wanted to capture the architecture of the season: the spiral of a drying seed pod, the helical climb of a vine, the concentric rings of a cross-sectioned gourd. The result is a piece that doesn’t merely sit on a table; it grows across it.
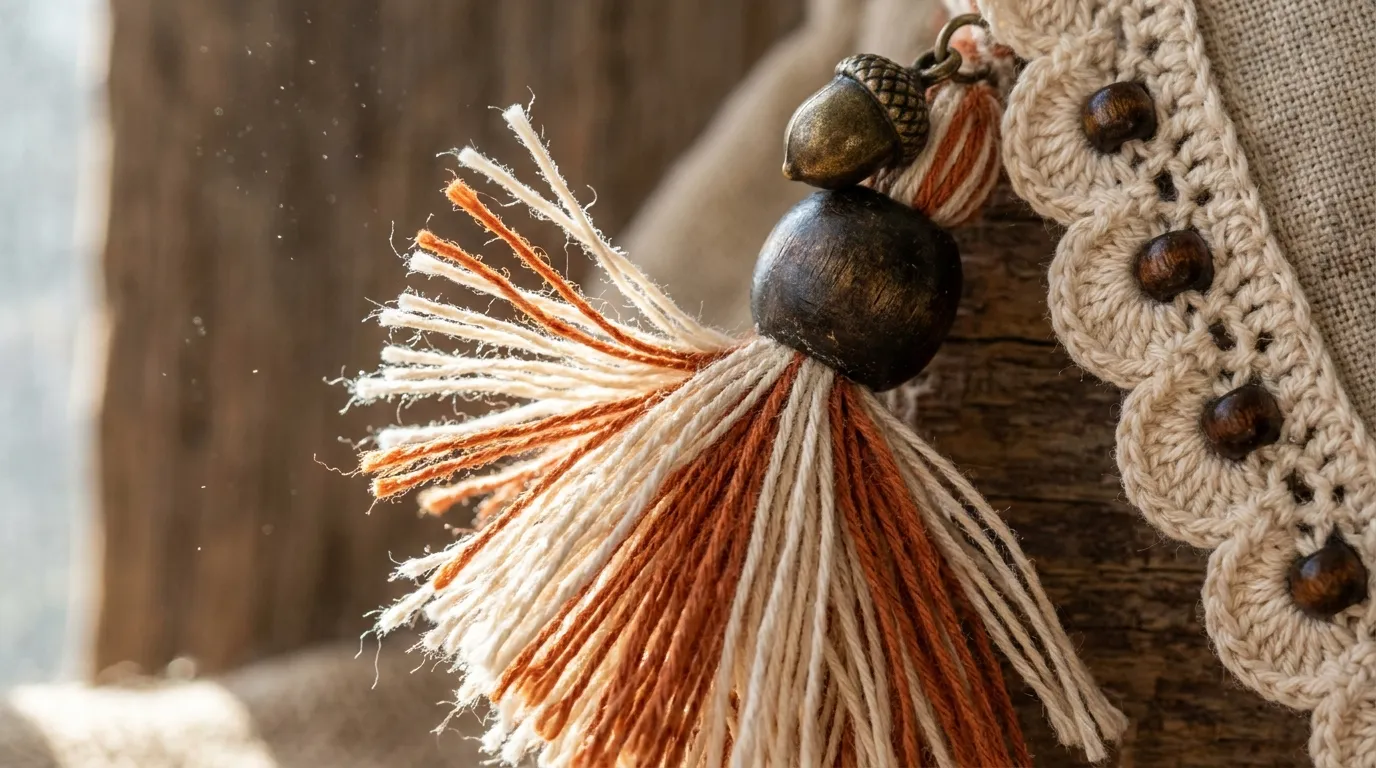
The Autumn Harvest Rosette Tablerunner employs a signature spiral twirl/helix geometry — each rosette begins at its center and unfurls outward in a continuous, unbroken coil of double crochet ridges, creating a three-dimensional bloom that catches light differently from every angle. Twelve such rosettes, joined by a lattice of half-double-crochet mesh, form the runner’s spine. A deep scalloped shell edging frames the length, while a cascade of hand-tied tassels — each crowned with a turned wooden bead — anchors the ends with tactile weight.
This pattern is written for the crocheter who delights in structural nuance: the way a back-loop-only ridge creates shadow, how a strategic increase rate governs spiral curvature, the rhythm of joining motifs without breaking yarn. You’ll work in the round for the rosettes, in rows for the joining mesh, and in a hybrid spiral-row technique for the edging. The result is a heirloom-quality textile, approximately 30 inches long by 12 inches wide, with 10–12 visible helical turns per rosette.
Pour a cup of spiced tea. Clear your largest blocking surface. Let’s begin.
2. Pattern Overview & Finished Dimensions
-
Finished Length: 30 inches (76 cm) vertical drop, including tassels
-
Finished Width: 12 inches (30.5 cm) at widest point (rosette diameter)
-
Rosette Count: 12 motifs (6 per side, offset)
-
Helical Turns per Rosette: 10–12 complete revolutions
-
Structure: Modular spiral rosettes joined by HDC mesh lattice; continuous scalloped edging; tassel fringe at both short ends
-
Weight: ~185 g / 6.5 oz (varies by fiber blend)
-
Drape: Medium-firm; holds spiral dimension while conforming to table surface
-
Reversible: Yes — both faces present distinct but harmonious textures (ridge-forward vs. valley-forward)
Fit Notes: Designed for tables 24–36 inches wide. For longer tables, add rosette pairs in increments of 2 (each pair adds ~4.5 inches). The helical geometry means width remains constant regardless of length.
3. Materials, Fiber & Hardware Checklist
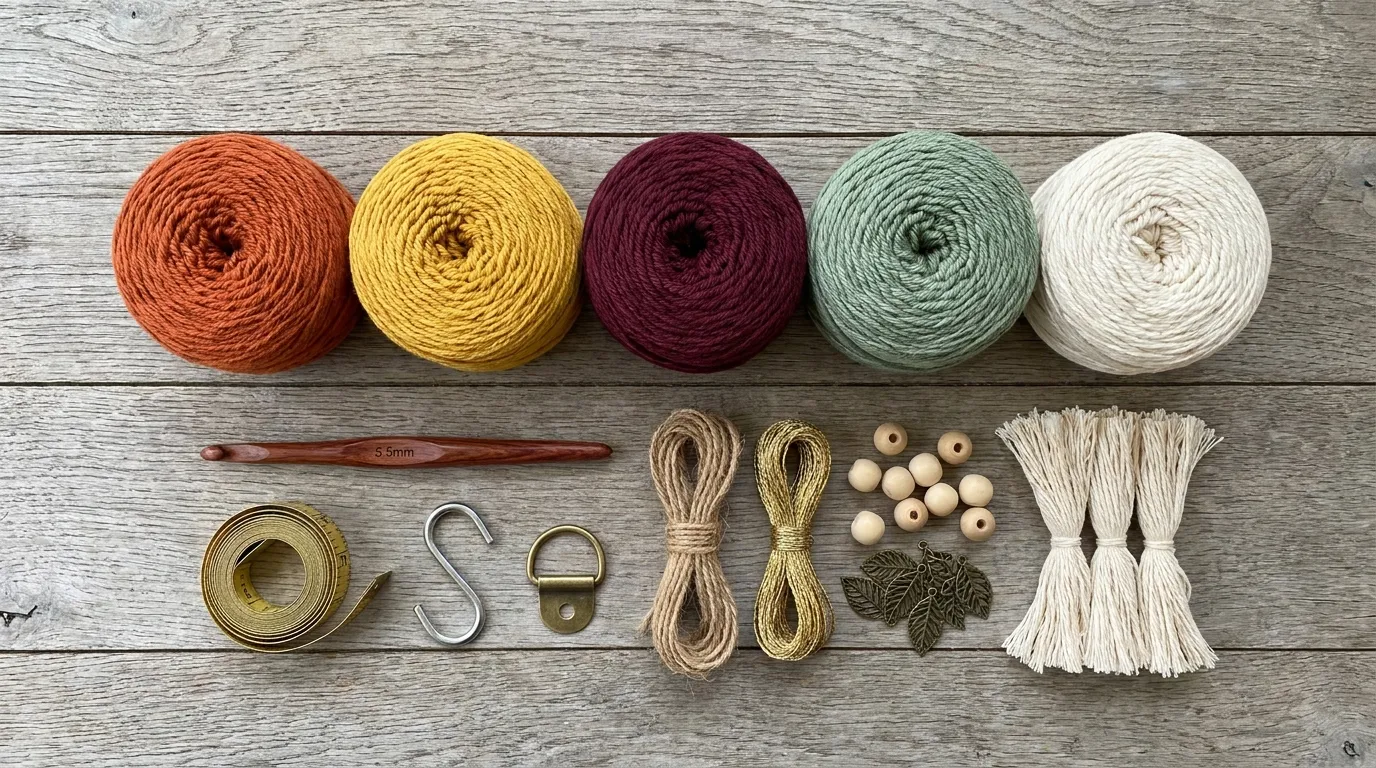
Yarn (Worsted / 4 / Medium):
-
Color A — Burnt Sienna: 220 yds (201 m) — primary rosette spiral
-
Color B — Golden Ochre: 140 yds (128 m) — secondary rosette accent rounds
-
Color C — Cream: 80 yds (73 m) — joining mesh, edging, tassels
-
Color D — Sage Green: 40 yds (37 m) — accent piping round (optional)
Recommended fibers: 100% cotton for crisp stitch definition, wool blend for warmth and bloom, or acrylic for washability. Avoid slippery silks or single-plies — the spiral architecture demands stitch memory.
Tools & Notions:
-
5.0 mm (H-8) crochet hook — or size needed to obtain gauge
-
4.5 mm (7) hook — for tighter edging tension (optional)
-
Tapestry needle (blunt tip, large eye)
-
Sharp scissors
-
Blocking mats + T-pins (minimum 36” length)
-
Steam iron or garment steamer
-
Hardware: 2 × 1-inch metal S-hooks (antiqued brass or blackened steel), 1 × 1.5-inch hanging ring (matching finish)
-
Accents: 24 × 12mm turned wooden beads (natural or stained walnut), 12 × 8mm wooden spacer beads
-
Tassel Form: 4-inch cardboard template or tassel maker
4. Stitch Abbreviations (US Terms)
| Abbreviation | Meaning |
|---|---|
| ch | chain |
| sl st | slip stitch |
| sc | single crochet |
| hdc | half double crochet |
| dc | double crochet |
| tr | treble crochet |
| BLO | back loop only |
| FLO | front loop only |
| inc | increase (2 sts in same st) |
| dec | decrease (sc2tog or hdc2tog as specified) |
| RS | right side |
| WS | wrong side |
| sp | space |
| st(s) | stitch(es) |
| rnd(s) | round(s) |
| rep | repeat |
| * * | repeat instructions between asterisks |
| [ ] | stitch count for round/row |
Special Stitches:
-
Standing DC: Begin with slip knot on hook, yo, insert in indicated st, yo, pull up loop, (yo, pull through 2 loops) twice. Counts as first dc.
-
Invisible Join: Cut yarn, pull through last st, thread needle, insert under both loops of first st of round, pull through, insert into back loop of last st worked, pull through to WS. Weaves in end simultaneously.
-
Shell (5-dc Shell): 5 dc in indicated st/sp.
-
Picot-3: Ch 3, sl st in 3rd ch from hook.
5. Architectural Mechanics / Technique Deep-Dive
The Spiral Rosette — Why It Works
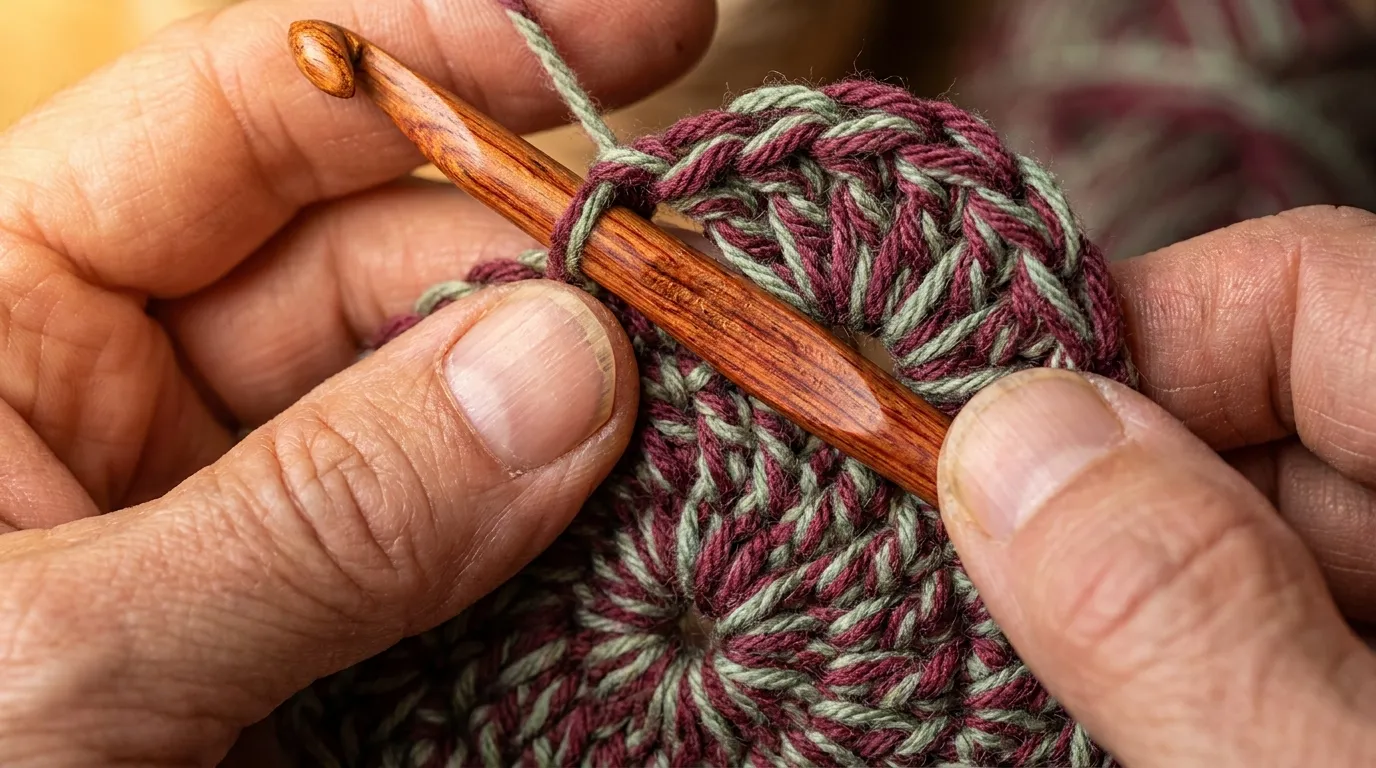
Traditional granny-square motifs grow in discrete rounds with visible seams. Our rosette grows as a continuous spiral — no joining, no turning chains, no seam line. This is achieved by working in the round without joining, placing each new stitch directly into the next available stitch of the previous revolution. The result: a seamless coil where the “beginning” and “end” of each round dissolve into one another.
Ridge Formation via BLO: Every dc round is worked BLO (back loop only). This pushes the front loop forward, creating a pronounced horizontal ridge that catches light and casts shadow — the “fluting” you see in the photographs. The ridges spiral outward like growth rings, giving each rosette its sculptural depth.
Increase Geometry: To maintain a flat(ish) spiral that doesn’t cup or ruffle, we follow a logarithmic increase rate: 12 increases distributed evenly per revolution for the first 4 revolutions, then 8 increases per revolution for revolutions 5–8, then 6 increases per revolution for revolutions 9–12. This mimics natural phyllotaxis — the same mathematics governing sunflower seed heads and pinecone scales.
The Joining Mesh — Structural Integrity: A simple hdc mesh (ch 1, skip 1, hdc in next) joins rosettes at their “equators” — the widest circumference. This mesh provides lateral stability while remaining flexible enough to drape. The mesh is worked after all rosettes are complete, sewn through the BLO ridges of adjacent motifs using a tapestry needle and Color C. This “sewn join” is stronger and flatter than crocheted joins.
Scalloped Edging — The Helical Border: The edging is worked in a continuous spiral around the entire perimeter (both long edges + short ends) without turning. This requires strategic corner shaping: at each short end, work 3 shells in the corner stitch to navigate the 180° turn. The edging uses a 4.5 mm hook for tighter tension, preventing flare.
Tassel Physics: Each tassel uses 18 strands of Color C (9 inches each, folded = 4.5” finished). The wooden bead is threaded before the binding wrap, seating at the tassel’s crown. This adds mass, improving hang and reducing tangling.
6. Step-by-Step Stitch Instructions
Phase 1: Spiral Rosettes (Make 12)
Color A (Burnt Sienna) — Primary Spiral
Work in continuous spiral. Do not join rounds. Use a stitch marker to track the first stitch of each revolution (move marker up each revolution).
Revolution 1 (Foundation): Ch 2. Rnd 1: 12 dc in 2nd ch from hook. [12] — This is Revolution 1 complete.
Revolution 2: Inc in each st around. [24]
Revolution 3: (Dc in next st, inc) 12 times. [36]
Revolution 4: (Dc in next 2 sts, inc) 12 times. [48]
Revolution 5: (Dc in next 5 sts, inc) 8 times. [56] — Note: increase rate drops to 8/rev.
Revolution 6: (Dc in next 6 sts, inc) 8 times. [64]
Revolution 7: (Dc in next 7 sts, inc) 8 times. [72]
Revolution 8: (Dc in next 8 sts, inc) 8 times. [80]
Revolution 9: (Dc in next 12 sts, inc) 6 times. [86] — Rate drops to 6/rev.
Revolution 10: (Dc in next 13 sts, inc) 6 times. [92]
Revolution 11: (Dc in next 14 sts, inc) 6 times. [98]
Revolution 12: (Dc in next 15 sts, inc) 6 times. [104] — Final revolution. Rosette diameter ~3”.
Finish Rosette: Sl st in next 3 sts to taper edge. Fasten off invisibly. Weave in ends.
Color B Accent Round (Optional — adds golden highlight): With RS facing, join Color B with standing dc in any BLO ridge of Revolution 12. Work 1 dc in each BLO around. Join with invisible join. [104]
Repeat for 12 rosettes total. Block each lightly (steam only, no pressure) to set spiral geometry before joining.
Phase 2: Joining Mesh Lattice (Color C — Cream)
Layout: Arrange 12 rosettes in 2 columns of 6, offset like brickwork (Column 2 rosettes centered vertically between Column 1 rosettes). Space centers 4.5” apart vertically, 6” apart horizontally.
Mesh Construction (Worked Flat, Back-and-Forth):
Row 1 (RS): With 5.0 mm hook and Color C, ch 61 (or multiple of 2 + 1 for desired width). Hdc in 3rd ch from hook and each ch across. Turn. [59 hdc]
Row 2: Ch 2 (counts as hdc), ch 1, skip 1 st, hdc in next st; rep from * to last st, hdc in last st. Turn. [30 hdc, 29 ch-1 sps]
Rows 3–18: Rep Row 2. — 18 rows total = ~11” height. Adjust row count for table length.
Do not fasten off. This mesh will be sewn to rosettes.
Sewing Join: Thread tapestry needle with Color C. Align mesh Row 1 with bottom rosette of Column 1. Sew through BLO ridges of rosette Revolution 6 (equator) and corresponding mesh ch-1 sps. Use whipstitch: 1 stitch per ridge/sp pair. Repeat for all 12 rosettes. Mesh floats slightly above table surface — this is intentional.
Phase 3: Continuous Scalloped Edging (Color C — Cream, 4.5 mm hook)
Work in continuous spiral around entire perimeter. RS always facing.
Setup: With RS facing, join Color C with standing sc at bottom-left corner of mesh (where mesh meets first rosette).
Long Edge (Right Side Up): Sc in next st/sp, ch 1, skip 1; rep along mesh edge to first rosette. At Rosette: Work sc in next BLO ridge, ch 1, skip 1 ridge around rosette circumference (approx. 52 sts). Continue along mesh to next rosette. Repeat for all rosettes on this side.
Short End (First Corner): At end of last rosette, 3 sc in corner st (navigates 180° turn). Continue sc, ch 1, skip 1 along short end (tassel attachment edge).
Long Edge (Wrong Side Up): Continue along opposite long edge — you are now working on WS of mesh but RS of rosettes (since they’re reversible). Same pattern: sc in next st/sp, ch 1, skip 1 along mesh, sc in next BLO ridge, ch 1, skip 1 around each rosette.
Second Short End: 3 sc in corner st, then sc, ch 1, skip 1 along final short end.
Join: When you reach starting sc, sl st into it. Fasten off invisibly.
Shell Row (Optional Decorative Row): Rejoin Color C at any sc. Ch 1, skip 1 sc, 5-dc shell in next ch-1 sp, skip 1 sc, sc in next sc; rep around. At corners: sc, 5-dc shell, sc all in corner st. Join with invisible join.
7. Assembly, Mounting & Structural Integration
Tassel Construction (Make 12 — 6 per short end):
- Wrap Color C around 4-inch template 18 times. Cut at one end.
- Fold bundle in half. Cut a 12-inch strand for binding.
- Thread 12mm wooden bead onto binding strand, slide to center.
- Position binding strand under folded top of tassel bundle (bead sits at fold). Wrap tightly 6 times, ¼” below fold. Tie square knot. Thread ends into tassel body with needle.
- Trim bottom ends evenly to 4.5” from binding.
Tassel Attachment:
Using tapestry needle and Color C, sew each tassel to short-end edging at every 4th shell peak (or every 3rd ch-1 sp if no shell row). Sew through binding wrap — do not pierce tassel strands. Space 6 tassels evenly across each end.
Hardware Mounting (for wall-hanging option):
- At top short end (center), sew hanging ring to back of mesh/rosette junction using Color C and whipstitch — 8 stitches minimum.
- Attach S-hooks to hanging ring. These allow the runner to be hung as a wall textile when not on the table.
Final Blocking:
- Pin runner to blocking mats, stretching gently to 30” × 12”. Pin each rosette center, mesh intersections, and edging points.
- Steam heavily (do not press — pressure flattens BLO ridges). Hold steamer 2” above surface.
- Allow to dry completely (24 hours) before unpinning.
8. Hardware, Accents & Embellishment Assembly
Wooden Bead Accents (Optional — for rosette centers):
Thread 8mm spacer bead onto 6-inch Color D (Sage) strand. Tie overhand knot at bead base. With tapestry needle, pull strand through exact center of rosette (Revolution 1 center hole). Knot securely on WS. Trim to ½”. Repeat for all 12 rosettes. Adds a subtle botanical “stigma” detail.
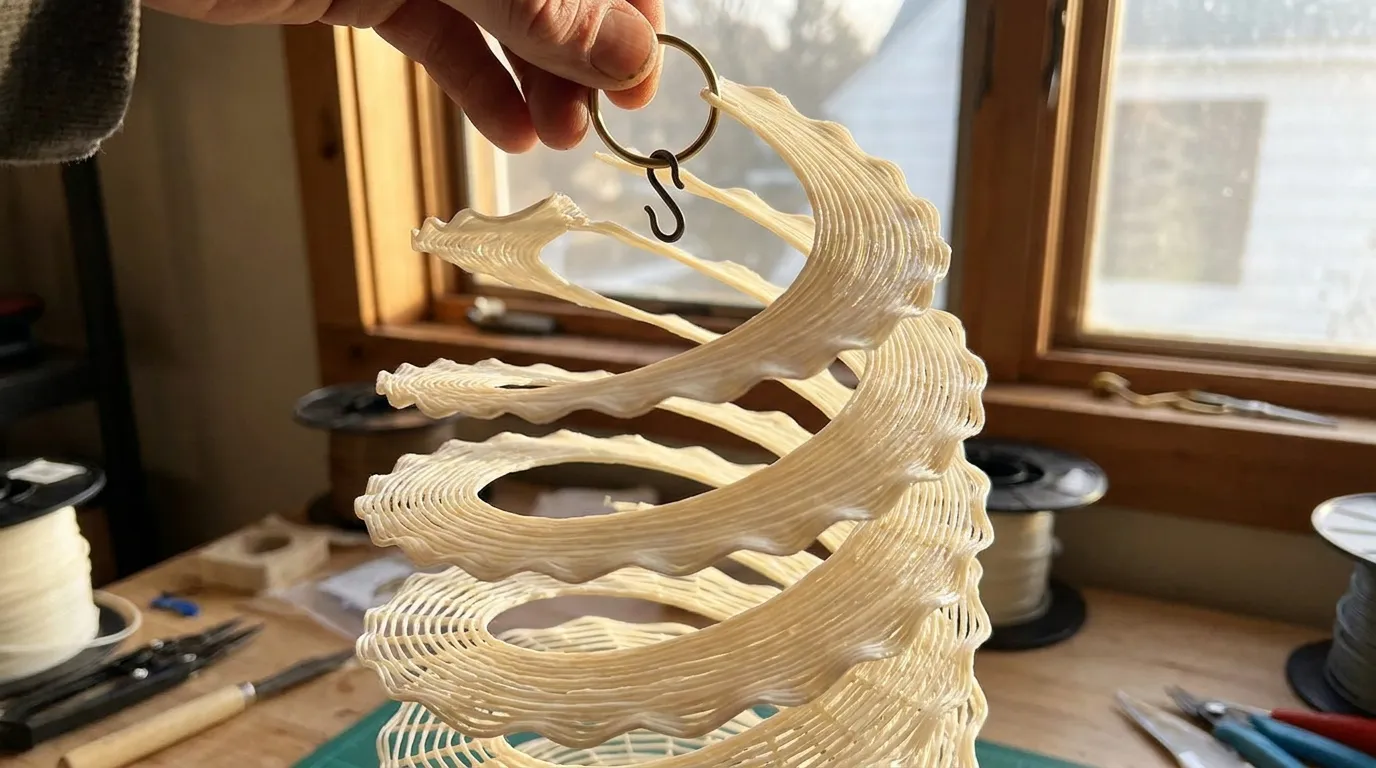
S-Hook & Ring Finish:
Buff metal hardware with microfiber cloth. If antiqued finish desired, lightly dab with patina solution (liver of sulfur diluted 1:10) on cotton swab, wipe immediately, seal with renaissance wax. This coordinates with the earthy palette.
Charm Integration (Maker’s Mark):
If desired, attach a small stamped metal charm (leaf, acorn, or initial) to the hanging ring via a 4mm jump ring. This becomes your signature — every piece you make carries it.
9. Blocking, Care & Maintenance
Blocking (Critical for Spiral Geometry):
-
First Block: After rosettes complete, before joining. Steam-block each rosette individually on a curved surface (bowl inverted) to enhance helical cup.
-
Final Block: After full assembly. Pin to exact dimensions. Steam heavily. The mesh will relax; rosettes will settle into their final spiral tension.
Washing:
-
Cotton/Linen: Machine wash cold, gentle cycle, mesh bag. Lay flat to dry. Re-block after washing.
-
Wool Blend: Hand wash cool, wool detergent. Roll in towel to remove water. Lay flat, re-shape spirals while damp.
-
Acrylic: Machine wash warm, tumble dry low. No blocking needed after wash.
Storage:
- Roll (don’t fold) around acid-free tissue tube. Store flat in cotton bag.
- Avoid plastic — fibers need to breathe.
- Tassels: comb gently with wide-tooth comb if tangled.
Repair:
- Snagged ridge: Use tapestry needle to coax loop back through to WS. Secure with matching thread.
- Loose tassel: Re-sew binding wrap. Add fray check to knot if needed.
10. Frequently Asked Questions (FAQ)
Q: Can I use DK weight yarn instead of worsted? A: Yes, but adjust hook to 4.0 mm (G-6) and expect a smaller runner (~24” × 9.5”). Increase rosette revolutions to 14–16 to maintain helical density. Yardage decreases ~20%. Gauge swatch is non-negotiable — the spiral geometry amplifies tension variations.
Q: My rosettes are cupping (bowling upward) instead of lying flat. What went wrong? A: Cupping means insufficient increases for your tension. Two fixes: (1) Add 2 extra increases per revolution (distribute evenly), or (2) switch to a larger hook for the increase rounds only. Steam-blocking aggressively on a convex surface (bowl) can also coax a mild cup flat.
Q: How do I join a new skein mid-spiral without a visible join? A: Use the Russian Join (split plies, interlock, felt/friction) for wool, or Magic Knot for cotton/acrylic. Place join at an increase point — the structural disruption hides the transition. Never join at a straight dc run.
Q: Can I make this rectangular instead of offset rosettes? A: Absolutely. Arrange rosettes in a 3 × 4 grid (3 columns, 4 rows). Mesh joins become a full grid. Edging works identically. Dimensions become ~24” × 16”. The offset layout is purely aesthetic — the helical geometry functions identically in any configuration.
11. Community Call-to-Action
You’ve crocheted more than a table runner — you’ve grown a spiral garden, stitch by deliberate stitch. I’d be honored to see how your Autumn Harvest Rosette Tablerunner lives in your home: draped over a farmhouse table, hung as a wall textile catching morning light, gifted to someone who needs a little autumn in their hands.
Share your make: Tag @NailItHome on Instagram or Pinterest with #AutumnHarvestRosette and #NailItHomePatterns. Tell us your fiber choices, your colorway twists, the table it graces. Every finished object teaches me something new about this pattern’s possibilities.
Questions? Stuck on Revolution 7? Drop a comment below or DM — I answer every maker’s query personally. This community thrives on shared knowledge.
Next in the Harvest Collection: The Gourd Luminaria Coasters (spiral base, LED-ready) and Vine & Tendril Napkin Rings (helical wire-core crochet). Subscribe to the Nail It Home newsletter for early access.
Pattern © 2026 Aurelia Thorne / Nail It Home. Free for personal use. Do not reproduce, translate, or sell this pattern. Finished items may be sold in small quantities (≤50/year) with credit: “Pattern by Aurelia Thorne @ NailItHome.net”.


